Levenhuk DTX 350 LCD Handleiding
Levenhuk Miscroscoop DTX 350 LCD
Bekijk gratis de handleiding van Levenhuk DTX 350 LCD (14 pagina’s), behorend tot de categorie Miscroscoop. Deze gids werd als nuttig beoordeeld door 47 mensen en kreeg gemiddeld 4.4 sterren uit 5 reviews. Heb je een vraag over Levenhuk DTX 350 LCD of wil je andere gebruikers van dit product iets vragen? Stel een vraag
Pagina 1/14
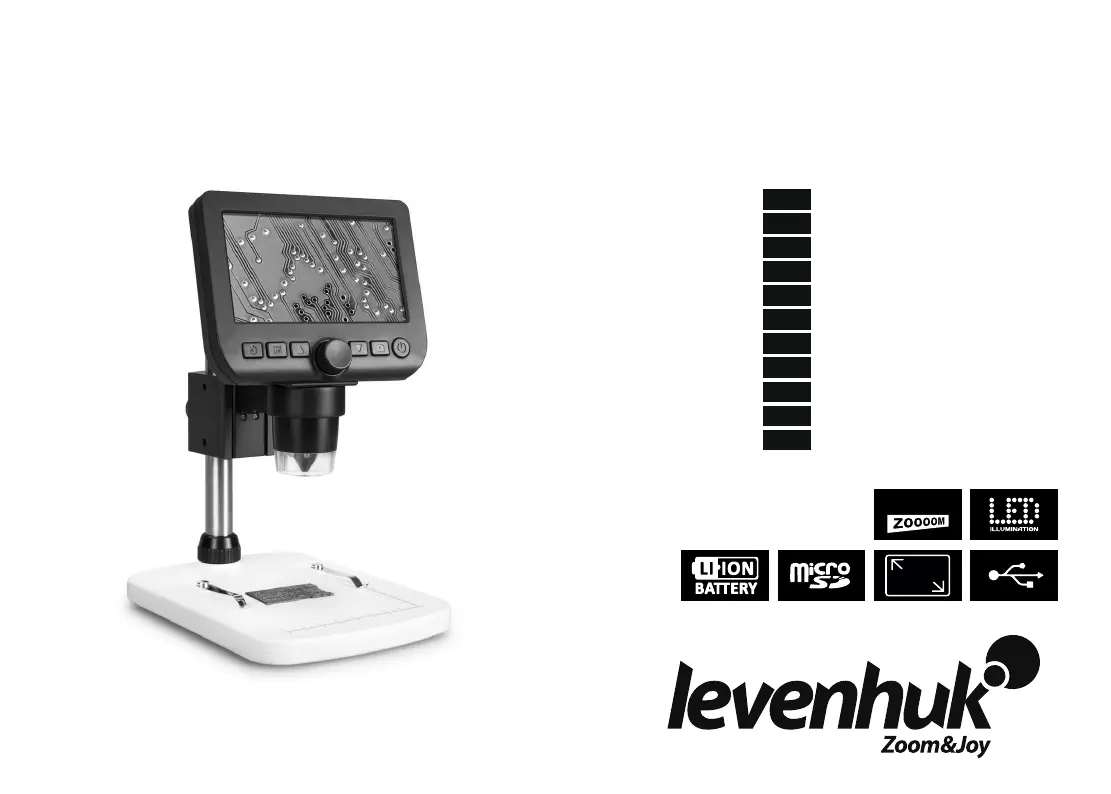
Levenhuk DTX 350 LCD
Digital Microscope
User Manual
Ръководство за потребителя
Návod k použití
Bedienungsanleitung
Guía del usuario
Használati útmutató
Guida all’utilizzo
Instrukcja obsługi
Manual do usuário
Инструкция по эксплуатации
Kullanım kılavuzu
EN
BG
CZ
DE
ES
HU
IT
PL
PT
RU
TR
600x
4.3''
Product specificaties
| Merk: | Levenhuk |
| Categorie: | Miscroscoop |
| Model: | DTX 350 LCD |
| Kleur van het product: | Black, White |
| Ingebouwd display: | Ja |
| Gebruikershandleiding: | Ja |
| Materiaal behuizing: | Kunststof |
| Type verlichting: | LED |
| Stroombron: | Batterij/USB |
| Capaciteit van de accu/batterij: | 2500 mAh |
| Beeldschermdiagonaal: | 4.3 " |
| Ondersteunde videoformaten: | AVI |
| Video recording: | Ja |
| Meegeleverde kabels: | USB |
| Compatibele geheugenkaarten: | MicroSD (TransFlash) |
| Megapixels: | 0.3 MP |
| Interface: | USB 2.0 |
| Ondersteund beeldformaat: | JPG |
| Ingebouwde camera: | Ja |
| Kleurenscherm: | Ja |
| Helderheidsregeling: | Ja |
| Bedrijfstemperatuur (T-T): | 0 - 45 °C |
| Batterijtechnologie: | Lithium-Ion (Li-Ion) |
| Type beeldscherm: | LCD |
| Type batterij: | Ingebouwd |
| Oplaadbare batterij: | Ja |
| Belichting: | Ja |
| Maximum vergroting: | 600 x |
| Gelijkspanning (DC): | 5 V |
| Lensmateriaal: | Glas |
| Microscope type: | Digitale microscoop |
| Geheugenkaartslot: | Ja |
| Minimale vergroting: | 20 x |
| Software inbegrepen: | Ja |
| Lens naar objectafstand (max): | 80 mm |
| Lens naar objectafstand (min): | 5 mm |
Heb je hulp nodig?
Als je hulp nodig hebt met Levenhuk DTX 350 LCD stel dan hieronder een vraag en andere gebruikers zullen je antwoorden
Handleiding Miscroscoop Levenhuk

6 Mei 2026
22 December 2025
30 Oktober 2025
16 Juli 2025
15 Juli 2025
15 Juli 2025
15 Juli 2025
15 Juli 2025
15 Juli 2025
15 Juli 2025
Handleiding Miscroscoop
Nieuwste handleidingen voor Miscroscoop
7 Mei 2026
6 Mei 2026
5 Mei 2026
5 Mei 2026
2 April 2026
31 Maart 2026
26 Maart 2026
26 Maart 2026
25 Maart 2026
25 Maart 2026