Lastolite HiLite Background Handleiding
Lastolite Overige camera toebehoren HiLite Background
Bekijk gratis de handleiding van Lastolite HiLite Background (12 pagina’s), behorend tot de categorie Overige camera toebehoren. Deze gids werd als nuttig beoordeeld door 25 mensen en kreeg gemiddeld 5.0 sterren uit 8 reviews. Heb je een vraag over Lastolite HiLite Background of wil je andere gebruikers van dit product iets vragen? Stel een vraag
Pagina 1/12
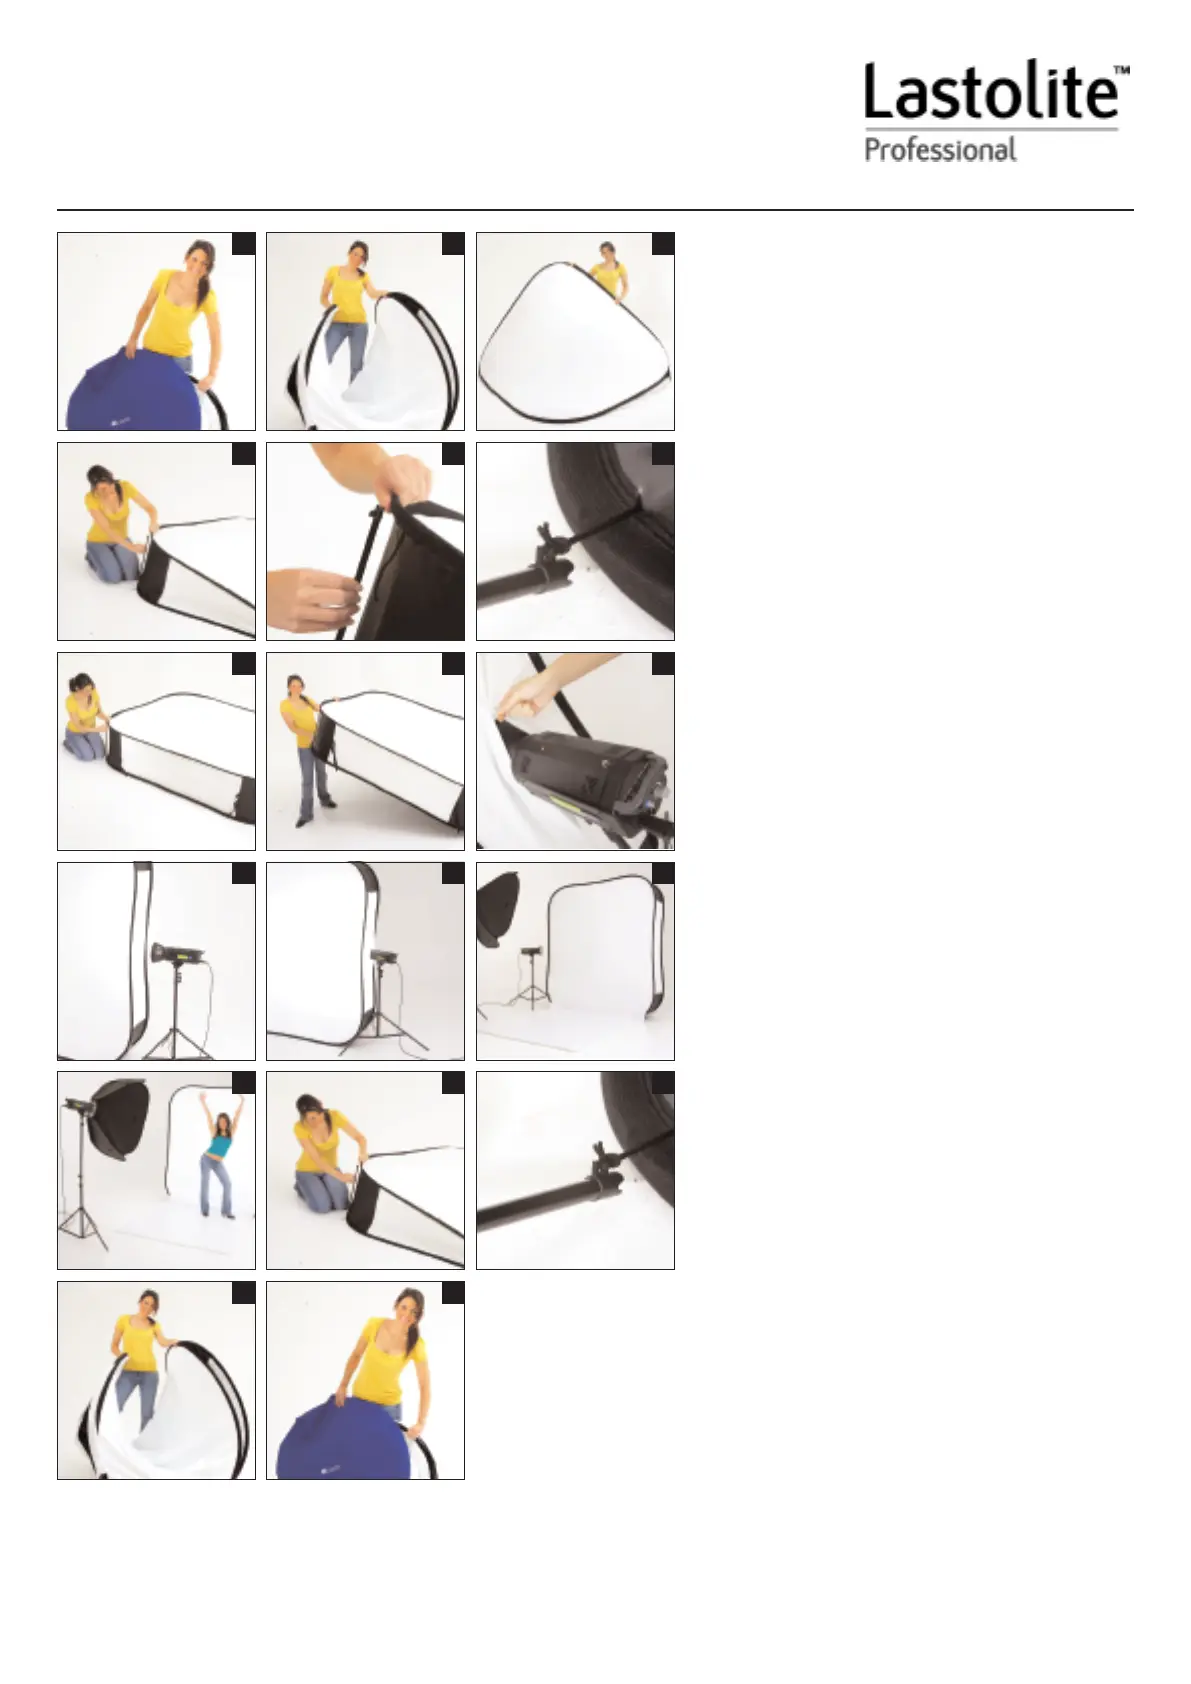
Setting up the HiLite
1. Remove the HiLite from the carry case and check the
contents. There should be 1 x HiLite and 4 x Rods.
2. Hold the two outer rims of the HiLite and allow the
centre rim to unfold. WARNING - The HiLite is quite
strong and can ‘pop’out suddenly. Take care with
people and furniture in close proximity.
3. Allow the HiLite to completely unfold.
4. Lay the HiLite on the floor and position one end of the
rod on the corner of the lower steel rim. Ensure the
steel rim locates into the jaws of the tip at the end of
the rod.
5. Pull the two steel rims away from each other and locate
the jaws of the tip at the other end of the rod into the
upper rim.
6. If you wish you can secure the rod in place by tying
one end of the rod to the black cords located on each
corner of the HiLite. Use these cords as guidance on
where to position the rods.
7. Repeat steps 4-6 for the remaining three corners,
closing any open zips as you work your way round..
8. Stand the HiLite upright (portrait) with the velcro edge
on the white side at the bottom and running up the right
hand side (as you look at the HiLite).
9. Open one of the side zips and insert the head of your
flash unit. Close the zips around the flash head.
10. Alternatively, leave the zips closed and position the
flash head on the outside for a more diffused light. (you
may need to flag off the light to prevent flare).
11.Position the flash head centrally at the side of the
HiLite and point it towards the back panel for an even
illumination. You can experiment with different positions
for different lighting effects.
12.If you purchased the Superwhite vinyl train, attach the
velcro at the base of the HiLite to the velcro on the
train. The Hilite can also be rot
ated 90 degrees so it
sits on its long edge creating a landscape background.
In this case attach the velcro on the longer edge of the
Superwhite vinyl.
13. The HiLite is ready to use.
Breaking down the HiLite
14. Remove the vinyl train (if attached), roll it up and return
it to the protective tube. Open all zip
s to allow the air to
escape. Lay down the HiLite and release the jaws on
the tips of each rod from the two steel rims.
15.If you chose to secure the tips with the cords, the rods
can be lef
t att
ached to the HiLite (When folding make
sure these are not trapped between the two outer
rims).
16.To Fold, stand at one corner and grip the two outer
rims as far down each edge as you can so the HiLite
forms a diamond shape in front of you. Whilst still
holding the rims firmly, lift your hands and bring them
together in a similar motion to closing a book. The
HiLite will form a ‘crisp’shape.
17.As your hands get closer together the opposite corner
to where you are standing will start to curl under
towards your feet. As you continue the motion of
closing a book pass one hand over the other. The
HiLite will automatically fold to form three circles. Bring
the three circular shapes together expelling any
trapped air and return the HiLite to the carry case.
Setting up yourHiLite Background
123
456
789
101112
1314
17
15
16
Product specificaties
| Merk: | Lastolite |
| Categorie: | Overige camera toebehoren |
| Model: | HiLite Background |
Heb je hulp nodig?
Als je hulp nodig hebt met Lastolite HiLite Background stel dan hieronder een vraag en andere gebruikers zullen je antwoorden
Handleiding Overige camera toebehoren Lastolite

4 Mei 2024
3 Mei 2024
3 Mei 2024
3 Mei 2024
Handleiding Overige camera toebehoren
Nieuwste handleidingen voor Overige camera toebehoren
10 Februari 2026
27 December 2025
29 November 2025
26 November 2025
24 November 2025
20 November 2025
18 Oktober 2025
30 September 2025
19 Mei 2025
15 Mei 2025