Klipsch Flexus Wall Mount Handleiding
Klipsch Niet gecategoriseerd Flexus Wall Mount
Bekijk gratis de handleiding van Klipsch Flexus Wall Mount (2 pagina’s), behorend tot de categorie Niet gecategoriseerd. Deze gids werd als nuttig beoordeeld door 40 mensen en kreeg gemiddeld 4.0 sterren uit 3 reviews. Heb je een vraag over Klipsch Flexus Wall Mount of wil je andere gebruikers van dit product iets vragen? Stel een vraag
Pagina 1/2
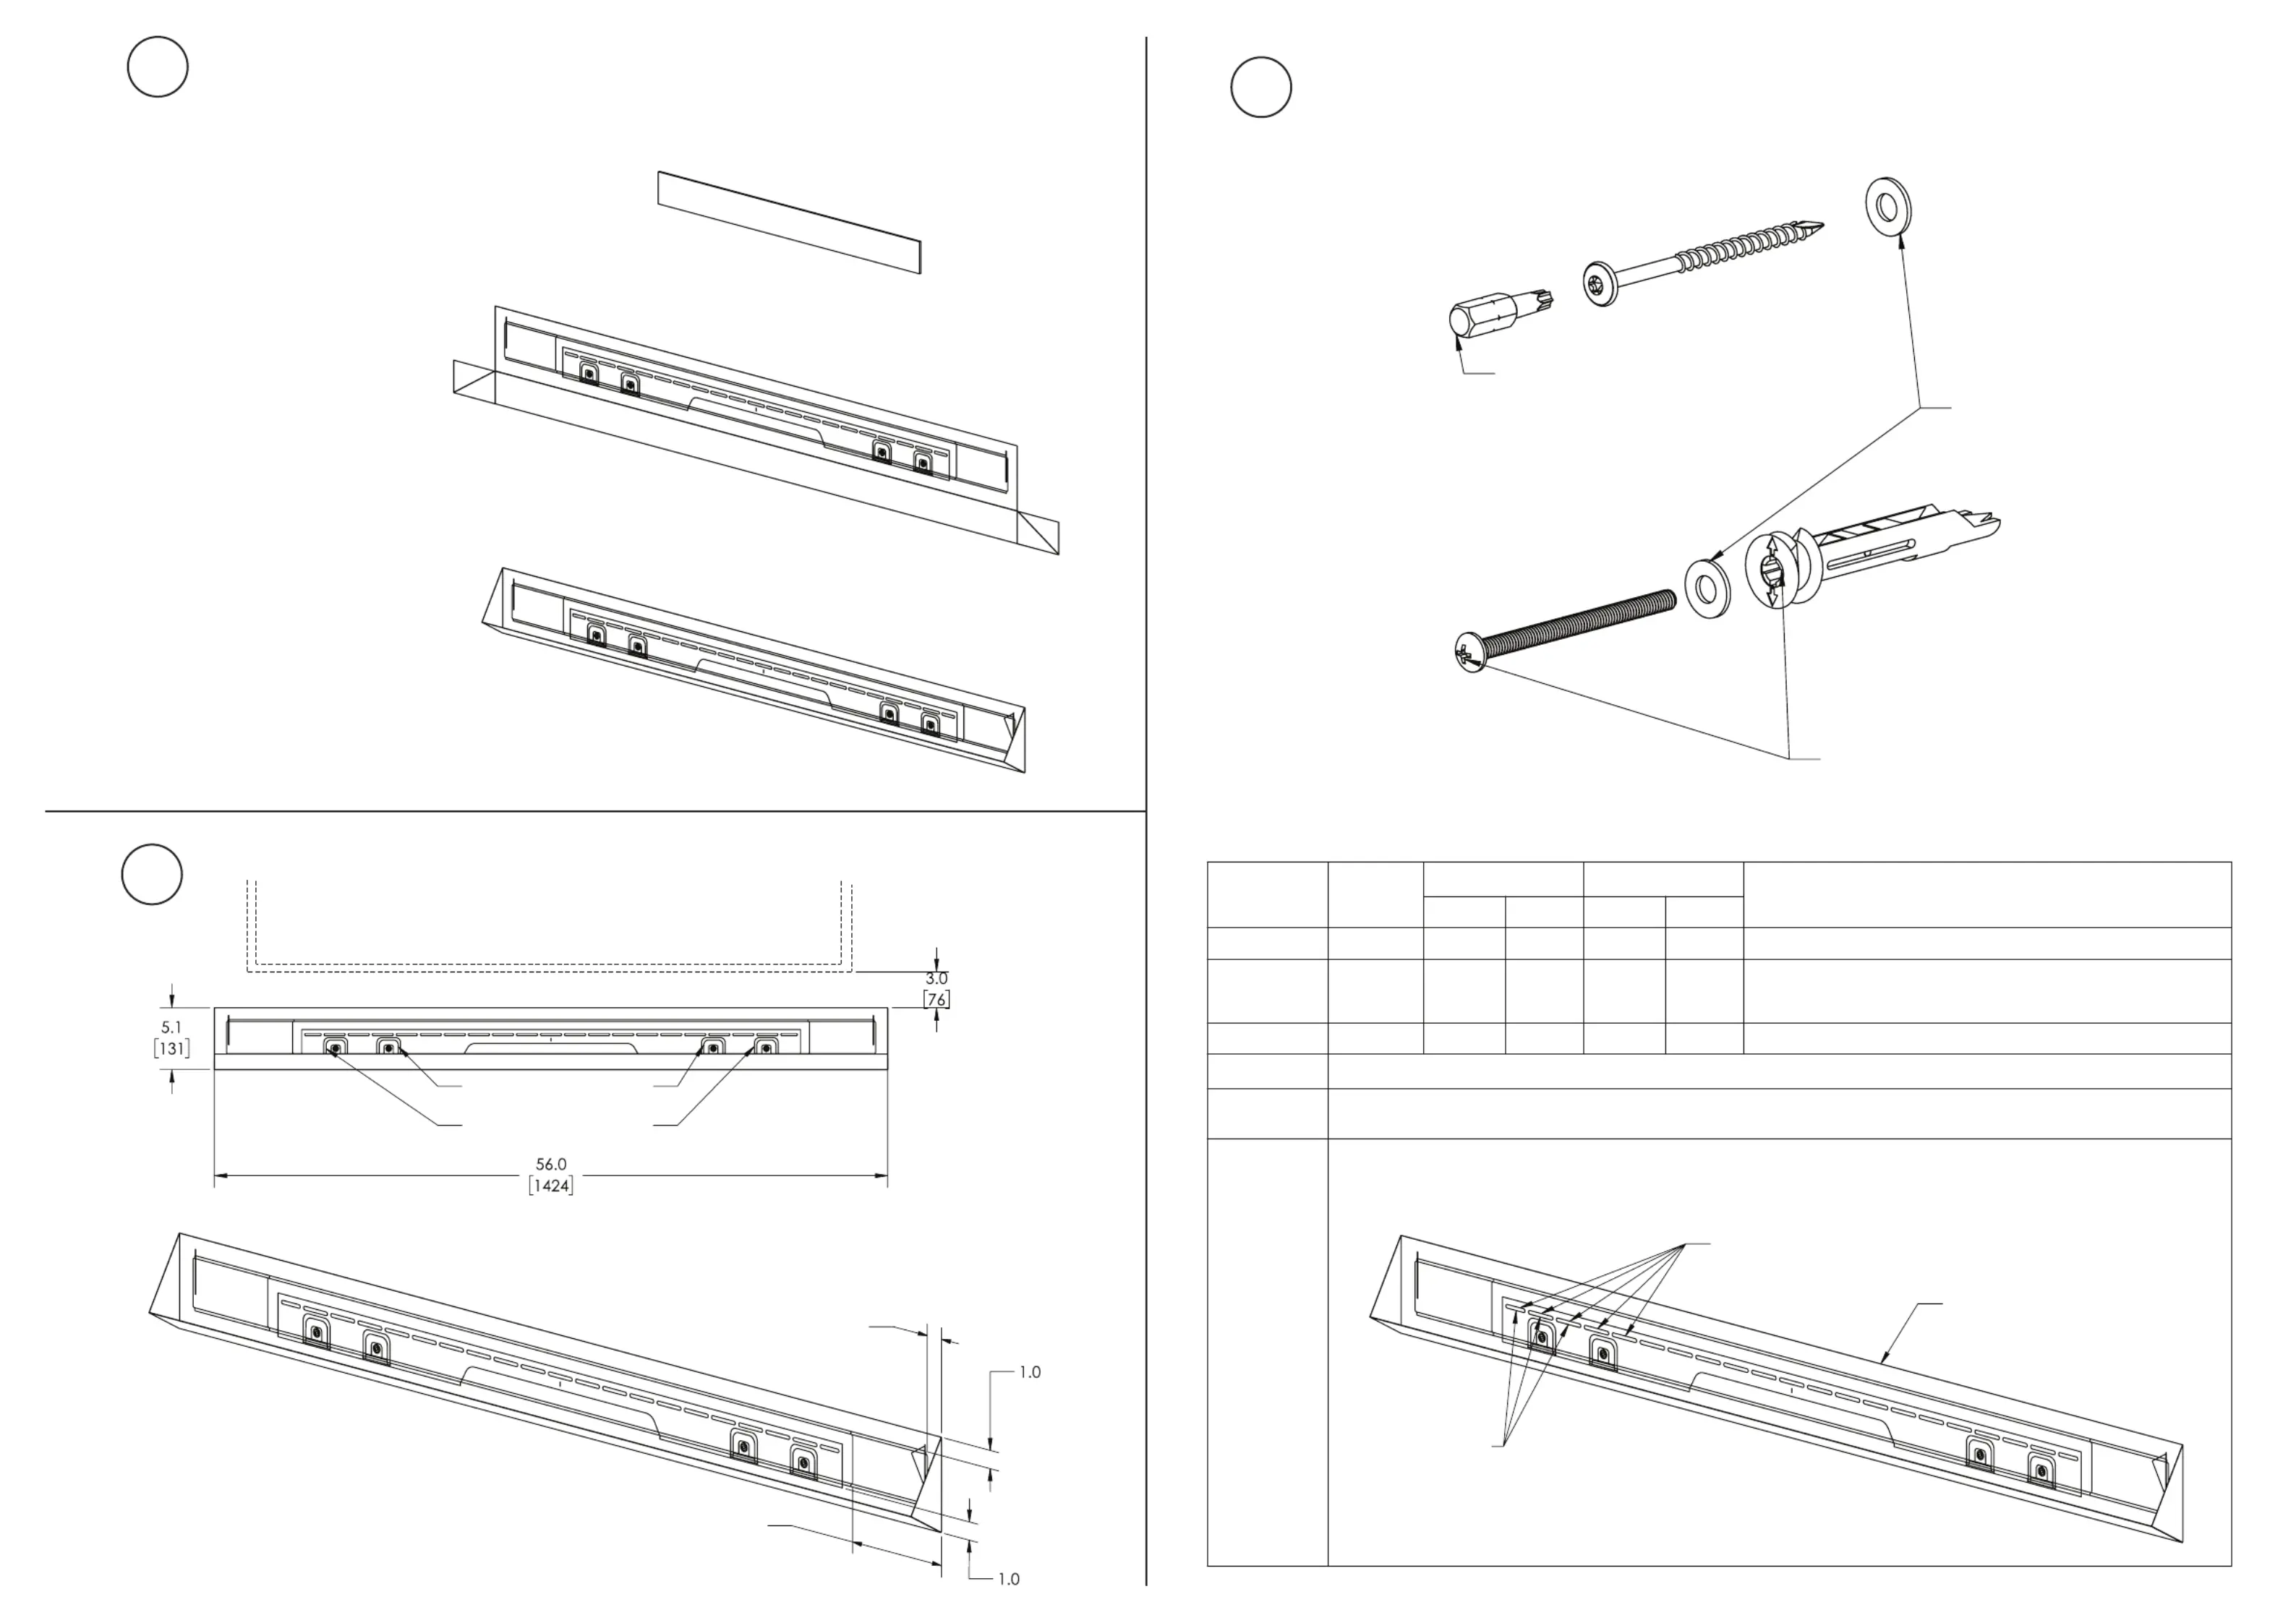
FLEXUS CORE 200
RIGHT-ANGLE BRACKET
FLEXUS CORE 300
RIGHT-ANGLE BRACKET
MOUNTING TEMPLATE HAS 1.0 INCH (25 MM) SPACING AROUND PERIMETER EXCEPT AS NOTED BELOW
1.0 (FLEXUS CORE 300)
6.5 (FLEXUS CORE 200)
Wood Screw
Anchor Screw
Wood Screw
Anchor
USE PROVIDED T20 DRIVE BIT
#2 PHILLIPS SCREWDRIVER NOT INCLUDED
ANCHOR
(TOGGLE SHOWN IN INSTALL ORIENTATION)
USE PROVIDED FLAT WASHER
WITH BOTH WOOD AND
ANCHOR SCREWS
Screws
FLEXUS CORE 200
Mounting Template
MUST USE ONE OF THESE FIVE SLOT OPENINGS
WHEN MARKING SCREW LOCATIONS ON WALL PER EACH SIDE.
FLEXUS CORE 300
MUST USE ONE OF THESE THREE SLOT OPENINGS
WHEN MARKING SCREW LOCATIONS ON WALL PER EACH SIDE.
Wood Screws
Total Screws
Wall Anchor &
Anchor Screw
Pre Drill
See Note 1
3
0
33
22
21
2
44
2
Note 1
Note 2
Note 3
See Note 2
Centered
Not
Centered
Centered
Not
Centered
16" Stud Wood
Spacing
Keep mounting template against wall. Use a 1/8" (3mm) drill bit and drill through template, drywall, and into stud.
Total pre drill depth 2~2.5 inches.
Mark screw location with sharp object by piercing template. Move folded template below and tape to wall to
help catch drywall debris. Use a #2 Phillips screwdriver, press anchor tip slightly into drywall.Apply pressure,
turn anchor until flush with drywall and arrows on head of anchor point up and down.
24" Stud Wood
Spacing
Concrete, Brick, or Plaster
Use a minimum of 3 fasteners (not included)
NO
NO
1
2
3
Wall mounting template. Don’t discard
during unboxing process.
PREPARE MOUNTING TEMPLATE
ATTACHMENT TO WALL DETAILS
MOUNTING TEMPLATE
Unfold template from its
shipping configuration.
Fold bottom flap and side
flaps along bend lines. Then
tuck triangular flap behind
and insert into vertical slot
opening at each end.
TV
Product specificaties
| Merk: | Klipsch |
| Categorie: | Niet gecategoriseerd |
| Model: | Flexus Wall Mount |
Heb je hulp nodig?
Als je hulp nodig hebt met Klipsch Flexus Wall Mount stel dan hieronder een vraag en andere gebruikers zullen je antwoorden
Handleiding Niet gecategoriseerd Klipsch

7 Oktober 2025
4 Juli 2025
26 Februari 2025
26 Februari 2025
26 Februari 2025
26 Februari 2025
26 Februari 2025
14 Januari 2025
14 Januari 2025
14 Januari 2025
Handleiding Niet gecategoriseerd
Nieuwste handleidingen voor Niet gecategoriseerd
23 Juli 2026
23 Juli 2026
23 Juli 2026
23 Juli 2026
23 Juli 2026
23 Juli 2026
22 Juli 2026
22 Juli 2026
22 Juli 2026
22 Juli 2026