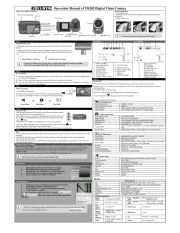
JVC GR-AX11 Handleiding
Bekijk gratis de handleiding van JVC GR-AX11 (51 pagina’s), behorend tot de categorie Camcorder. Deze gids werd als nuttig beoordeeld door 36 mensen en kreeg gemiddeld 4.4 sterren uit 18.5 reviews. Heb je een vraag over JVC GR-AX11 of wil je andere gebruikers van dit product iets vragen? Stel een vraag
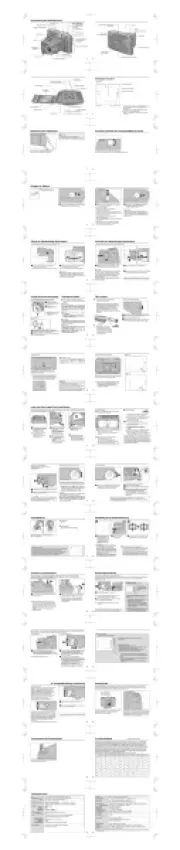
Pagina 1/51

2 EN
Dear Customer,
Thank you for purchasing the JVC Compact VHS camcorder. Before use, please read the safety informa-
tion and precautions contained in the following pages to ensure safe use of your new camcorder.
Warning on lithium battery
The battery used in this device may present a
fire or chemical burn hazard if mistreated. Do
not recharge, disassemble, heat above 100°C or
incinerate.
Replace the battery with Maxell, Panasonic
(Matsushita Electric), Sanyo or Sony CR2025;
use of another battery may present a risk of fire
or explosion.
nDispose of used battery promptly.
nKeep away from children.
nDo not disassemble and do not dispose of in
fire.
PAL
nCamcorder is designed exclusively for the VHS-C video cassette. Only cassettes marked VHS-C can be
used with this unit.
nHQ VHS is compatible with existing VHS equipment.
SAFETY PRECAUTIONS
Using This Instruction Manual
• All major sections and subsections are listed in the Table Of Contents (Z pg. 3).
• Notes appear after most subsections. Be sure to read these as well.
• Basic and advanced features/operation are separated for easier reference.
It is recommended that you . . .
.... refer to the Index ( pg. 48 – 50) and familiarize yourself with button locations, etc. before use.Z
.... read thoroughly the Safety Precautions that follow and cautions (Z pg. 51, 52). They contain extremely
important information regarding the safe use of your new camcorder.
CAUTIONS:
nTo prevent shock, do not open the cabinet.
No user serviceable parts inside. Refer
servicing to qualified personnel.
nWhen you are not using the AC Power
Adapter/Battery charger for a long period of
time, it is recommended that you disconnect
the power cord from AC outlet.
WARNING:
TO PREVENT FIRE OR SHOCK
HAZARD, DO NOT EXPOSE
THIS UNIT TO RAIN OR
MOISTURE.
This camcorder is designed to be used with
PAL-type colour television signals. It cannot be
used for playback with a television of a different
standard. However, live recording and
viewfinder playback are possible anywhere.
Use the BN-V12U/V22U/V25U battery packs
and, to recharge them, the provided multi-
voltage AC Power Adapter/Charger. (An
appropriate conversion adapter may be
necessary to accommodate different designs of
AC outlets in different countries.)
NOTES:
●
The rating plate (serial number plate) and
safety caution are on the bottom and/or the
back of the main unit.
●
The rating plate (serial number plate) of the
AC Power Adapter/Charger is on its bottom.
This unit is produced to comply with Standard
IEC Publ. 65.

EN 3
n
Program Manager
II
(
Z
pg. 18 – 31)
nProgramme AE with Special Effects
(Z pg. 18, 19)
•Auto Mode Lock •Auto Mode Release
•Electronic Fog Filter •ND Effect
•Sepia •Twilight •Sports
•1/1000 sec. High Speed Shutter
•1/2000 sec. High Speed Shutter
n5Sec.-Rec (5 sec. Recording)
(Z pg. 15)
n
22x Optical Hyper Zoom (
Z
pg. 14)
nIntergrated Auto Light
(GR-AX31/AX21 only) (Z pg. 16)
CONTENTS
EN 3
GETTING STARTED
4
Power .............................................. 4
Clock (Lithium) Battery Insertion/Removal..... 6
Date/Time Setting ................................ 7
Tape Length Setting ............................... 8
Recording Mode Setting .......................... 8
Loading/Unloading A Cassette .................. 9
Grip Adjustment ................................. 10
Viewfinder Adjustment ......................... 10
Shoulder Strap Attachment .................... 11
Tripod Mounting ................................. 11
RECORDING
12
Basic Recording ................................. 12
Basic Features .................................. 14
Advanced Features ............................. 18
PLAYBACK
32
Basic Playback .................................. 32
Features ......................................... 33
Using The Cassette Adapter .................. 35
Basic Connections .............................. 36
TAPE DUBBING
37
USING REMOTE CONTROL
UNIT (GR-AX31/AX21 only)
38
Random Assemble Editing ..................... 40
Insert Editing.................................... 44
Audio Dubbing .................................. 45
TROUBLESHOOTING
46
INDEX
48
Controls ......................................... 48
Connectors ...................................... 48
Indicators ........................................ 48
Other Parts ..................................... 48
Viewfinder ........................ 50Indications
CAUTIONS
51
SPECIFICATIONS
53
MAJOR FEATURES
PROVIDED ACCESSORIES
•AC Power Adapter/
Charger AA-V15EG
•Cassette Adapter
C-P7U
•Remote Control Unit RM-V705U
(GR-AX31/AX21 only)
•Battery Pack
BN-V12U
•Lithium Battery CR2025
•x 2 for GR-AX31/AX21
(clock operation and remote
control unit)
•x 1 for GR-AX11
(clock operation)
•Shoulder Strap
•AUDIO/VIDEO
(A/V) Cable
•DC Cord
The Logical Choice
The only compact video cassettes that can be used with
your VHS VCR*
*With Cassette Adapter

4 EN
GETTING STARTED
Power
This camcorder’s 3-way power supply system lets you
choose the most appropriate source of power.
NOTES:
●
No function is available without power supply.
●
Use only specified power supply.
●
Do not use provided power supply units with other
equipment.
CHARGING THE BATTERY PACK
SUPPLY POWER
1
Connect the charger’s AC power cord to a wall
outlet.
ATTACH BATTERY PACK
2
Align the marks and slide the battery pack in the
direction of the arrow until it locks in place.
•The CHG. indicator begins blinking to indicate
charging has started.
DETACH BATTERY PACK
3
When the CHG. indicator stops blinking but stays lit,
charging is finished. Slide the battery pack opposite
the direction of the arrow.
REFRESH
The AC power adapter features a REFRESH
function that allows you to fully discharge
the battery pack before recharging.
Perform the REFRESH function after no less
than 5 chargings.
To discharge the battery . . .
..... attach the battery pack to the adapter
as shown in the above illustration.
Then push REFRESH. The REFRESH
indicator lights when discharging
starts, and goes out when discharging
is complete.
CHG. (charge)
indicator
Marks
To AC outlet
REFRESH indicator
REFRESH switch
BATT. PACK
CHARGE DISCHARGE
BN-V12U approx. 1 hr. 10 min. approx. 3 hrs. 30 min.
BN-V22U approx. 2 hrs. 10 min. approx. 7 hrs.
BN-V25U approx. 2 hrs. 40 min. approx. 10 hrs.
Push in.
Hook on.
BATT. RELEASE
11
2
ATTENTION:
Before detaching the power source,
make sure that the camcorder’s power
is turned off. Failure to do so can result
in a camcorder malfunction.
USING THE BATTERY PACK
ATTACH BATTERY PACK
1
Hook its top end to the camcorder and push the
battery pack in until it locks in place.
DETACH BATTERY PACK
2
Slide BATT. RELEASE and pull out the battery pack.
BATT. PACK GR-AX31 GR-AX21/AX11
BN-V12U 75 (40) 75 (40)
BN-V22U 150 (90) 155 (95)
BN-V25U 200 (120) 200 (120)
Approximate recording time (unit: min.)
( ) : when the video light is on. (GR-AX31/AX21 only)
Product specificaties
| Merk: | JVC |
| Categorie: | Camcorder |
| Model: | GR-AX11 |
Heb je hulp nodig?
Als je hulp nodig hebt met JVC GR-AX11 stel dan hieronder een vraag en andere gebruikers zullen je antwoorden
Handleiding Camcorder JVC

2 Juli 2023

19 Juni 2023

7 Juni 2023

6 Juni 2023

23 Mei 2023

22 Mei 2023

21 Mei 2023

20 Mei 2023

20 Mei 2023

19 Mei 2023
Handleiding Camcorder
- Brinno
- Contour Design
- Linksys
- Iget
- SJCAM
- Marshall
- Canon
- Contax
- Aqua-Vu
- Denver
- Cobra
- Dragon Touch
- BenQ
- Kobian
- Kenwood
Nieuwste handleidingen voor Camcorder
9 Juli 2025
9 Juli 2025
6 Juli 2025
5 Juli 2025

5 Juli 2025

4 Juli 2025
17 Juni 2025
17 Juni 2025

17 Juni 2025

16 Juni 2025