Hoshizaki HS-5234 Handleiding
Hoshizaki
Niet gecategoriseerd
HS-5234
Bekijk gratis de handleiding van Hoshizaki HS-5234 (6 pagina’s), behorend tot de categorie Niet gecategoriseerd. Deze gids werd als nuttig beoordeeld door 7 mensen en kreeg gemiddeld 4.3 sterren uit 4 reviews. Heb je een vraag over Hoshizaki HS-5234 of wil je andere gebruikers van dit product iets vragen? Stel een vraag
Pagina 1/6

1
2A8351-010
Hoshizaki Optional Heated Overow Drain Pan Kit
HS-5234
For Use with Commercial "S" Series Upright Models
Installation Instructions
Check to ensure that all parts are included:
Index
No. Description
Part
Number Qty
1 Heated Overow Drain Pan
(includes 8 ft. (2.4 m) Power Cord)
3A9247-01 1
2 Heated Overow Drain Pan Bracket 3A9248-01 1
3 Rubber Gasket 413854-03 1
4 Drain Fitting 4A2792-01 1
5 Silicone Hose (3/8×1/2 in.; L = 2 m) 7730I3812 1
6 Wire Harness (6 in.) 4A6030-01 1
7 Self-Drilling Hex Screw 7B03I1210 8
8 437618-01 1Nylon Tie Mount
9 8911-0200 4Nylon Tie
10 Wire Clamp 4A0809-03 4
11 Wiring Label 3A9294-01 1
WARNING
• The appliance should be serviced only by qualied service personnel to reduce the risk of death, electric
shock, serious injury, or re.
• No installation or service should be undertaken until the technician has thoroughly read these instructions.
Failure to follow these instructions will adversely affect safety, performance, component life and warranty
coverage, and may result in costly water damage.
• To reduce the risk of electric shock, do not touch the plug with damp hands. Move the power switch to the
"OFF" position, then unplug the appliance from the electrical outlet before servicing.
Installation Instructions
1) Move the power switch to the "OFF" position, then unplug the appliance from the electrical outlet.
2) Move the appliance out to access the rear of the appliance.
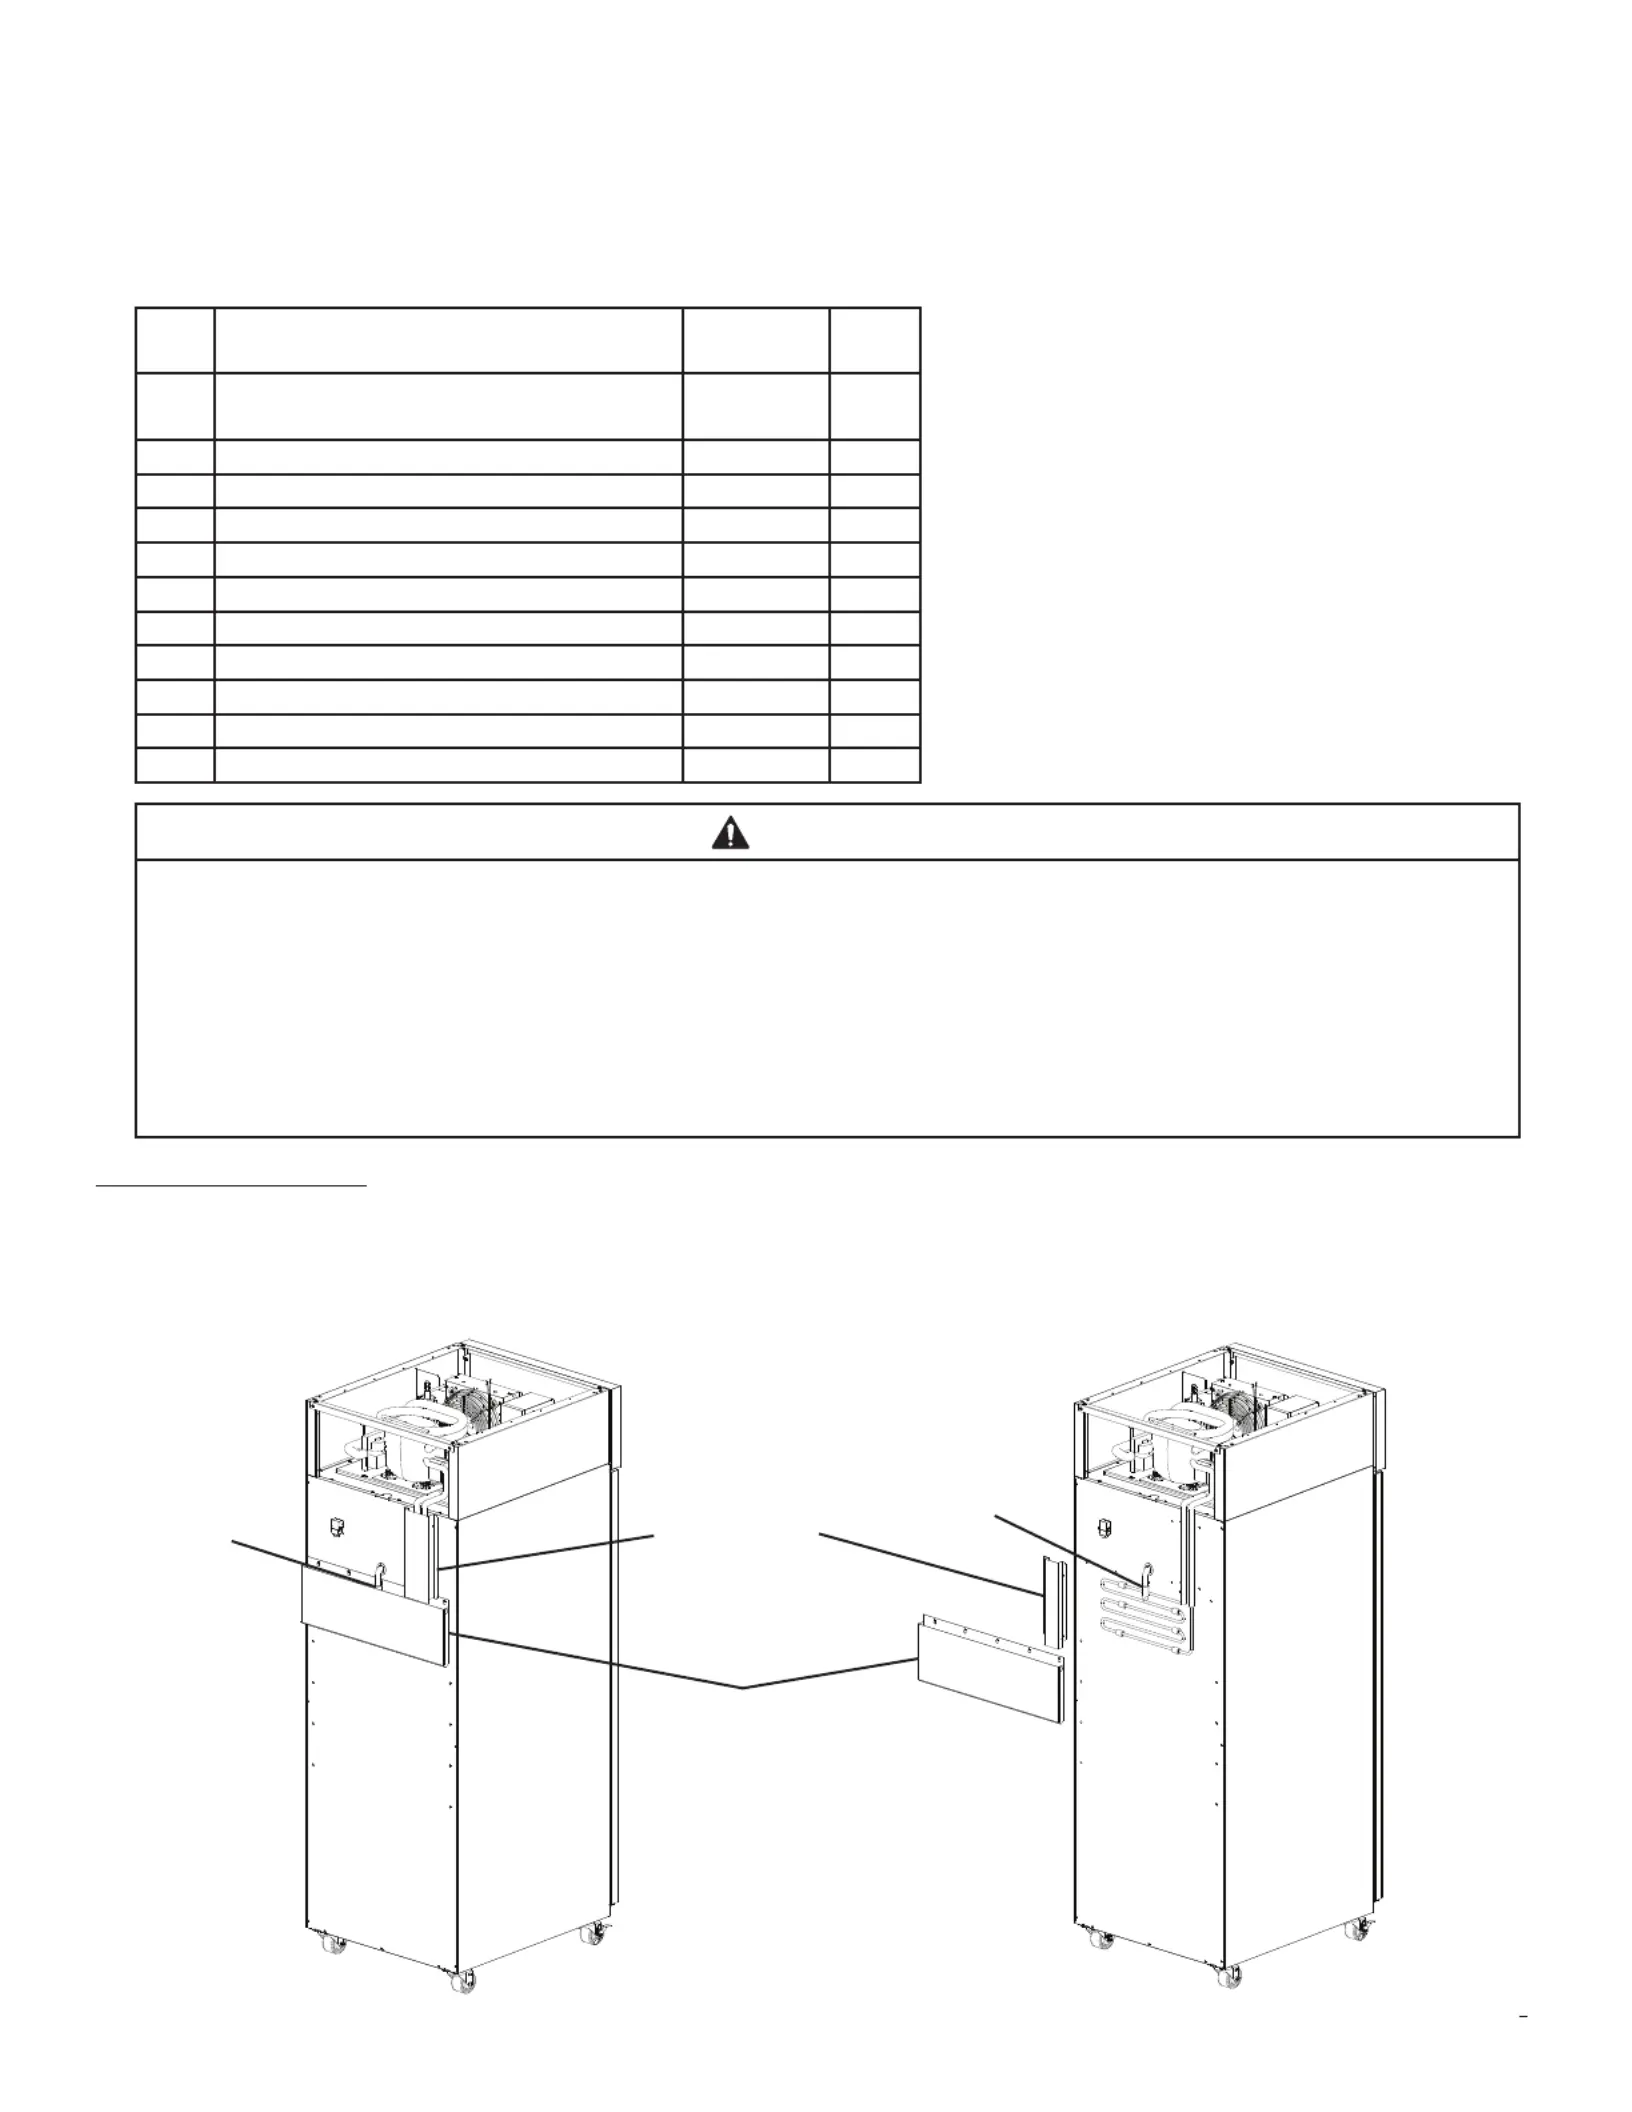
3) Remove the channel cover and condensate pan from the rear of the appliance. See Fig. 1.
4) Pour the condensate water out, then clean and dry the condensate pan.
Fig. 1
Model Shown: CF1S-FS
Condensate Pan
Channel CoverDrain Boot
Drain Boot

2
2A8351-010
6) Once tight, replace the condensate pan and channel cover in their correct positions. Connect the silicone hose provided in this kit
onto the end of the drain tting. See Fig. 3. NOTICE! Be sure the drain boot is correctly positioned back into the condensate
pan.
7) Place the heated overow drain pan into the heated overow drain pan bracket. See Fig. 4.
Fig. 3
Drain Fitting
Condensate Pan
Drain Fitting
Silicone Hose
Drain Boot
Channel Cover
Fig. 4
Heated Overow
Drain Pan Assembly
Heated Overow Drain
Pan Bracket
Drain Fitting Nut
Drain Fitting
Fig. 2
Condensate Pan
Rubber Gasket
Condensate Pan
Drain Fitting
Overow Hole
5) Remove the drain tting nut from the drain tting provided in this kit, then apply thread sealant tape or thread sealant to the drain
tting. Place the drain tting into the overow hole from the outside. Next, place the rubber gasket and drain tting nut onto the drain
tting and tighten. See Fig. 2. Be sure the drain tting is facing down.
Rear
Front
Thread Sealant Tape
or Thread Sealant
Heated Overow
Drain Pan
Front
Rear
Model Shown: CF1S-FS

3
2A8351-010
9) Measure 13-3/4 in. (349 mm) from the right side of the appliance. Next, measure up 12 in. (305 mm) from the top of the heated
overow drain pan mounting bracket and place a mark. Next, drill a 1/4 in. (6mm) hole at the mark.
See Fig. 6. NOTICE! Do not drill deeper than 1 in. (25 mm). Drilling deeper could penetrate the interior cabinet wall.
Fig. 7
Fig. 6
Nylon Tie Mount
1/4 in. (6 mm)
Nylon Tie Mount Hole
NOTICE!
Do not drill
deeper than
1 in. (25 mm)
12 in. (305 mm)
10) Place a nylon tie through the nylon tie mount and close (do not tighten). Route the silicone hose through the nylon tie then down into
the large center hole at the top of the heated overow drain pan mounting bracket. See Fig. 7. Do not cut the silicone hose at this
time.
13-3/4 in.
(349 mm)
Silicone Hose
Heated Overow Drain
Pan Assembly
Larger Center
Hole
Center
Nylon Tie
Nylon Tie Mount
8) Place the heated overow drain pan assembly at the rear of the appliance as shown in Fig. 5. Measure from the right side of the
appliance as shown for proper location. Lift it ush against the rear panel of the appliance and secure using 4 of the self-drilling hex
screws provided in this kit. See Fig. 5. The heated overow drain pan power cord connector should be facing the right side from rear
view.
Fig. 5
Self-Drilling
Screws
Heated Overow Drain Pan
Power Cord Connector
Heated Overow Drain Pan Assembly
Model Shown: CF1S-FS
Center of Appliance (1 section)
(Right Side on 2 Section Appliance)
Product specificaties
Merk: | Hoshizaki |
Categorie: | Niet gecategoriseerd |
Model: | HS-5234 |
Heb je hulp nodig?
Als je hulp nodig hebt met Hoshizaki HS-5234 stel dan hieronder een vraag en andere gebruikers zullen je antwoorden
Handleiding Niet gecategoriseerd Hoshizaki
1 September 2025
15 Augustus 2025
15 Augustus 2025
15 Augustus 2025
14 Augustus 2025
14 Augustus 2025
14 Augustus 2025
14 Augustus 2025
14 Augustus 2025
30 Juli 2025
Handleiding Niet gecategoriseerd
- EXSHOW
- Cre8audio
- Pro-Ject
- GoPro
- Alfresco
- Adesso
- Hamstra
- BC Acoustique
- Ark
- Frequency Central
- Constructa
- Hager
- Amprobe
- Audient
- Growatt
Nieuwste handleidingen voor Niet gecategoriseerd
13 September 2025
13 September 2025
13 September 2025
13 September 2025
13 September 2025
13 September 2025
13 September 2025
13 September 2025
13 September 2025
13 September 2025