Honeywell 5851 Handleiding
Bekijk gratis de handleiding van Honeywell 5851 (48 pagina’s), behorend tot de categorie Kluis. Deze gids werd als nuttig beoordeeld door 70 mensen en kreeg gemiddeld 4.6 sterren uit 5 reviews. Heb je een vraag over Honeywell 5851 of wil je andere gebruikers van dit product iets vragen? Stel een vraag
Pagina 1/48
Model / Modèl / Modelo 5851 & 5852
STEEL DRAWER AND SHELF SAFE
COFFRE-FORT DE TIROIR EN ACIER
COFFRE-FORT AVEC TIROIR ET ÉTAGÈRE EN ACIER
Read this manual carefully and never store it inside the safe!
Lire attentivement ce manuel et ne jamais le garder à l’intérieur du coffre-fort !
¡Lea este manual cuidadosamente y nunca lo guarde dentro de la caja fuerte!
1
Model 5851 & 5852
Steel Drawer and Shelf Safe
PACKAGE CONTENTS
1 – Steel Drawer Safe
1 – Operation Manual
2 – Override Access Keys
4 – “AA” Batteries
1 – Mounting Kit w/ Bolts
1
– Removable Steel Shelf
1
– Foam Floor Mat
DO NOT RETURN SAFE TO STORE!
For missing parts or difficulty operating your
safe, please contact our Consumer Assistance
Department by telephone.
Store will not accept returned products without
prior authorization. You must first contact our
consumer assistance department.
US/Canada
1-877-354-5457 (Toll Free)
Australia
0011-800-5325-7000 (Toll Free)
Germany
00-800-5325-7000 (Toll Free)
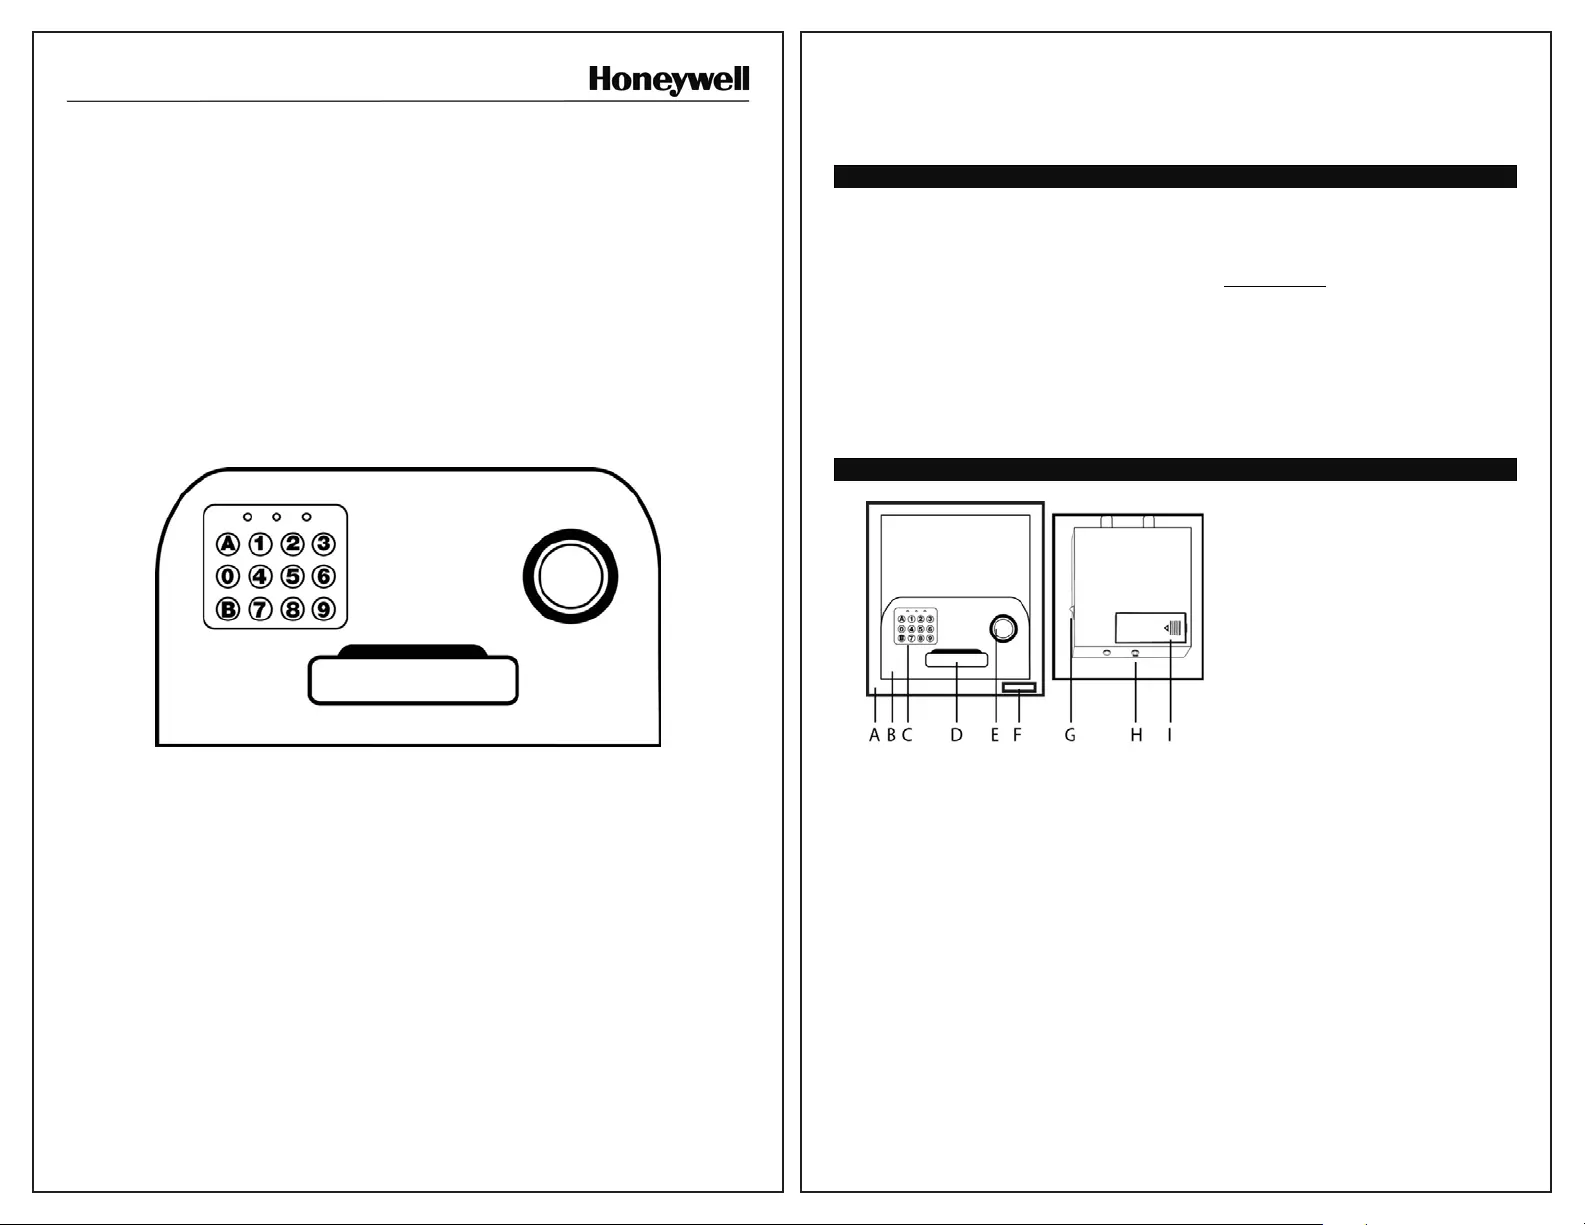
PRODUCT OVERVIEW
A - Safe Cabinet Body
B - Safe Door Assembly
C - Electronic Digital Keypad
D - Safe Entry Lever
E - Override Key Cover
F - Serial Number Label
G - Light On / Off Switch
H - Reset Button
I - Battery Cover
Product specificaties
| Merk: | Honeywell |
| Categorie: | Kluis |
| Model: | 5851 |
Heb je hulp nodig?
Als je hulp nodig hebt met Honeywell 5851 stel dan hieronder een vraag en andere gebruikers zullen je antwoorden
Handleiding Kluis Honeywell

16 November 2024
16 April 2024
11 Maart 2024
11 Maart 2024
11 Maart 2024
11 Maart 2024
27 Februari 2024
18 December 2023
18 December 2023
18 December 2023
Handleiding Kluis
Nieuwste handleidingen voor Kluis
8 Juli 2026
19 Juni 2026
16 Juni 2026
16 Juni 2026
15 Juni 2026
15 Juni 2026
15 Juni 2026
15 April 2026
6 April 2026
29 Maart 2026