Halfords High Mount 3 Handleiding
Halfords Fietsendrager High Mount 3
Bekijk gratis de handleiding van Halfords High Mount 3 (4 pagina’s), behorend tot de categorie Fietsendrager. Deze gids werd als nuttig beoordeeld door 61 mensen en kreeg gemiddeld 4.7 sterren uit 8 reviews. Heb je een vraag over Halfords High Mount 3 of wil je andere gebruikers van dit product iets vragen? Stel een vraag
Pagina 1/4
Product may differ from images shown
Special Recommendations
Avoid any vehicle bodywork of insufficient
strength, trim and items such as aerofoils or
spoilers.
IMPORTANT! Carrier straps must always be re-
tightened after cycles have been mounted to the
carrier. Straps should be checked routinely for
signs of wear and abrasion, and any worn straps
must be replaced immediately.
After driving for a few miles STOP and check that
all straps are secure and tight. If necessary,
tighten the straps and tidy away any loose ends.
This must be repeated at suitable intervals
depending on the nature of the road.
Do not exceed 45kg maximum load (3 adult
cycles) or 30kg maximum load (2 adult cycles)
when the carrier is used on a booted saloon.
To ensure full compliance with the road traffic
regulations, the use of lighting board/ number
plate is required if your vehicle’s existing
lighting/number plates are obscured by the use of
the carrier.
Drive with care, the handling characteristics of
your vehicle will be affected when carrying cycles,
(e.g. cornering, braking, side winds etc).
Retain these instructions for future reference,
ensure that any other users of the cycle carrier are
familiar with their contents.
The carrier may obstruct the rear window wiper of
your vehicle. DO NOT operate the wiper with the
carrier fitted.
When positioning cycles on the carrier ensure that
they do not project beyond the profile of the
vehicle and that no part of any cycle can touch the
paintwork.
The use of rear mounted cycle carriers may be
restricted in certain countries outside the UK.
Always check with the relevant national tourist
authorities prior to commencing your journey.
Use cloth or foam padding to prevent abrasion
damage occurring between the frames of your
cycles, or from contact between the cycles and
the cycle carrier.
Care must be taken when positioning and loading
the cycle carrier to avoid placing cycle tyres near
the exhaust, and to ensure that a satisfactory
ground clearance is maintained between the
cycles and the road. Extra care should be taken
when negotiating rough road surfaces, humps and
ferry ramps.
All lengths are approximate.
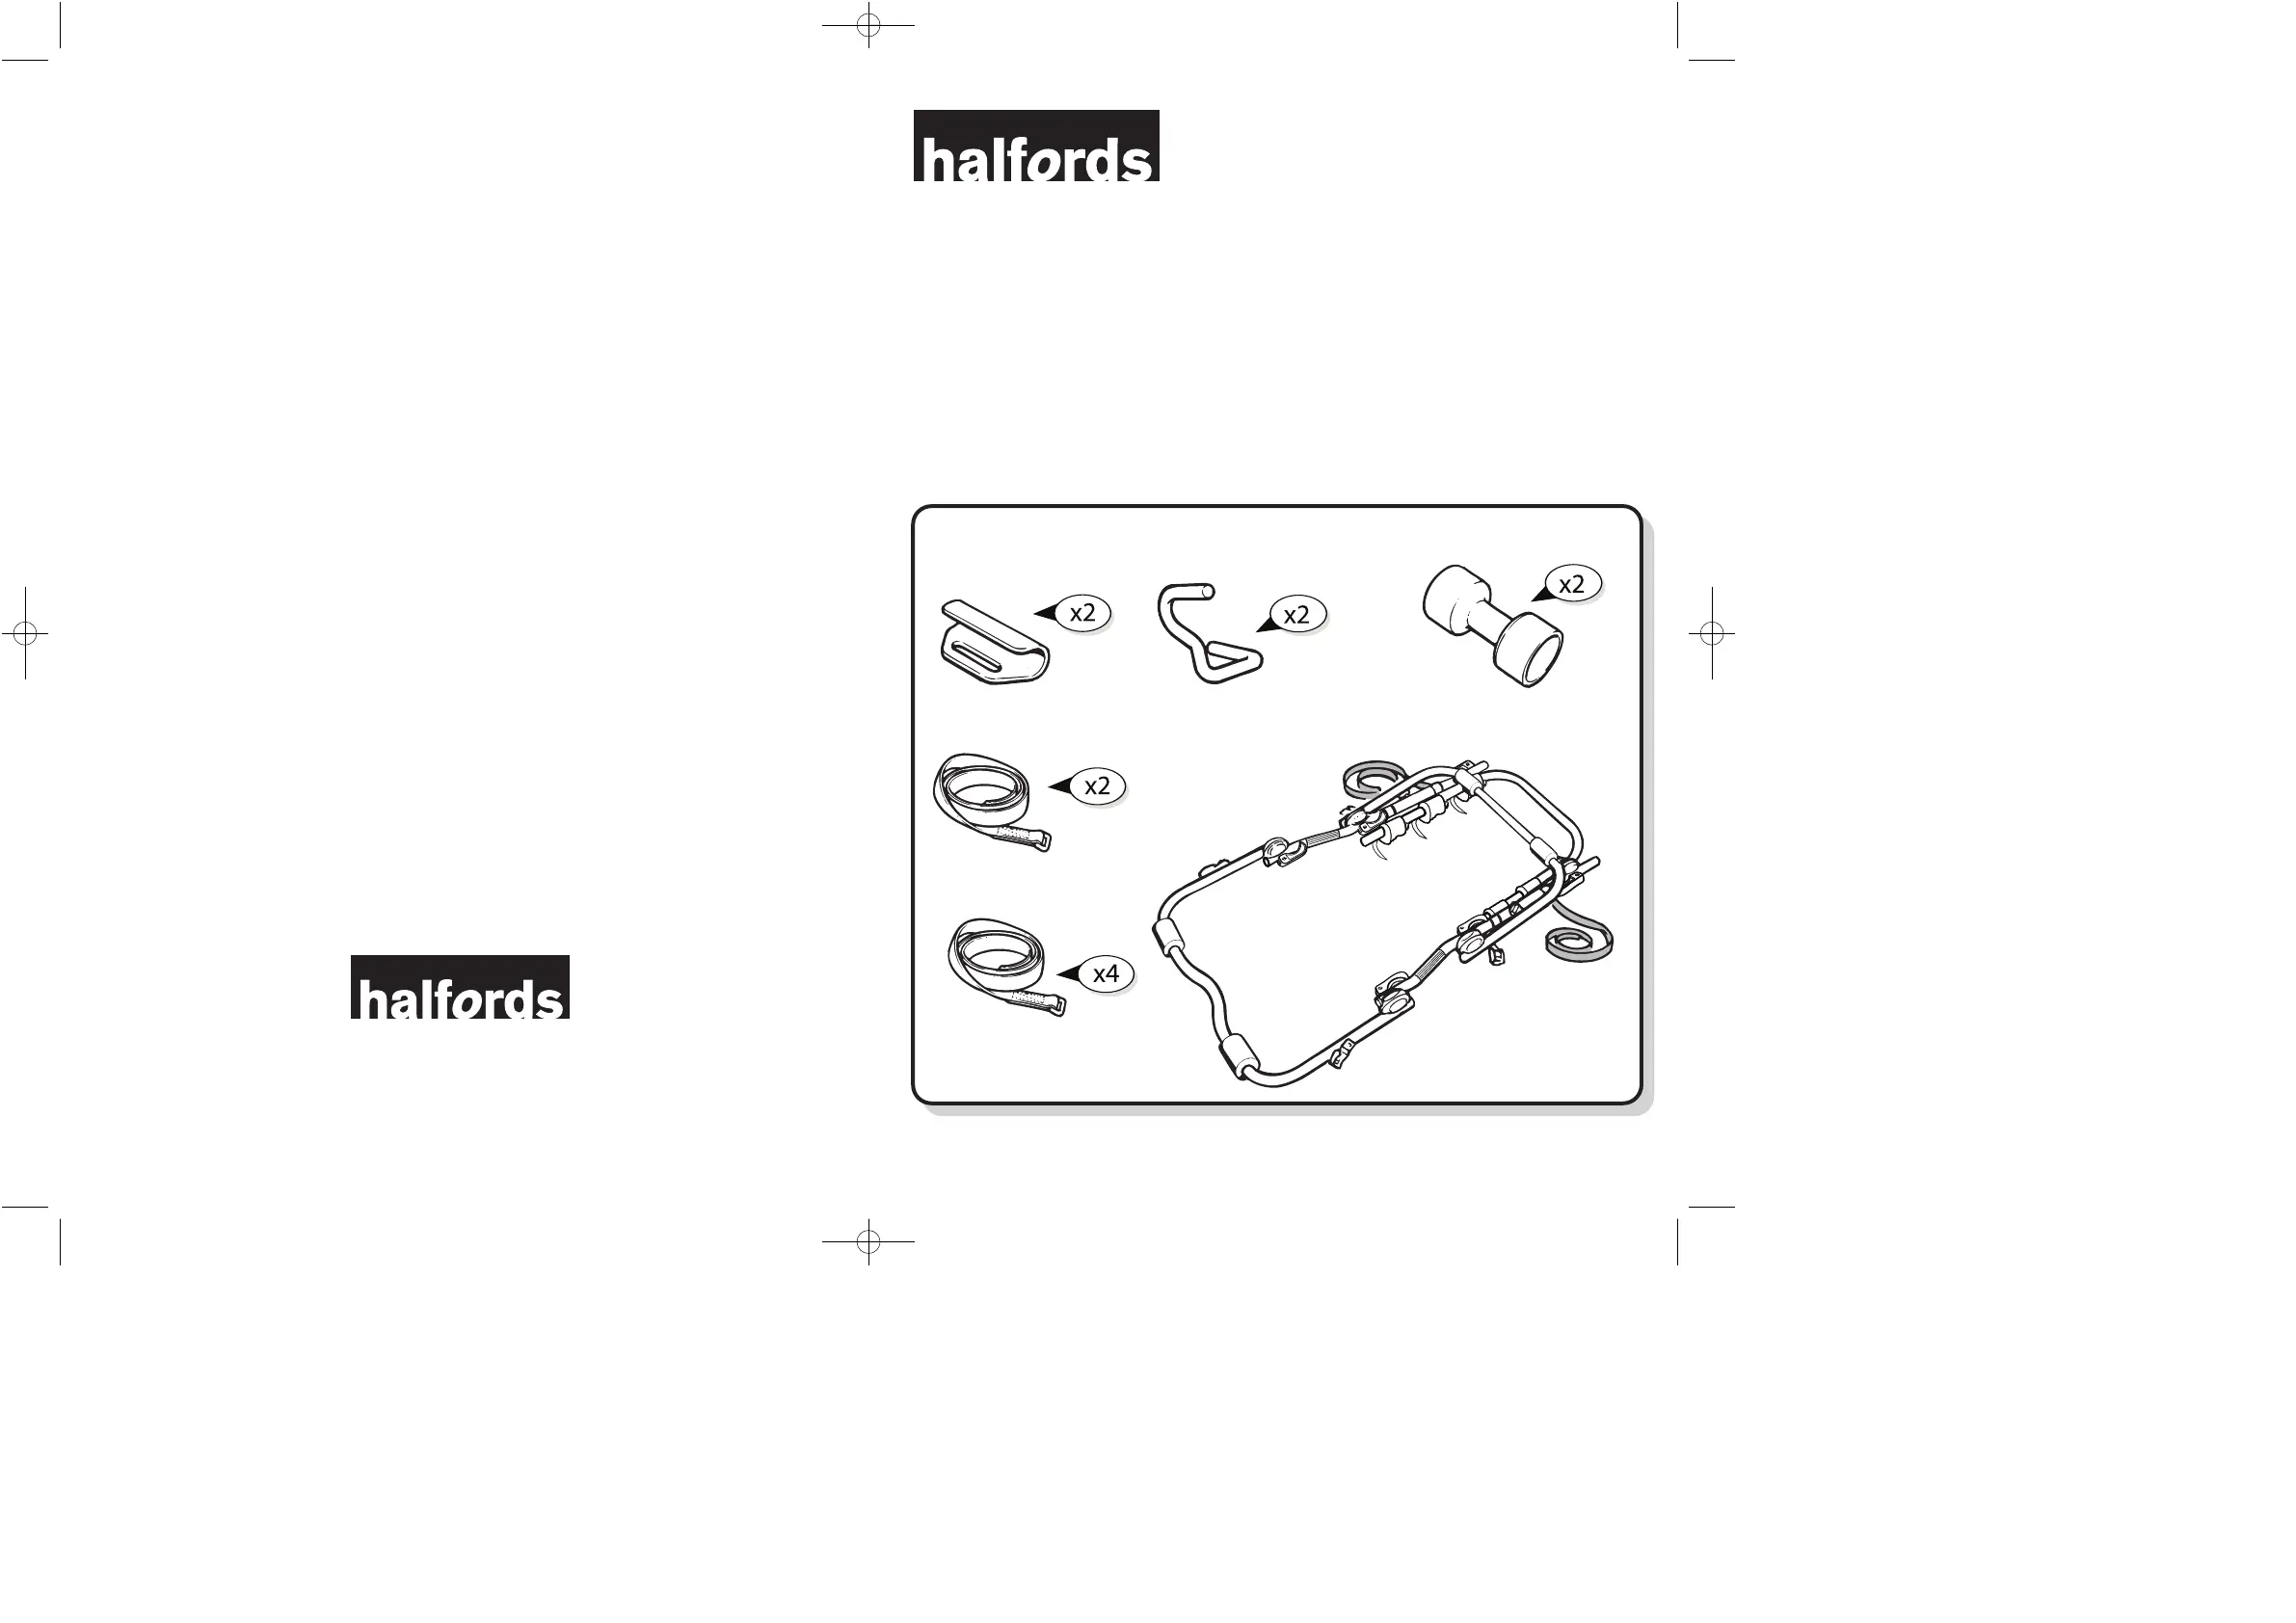
Kit Contents
Panel hook
Chassis hook
Dumbbells
160cm
95cm
Main frame
Please follow instructions carefully to ensure the safety of yourself and other road users.
The initial assembly and fitting of the carrier will take approximately 15 minutes.
Before you begin:
•Due to the contruction of boot lids we recommend only two cycles be carried on saloon
cars with this carrier.
•Make sure all parts are included in the package.
•Ensure that the vehicle boot lid/rear bumper are free from dirt and grime.
High Mount 3 Bike Carrier
Fitting Instructions
Made in the UK
Halfords Ltd, Washford
Redditch, B98 0DE
PI386-02
halfords hi 3 bike 1/2/10 15:13 Page 1
Product specificaties
| Merk: | Halfords |
| Categorie: | Fietsendrager |
| Model: | High Mount 3 |
Heb je hulp nodig?
Als je hulp nodig hebt met Halfords High Mount 3 stel dan hieronder een vraag en andere gebruikers zullen je antwoorden
Handleiding Fietsendrager Halfords

31 Januari 2024
Handleiding Fietsendrager
Nieuwste handleidingen voor Fietsendrager
29 Mei 2026
28 Mei 2026
27 Mei 2026
31 December 2026
22 December 2025
26 November 2025
24 November 2025
22 November 2025
21 November 2025
21 November 2025