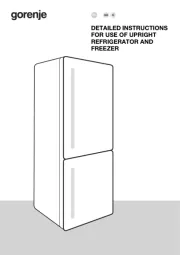
Gorenje R6295W Handleiding
Bekijk gratis de handleiding van Gorenje R6295W (7 pagina’s), behorend tot de categorie Koelkast. Deze gids werd als nuttig beoordeeld door 102 mensen en kreeg gemiddeld 3.7 sterren uit 51.5 reviews. Heb je een vraag over Gorenje R6295W of wil je andere gebruikers van dit product iets vragen? Stel een vraag
Pagina 1/7

Instructions for Use2
Gorenje R2907 Larder Refrigerator EN
Before Use ..............................................2
Instructions for Use
We Care for the Environment
Tips for Energy Savings
Important ...............................................2
Disposing of the Worn Out Appliance
Siting and Installation ...........................3
Choosing the Right Place
Siting the Appliance
Connection to Power Supply
Description of the Appliance ................4
Operation Of The Appliance ................5
Temperature Selection
Use...........................................................5
Storing Fresh Foods
Maintenance and Cleaning ...................6
Automatic Defrosting of the Refrigerator
Cleaning the Appliance
Switch Off the Appliance When Not In Use
Changing the Direction of Opening the
Door ........................................................7
Trouble-Shooting Guide........................7
Before Use
• Before connecting the appliance to the
mains supply and switching on for the
first time, let it stand for about 3 hours to
give the refrigeration system time to
settle down after possible disturbance
during delivery.
• Clean the appliance thoroughly, especially
the interior (See Cleaning and Maintenance).
• Check that the shelves are correctly placed
inside the appliance as described in chapter
Description of the Appliance.
Instructions for Use
These instructions have been prepared for
various models of refrigerator and you may find
in it description of some functions and
accessories that your appliance does not have.
We Care for the Environment
• Our products use environmentally friendly
packaging, which can be either recycled or
disposed of in an environmentally friendly
manner. To this end, individual packaging
materials are clearly marked.
• These instructions are printed either on
recycled paper or chlorine free bleached
paper.
• When your appliance finally wears out,
please dispose of it in line with current
environmental regulations)
Tips for Energy Savings
• Try not to open the door too often, especially
when the weather is hot. Once you have
opened the door, try to close it as soon as
possible.
• Check from time to time that there is
adequate air circulation around the appliance
• Reduce the thermostat settings from higher
to lower as soon as possible (depending on
how full the appliance is, ambient
temperature etc).
• Before loading the appliance with packages
of fresh foods, make sure they are cooled to
ambient temperature.
• If the gasket is damaged or if it turns out that
the sealing is poor, the energy consumption
is substantially higher. To restore efficiency,
replace the gasket.
• The condenser on the rear wall should
always be clean and free of dust.
Important
• If you have bought this appliance to replace
an old one equipped with a lock that cannot
be opened from inside, make sure that the
lock is broken. This will make it impossible
for children to lock themselves inside the
appliance and suffocate.
• The appliance must be correctly connected
to the mains supply. (see: Connecting to the
Mains Supply).
• If the food has strange smell or color, throw it
away, because it is very likely that it is
spoiled and therefore dangerous to eat.

Instructions for Use 3
• Disconnect the appliance from the power
supply before repairing it (only a qualified
technician should repair it), before cleaning
and before replacing the light bulb.
• Be careful not to damage the rear wall of the
appliance (the condenser unit or the tubes -
for example when moving the appliance) or
any part of the refrigerating system inside the
appliance.
• The refrigerating system of the appliance is
filled with refrigerant and oil, so when the
appliance is damaged, handle it with care
and dispose it of in compliance with current
environmental regulations.
• If the supply cord is damaged, it must be
replaced by the manufacturer or his service
agent or a another suitably qualified person
in order to avoid hazard.
• The rating plate is inside the appliance or
outside on the rear wall.
The symbol on the product or on its
packaging indicates that this product
may not be treated as household
waste. Instead it shall be handed over
to the applicable collection point for the
recycling of electrical and electronic
equipment. By ensuring this product is
disposed of correctly, you will help prevent
potential negative consequences for the
environment and human health, which
could otherwise be caused by inappropriate
waste handling of thisproduct. For more
detailed information about recycling of this
product, please contact your local city
office, your household waste disposal
service or the shop where you purchased
the product.
Disposing of the Worn Out Appliance
• When your appliance finally wears out,
dispose it of. If the appliance has a lock,
break it, in order to prevent eventual
accidents (danger of children get locked
inside the appliance).
• The refrigerating system of the appliance is
filled with refrigerant and insulating
substances which should be separately
treated and processed. Call your nearest
authorised service agent or specialised
servicing centre. If you don't find one, contact
your local authorities or your distributor. Be
careful not to damage the tubes on the rear
wall of the appliance (danger of pollution).
Siting and Installation
Choosing the Right Place
Place the appliance in a dry and well ventilated
room. Suitable room temperatures are from
10ºC to 32ºC
Never place the appliance near heat emitting
devices (e.g. cooker, radiator, water heater or
similar) and do not expose it to direct sunlight.
The appliance should be positioned at least 3
cm away from an electric or gas cooker and at
least 30 cm away from a boiler. If this is not
possible, use an appropriate insulation.
Behind the appliance there should be free
space at least 2 cm wide and above the
appliance there should be at least 5cm
clearance between the top of the appliance and
any kitchen units.
Class
Ambient temperature
SN (sub-normal) from + 10°C to + 32°C
Siting the Appliance
• Place the appliance firmly on a solid base.
Some appliances have adjustable feet at the
front; use them to level the appliance.
• Two spacers attached to the appliance must
be fitted onto the upper edge of the
condenser, to prevent the appliance from
being installed too close to the wall. Spacers
are manufactured for all-purpose function
depending on the distance of the condenser
from the wall. Therefore turn spacers
correspondingly and fix them to the
appliance.
•
The appliance may stand freely or it can be
placed next to a kitchen furniture element
or a wall. Mind the space required to open

Instructions for Use4
the door and pull out the drawers and
shelves (see installation diagram).
35 mm
90
o
Connection to Power Supply
ELECTRICAL CONNECTION
For your safety please read the following
information
Warning: This appliance must be earthed.
The appliance must be connected to a 220-240
volts 50 cycle AC supply by means of a three
pin socket, suitably earthed and should be
protected by a 13 amp fuse in the plug or a15
amp fuse in the consumer unit.
The appliance is supplied with a moulded 13
amp 3 pin mains plug fitted with a 13amp fuse.
Should the fuse require replacement, it must
be replaced with a fuse rated at 13 amp and
approved to BS1362.
The plug contains a removable fuse cover that
must be refitted when the fuse is replaced. In
the event of the fuse cover being lost or
damaged, the plug must not be used until a
replacement cover has been obtained.
If the moulded mains plug is unsuitable for the
socket outlet in your home or is removed for
any other reason, then the fuse should be
removed and the cut off plug disposed of safely
to prevent the hazard of electric shock.
There is a danger of electric shock if the cut off
plug is inserted into any 13 amp socket outlet.
How to wire a 13 amp plug.
Important
The wires in the mains lead on this appliance
are coloured in accordance with the following
code:
Green and Yellow - Earth
Blue – Neutral
Brown – Live
As the colours may not correspond with the
markings identifying the terminals in your plug
proceed as follows.
The green and yellow wire must be connected
to the terminal in the plug which is marked with
the letter E or with the earth symbol or
coloured green and yellow.
The blue wire must be connected to the
terminal marked N or coloured black.
The brown wire must be connected to the
terminal marked L or coloured red.
Description of the Appliance
Shelf (1)
(the number of shelves depends on model)
Shelf are placed on the guides inside the
appliance. They are protected against pulling
out. If you want to remove them, slightly lift up
the back part and pull out.
Perishable food should be stored on the back
i.e. the coldest part of the shelves.
Defrost Water Outlet (2)
The interior of the refrigerator is cooled by a
cooling plate incorporated in the rear wall.
Under the plate there is a channel and an
outlet for defrost water.
Product specificaties
| Merk: | Gorenje |
| Categorie: | Koelkast |
| Model: | R6295W |
| Apparaatplaatsing: | Vrijstaand |
| Kleur van het product: | Wit |
| Gewicht: | 52000 g |
| Breedte: | 600 mm |
| Diepte: | 625 mm |
| Hoogte: | 1435 mm |
| Geluidsniveau: | 40 dB |
| Jaarlijks energieverbruik: | 178 kWu |
| Gewicht verpakking: | 54500 g |
| Energie-efficiëntieklasse (oud): | A |
| Koelkast binnenverlichting: | Ja |
| Aantal planken koelkast: | 12 |
| Totale nettocapaciteit: | 284 l |
| Eierenrekje: | Ja |
| No Frost system: | Nee |
| Totale brutocapaciteit: | 285 l |
| Ingebouwde vriezer: | Nee |
| Aantal compressors koelkast: | 1 |
| Klimaatklasse: | SN |
| Afmetingen verpakking (BxDxH): | 640 x 710 x 1505 mm |
Heb je hulp nodig?
Als je hulp nodig hebt met Gorenje R6295W stel dan hieronder een vraag en andere gebruikers zullen je antwoorden
Handleiding Koelkast Gorenje
5 September 2025
5 September 2025
4 September 2025
4 September 2025
4 September 2025
4 September 2025
4 September 2025
4 September 2025
8 Augustus 2025
19 April 2025
Handleiding Koelkast
- Dunavox
- Zanussi
- Icecool
- Dimplex
- Boretti
- Silvercrest
- Hatco
- Foster
- Saba
- Sunwind
- Romo
- Coors Light
- Lemair
- Merax
- Winia
Nieuwste handleidingen voor Koelkast
18 September 2025
18 September 2025
17 September 2025
16 September 2025
16 September 2025
16 September 2025
16 September 2025
16 September 2025
16 September 2025
16 September 2025