EtherWAN EX17908 Handleiding
EtherWAN Schakelaar EX17908
Bekijk gratis de handleiding van EtherWAN EX17908 (2 pagina’s), behorend tot de categorie Schakelaar. Deze gids werd als nuttig beoordeeld door 15 mensen en kreeg gemiddeld 5.0 sterren uit 6 reviews. Heb je een vraag over EtherWAN EX17908 of wil je andere gebruikers van dit product iets vragen? Stel een vraag
Pagina 1/2
Copyright 2020 EtherWAN Systems, Inc. Page 1
All Rights Reserved
EX17908
02/25/2020
W70G-E17908XQ2
1 Unpacking
Unpack the items. Your package should include:
One EX17908 Web-Smart switch
One external power adapter
One CD containing this user’s guide
If items are missing or damaged, notify your
EtherWAN representative. Keep the carton and
packing material.
2 What Else You Need
Category 5 or better Ethernet cables
Notebook PC with Ethernet (RJ-45) Interface
and installed Web browser
3 Select a Location
Desktop installations: Mount on a flat table
or shelf surface.
Rack installations: Use a 19-inch (48.3-
centimeter) EIA standard equipment rack
that is grounded and physically secure.
Identify a power source within 6 feet (1.8
meters).
Choose a dry area with ambient temperature
between 0 and 40ºC (32 and 104ºF).
Do not cover fans on the rear and side.
Keep away from heat sources, sunlight, warm
air exhausts, hot-air vents, and heaters.
Be sure there is adequate airflow.
Keep the switch at least 6 ft (1.83 m) away
from the nearest source of electromagnetic
noise, such as a photocopy machine.
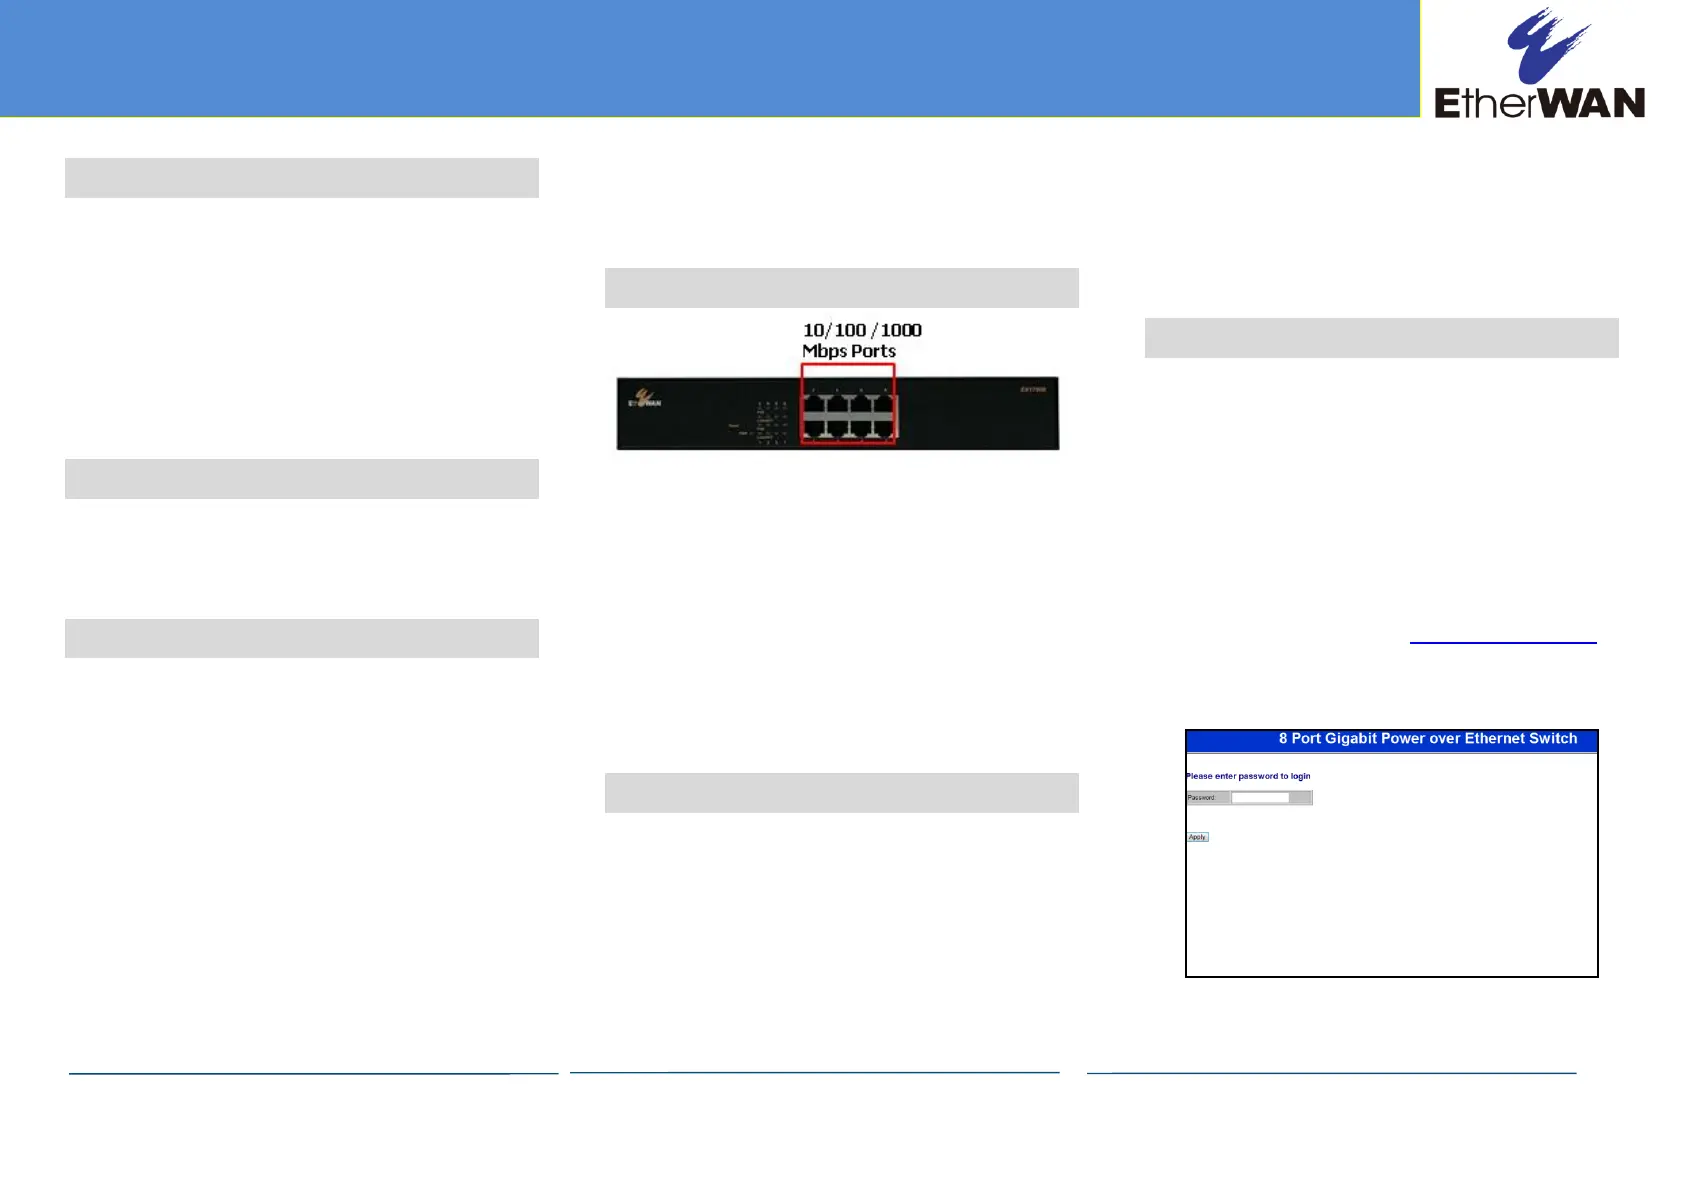
4 Connect to the Data Ports
The switch provides eight 10/100/1000 Mbps RJ-
45 ports that can connect to Power over
Ethernet (PoE) devices, such as an IP surveillance
camera or a Voice Over Internet Protocol (VoIP)
phone.
A.Insert one end of a Category 5 or better
Ethernet cable into a switch port.
B.Connect the other end into the Ethernet port
of the device.
C.Repeat steps A and B for each additional
device you want to connect to the switch.
5 Apply AC Power
A.Connect the female end of the supplied AC
power adapter cable to the power receptacle
on the switch rear panel. Connect the other
end to a grounded 3-pronged AC outlet.
B.On the switch rear panel, move the ON/OFF
switch to the ON position.
When you apply AC power:
All green PoE and Link/ACT LEDs blink
momentarily.
The fans start.
The yellow Power LED goes ON.
The Link/ACT LEDs for every port connected
to a device flash, as the switch conducts a
brief Power On Self-Test (POST).
6 Configure the Switch
After the switch passes its POST, perform a basic
configuration of the switch.
A.Connect an available 10/100/1000 Mbps RJ-
45 switch port to a PC using a Category 5 or
better Ethernet cable.
B.Confirm that the Link/ACT LED for the switch
port to which the PC is connected is ON.
C.Configure the PC’s TCP/IP settings to use the
subnet 192.168.2.2.
D.In a Web browser, type http://192.168.2.1
in the address bar and press Enter.
E.At the Password screen, type admin as the
default password, and then click Apply.
EX17908 Web-Smart Switch Installation Guide
Continued on next page
Product specificaties
| Merk: | EtherWAN |
| Categorie: | Schakelaar |
| Model: | EX17908 |
Heb je hulp nodig?
Als je hulp nodig hebt met EtherWAN EX17908 stel dan hieronder een vraag en andere gebruikers zullen je antwoorden
Handleiding Schakelaar EtherWAN

5 Maart 2026
14 November 2025
12 November 2025
12 November 2025
12 November 2025
12 November 2025
11 November 2025
10 November 2025
10 November 2025
10 November 2025
Handleiding Schakelaar
Nieuwste handleidingen voor Schakelaar
20 Mei 2026
20 Mei 2026
19 Mei 2026
18 Mei 2026
12 Mei 2026
12 Mei 2026
11 Mei 2026
11 Mei 2026
8 Mei 2026
6 Mei 2026