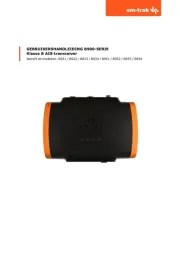
Em-Trak A200 Handleiding
Bekijk gratis de handleiding van Em-Trak A200 (2 pagina’s), behorend tot de categorie Niet gecategoriseerd. Deze gids werd als nuttig beoordeeld door 26 mensen en kreeg gemiddeld 4.9 sterren uit 13.5 reviews. Heb je een vraag over Em-Trak A200 of wil je andere gebruikers van dit product iets vragen? Stel een vraag
Pagina 1/2

Class A
AIS Transceiver
QUICK START GUIDE
What’s in the box?
For full instructions on how to install and use your
AIS Transceiver please refer to the product manual.
Step 1 – Install the transceiver
Front panel controls
What do I need?
201-0627:4
Panel mounted
Overhead mounted
(reverse mounting bracket)
Desk mounted
Step 2 – Install the antennas
GNSS antenna should be at least 5m (16ft)
from radar or satellite communication antennas.
It should also be away from the radar beam path
and mounted on a rigid surface.
VHF antenna should be at least
3m (10ft) from other transmitting radio,
satellite and radar antennas.
Radar beam path
GNSS antenna
3m (10ft) 5m (16ft)
VHF antenna
Power cable
Warranty card
Product
manual Product mounting
template
Quick start
guideFlyer
AIS transceiver
18 way data cable 14 way data cable
Vessel type: Class A / SOLAS or Inland
MMSI number (9 digits):
Vessel name:
Vessel callsign:
IMO number (if available):
Vessel dimensions and GNSS antenna position:
Information needed for installation:
Scroll wheel
(push to select)
Function keys
(up, down, left right)
Back / Home
Micro SD card
slot behind door
Navigation Status /
Screen brightness
Select
Options menu
Display
Mounting bracket
Fixings
Ref A
Antenna
Ref A + Ref B = Length in metres Ref C + Ref D = Beam in metres
Ref B
Stern Bow
Ref C
Ref D
Quick operation
guide
VHF antenna
(Connector
type: PL-259)
Pozidriv (PZ2)
screwdriver
Allen keys (3mm, 4mm)
12V/24V
power supply
DrillSaw (for panel cut-out)
Grounding wire
Surge arrestor
GNSS Antenna
Cable Assy

Step 4 – Quick start sequence
NAME/MMSI Range Bearing TypeCPA TCPA Age
DUBLIN FISHER 1m 50s
B
B
BS
PROXIMITY CRAFT 1m 47s
ATLANTIC PRIDE 0m 1s
212222222 0m 36s
EMSLAKE 0m 45s
PIER 4 0m 6s
444110175
3.15NM
15.5NM
6.9NM
6.7NM
-
5.2NM
35.8NM
3.15NM
15.5NM
6.9NM
6.7NM
-
5.2NM
35.8NM
-
-
-
-
-
5h 38m
-
120.8
0
22.6
0
37.20
313.4
0
-
86.6
0
167.3
0
0m 5s
Visible: 12 Filtered out: 0
TARGET LIST Int. GNSS
16:58:29 SOG 21.1kt
UTC + 1h COG 88.0°
50° 32.0286’ N
0° 55.2715’ W
Speed / Course
Time
Time oset
Menu title
Main display
area
Status indicators
Messages
Rx
Tx
Filtering
Blue sign (Inland only)
Navigation status
Alarms
Position
CONFIGURATION CHECK Int. GNSS
--:-- -- SOG - 21.1kt
UTC + 1h COG - 88.0˚
50˚ 32.0286’ N
0˚ 55.2715’ W
Save settingsCancel setup
Power supply
MMSI 235001402
GPS position x
EXT ERNAL ANTENNA POSITION No GNSS
--:-- -- SOG -
UTC + 1h COG -
-
-
NextCancel setup
A
B
C
D
m
m
m
m
If present, the external antenna will be connected to
a separate GNSS receiver which can be connected
to this product via an NMEA interface.
D
B A
C
INTERNAL ANTENNA POSITION No GNSS
--:-- -- SOG -
UTC + 1h COG -
-
-
NextCancel setup
A
B
C
D
D
B A
C
m
m
m
m
The internal GNSS antenna is the
antenna supplied with this product.
This antenna must be connected.
ENTER VESSEL IDENT ITY No GNSS
--:-- -- SOG -
UTC + 1h COG -
-
-
NextSkip setup
MMSI (required)
Vessel name
Vessel callsign
IMO number
(if available)
Vessel type
SELECT OPERATING MODE No GNSS
--:-- -- SOG -
UTC + 1h COG -
-
-
Please select the required operating mode.
Class A / SOLAS mode is for general use. Inland AIS is for vessels operating on CCNR
administered inland waterways such as the Rhine.
NextSkip setup
Class A / SOLASVessel type
Inland AIS
INTRODUCTION No GNSS
--:-- -- SOG -
UTC + 1h COG -
-
-
Welcome to your new AIS transceiver.
This setup process will assist with conguring the basic aspects of this device
required for a standard installation. More advanced options (such as conguring
NMEA2000 data sources) are available in options menus after completion of the
setup process. All information entered can be changed at a later date.
The default administrator password is 0000.
NextSkip setup
WARNING - LIMITATIONS ON USE
WARNING - LIMITATIONS ON USE
No GNSS
--:-- -- SOG -
UTC + 1h COG -
-
-
This product, including the C-MAP by Jeppesen charts, is intended to be used
only as an aid to navigation. It should facilitate use of ocial government
charts, not replace them. Only Ocial Government Charts and Notices to
Mariners contain all the current information needed for safe navigation. This
product’s features cannot be relied on as complete or accurate and may vary
depending on location. It is the captain’s responsibility to use ocial
government charts, notices to mariners, caution, sound judgement and
proper navigational skills when operating their boat using this product.
This product supports C-MAP by Jeppesen electronic charts. Their use is
Accept
Ship’s sensor data (DGPS, GYRO, Heading)
NMEA2000
Optional connections
Chassis/GND
GNSS antenna
VHF antenna
Surge arrestor
12/24V
DC Supply
Red Black
PINWIRE COLOURSIGNAL
LR DGPS TX B
LR DGPS TX A
LR DGPS RX B
LR DGPS RX A
LR DGPS COM
PILOT TX B
PILOT TX A
PILOT RX B
PILOT RX A
PILOT COM
ALARM NC
ALARM COM
EXT DISPLAY TX B
EXT DISPLAY TX A
EXT DISPLAY RX B
EXT DISPLAY RX A
EXT DISPLAY COM
CHASSIS
ORANGE
BROWN
PURPLE
BLUE
BLACK
RED
RED/WHITE
PINK
YELLOW
GREEN
GREY
WHITE
ORANGE/WHITE
BLACK/WHITE
BROWN/WHITE
YELLOW/WHITE
GREEN/WHITE
DRAIN WIRE
3
4
7
8
1
2
5
6
10
11
16
12
13
17
14
18
15
9
Displays (ECDIS, Radar)
PIN
1
3
6
7
2
5
8
9
12
11
14
13
10
4
WIRE COLOUR
BLACK
BROWN
BLUE
RED
ORANGE
PURPLE
GREEN
WHITE
WHITE/BLACK
GREY
YELLOW
RED/BLACK
PINK
DRAIN WIRE
SIGNAL
BLUE SIGN N
BLUE SIGN P
SILENT N
SILENT P
SENSOR 1 RX B
SENSOR 1 RX A
SENSOR 1 COM
SENSOR 2 RX B
SENSOR 2 RX A
SENSOR 2 COM
SENSOR 3 RX B
SENSOR 3 RX A
SENSOR 3 COM
CHASSIS
An optional junction box is available to assist with wiring to sensors and displays
Step 3 – Connecting
the transceiver
NOTE: Numbers and tables refer to
connector pins on unit
This product must be connected to
protective earth via the earth connection
point. It is essential that the earth
connection point is used in all installations,
regardless of what other equipment
is connected. The earth connection point
must be bonded to protective earth using
as short a connection as possible.
11 10 9 78
15 14 1213
6 5 34
18 16
2 1
17
9 8 7 6
12 11 10
5 4 3
2 1
14 13
2 1
2 1
3
5
4
PIN
1
2
WIRE COLOUR
RED
BLACK
SIGNAL
VIN +
VIN -
PIN
1
2
3
4
5
SIGNAL
N2K_NET_SHIELD
N2K_NET_S
N2K_NET_C
N2K_NET_H
N2K_NET_L
The unit is now
congured and
ready to go.
Final window, all three
ticks should be displayed.
Product specificaties
| Merk: | Em-Trak |
| Categorie: | Niet gecategoriseerd |
| Model: | A200 |
Heb je hulp nodig?
Als je hulp nodig hebt met Em-Trak A200 stel dan hieronder een vraag en andere gebruikers zullen je antwoorden
Handleiding Niet gecategoriseerd Em-Trak
3 Juli 2025

30 Juni 2025

30 Juni 2025

30 Juni 2025

30 Juni 2025

30 Juni 2025

14 Mei 2024

14 Mei 2024

14 Mei 2024

14 Mei 2024
Handleiding Niet gecategoriseerd
- SunBriteTV
- 9.solutions
- Bxterra
- HiLook
- TomTom
- Festool
- Sure Petcare
- Vitalmaxx
- HomeCraft
- PeakTech
- Grandstream
- Ag Neovo
- Primus WindPower
- Arylic
- Kugoo
Nieuwste handleidingen voor Niet gecategoriseerd

13 September 2025

13 September 2025

13 September 2025

13 September 2025

13 September 2025

13 September 2025

13 September 2025

13 September 2025

13 September 2025
13 September 2025