Easypix VX931 Handleiding
Easypix Fotocamera VX931
Bekijk gratis de handleiding van Easypix VX931 (8 pagina’s), behorend tot de categorie Fotocamera. Deze gids werd als nuttig beoordeeld door 37 mensen en kreeg gemiddeld 4.9 sterren uit 6 reviews. Heb je een vraag over Easypix VX931 of wil je andere gebruikers van dit product iets vragen? Stel een vraag
Pagina 1/8
12
1.0 Table of Contents
1.1 Total pages
2.0 Cautions
3.0 Overall Introduction
3.1 Accessories
3.2 External View
3.3 Display Information
4.0 Getting Ready
4.1 Turn on/off Camera
4.2 Loading the battery
4.3 Insert / Remove Memory Card
4.4 Attaching Wrist Strap
5.0 Buttons & Function
5.1 Power
5.2 Shutter
5.3 Tele / Wide
5.4 Playback
5.5 Mode
5.6 Delete & +/-
5.6.1 EV
5.6.2 ISO
5.6.3 WB
5.7 Menu /OK
5.7.1 Up/Play & Pause/ Macro
5.7.2 Right/Flash
5.7.3 Down/Voice Memo
5.7.4 Left/Self-Timer
6.0 Still Image Mode
6.1 Shooting
6.2 Menu Mode
6.2.1 Size
6.2.2 Quality
6.2.3 Sharpness
6.2.4 Saturation
6.2.5 Effect
6.2.6 Metering
6.2.7 Scene Mode
6.2.8 Shooting
2.0 Cautions
Do not try to disassemble the camera by yourself, which may damage the camera or cause
electric shock.
Do not fire the flash in a close distance (less than 1 meter); it may hurt your eyes.
Keep the camera away from the reach of children or animals to prevent them from swallowing the
batteries or small accessories.
Stop using the camera if any kind of liquid or foreign object enters the camera. If it happens, power
off the camera and contact your dealer for help.
Do not operate this camera with wet hands; it may cause electric shock.
The camera may be damaged in an environment of high temperature.
To avoid electricity leakage, please remove the battery if the camera is expected not to be in use
for a long period.
It is normal that the temperature of the camera body rises if the camera works for a long time.
Small Tip to Save You Big Headache
A digital camera is in a way very similar to a computer. If the digital
camera hangs itself during operation, please follow the procedures
below and most likely the camera can be re-activated.
1. Remove the battery.
2. Reload the battery.
3. Switch on the camera.
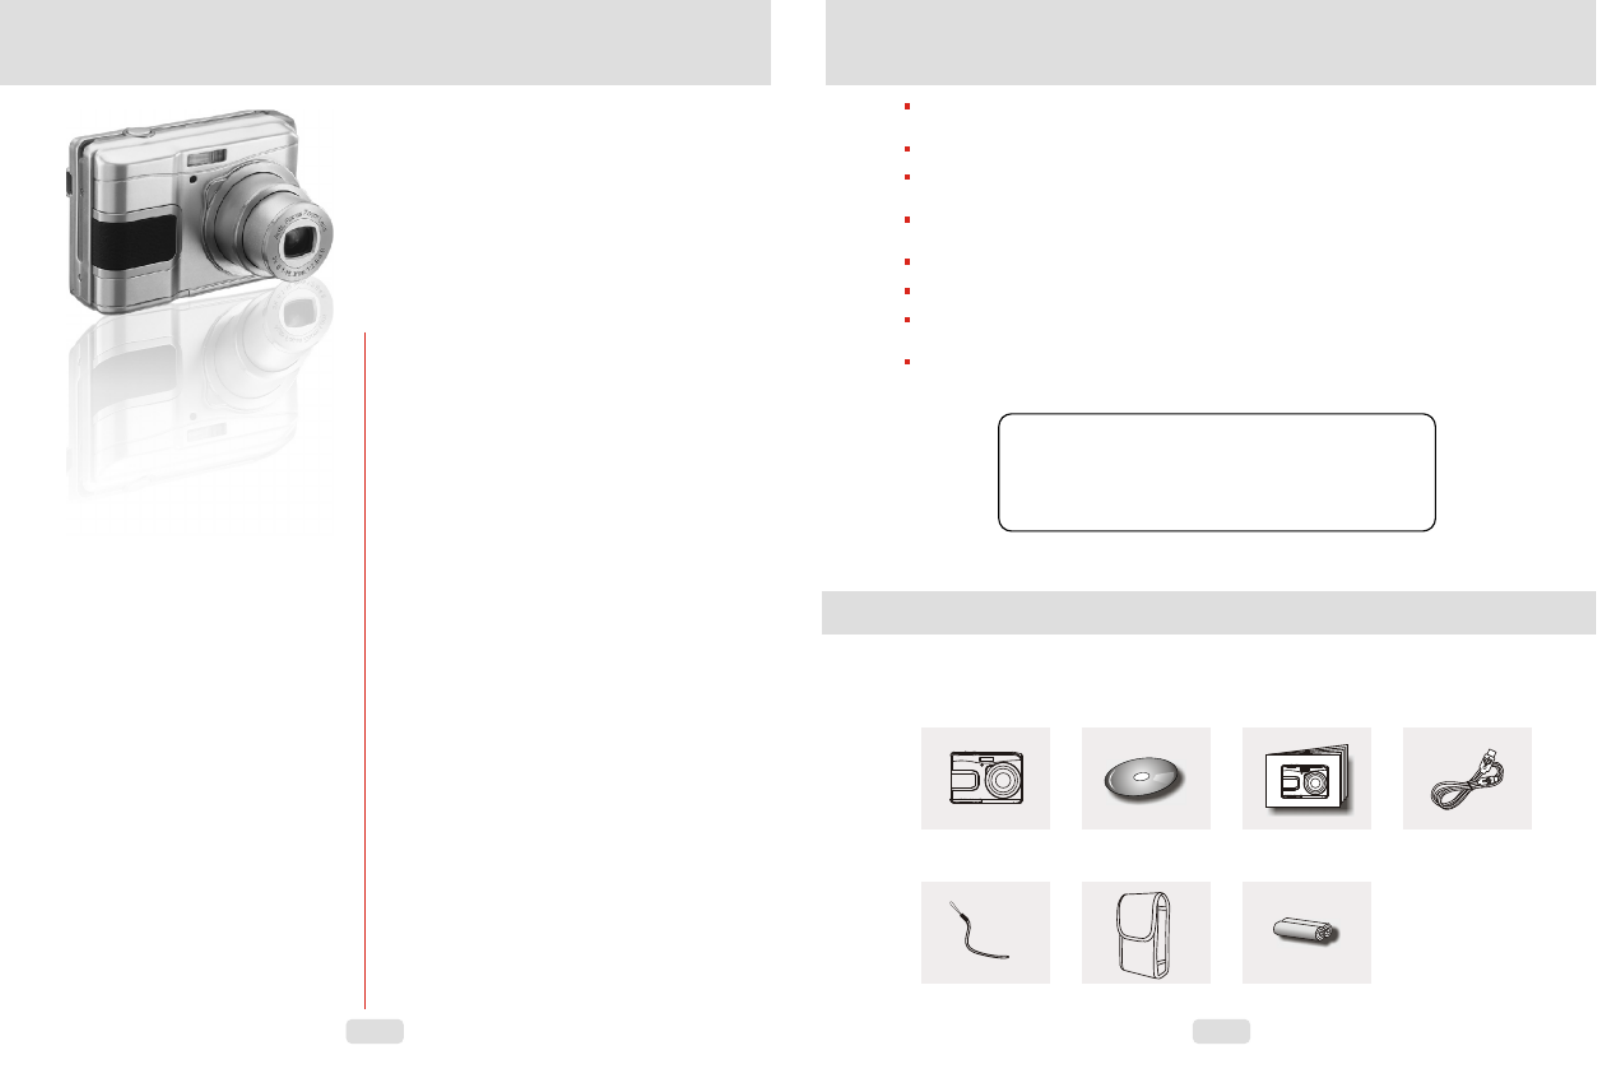
3.0 Overall Introduction
3.1 Accessories
Digital Camera Camera Driver & User Manual USB Cable
Software CD
Wrist Strap Camera Pouch 2xAA Batteries
User Manual
7.0 Movie Clip Mode
7.1 Movie Recording
7.2 Movie Size
8.0 Voice Recording Mode
9.0 Play back Mode
9.1 Playback of Still lmage
9.2 Playback of Movie Clip
9.3 Thumbnail
9.4 Exploring an image
9.5 Slide
9.6 Protect
9.7 Delete
9.8 Copy To Card
9.9 DPOF
10.0 Set Up Mode
10.1 Auto Off
10.2 Language
10.3 Format
10.4 Date Input
10.5 Imprint
10.6 Beep
10.7 Light Frequency
10.8 Quick View
10.9 System Reset
10.10 USB
10.10.1 PC Cam
10.10.2 Disk Drive
10.10.3 Printer
11.0 PictBridge Mode
---------------
-----------------------
----------------------
-----------------
--------------------
------------------
------------------
-----------
----------------
-------------------
---------------------------
--------------------------
------------------------
-------------------------
----------------------------
-----------------------
---------------------------
--------------------------
---------------------------
-------------------------
-------------
---------------------
-----------------
-------------------
------------------
-------------------------
-----------------------
--------------------------
------------------------
----------------------
----------------------
-------------------------
-----------------------
---------------------
-----------------------
------------------------
-------------------------
------------------------------
----------------------
------------------
------------------
---------------------------
--------------------
-------------------------------
-----------------------------
------------------------------
-------------------------
------------------------------
------------------------
---------------------------
--------------------------
----------------------------
--------------------------
----------------------------
------------------------------
----------------------
--------------------------
-----------------------
-----------------------------
-------------------------
------------------------
--------------------------
------------------
4
4
4
4
4
1
1
2
2
2
3
3
4
4
4
4
5
5
5
5
5
5
6
6
6
6
6
6
6
6
6
6
7
7
7
7
7
7
7
7
7
7
8
8
8
8
9
9
9
10
10
10
11
11
11
11
11
12
12
12
12
12
12
12
12
12
13
13
-----------------------
--------------
--------------------
------------------------------
14
14
14
1.0 Table of Contents
11.1 Connecting the Camera to
a PictBridge-supported Printer
11.2 Select pictures to print
11.3 Custom Set
12.0 Software Application
12.1 ArcSoft Medialmpression
12.2 Easy Link with You Tube
13.0 Appendix
-------------------
------------------
-------------------
------------------------------
13
13
15
-------------------
--------------------------
---------------------------
14.0 Specification16
--------------------------
Product specificaties
| Merk: | Easypix |
| Categorie: | Fotocamera |
| Model: | VX931 |
Heb je hulp nodig?
Als je hulp nodig hebt met Easypix VX931 stel dan hieronder een vraag en andere gebruikers zullen je antwoorden
Handleiding Fotocamera Easypix

15 September 2025
28 September 2023
10 Juni 2023
6 Juni 2023
27 Mei 2023
18 Mei 2023
6 Mei 2023
5 Mei 2023
3 Mei 2023
22 April 2023
Handleiding Fotocamera
Nieuwste handleidingen voor Fotocamera
22 Juli 2026
17 Juli 2026
14 Juli 2026
14 Juli 2026
14 Juli 2026
13 Juli 2026
13 Juli 2026
13 Juli 2026
12 Juli 2026
7 Juli 2026