Davis 1651 Handleiding
Bekijk gratis de handleiding van Davis 1651 (1 pagina’s), behorend tot de categorie Horloge. Deze gids werd als nuttig beoordeeld door 35 mensen en kreeg gemiddeld 4.0 sterren uit 8 reviews. Heb je een vraag over Davis 1651 of wil je andere gebruikers van dit product iets vragen? Stel een vraag
Pagina 1/1
User manual
Gebrauchsanweisung
Mode d'emploi
Gebruiksaanwijzing
DeutschNederlands
EnglishFrancais
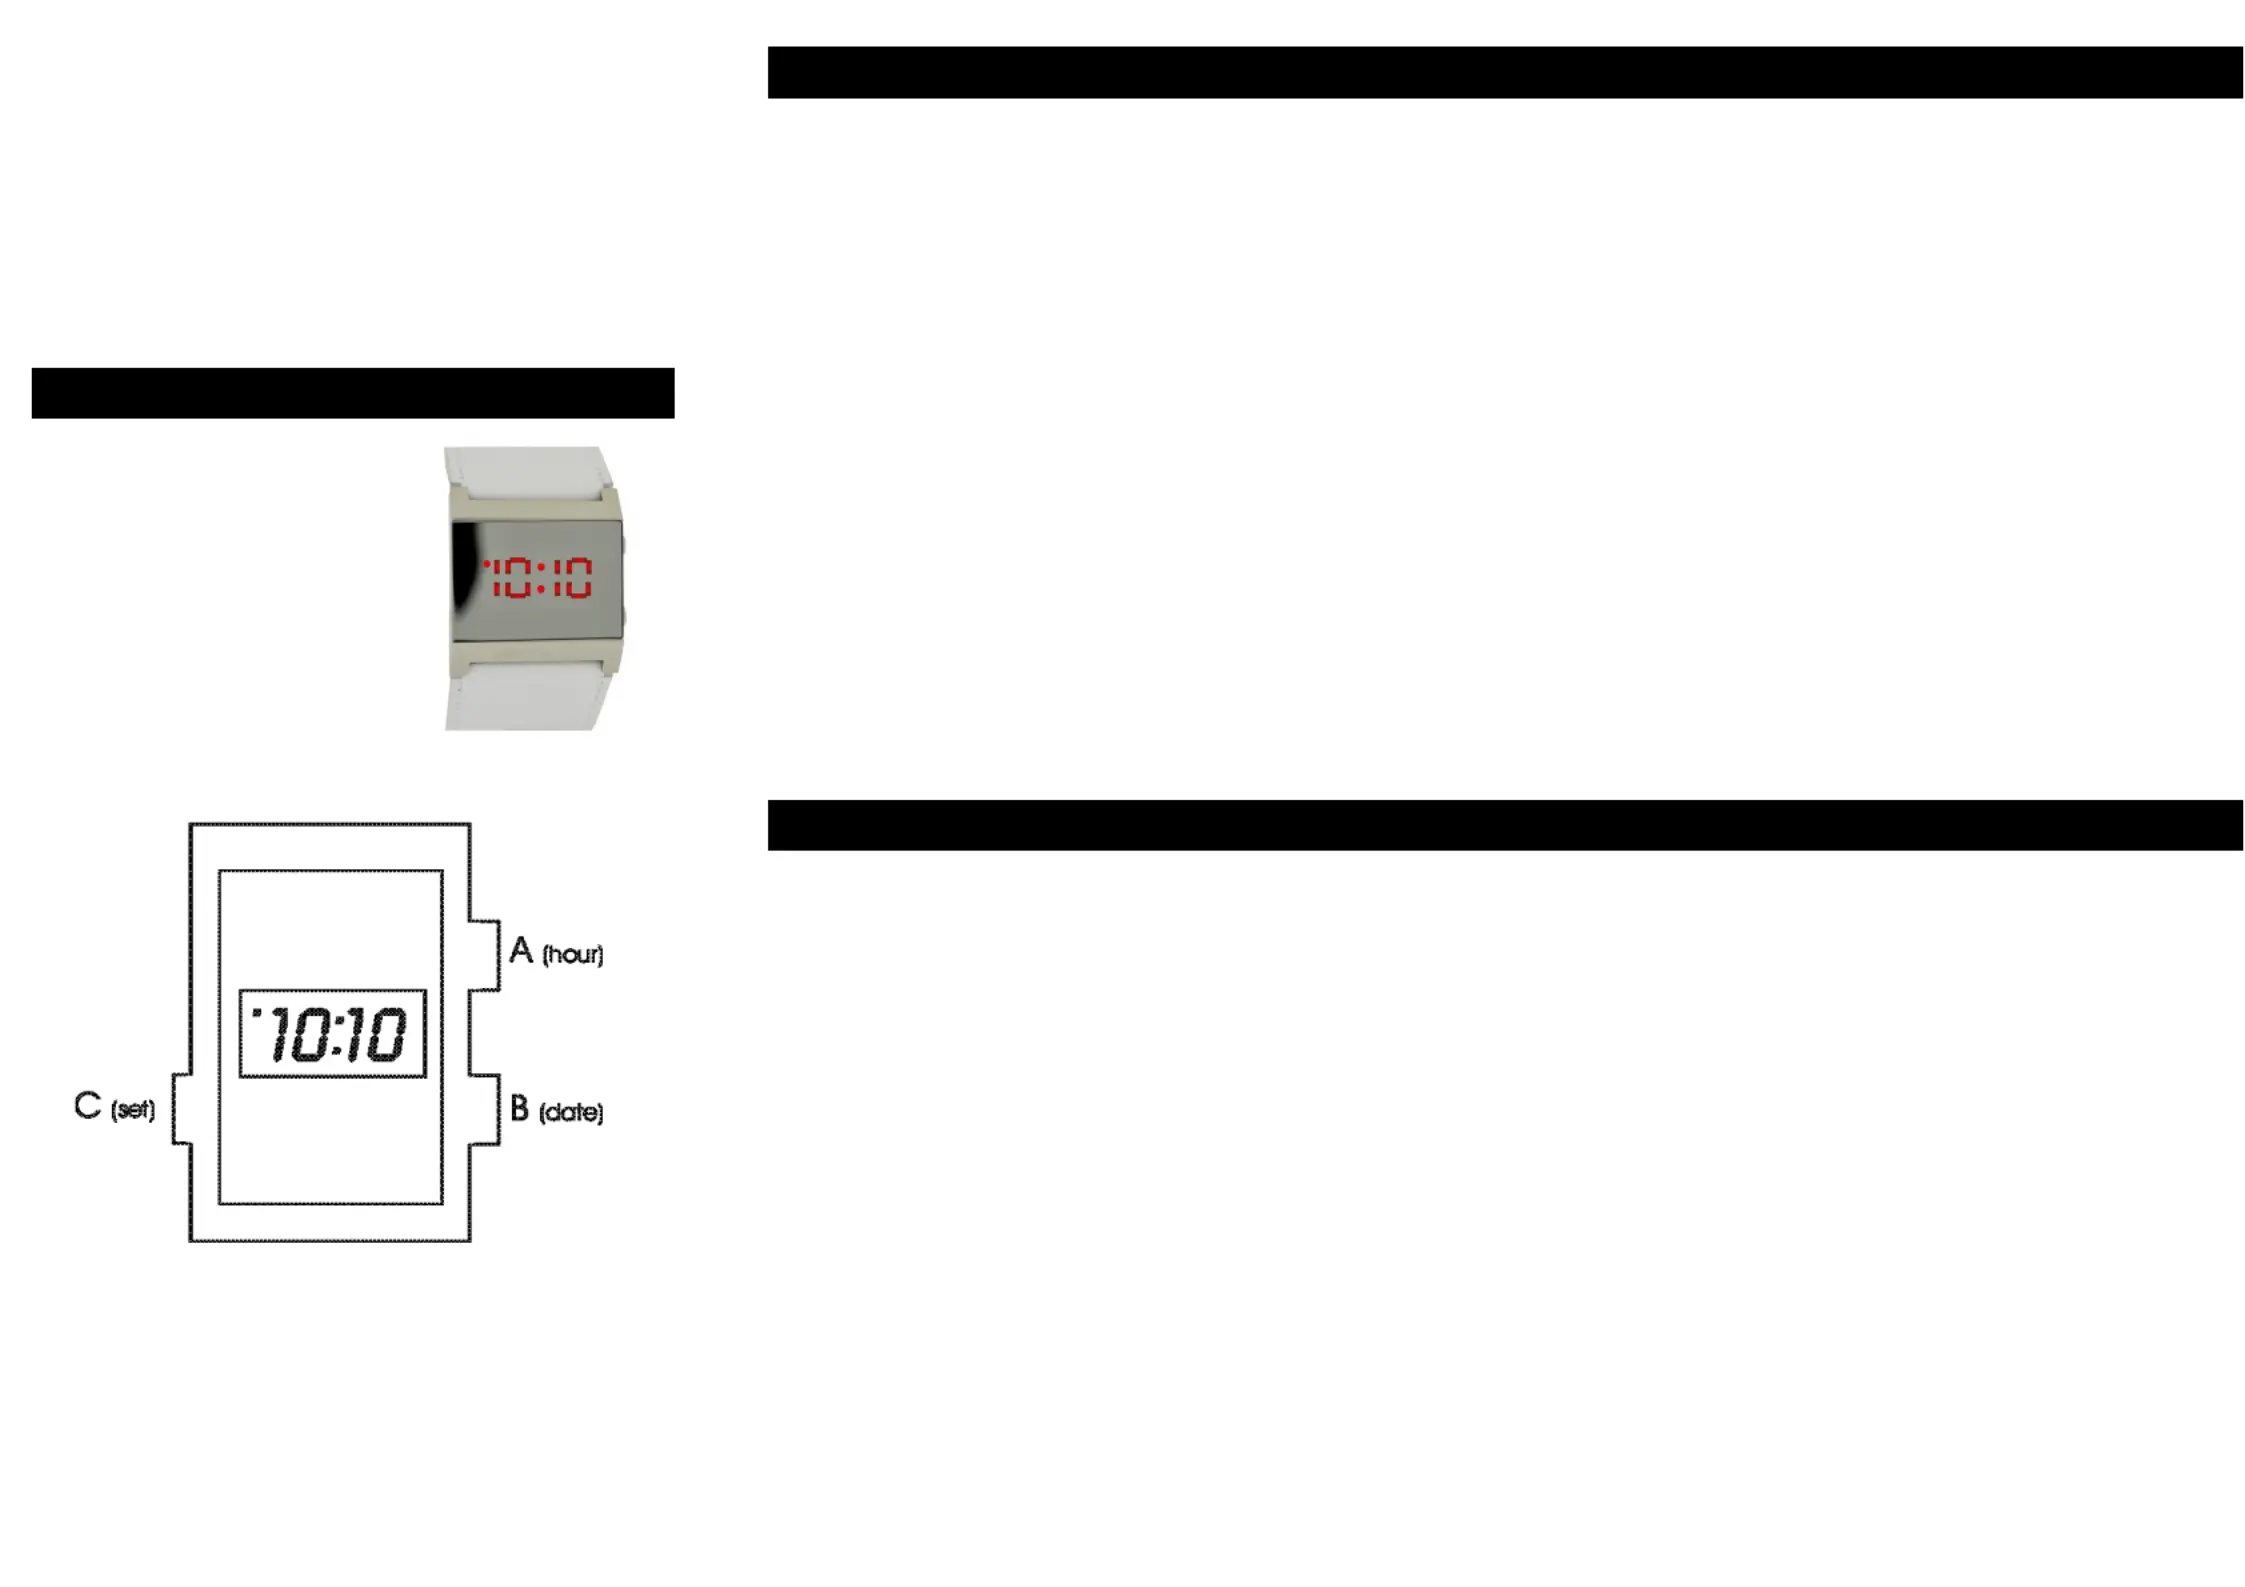
Display the time (= Normal time display mode)
Press key (A) once to display the time. If no key is being pressed again, the LED display will
be turned off automatically in 2-3 seconds
Display the date (= Date display mode)
Press key (B) once to display the date. If no key is being pressed again, the LED display will
be turned off automatically in 2-3 seconds.
Setting the time
Press key (A) to display the time, then press and hold Key (C) for approximately 2 seconds
until the hour/minute digits are flashing, indicating the watch is in the setting mode. Use Key
(A) to adjust the hour digits and Key B to adjust the minute digits.
When setting the hour digits, the "AM" or "PM" mark will appear at the left hand side.
Setting the date
Press key (B) to display the date, then press and hold Key (C) for approximately 2 seconds
until the Month and Day digits are flashing, indicating the watch is in the month/day setting
mode. A mark in the bottom left indicates that you are in the funcion date. Use Key B to
adjust the Day digits and Key C to adjust the Month digits.
Setting must be done only in key (A) or (B) are pressed.
Affichage de l'heure :
Appuyer une fois sur le bouton (A) pour afficher l'heure. Si aucun bouton n'est actionné une
seconde fois, l'affichage lumineux s'éteindra automatiquement au bout de 2 à 3 secondes.
Affichage de la date :
Appuyer une fois sur le bouton (B) pour afficher la date. Si aucun bouton n'est actionné une
seconde fois, l'affichage lumineux s'éteindra automatiquement au bout de 2 à 3 secondes.
Réglage de l'heure :
Appuyer sur le bouton (A) pour afficher l'heure, maintenir appuyé le bouton (C) pendant
approximativement 2 secondes jusqu'à ce que les chiffres heure/minute clignotent, indiquant
que la montre est dans le mode réglage. Utiliser le bouton (A) pour régler les chiffres de
l'heure et le bouton (B) pour régler les chiffres des minutes.
Lorsque vous réglez les chiffres de l'heure, le signe « AM » ou « PM » va apparaître sur le
côté gauche sous forme d'un point en haut pour AM et d'un point au milieu pour PM.
Réglage de la date :
Appuyer sur le bouton (B) pour afficher la date puis maintenir appuyé le bouton (C) pendant
approximativement 2 secondes jusqu'à ce que les chiffres du mois et du jour clignotent,
indiquant que la montre est dans le mode réglage du mois et de la date. Un point situé en bas à
gauche indique que vous êtes dans la fonction date de la montre. Appuyer sur le bouton (A)
pour régler le mois et sur le bouton (B) pour régler le jour.
Les réglages ne peuvent s'effectuer uniquement si les boutons (A) et (B) ont été actionnés.
Weergave van de tijd (normale tijd weergave)
Druk een maal op knop (A) om te tijd weer te geven. Als er op geen andere knop gedrukt
wordt dan zal het LED display automatisch na ?? seconden uitgaan.
Weergave van de datum (normale datum weergave)
Druk eenmaal op knop (B) om de datum weer te geven. Als er op geen andere knop gedrukt
wordt dan zal het LED display automatisch na 2-3 seconden uitgaan.
Het instellen van de tijd
Druk eenmaal op knop (A) om de tijd weer te geven, druk daarna knop (C) 2
seconden lang in totdat de uur en minuten knipperen. Druk op knop (A) om de uren in
stellen en druk op knop (B) om de minuten in te stellen.
Bij het instellen van de uren zal het "AM" of "PM" puntje verschijnen aan de linkerkant.
Het instellen van de datum
Druk eenmaal op knop (B) om in de datum weer te geven. Druk daarna op knop (C)
2 seconden lang ingedruk totdat de maand en dag knipperen. Links onder ziet u een puntje
wat markeert dat u in de datum functie zit. Druk op knop (B) om de dag in te
stellen en druk op knop (A) om de maand in te stellen.
Het instellen kan alleen als eerst knop (A) of (B) zijn ingedrukt.
1651
Product specificaties
| Merk: | Davis |
| Categorie: | Horloge |
| Model: | 1651 |
Heb je hulp nodig?
Als je hulp nodig hebt met Davis 1651 stel dan hieronder een vraag en andere gebruikers zullen je antwoorden
Handleiding Horloge Davis

21 Juli 2023
21 Juli 2023
21 Juli 2023
9 Juli 2023
9 Juli 2023
9 Juli 2023
9 Juli 2023
9 Juli 2023
9 Juli 2023
9 Juli 2023
Handleiding Horloge
Nieuwste handleidingen voor Horloge
22 Juni 2026
5 Mei 2026
5 Mei 2026
30 Maart 2026
3 Januari 2026
17 December 2025
11 December 2025
11 December 2025
11 December 2025