Chamberlain myQ-SGC2WCH Handleiding
Chamberlain Niet gecategoriseerd myQ-SGC2WCH
Bekijk gratis de handleiding van Chamberlain myQ-SGC2WCH (6 pagina’s), behorend tot de categorie Niet gecategoriseerd. Deze gids werd als nuttig beoordeeld door 27 mensen en kreeg gemiddeld 4.9 sterren uit 2 reviews. Heb je een vraag over Chamberlain myQ-SGC2WCH of wil je andere gebruikers van dit product iets vragen? Stel een vraag
Pagina 1/6
myQ-SGC2WCH / myQ-SGC2WLM
Smart Garage™ Camera
Installation Guide
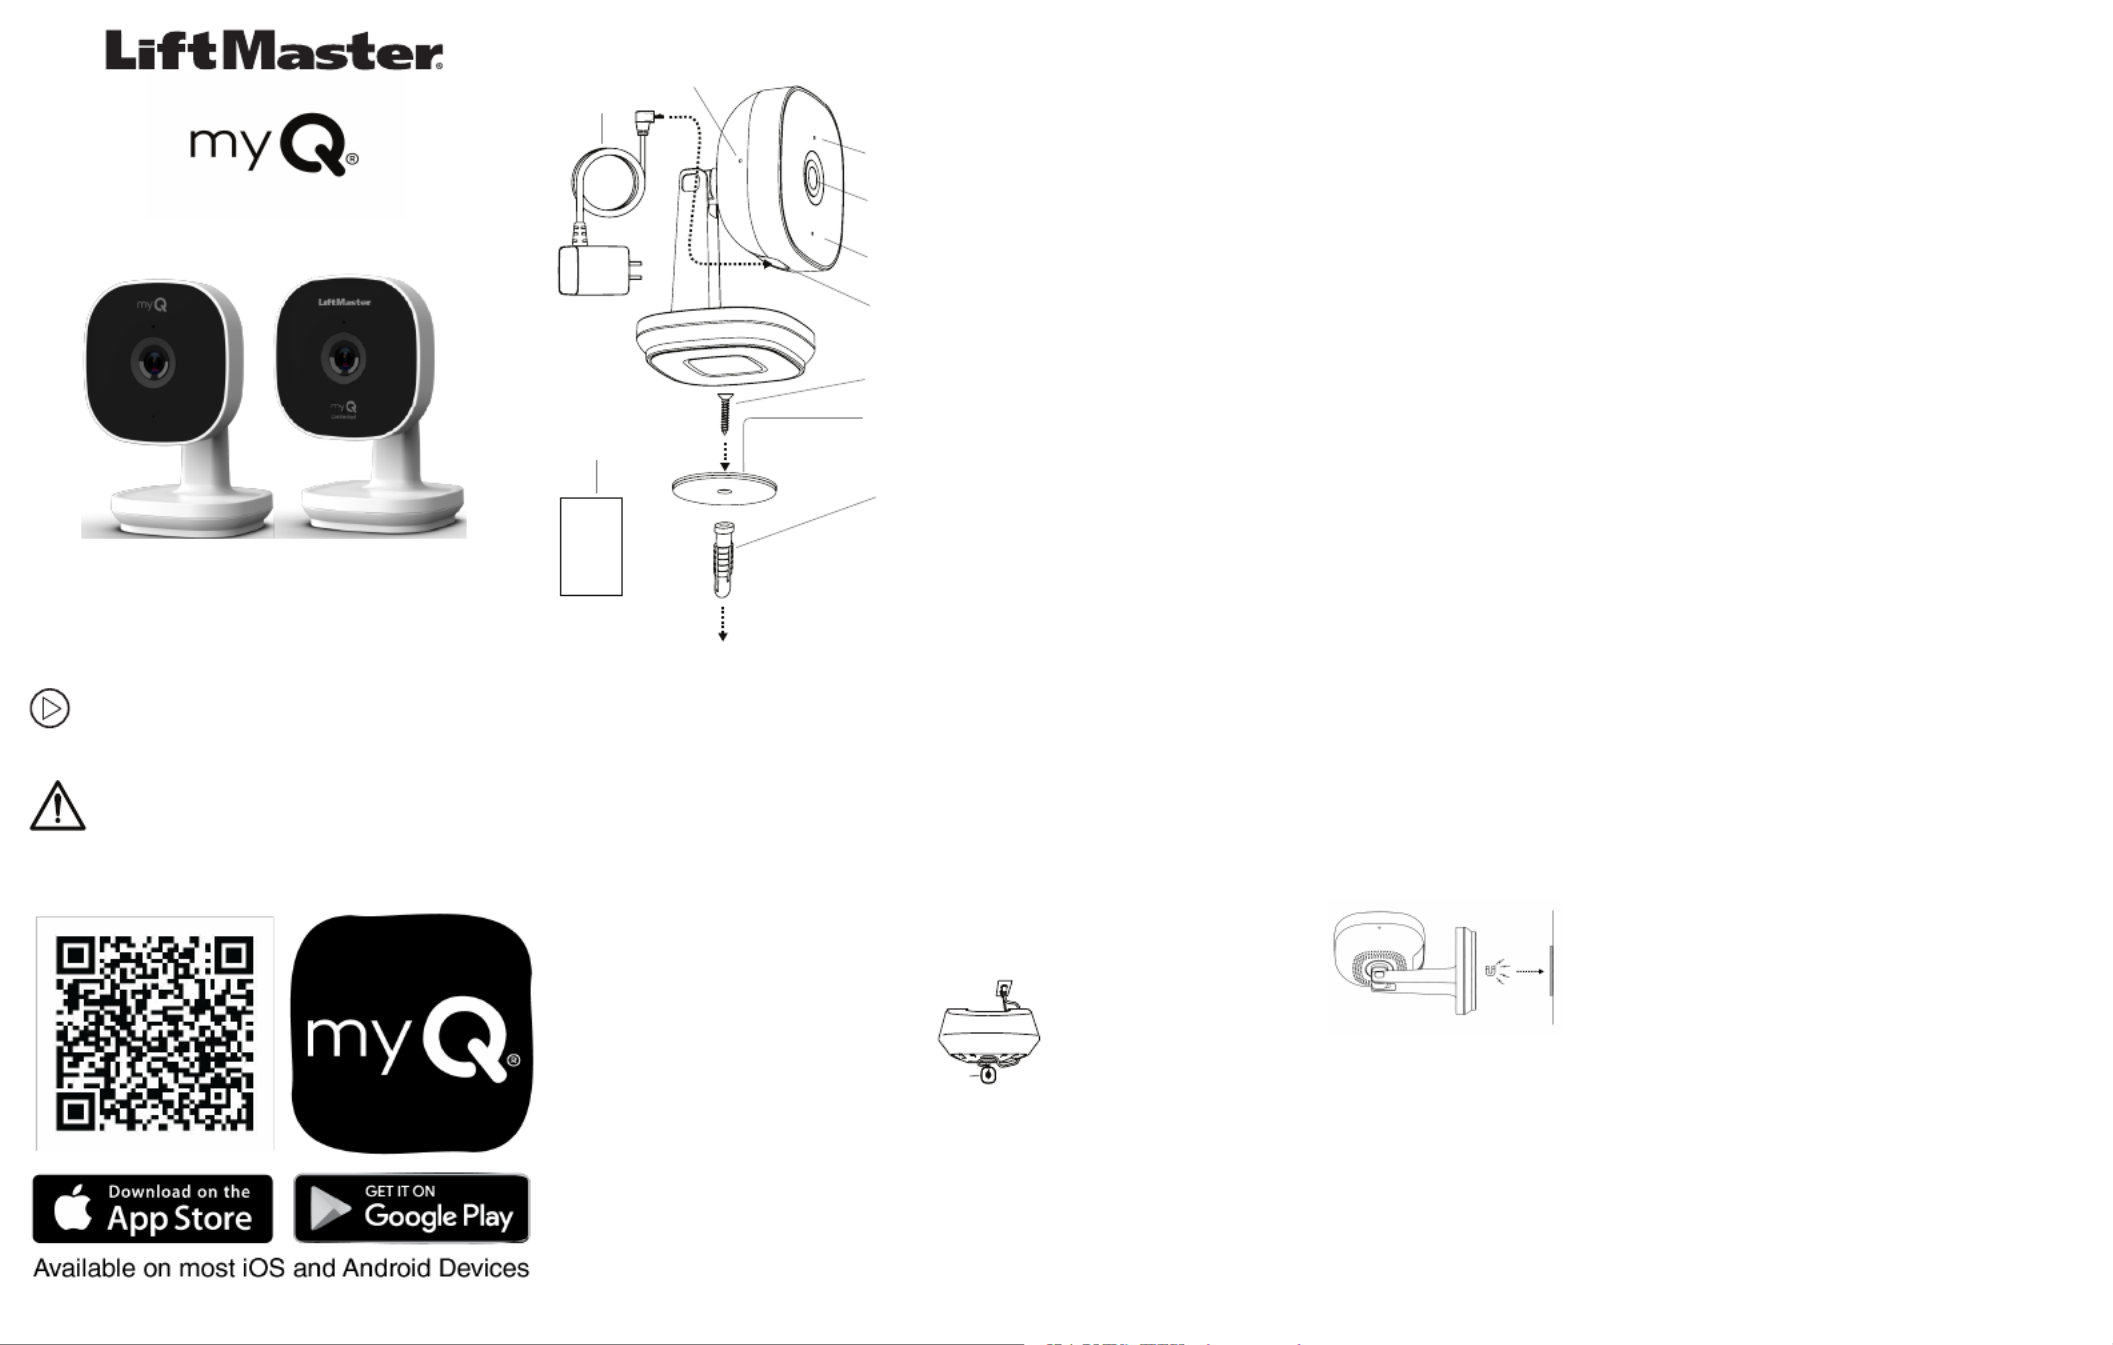
What's In the Box
USB Input
Microphone
Camera Lens
Reset Button
Micro USB
Cable
LED
Mounting
Plate
Mounting
Screw
Drywall
Anchor
Alcohol wipe, for
adhesive mount only
1. Connect Your Smart Garage™Camera
Use the myQ®App, your mobile device, and your
router to control your Smart Garage™ Camera.
Before You Start:
1.Be sure your mobile device's Wi-Fi®is on
and displays a strong signal where the
camera will sit.
2.Check that Bluetooth is enabled on your
mobile device.
3.Enable Location Services on your mobile
device.
4.Download the myQ®App.
TIP: Ifyou already have the myQ®App,
confirm you have the latest version to
optimize your myQ®experience.
5.Create or sign in to your account.
6.Add your Smart Garage™ Camerato your
myQ®account.
2. Preparation
Check Your ViewBefore YouMount:
lPower up the Smart Garage™ Camera in your
chosen mounting area.
lEnsure Smart Garage™ Camera is in reach of
the included 6' Micro-USB power adapter.
lHold the camera at your chosen mounting
area, free from visual and metal obstructions.
Check your mobile device view shows what
you want to seebefore you mount.
lRemove the protective lens cover film.
See the Smart Garage™ Camera installation
video at.support.chamberlaingroup.com
WARNING: This product can expose you to
chemicals including lead, which areknown
to the State of California to cause cancer or
birth defects or other reproductive harm. For more
information go to www.P65Warnings.ca.gov
3. Mount the Smart Garage™ Camera
For Indoor Use Only
Items YouMay Need:
lLadder
lPhilips Screw Driver
lDrill and .25" diameter Drill Bit (drywall mount
only)
lHammer
Choose from OptionsA or B:
Option A: Set to Garage Door Opener
Smart
Garage™
Camera
1.Determine whether the garage
door opener has a plastic or
metallic cover. For plastic,
clean desired mounting
location using included alcohol
wipe ensuring location is clean
of all dirt/debris and isallowed to dry. Peel
liner from adhesive (from the mounting
plate), do not touch adhesive and place the
plate to desired clean area and apply
moderate pressure for a minimum of 15
seconds. Wait 1 hour before placing the
camera onto the magnetic mounting plate to
allow the adhesivebond to reach maximum
strength. Place the camera on the magnetic
mounting plate. Formetalliccovers, no disk
is required. Simply place the camera base to
the metallic cover.
2.Face the camera head toward the desired
location.
Option B: Surface Mount
1.Determine if the
camera will be
mounted to
drywall or a
stud. For drywall
mount, pre-drill
a .25” diameter hole and lightly tap the
anchor into the hole using a hammer. Install
the mounting plate using the supplied
screw. For stud mount, do not use the
anchor and install the mounting plate using
supplied screw.
2.With the Smart Garage™ Camera head
facing in the desired visual location, attach it
to the magnetic mounting plate.
4. Connect Power
1.Power your Smart Garage™ Camera with the
included micro-USB power adapter. The
LED lights solid white. After approximately
40 seconds, the LED flashes blue, blue-
green, then solid green. You are now
connected.
Warning: Keep the cable away from all
moving garagedoor opener and other parts.
2.From the myQ®App, tap your camera and
the live video displays.
3.Adjust the Smart Garage™ Camera, twisting
the posable camera head to change the
viewing angle.
Product specificaties
| Merk: | Chamberlain |
| Categorie: | Niet gecategoriseerd |
| Model: | myQ-SGC2WCH |
Heb je hulp nodig?
Als je hulp nodig hebt met Chamberlain myQ-SGC2WCH stel dan hieronder een vraag en andere gebruikers zullen je antwoorden
Handleiding Niet gecategoriseerd Chamberlain

11 Augustus 2025
6 Juli 2025
16 Juni 2025
15 Juni 2025
12 November 2024
10 Juni 2024
27 Mei 2024
30 Juni 2023
16 Mei 2023
Handleiding Niet gecategoriseerd
Nieuwste handleidingen voor Niet gecategoriseerd
23 Juli 2026
23 Juli 2026
23 Juli 2026
23 Juli 2026
23 Juli 2026
23 Juli 2026
23 Juli 2026
23 Juli 2026
23 Juli 2026
22 Juli 2026