Cambro VBRL6519 Handleiding
Cambro
Salademaker
VBRL6519
Bekijk gratis de handleiding van Cambro VBRL6519 (4 pagina’s), behorend tot de categorie Salademaker. Deze gids werd als nuttig beoordeeld door 23 mensen en kreeg gemiddeld 4.1 sterren uit 12 reviews. Heb je een vraag over Cambro VBRL6519 of wil je andere gebruikers van dit product iets vragen? Stel een vraag
Pagina 1/4

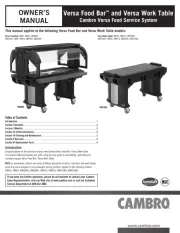
Owner’s
Manual
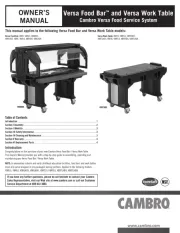
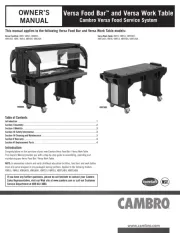
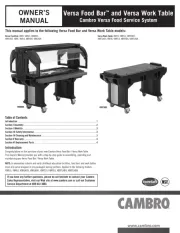
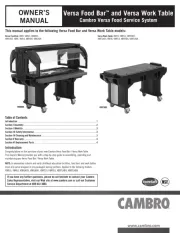
Versa Food Bar
™
and Versa Work Table
Cambro Versa Food Service System
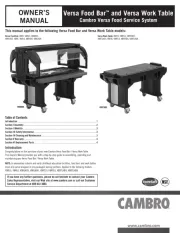
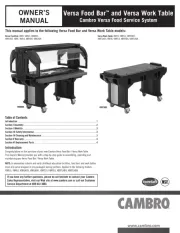
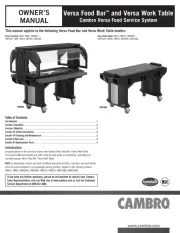
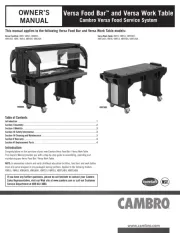
VBRHD6
VBRTHD5
Versa Food Bar: VBR5, VBRL5, VBRHD5,
VBRLHD5, VBR6, VBRL6, VBRHD6, VBRLHD6
Versa Work Table: VBRT5, VBRTL5, VBRTHD5,
VBRTLHD5, VBRT6, VBRTL6, VBRTHD6, VBRTLHD6
This manual applies to the following Versa Food Bar and Versa Work Table models:
Table of Contents
Introduction ��������������������������������������������������������������������������������������������������������������������������������������1
Section I Assembly ����������������������������������������������������������������������������������������������������������������������������2
Section II Mobility �����������������������������������������������������������������������������������������������������������������������������3
Section III Safety Information ����������������������������������������������������������������������������������������������������������3
Section IV Cleaning and Maintenance ����������������������������������������������������������������������������������������������3
Section V Warranty ���������������������������������������������������������������������������������������������������������������������������4
Section VI Replacement Parts ����������������������������������������������������������������������������������������������������������4
Introduction
Congratulations on the purchase of your new Cambro Versa Food Bar / Versa Work Table�
This Owner’s Manual provides you with a step-by-step guide to assembling, operating and
maintaining your Versa Food Bar / Versa Work Table�
NOTE: In elementary schools and early childhood education facilities, food bars and work tables
must only serve wrapped or pre-packaged serving portions� Applies to the following models:
VBRL5, VBRL6, VBRLHD5, VBRLHD6, VBRTL5, VBRTL6, VBRTLHD5, VBRTLHD6�
If you have any further questions, please do not hesitate to contact your Cambro
Sales Representative, visit our Web site at www.cambro.com or call our Customer
Service Department at 800 833 3003.

2
Section I - Versa Food Bar™ and Work Table Assembly Instructions
Tools Needed For Assembly: Base Parts ListCrescent Wrench
A. 1 - Food Bar Body
B. 2 - Legs with Pre-installed Casters w/ Brakes
C. 1 - Faucet
D. 2 - Brushed Metal Finish Panels for the Legs
E. 20 - 1
1
/2" (3,81 cm) Bolts - 10 per leg
F. 20 -
1
/2" (1,27 cm) Flat Washers - 10 per leg
G. 4 or 5 Well Covers: 4 well covers for 5' (152 cm) Versa Work Table,
5 Well Covers for 6' (183 cm) Versa Work Table
H. 1 - Asset Management Label
I. 20 -
1
/2" Internal Star Lock Washers – 10 per leg
Sneeze Guard Parts List
A. 1 - Top Shelf
B. 2 - Clear Sneeze Guard Top Panels
C. 2 - Upright Assemblies
D. 4 - Sneeze Guard End Panels
E. 2 - Top Shelf Black Thumb Screws with Finish Washers
F. 4 - White Nylon Thumbscrews
G. 4 - 1
1
/4" (3,18 cm) Black Rubber Flat Washers
Base Assembly Instructions
1� Place Food Bar body (part A) upside down as shown�
2� Make sure Teflon
®
tape is on faucet thread� Screw faucet (part C) into bottom of
Food Bar body� Drain faucet has "O" ring pre-installed�
3� Unpack the two decorative leg panels�
4� Place one panel to fit into the panel holders on the legs� The panel should slide
into the holders� The panel can also slightly bend to fit into the holders�
5� Before attaching legs to food bar body, ensure that the side with the decorative
panel is facing outward� Attach legs (part B) to body using 1
1
/ " (3,81 cm) bolts 2
with
1
/2" (1,27 cm) flat washers (10 ea� per leg section) along with
1
/2" (1,27 cm)
internal star lock washers (10 ea� per leg section) on top of the flat washers� Hand
tighten bolts initially� Use crescent wrench for final tightening� Do not use power
tools or impact to tighten� Over-tightening will cause stripped threads�
6� The Asset Management label will adhere best to a smooth surface on the Versa
Food Bar/Work Table� If possible, avoid placing the label on a textured surface�
NOTE: With well covers removed, the Versa Work Table well can be used for self serve
bottled or canned beverages or packaged food products only�
WARNING: Open well should not be used to hold ice for human consumption� When well
covers are in place, work table is not acceptable for direct food contact�
WARNING: A sneeze guard is required by law for service of unpackaged or bulk foods�
Sneeze Guard Assembly Instructions
1� Place uprights (part C) in the recesses at both ends of the food bar body� The
sneeze guard positioning pins in each upright should be facing inward to the food
bar body well�
2� Place nylon thumbscrews through holes located on the bottom of each side
of the food bar body and thread the thumbscrews into the base of each upright
until tight�
3� Remove the blue protective cover from all sneeze guard panels�
4� Slide the ends of a clear sneeze guard panel between the two uprights so that
each panel end rests on top of the positioning points or pins� Repeat with the
second clear sneeze guard panel being careful not to spread the uprights so as to
cause the first panel to drop out of position�
5� Place the top shelf so that it fits on top of both uprights� With the top shelf in
place, install the black knob thumbscrew and finish washer into each upright to
tighten the top shelf in place�
6� Place one 1
1
/4" (3,18 cm) Black Rubber Flat Washer on the bottom pivot pin of each
clear sneeze guard end panel�
6� Lift each end of each clear sneeze guard panel assembly and position a sneeze
guard end panel so that the tallest edge lines up with the side of the upright�
7� Firmly snap the end panel into the upright� Repeat with an end panel on the other
upright� See photos A, B, and C below�
8� Position the end panels to allow the clear sneeze guard panel assembly to fit
smoothly onto the sneeze guard end panels� Use the location cone as a guide to fit
the parts together� See photo C below�
Base Assembly Instructions applies to the following models:
VBR5 VBR6 VBRT5 VBRT6VBRL5 VBRL6 VBRTL5
VBRTL6 VBRHD5 VBRHD6 VBRTHD5 VBRTHD6
VBRLHD5 VBRLHD6 VBRTLHD5 VBRTLHD6
Sneeze Guard Assembly Instructions applies to the following models:
VBR5 VBR6 VBRL5 VBRL6
VBRHD5 VBRHD6 VBRLHD5 VBRLHD6
B
A
B
E
C
D
C
F
D
D
E
D
a B C

3
Section II - Mobility
Section III - Safety Information
Section IV – Cleaning and Maintenance
Knock-Down and Transport
1� If the model has tray rails, lower the tray rails�
2� Lift the clear sneeze panel arm one at a time and swing the sneeze guard end
panels inward (toward the food bar body well)�
3� Lower the clear sneeze panel arm to the down position� Repeat for the other side�
4� Adjust the caster brakes to the OFF position�
5� The unit is ready for transport�
A. Cleaning Instructions
B. Caster Maintenance
Caster maintenance should be performed each time the Food Bar has been washed or
steam cleaned�
Clear Sneeze Guards:
Clean with a mild, non-abrasive detergent and warm water� Clean then wipe dry with
soft cloth or soft paper towel� Do not use window cleaner, ammonia based NOTICE:
cleaners, kitchen scouring compounds, cleaning solvents such as acetone, bleach,
benzene, carbon tetrachloride or thinners� These chemicals will damage the sneeze
guards�
Faucet:
Scrub with brush, hot soapy water and rinse thoroughly with clean water�
WARNING: Never use a metal brush or abrasive cleaners� These tools will damage
the faucet�
1� Grease swivel raceway of caster using a lubricant such as Lubriplate #930-AA,
Keystone #84EPXLT multi-purpose grease or equivalent� Apply grease using a
grease gun with a needle nose adapter or a tube-type applicator such as Sta-lube
Moly-graph Assembly Lube (Fig� A)� These can be obtained at most auto parts
stores�
2� Use a light oil such as WD-40 on the hub (Fig� B)� Check caster for damage and
test caster spin and swivel rotation before returning to service�
3� Check/tighten all thumbscrews and hex bolts on each leg assembly after each
cleaning and caster maintenance�
4� Always replace casters if damaged or inoperable�
To help protect your Cambro Versa Food Bar™ / Versa Work Table and reduce risk of injuries:
• Donotuseanytypeofcanned/portablecookingfuelinsideaVersaFoodBar/VersaWorkTable.
• Donotplaceanyitemhotterthan190˚F(88˚C)insideorontheVersaFoodBar/VersaWorkTable.
• DonotplacetheVersaFoodBar/VersaWorkTableagainstanydirectheatsourcesuchasahotovenorgrill.
• MaximumweightlimitoneachVersaFoodBarTrayRailis50lbs.(22,5Kg).
• TheVersaFoodBar/VersaWorkTableandVersaTrayRailsarenotdesignedforleaning,sitting,climbingorstanding.
• MaximumweightlimitonthemerchandisingshelfoftheVersaFoodBaris20lbs.(9Kg).
• DonotstackitemsonthemerchandisingshelfoftheVersaFoodBar.
Food Bar Body, Uprights and Top Shelf:
Using a mild detergent wash with warm soapy water and a plastic bristle brush and
rinse thoroughly with clean water� Unit may also be carefully steam cleaned if desired�
NOTICE: Never use a metal brush or abrasive cleaners or pads� These tools will damage
the Versa Food Bar� If staining occurs, use any standard de-stainer�
NOTE: The food bar may be drained by connecting a hose to the faucet�
a
B
Product specificaties
| Merk: | Cambro |
| Categorie: | Salademaker |
| Model: | VBRL6519 |
Heb je hulp nodig?
Als je hulp nodig hebt met Cambro VBRL6519 stel dan hieronder een vraag en andere gebruikers zullen je antwoorden
Handleiding Salademaker Cambro
11 Juni 2025
11 Juni 2025

10 Juni 2025
10 Juni 2025
10 Juni 2025
10 Juni 2025
10 Juni 2025
10 Juni 2025
10 Juni 2025
10 Juni 2025
Handleiding Salademaker
Nieuwste handleidingen voor Salademaker
10 Juni 2025

28 Augustus 2023

28 Augustus 2023

9 Augustus 2023

8 Augustus 2023

3 Juli 2023

31 Mei 2023

28 April 2023

16 April 2023

4 Maart 2023