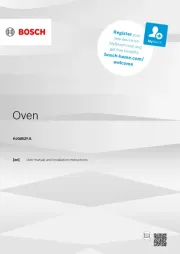
Bosch HBL87M53UC Handleiding
Bekijk gratis de handleiding van Bosch HBL87M53UC (4 pagina’s), behorend tot de categorie Oven. Deze gids werd als nuttig beoordeeld door 79 mensen en kreeg gemiddeld 4.3 sterren uit 40 reviews. Heb je een vraag over Bosch HBL87M53UC of wil je andere gebruikers van dit product iets vragen? Stel een vraag
Pagina 1/4

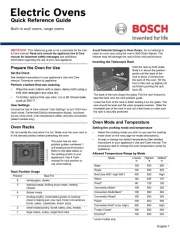
Built-in Wall Oven
Quick Reference Guide
IMPORTANT: This reference guide is not a
substitute for the Use and Care manual. Read the
appliance Use and Care manual for important
safety messages and additional information
regarding the use of your new appliance.
Not all features are available to all models. Your appliance
may vary slightly. Procedures also vary by appliance. See your
appliance’s Use and Care manual for detailed instructions.
Prior to use
1. Set the clock.
2. Wipe the oven interior with a clean, damp cloth using a
mild dish detergent. Rinse and dry with a soft cloth.
3. Turn on ventilation or open a window. Some smoke and
odor is normal for rst-time use.
4. Set the oven to at for 30 minutes.Bake 350 °F
5. Turn the oven and allow the oven to cool with the door o
closed.
Setting the oven racks
1
2
3
4
5
6
Rack position
Rack positions are
numbered from 1 to 6,
from bottom to top.
The rail at the top of the oven is used as the guide for the top
rack (position 6). Use rack positions 1 through 6 only.
DO NOT attempt to use the top guide to support an oven rack.
Rack position Best for
6hamburgers, steaks
5toasting bread, broiling most meats,
melting cheese
4thicker meats
3broiling poultry, most baked goods on a
cookie sheet or baking pan using a single
rack, includes frozen convenience foods,
cakes, casseroles, frozen pizza
2small roasts or poultry, Bundt® cakes, pies,
breads
1large roasts, turkey, angel food cake
Inserting a telescopic rack
1. Slide the rack in evenly.
2. Tilt the front of the rack up about " (2 cm) and nish
pushing the rack all the way back.
1
2
3. Pull the rack forward to engage the bottom of the rack
onto the rear of the rack position guide.
4. Lower the front of the rack to nish seating it on the rack
guide. The rack should feel stable when properly seated.
Setting the oven mode and temperature
1. Select desired cooking mode on the control panel. For
double ovens, touch Upper/Lower to select oven.
2. Touch to select preset temperature or use the Enter
numeric keypad to change temperature.
3. Touch .Enter
Temperature range by cooking mode
Mode HighestLowest
Bake 100 °F 550 °F
Roast 100 °F 550 °F
Broil (low, high) 450 °F 550 °F
Warm 150 °F 225 °F
Proof 85 °F 125 °F
Convection Bake 100 °F 550 °F
Convection Multi Rack 100 °F 550 °F
Convection Roast 100 °F 550 °F
Pizza 100 °F 550 °F
Convection Broil (low, high) 450 °F 550 °F
Air Fry 100 °F 550 °F
Frozen Foods 100 °F 550 °F
EcoChef™ 100 °F 550 °F

Mode description and usage
Oven mode Symbol Recommended foods Usage tips
Bake %Variety of foods, such as cakes, pastries, quick
breads, quiche and casseroles.
Best used with a single rack.
Roast %Best suited for meats, poultry, less tender cuts
of meats and roasting vegetables.
Preheat not necessary. Use for cooking bags and
covered bakeware.
Broil (Tender cuts of meat (1" or less), poultry,
browning bread & casseroles.
Preheat oven 3 - 4 minutes. Use with rack in pan to
drain fat away. Turn meat once.
Warm %Keeping cooked foods at serving temperature. To keep food moist, cover with lid or foil.
To keep food dry, do not cover.
Proof $Rising of bread dough containing yeast. Loosely cover dough with a cloth for rising.
Conv Bake 2Best for baked goods such as cornbread, pies,
quick breads, tarts, and yeast breads.
Reduce temperature 25°F from recipe.
Use for 1 or 2 racks of food.
Conv
Multi Rack
:Use for biscuits, cookies, cream pus,
cupcakes, dinner rolls, and muns.
Reduce temperature 25°F from recipe.
Use for 2 and 3 racks of food.
Conv Roast 2Tender cuts of meat and poultry. Roasting
vegetables. Meats are more juicy and moist
than results with roast mode.
Preheat not necessary. Use recipe/cooking chart
temperature. Use open roasting pan with rack.
Pizza 2All types of pizza - fresh, frozen, pre-baked
crust, ready-to-bake.
Preheat baking stone while preheating. For crispy
crust use oven rack. For best browning use dark
coated pizza pan.
Conv Broil 4Tender cuts of meat (more than 1"), poultry
and sh. Not for browning.
Preheat oven 3 - 4 minutes. Use with rack in pan to
drain fat away. Turn meat once.
Air Fry Frozen tater tots, frozen French fries,
frozen chicken nuggets, Crispy chicken strips,
frozen hot wings, bone-in or boneless.
Use a pan with low sides or no sides for better
air ow over foods. Preheat oven 5 mins. before
placing food inside.
Frozen
Foods
:Frozen convenience foods such as sh sticks,
chicken nuggets and French fries.
No preheating required.
EcoChef™ 7Tender cuts of meat and poultry. Requires use of probe. Allow 5 - 10 minute stand
time outside the oven.
9 CAUTION Do not use the warm mode to warm cold food. Maintain proper food temperature (USDA recommends
140°F or higher). DO NOT keep food warm for longer than 1 hour.
Pan placement
▸Place pans in the center of the oven rack.
▸Allow 1" to 1 ½" of air space around pans.
▸When baking four cake layers at the same time stagger pans
on two racks so one pan is not above another.
Baking pans and dishes
▸Use light, anodized or shiny metal bakeware for tender,
light, golden brown crusts.
▸Dark, rough or dull pans absorb heat and will result
in a browner, crisper crust. Follow the manufacturer’s
recommendations in selecting baking temperatures.
▸Insulated cookie sheets or bakeware will increase the length
of cooking time.
▸ Use low-sided, uncovered pans for convection modes.
For best cooking results
▸ Open the oven door as briey as possible to avoid reducing
the oven temperature.
▸Use the interior oven light to view the food through the oven
window rather than opening the door frequently.
▸ When using convection baking modes (including multi-
rack), set the oven temperature 25° F lower than indicated
in conventional baking recipes or package directions.
▸Preheat oven for baked goods and pizza.
Changing the settings
500 Series
1. To access the settings menu for single ovens, press
clock and for 2 seconds. @
For double ovens, press Upper Oven Timer and .
2. clockPress to cycle through the settings list.
3. Press or to change the setting.@ A
4. clockPress to move to the next setting option.
800 Series and Benchmark® models
1. SettingsPress .
The st setup item is displayed. The display shows
SET CLOCK.
2. SettingsPress again to access the settings menu.
3. SettingsPress the button to cycle through available
options or to display a dierent setup item.
4. To change the value for the displayed setting, press the
Enter button to enter the edit mode.
5. numeric keypadUse the to change the setting value. The
new value is automatically accepted as the display reverts
from edit mode back to standby mode.
Exiting the settings menu
Press the Oven Clear/O button.

Setting the oven timer
500 Series
1. TimerPress .
2. Press or @ A to set the time.
3. TimerPress to set the value.
800 Series and Benchmark® models
1. Oven TimerPress .
2. heating modeSelect a .
3. EnterPress .
4. Enter the desired timer value in H/MM format using the
numeric keypad.
5. EnterPress .
Setting the probe
1. Insert the probe into the meat.
2. Connect the probe to the oven.
3. cooking modeSet the .
4. numeric keypadUse the to enter the desired probe
temperature.
5. EnterPress .
Setting the Sabbath mode
500 Series
1. Turn the mode knob to Bake.
2. Set the temperature to a value within the 100° to 450°F
range.
3. TimerPress and hold for 3 seconds.
4. Press or to edit Sabbath cook time by 30 minute @ A
increments.
800 Series and Benchmark® models
1. cooking modeSet the .
2. Oven TimerPress and hold the button for 5 seconds.
3. numeric keypadUse the to enter the desired Sabbath
mode timer value between 0:01 and 74:00.
4. EnterPress .
5. To end the Sabbath mode and return to normal function,
press Oven Clear/O.
Setting EcoChef™
1. Set the probe as described in the “Probe” section.
2. Eco ChefPress .
3. Scroll through the Food Temps using the soft key until the
desired food temperature is highlighted.
4. Oven TempSelect .
5. numeric keypadUse the to set the temperature.
(The mode is automatically set.)
6. EnterPress .
Setting self clean
1. Remove all accessories and racks from the oven.
2. Self CleanPress .
3. Use the numeric keypad to enter a number of hours.
4. EnterPress .
5. The oven door locks prior to starting self clean.
Note: The door remains locked until the oven has cooled
down after self-cleaning. The door can be opened again
only after SELF CLEAN disappears from the display.
Canceling self clean
1. Press Oven Clear/O.
For safety, when the self clean timer ends, the unit must
cool down before the door can unlock.
2. Press Oven Clear/O to clear the display when self clean
is nished.
3. After the oven has cooled down and the door is unlocked,
wipe remaining ash from the oven using a moist cloth.
Downloading the Home Connect® app
1. Open the App Store (Apple® devices) or Google Play® store
(Android™ devices) on your smartphone or tablet.
2. Search for the “Home Connect (America)” app published by
BSH Home Appliances in the store’s search and install it.
3. Open the app and register to create a Home Connect
account.
4. Refer to the Home Connect leaet supplied with your
appliance to complete the appliance setup to Home
Connect.
Enabling remote start
To use your mobile device to operate your oven, remote start
must be enabled.
1. Remote StartSelect on the display or rotate the knob to
remote start.
F appears in the display.
2. You can now make changes from your mobile device or
start a new operation.
Product specificaties
| Merk: | Bosch |
| Categorie: | Oven |
| Model: | HBL87M53UC |
Heb je hulp nodig?
Als je hulp nodig hebt met Bosch HBL87M53UC stel dan hieronder een vraag en andere gebruikers zullen je antwoorden
Handleiding Oven Bosch
2 September 2025
2 September 2025

1 September 2025
15 Augustus 2025
15 Augustus 2025
15 Augustus 2025
15 Augustus 2025
15 Augustus 2025
14 Augustus 2025
14 Augustus 2025
Handleiding Oven
- AENO
- Vivax
- Arda
- Krefft
- Silvercrest
- Everglades
- Redmond
- G3 Ferrari
- Schneider
- Kenmore
- Hestan
- Kernau
- Doyon
- Steba
- Cata
Nieuwste handleidingen voor Oven
15 September 2025
15 September 2025

15 September 2025
15 September 2025
15 September 2025
15 September 2025
13 September 2025
13 September 2025
12 September 2025
12 September 2025