Best Buy BE-TVLTLC Handleiding
Bekijk gratis de handleiding van Best Buy BE-TVLTLC (57 pagina’s), behorend tot de categorie Wandsteun. Deze gids werd als nuttig beoordeeld door 28 mensen en kreeg gemiddeld 4.7 sterren uit 14.5 reviews. Heb je een vraag over Best Buy BE-TVLTLC of wil je andere gebruikers van dit product iets vragen? Stel een vraag
Pagina 1/57

INSTALLATION GUIDE/GUÍA DE INSTALACIÓN
Before using your new product, please read these instructions to prevent any damage.
Avant l’utilisation de ce produit neuf, lire ces instructions afin d'éviter tout dommage.
Antes de usar su producto nuevo, lea este instructivo para prevenir cualquier daño.
ENGLISH. . . . . . . . 4
FRANÇAIS . . . . . 25
ESPAÑOL . . . . . . 46
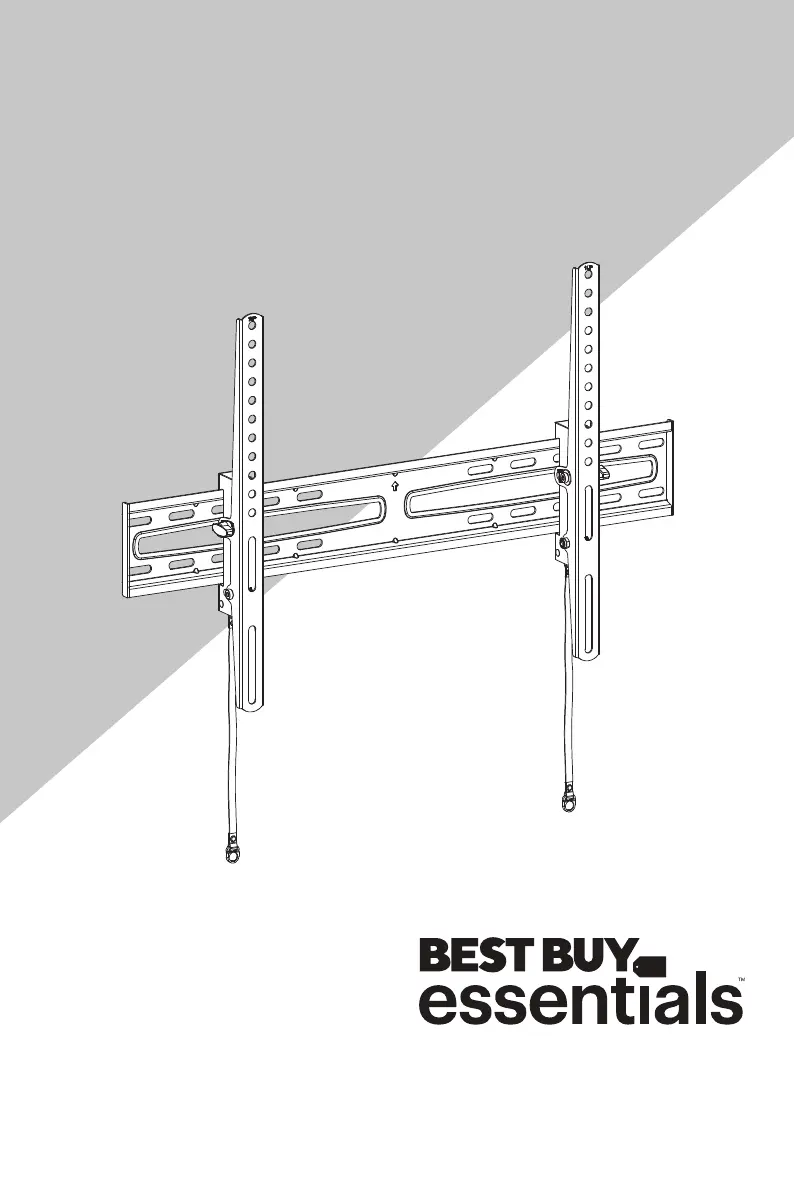
Large Tilting Wall Mount for 47 - 84" TVs
Grand support mural inclinable pour des
téléviseurs de 47 à 84 po
Soporte de pared basculante grande para
televisores de 47 a 84 pulg.
Installation Guide/Guia de instalación/Guide d'installation
BE-TVLTLC / BE-TVLTLC-C

2
Contents/Table des matières/Contenido
ENGLISH . . . . . . . . . . . . . . . . . . . . . . . . . . . . . . . . . . . . . . . . . . . . . . . . . . . 4
SAFETY INFORMATION INSTRUCTIONS . . . . . . . . . . . . . . . . . . . . . . . . . . . . . . . . . 4
Features. . . . . . . . . . . . . . . . . . . . . . . . . . . . . . . . . . . . . . . . . . . . . . . . . . . . . . . . . . . . . . . 4
VESA TV screw hole patterns . . . . . . . . . . . . . . . . . . . . . . . . . . . . . . . . . . . . . . . . . . . . . . . . 5
Dimensions . . . . . . . . . . . . . . . . . . . . . . . . . . . . . . . . . . . . . . . . . . . . . . . . . . . . . . . . . . . . . . . . 5
Tools needed . . . . . . . . . . . . . . . . . . . . . . . . . . . . . . . . . . . . . . . . . . . . . . . . . . . . . . . . . . 6
Package contents. . . . . . . . . . . . . . . . . . . . . . . . . . . . . . . . . . . . . . . . . . . . . . . . . . . . . . 6
Parts . . . . . . . . . . . . . . . . . . . . . . . . . . . . . . . . . . . . . . . . . . . . . . . . . . . . . . . . . . . . . . . . . . . . . . . 6
TV Mounting Hardware . . . . . . . . . . . . . . . . . . . . . . . . . . . . . . . . . . . . . . . . . . . . . . . . . . . . . 7
Installation instructions . . . . . . . . . . . . . . . . . . . . . . . . . . . . . . . . . . . . . . . . . . . . . . . . 8
STEP 1- Determine whether your TV has a flat, irregular, or obstructed back. . . 8
STEP 2 - Select screws, washers, and spacers. . . . . . . . . . . . . . . . . . . . . . . . . . . . . . . . . 9
STEP 3 - Option 1: Attach hardware to a flat back TV . . . . . . . . . . . . . . . . . . . . . . . . 10
STEP 3 - Option 2: Attach hardware to an irregular or obstructed back TV . . . . 12
STEP 4 - Determine wall-mount location. . . . . . . . . . . . . . . . . . . . . . . . . . . . . . . . . . . . 14
STEP 5 - Option 1: Install on a wood stud wall. . . . . . . . . . . . . . . . . . . . . . . . . . . . . . . 15
STEP 5 - Option 2: Install on a solid concrete or concrete block wall. . . . . . . . . . 18
STEP 6 - Mount your TV to the wall plate. . . . . . . . . . . . . . . . . . . . . . . . . . . . . . . . . . . . 21
STEP 7 - Adjust the tilt angle . . . . . . . . . . . . . . . . . . . . . . . . . . . . . . . . . . . . . . . . . . . . . . . 22
ONE-YEAR LIMITED WARRANTY . . . . . . . . . . . . . . . . . . . . . . . . . . . . . . . . . . . . . . .23
FRANÇAIS. . . . . . . . . . . . . . . . . . . . . . . . . . . . . . . . . . . . . . . . . . . . . . . . . 25
INFORMATIONS SUR LA SÉCURITÉ . . . . . . . . . . . . . . . . . . . . . . . . . . . . . . . . . . . . .25
Caractéristiques . . . . . . . . . . . . . . . . . . . . . . . . . . . . . . . . . . . . . . . . . . . . . . . . . . . . . .26
Modèles d'orifices VESA pour téléviseur : . . . . . . . . . . . . . . . . . . . . . . . . . . . . . . . . . . . 26
Dimensions . . . . . . . . . . . . . . . . . . . . . . . . . . . . . . . . . . . . . . . . . . . . . . . . . . . . . . . . . . . . . . . 26
Outils nécessaires. . . . . . . . . . . . . . . . . . . . . . . . . . . . . . . . . . . . . . . . . . . . . . . . . . . . .27
Contenu de l'emballage. . . . . . . . . . . . . . . . . . . . . . . . . . . . . . . . . . . . . . . . . . . . . . .27
Éléments . . . . . . . . . . . . . . . . . . . . . . . . . . . . . . . . . . . . . . . . . . . . . . . . . . . . . . . . . . . . . . . . . . 27
Accessoires de montage du téléviseur. . . . . . . . . . . . . . . . . . . . . . . . . . . . . . . . . . . . . . 28
Instructions d’installation . . . . . . . . . . . . . . . . . . . . . . . . . . . . . . . . . . . . . . . . . . . . .29
ÉTAPE 1 : Déterminer si le téléviseur a un dos plat ou de forme irrégulière ou est
obstrué . . . . . . . . . . . . . . . . . . . . . . . . . . . . . . . . . . . . . . . . . . . . . . . . . . . . . . . . . . . . . . . . . . . 29
ÉTAPE 2 - Sélectionner les vis, les rondelles et les entretoises . . . . . . . . . . . . . . . . 30
ÉTAPE 3 - Option 1 : Fixation de la visserie sur un téléviseur à dos plat . . . . . . . 31
ÉTAPE 3 - Option 2 : Fixation de la visserie sur un téléviseur à dos de forme
irrégulière ou obstrué. . . . . . . . . . . . . . . . . . . . . . . . . . . . . . . . . . . . . . . . . . . . . . . . . . . . . . 33
ÉTAPE 4 - Déterminer l’emplacement du support de montage mural . . . . . . . . 35
ÉTAPE 5 - Option 1 : Installation sur un mur à montants en bois. . . . . . . . . . . . . . 36
ÉTAPE 5 - Option 2 : Montage sur un mur en béton ou en blocs de béton . . . . 39
ÉTAPE 6 : Fixation du téléviseur à la plaque murale. . . . . . . . . . . . . . . . . . . . . . . . . . 42
ÉTAPE 7 - Réglage de l'inclinaison . . . . . . . . . . . . . . . . . . . . . . . . . . . . . . . . . . . . . . . . . . 43
GARANTIE LIMITÉE D’UN AN . . . . . . . . . . . . . . . . . . . . . . . . . . . . . . . . . . . . . . . . . .44

3
Large Tilting Wall Mount for 47 - 84” TVs
www.bestbuy.com/bestbuyessentials
ESPAÑOL . . . . . . . . . . . . . . . . . . . . . . . . . . . . . . . . . . . . . . . . . . . . . . . . . 46
INSTRUCCIONES DE SEGURIDAD IMPORTANTES. . . . . . . . . . . . . . . . . . . . . . . .46
Características . . . . . . . . . . . . . . . . . . . . . . . . . . . . . . . . . . . . . . . . . . . . . . . . . . . . . . . .47
Patrones de agujeros de tornillos VESA para televisores . . . . . . . . . . . . . . . . . . . . . 47
Dimensiones . . . . . . . . . . . . . . . . . . . . . . . . . . . . . . . . . . . . . . . . . . . . . . . . . . . . . . . . . . . . . . 47
Herramientas requeridas. . . . . . . . . . . . . . . . . . . . . . . . . . . . . . . . . . . . . . . . . . . . . .48
Contenido del paquete . . . . . . . . . . . . . . . . . . . . . . . . . . . . . . . . . . . . . . . . . . . . . . .48
Elementos. . . . . . . . . . . . . . . . . . . . . . . . . . . . . . . . . . . . . . . . . . . . . . . . . . . . . . . . . . . . . . . . . 48
Ferretería de montaje del televisor . . . . . . . . . . . . . . . . . . . . . . . . . . . . . . . . . . . . . . . . . 49
Instrucciones de instalación. . . . . . . . . . . . . . . . . . . . . . . . . . . . . . . . . . . . . . . . . . .50
PASO 1 - Determine si su televisor tiene una parte posterior plana, irregular u
obstruida. . . . . . . . . . . . . . . . . . . . . . . . . . . . . . . . . . . . . . . . . . . . . . . . . . . . . . . . . . . . . . . . . . 50
PASO 2 - Selección de los tornillos, arandelas y espaciadores . . . . . . . . . . . . . . . . 51
PASO 3 - Opción 1: Fijación de los accesorios a un televisor con parte posterior
plana. . . . . . . . . . . . . . . . . . . . . . . . . . . . . . . . . . . . . . . . . . . . . . . . . . . . . . . . . . . . . . . . . . . . . . 52
PASO 3 - Opción 2: Fijación de los accesorios a un televisor con parte posterior
irregular u obstruida . . . . . . . . . . . . . . . . . . . . . . . . . . . . . . . . . . . . . . . . . . . . . . . . . . . . . . . 54
PASO 4 - Determine la ubicación del montaje en pared . . . . . . . . . . . . . . . . . . . . . 56
PASO 5: Opción 1: Instalación en una pared con viga de madera. . . . . . . . . . . . . 57
PASO 5: Opción 2: Instalación en una pared de concreto sólido o de bloques de
concreto . . . . . . . . . . . . . . . . . . . . . . . . . . . . . . . . . . . . . . . . . . . . . . . . . . . . . . . . . . . . . . . . . . 60
PASO 6 - Fijación del televisor a la placa para pared . . . . . . . . . . . . . . . . . . . . . . . . . 63
PASO 7 - Ajuste el ángulo de inclinación . . . . . . . . . . . . . . . . . . . . . . . . . . . . . . . . . . . . 64
GARANTÍA LIMITADA DE UN AÑO . . . . . . . . . . . . . . . . . . . . . . . . . . . . . . . . . . . . .65
Product specificaties
Merk: | Best Buy |
Categorie: | Wandsteun |
Model: | BE-TVLTLC |
Heb je hulp nodig?
Als je hulp nodig hebt met Best Buy BE-TVLTLC stel dan hieronder een vraag en andere gebruikers zullen je antwoorden
Handleiding Wandsteun Best Buy
7 November 2024
26 Juli 2024
Handleiding Wandsteun
- Nedis
- VCM
- Garmin
- Duronic
- Adam
- Meliconi
- StarTech.com
- Goobay
- Chief
- Newstar
- Konig
- V7
- Grunkel
- CGV
- Crimson
Nieuwste handleidingen voor Wandsteun
16 Juni 2025
10 Juni 2025
5 Mei 2025
5 Mei 2025
5 Mei 2025
5 Mei 2025
5 Mei 2025
5 Mei 2025
5 Mei 2025
5 Mei 2025