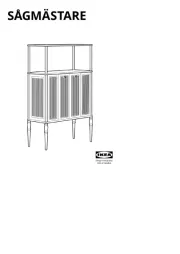
BDI Cosmo 5720 Handleiding
Bekijk gratis de handleiding van BDI Cosmo 5720 (10 pagina’s), behorend tot de categorie Kast. Deze gids werd als nuttig beoordeeld door 26 mensen en kreeg gemiddeld 4.7 sterren uit 13.5 reviews. Heb je een vraag over BDI Cosmo 5720 of wil je andere gebruikers van dit product iets vragen? Stel een vraag
Pagina 1/10

Product Registration
Registering your new BDI product allows us to send you important
product updates, service information and helpful hints related to your
BDI products. Register today, and you will be entered to win free a
BINK table from BDI: www.bdiusa.com/register
Placement and Maintenance
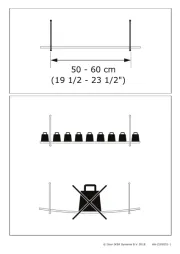
Your Cosmo Bar is designed for indoor use on level floors.
Clean wood, metal, and porcelain surfaces with a damp cloth.
Cosmo is engineered for easy assembly. Carefully follow this procedure
to prevent any damage. Do not use power tools for assembly of this
product.
Step 1
Unpack and identify the parts listed below. The assembly workspace
should be a non-marring surface such as carpet. For missing hardware
pieces, contact BDI Customer Service at:
customerservice@bdiusa.com.
For all other concerns, please contact your BDI retailer.
bdiusa.com
customerservice@bdiusa.com
Designed by Matthew Weatherly.
These distinctive product configurations are protected by US and international patents, trade dress, and/or
copyright laws. Cosmo & BDI are trademarks of Becker Designed, Inc. All rights reserved. ©2019, BDI
Made in China. 12.05.2019 V3
COSMO™ 5720
BAR
Tool Required:
Slotted Screwdriver
A1 Cabinet x 1
A2 Lower Shelf x 1
C6 Middle Drawer
Liner x 1
C7 Side Drawer
Liner x 2
C5 Anti-skid Pad x 2
T1 Hex Driver x 1
H1 M6 x 12mm Screw
x 26
C3 Bottom Connector
Tube x 2
H5 Micro HDMI/USB
charge cord x 1
C2 Top Connector Tube x 2
C1 Base Frame x 2
T2 Leveler Wrench x 1
H3 Wall Anchor
Strap x 2
H4 Rechargeable
Strip Light

bdiusa.com
customerservice@bdiusa.com
COSMO 5720
BAR
2
Step 2 - Base Assembly
Position base frame C1 on the floor with tabs facing up. Slide onto the 2 both top connector tubes C2
large U shaped tabs of making sure the holes are facing inside. Slide base frame C1 both bottom con-
nector tubes C2 base frame onto the 2 small U shaped tabs of with holes facing down. Attach connec-
tor tubes using . Sleeve the other over the assembly as shown below and 8 screws H1 base frame C1
tighten all with 16 screws H1 hex wrench T1.
C2
C2
C3
C3
H1
T1 H1 x 16
C1
C1
H1
H1
H1
H1
H1
H1
H1

bdiusa.com
customerservice@bdiusa.com
COSMO 5720
BAR
3
2 Person skTa
Step 3 - Base Attachment
With help from another person, carefully position the onto at least cabinet A1 two layers of packing
material back Note: and orient on its as shown. the packing material creates finger space to lift the
cabinet after attaching the base. Position the base as shown and attach with and tighten 4 screws H1
with hex wrench T1.
2 layers of honeycomb
packing material
T1 H1 x 4
H1
H1
H1
H1
A1 Cabinet x 1
Product specificaties
| Merk: | BDI |
| Categorie: | Kast |
| Model: | Cosmo 5720 |
Heb je hulp nodig?
Als je hulp nodig hebt met BDI Cosmo 5720 stel dan hieronder een vraag en andere gebruikers zullen je antwoorden
Handleiding Kast BDI
7 Juni 2025
9 April 2025

31 Maart 2025
31 Maart 2025

31 Maart 2025

28 Oktober 2024

6 Januari 2024

6 Januari 2024

5 Januari 2024

5 Januari 2024
Handleiding Kast
- Stanley
- HP
- Nameek's
- Profijt Meubel
- Foppapedretti
- Bbf
- Milwaukee
- Kirkton House
- Step2
- IKEA
- Jysk
- Miomare
- Tiger
- United Office
- Hooker
Nieuwste handleidingen voor Kast
19 Augustus 2025

15 Augustus 2025

30 Juli 2025
30 Juli 2025
30 Juli 2025

30 Juli 2025
30 Juli 2025
29 Juli 2025
29 Juli 2025
29 Juli 2025