AXESS AXRC-BW1 Handleiding
AXESS
Niet gecategoriseerd
AXRC-BW1
Bekijk gratis de handleiding van AXESS AXRC-BW1 (8 pagina’s), behorend tot de categorie Niet gecategoriseerd. Deze gids werd als nuttig beoordeeld door 35 mensen en kreeg gemiddeld 3.7 sterren uit 18 reviews. Heb je een vraag over AXESS AXRC-BW1 of wil je andere gebruikers van dit product iets vragen? Stel een vraag
Pagina 1/8

AXRC-BW1
I N S T A L L A T I O N I N S T R U C T I O N S
AxxessInterfaces.com © COPYRIGHT 2020 METRA ELECTRONICS CORPORATION REV. 1/23/20 INSTAXRC-BW1
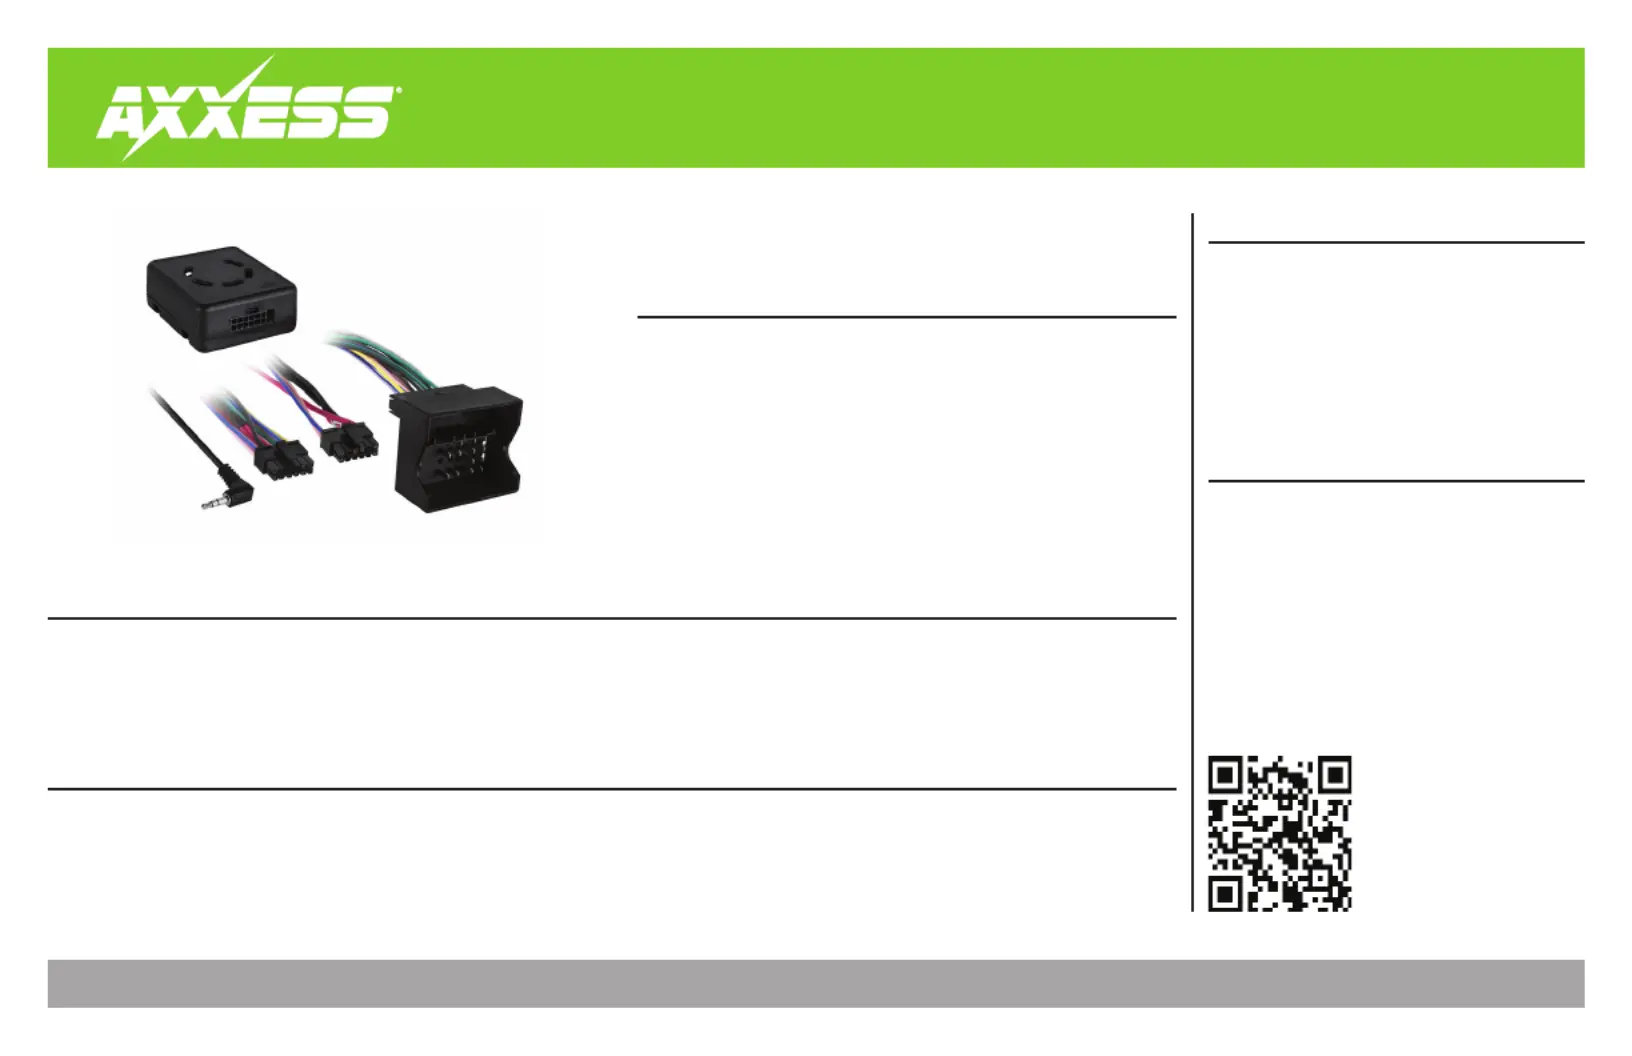
Product Info
INTERFACE COMPONENTS
INTERFACE FEATURES
TOOLS & INSTALLATION ACCESSORIES REQUIRED
• Crimping tool and connectors, or solder gun,
solder, and heat shrink • Tape • Wire cutter
• Zip ties
TABLE OF CONTENTS
Connections ............................................................2
Installation .............................................................3
Programming .........................................................3
BMW/Mini Chime Retention 2006-2015
APPLICATIONS
• AXRC-BW1 interface
• AXRC-BW1 harness
• Fuse holder with 96” length of wire
• Provides accessory power (12-volt 10-amp)
• Retains R.A.P. (retained accessory power)
• Provides NAV outputs (parking brake, reverse, and V.S.S)
• Retains warning chimes
• For non-amplified models, or when bypassing a factory amplifier
• Retains balance and fade
• Micro-B USB updatable
BMW
1 Series (without amp) 2008-2013
3 Series (without amp) 2006-2013
M3 (without amp) 2007-2013
MINI
Cooper (without amp) 2007-2015

2
CONNECTIONS
From the AXRC-BW1 harness to the aftermarket radio:
• Connect the wire to the ground wire.Black
• Connect the Yellow wire to the fuse holder with 96” length of wire:
• Remove the fuse from the fuse holder.
• Connect the 6” long wire side of the fuse holder to the vehicles battery.
• Connect the 96” long wire side of the fuse holder to the Yellow wire.
• Connect the wire to the accessory wire.Red
• Connect the wire to the power antenna wire.Blue
• If the aftermarket radio has an illumination wire, connect the wire to it.Orange
• Connect the wire to the right front positive speaker output.Gray
• Connect the Gray/Black wire to the right front negative speaker output.
• Connect the wire to the left front positive speaker output.White
• Connect the wire to the left front negative speaker output.White/Black
• Connect the wire to the left rear positive speaker output.Green
• Connect the wire to the left rear negative speaker output.Green/Black
• Connect the wire to the right rear positive speaker output.Purple
• Connect the wire to the right rear negative speaker output.Purple/Black
The following (3) wires are only for multimedia/navigation radios that require these wires.
• Connect the wire to the VSS/speed sense wire.Blue/Pink
• Connect the wire to the reverse wire.Green/Purple
• Connect the wire to the parking brake wire.Light Green
12-pin pre-wired AXSWC harness:
• This harness is to be used along with the optional AXSWC (not included) to retain steering
wheel audio controls. If the AXSWC is not being used, disregard this harness. If it will be
used, please refer to the AXSWC instructions for radio connections and programming.
Disregard the harness that comes with the AXSWC.Note:

3
REV. 1/23/2020 INSTAXRC-BW1
INSTALLATION PROGRAMMING
With the key in the off position:
• Connect the AXRC-BW1 harness into the interface, and then to the vehicle.
• Re-insert the fuse back into the fuse holder.
Attention! If the interface loses power for any reason, the following steps will need to be
performed again. Also, if installing an AXSWC connect it after you initialize and test the interface/
radio, with the key in the off position.
• Turn the key (or push-to-start button) to the ignition position and wait until the radio comes on.
If the radio does not come on within 60 seconds, turn the key to the off position, Note:
disconnect the interface, check all connections, reconnect the interface, and then try again.
• Turn the key to the off position, and then to the accessory position. Test all functions of the
installation for proper operation, before reassembling the dash.
Product specificaties
Merk: | AXESS |
Categorie: | Niet gecategoriseerd |
Model: | AXRC-BW1 |
Heb je hulp nodig?
Als je hulp nodig hebt met AXESS AXRC-BW1 stel dan hieronder een vraag en andere gebruikers zullen je antwoorden
Handleiding Niet gecategoriseerd AXESS
25 Februari 2025
25 Februari 2025
25 Februari 2025
25 Februari 2025
25 Februari 2025
25 Februari 2025
25 Februari 2025
25 Februari 2025
25 Februari 2025
25 Februari 2025
Handleiding Niet gecategoriseerd
- Grüniq
- Steelseries
- EOTech
- Cobra
- Revox
- Wiha
- Exped
- Homematic IP
- Smart365
- PDP
- Tekron
- Gerber
- Chauvin Arnoux
- Vankyo
- Huslog
Nieuwste handleidingen voor Niet gecategoriseerd
16 Juni 2025
16 Juni 2025
16 Juni 2025
16 Juni 2025
16 Juni 2025
16 Juni 2025
16 Juni 2025
16 Juni 2025
16 Juni 2025
16 Juni 2025