Atlas FAP8CXT Handleiding
Bekijk gratis de handleiding van Atlas FAP8CXT (1 pagina’s), behorend tot de categorie Speaker. Deze gids werd als nuttig beoordeeld door 16 mensen en kreeg gemiddeld 5.0 sterren uit 7 reviews. Heb je een vraag over Atlas FAP8CXT of wil je andere gebruikers van dit product iets vragen? Stel een vraag
Pagina 1/1
FAP8CXT
Installation Instructions
ATS002573 RevA 12/06
ATS002573 RevA 12/06
FAP8CXT
Installation
Instructions
Mounting
Template
14
1
⁄8" Dia.
The Atlas Sound Strategy II Series
®
assembles and mounts easily
into
existing construction drop ceiling or drywall materials.
Painting
Shield
13
3
⁄4" Dia.
DROP TILE CEILING INSTALLATION
1. Remove 2'x2' or 2'x4' tile.
2. Align the adjustabledualrail and C-ring assembly onrear of tile in desiredposition.
3. Using template provided; mark the cutout circle inthe d
esired mounting location, 14"dia. mountinghole.
4. Affix C-ringassembly to rails usingscrews providedand position assembly on rear of ceiling tile.
Replace tile into gridmaking sure that formed ends of tile bridge rails engage T-bar tilesupport rails.
5. Bring service loop from rear of tile,through tile bridge C-ring to access panellocatedon sideof enclosure.
Terminate the service loop to Phoenix style connector provided (please note polarity). Combination knockouts are
provided tofacilitate conduit. A UL recognized conduit connector should be used toterminate conduit.
Connection cavity is notintended for use as a junctionbox.
6. Insert enclosure through front of tile. Usingstandard #2 Phillips screwdriver or screw-gun, tighten
(4)dogleg assemblies until they engageC-ringassembly. DONOT OVER-TIGHTEN DOG LEG SCREWS!
7. Adjust front mounted switch to desired wattage tap setting or 8Ω*. (Seeimportant note regarding 8Ω operation)
8.Installpress-fit grille into front bezelring. Push baffle upwards untilbaffle is flush withbezelring.
9.For safety and seismic considerations a suspension ringis in
tegrated into input panel section ofuni
t.Atlas Sound strongly suggests that
a supportwirebe installed
from this support pointto a suitable anchor pointabove ceiling grid. In drop til
e applications, this wire can
usually be installed from anadjacent tile access near speakerlocation.
DRY WALL ("HARD DECK") INSTALLATION
1. Using template provided; mark thecutout circle inthe desired mountinglocation, 14
" dia. mountinghole.
2. Place tile bridge rails and C-ring through
hole. Use V-shaped edge of C-ringt
oalign tile bridge assembly above ceiling
(alignment screwsprovidedarenot required for this typeof installation)
3. Bring service loop from rear of tile, through tile bridge C-ringto access panellocat
ed on side ofenclosure. Terminate the service loopto
Phoenixstyle connector provided (please note polarity). Combination kn
ockouts are
provided to fa
cilitate conduit.A UL recognized conduit connector
should be usedto terminate conduit.Connection cavity isnotintended for use as a jun
ctionbox.
4.Insert enclosureinto hole. Using standard #2 Phillips screwdriver or screw-gun, tighten (4) doglegassemblies until they engage the C-ringassembly.
DO NOT OVER-TIGHTENDOG LEG SCREWS!
5
. Adjust front mounted switchto desiredwattage tap settingor 8Ω*. (See important note regarding 8Ω operation)
6.Install press-fit grille into front bezel ring. Push baffle upwards until baffleis f
lush with beze
l ring.
New Construction(Drywall Ceilings)
Use of optional FAP82-TR1 newconstructionbracket essentially reserves speaker mountinglocation prior to
drywallinstallation in n
ew construction. The
bracket mounts between16" or24" OC studs and includes a 3⁄8" downward lip to provide a template for drywall installers tocut around. For final installation,
please followinstructions below. Note:tile bridge components are not usedin newc
onstruction applications where new constructionbracket is utilized.
1.Bring service loop through hole in ceiling provided by preconstruction bracket to access panel locatedon side ofEnclosure.
Terminate service loop toPhoenix style connector provided (please note polarity). Combination knockouts are provided to facilitate conduit.
2.
Insert speaker assembly into hole. Usingstandard #2Ph
illips screwdriver or screw-gun
, tighten(4) dog leg assemblies until they engag
e ring provided
onnewconstructionbracket. DO NOT OVER-TIGHTEN DOG LEG SCREWS!
3. Adjust front mountedswitchto desiredwattage tap setting or 8Ω* (See impor
tant note regarding 8Ω operation)
4. Install press-fitgrille in
tofront bezel ring. Push baffle upwards until baffle is flushwith bezel ring.
NOTE: Do
g legs willaccommodate ceiling material
thickness up to 1 1⁄4" as shipped from factory.
For thicker ceilingmaterials (up to 2") simply unscrewand f
lip doglegs as shown.
DO NOTOVER-
TIGHTENDOGLEG
S IN EITHERCONFIGURATION!
NOTE: *DO NOT USE 8Ω SETTING WITH70.7V/100VS
YSTEMS!
*DO NOT OVERPOWER IN 8Ω CONFIGURA
TION!
AMPLIFIEROUTPUT SHOULD NOT EXCEED
70W RMS @8Ω PER SP
EAKER
1FAP82
-TR NOT TESTED OR EVALUATED BY UNDERWRITERS LABRATORIES (UL)
A UL RECOGNIZEDCONDUIT CLAMP MUST BE USED FOR CONDUITCONNECTIONS. CABLE CONNECTION CAVITY IS NOT INTENDED TO BE USED AS A JUNCTION BOX.
FREQUENCY RESPONSE: 60Hz -15kHz
SENSITIVITY: 92dB (1W/1M)
FAP8CXT
FAP8CXT
FAP8CXT
FAP8CXT
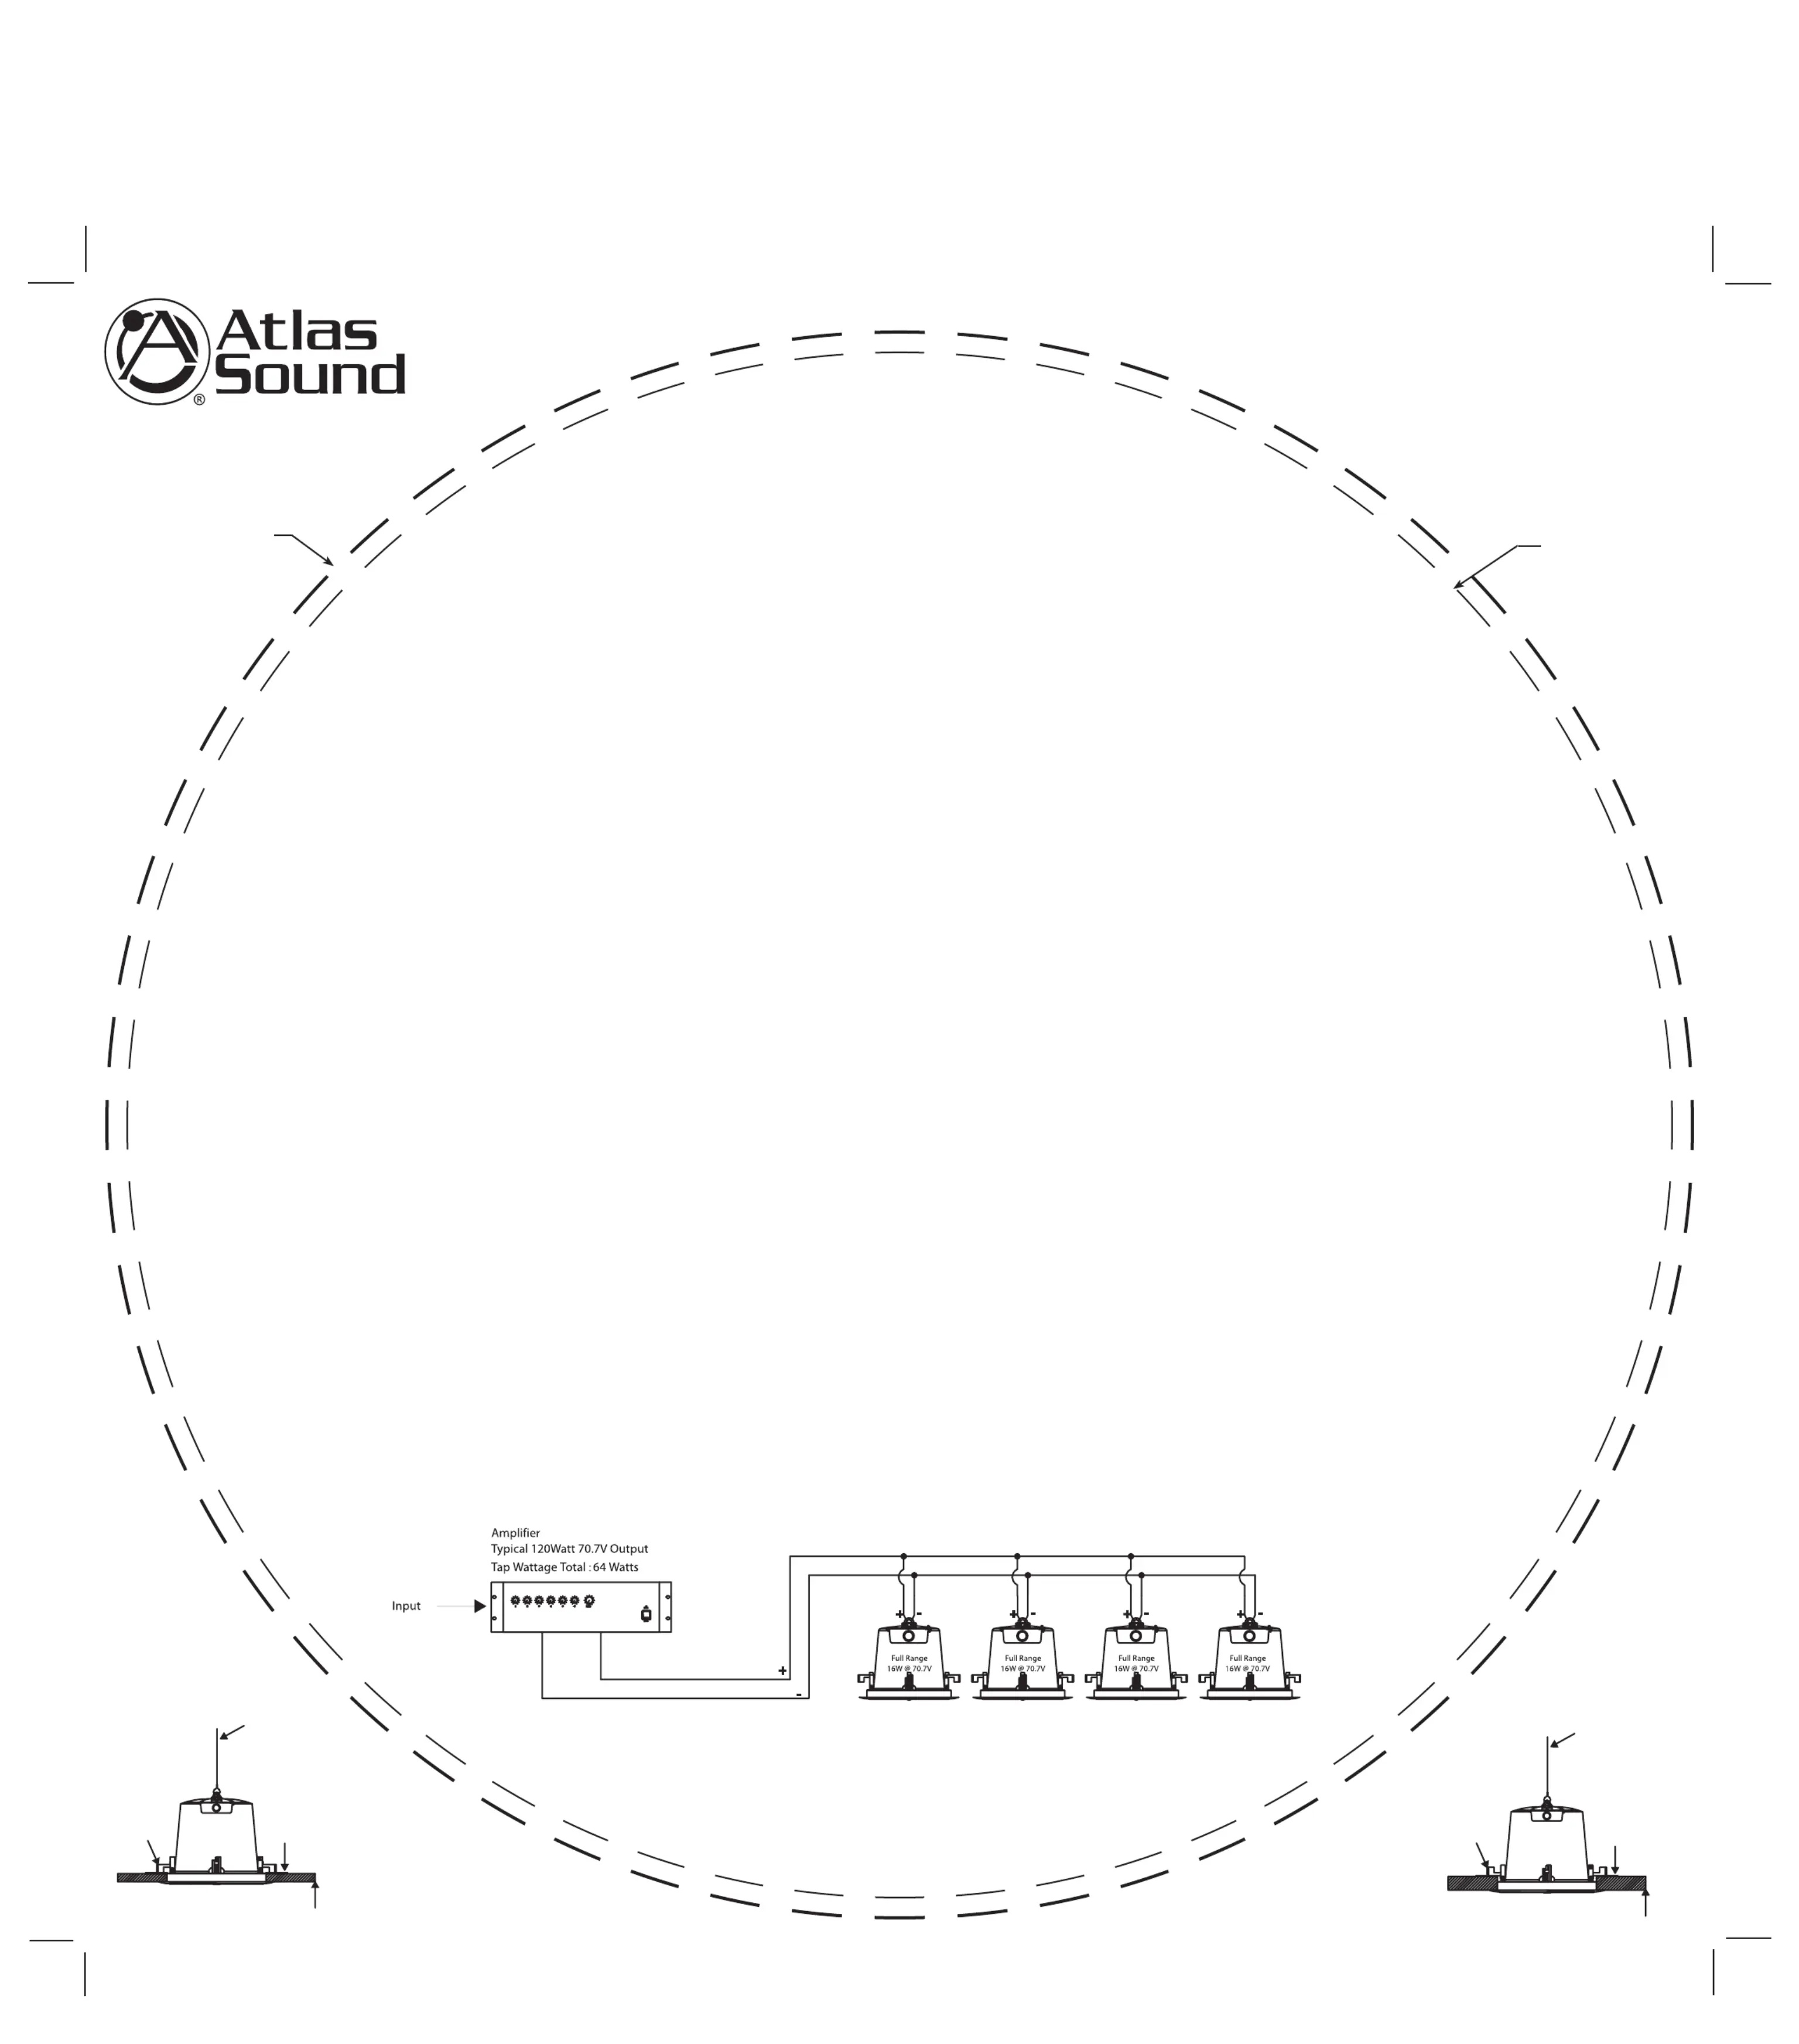
TypicalParallelHookupof FullRange70.7/100VSpeakers
Auxillary Suspension Point
Dog Leg
In Normal
PositionTile Bridge
Ceiling Material up to 1-1/4
"
Auxillary Suspension Point
Dog Leg
In Inverted
PositionTile Bridge
Ceiling Material up to 2
"
Product specificaties
| Merk: | Atlas |
| Categorie: | Speaker |
| Model: | FAP8CXT |
| Kleur van het product: | Wit |
| Breedte: | 400 mm |
| Gewicht verpakking: | 10430 g |
| Gemiddeld vermogen: | 60 W |
| Aantal luidsprekers: | 1 |
| Aantal per verpakking: | 1 stuk(s) |
| Impedantie: | 8 Ohm |
| Speaker plaatsing: | Plafond-montage |
| Frequentiebereik: | 60 - 15000 Hz |
| Gevoeligheid: | 92 dB |
| Diameter woofer: | 203 mm |
Heb je hulp nodig?
Als je hulp nodig hebt met Atlas FAP8CXT stel dan hieronder een vraag en andere gebruikers zullen je antwoorden
Handleiding Speaker Atlas

2 September 2025
1 September 2025
19 November 2024
19 November 2024
19 November 2024
9 Juli 2024
27 Juni 2024
15 Maart 2024
25 Januari 2024
25 Januari 2024
Handleiding Speaker
Nieuwste handleidingen voor Speaker
4 Juni 2026
2 Juni 2026
2 Juni 2026
2 Juni 2026
2 Juni 2026
2 Juni 2026
2 Juni 2026
2 Juni 2026
1 Juni 2026
1 Juni 2026