Atdec TH-400-LED Handleiding
Atdec
Niet gecategoriseerd
TH-400-LED
Bekijk gratis de handleiding van Atdec TH-400-LED (2 pagina’s), behorend tot de categorie Niet gecategoriseerd. Deze gids werd als nuttig beoordeeld door 71 mensen en kreeg gemiddeld 4.3 sterren uit 36 reviews. Heb je een vraag over Atdec TH-400-LED of wil je andere gebruikers van dit product iets vragen? Stel een vraag
Pagina 1/2

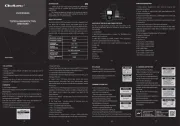
Component Checklist
Step 1. Component Checklist
Check you have received all parts against the Component Checklist above.
Hardware
Mounting Fasteners
M8 x 20mm
Screw (x4)
M8 x 40mm
Screw (x4)
Cable Access
Support (x1)
Step 2. Attach Wire Mount to the Display
Note: This product is suitable for LED/LCD displays with VESA mounting hole configurations 400mm (16”) wide, supporting a
maximum weight of 50 kg (110 lbs).
TH-400-LED
70
LED Slim Wall Mount
Installation Instructions
Nylon
Anchor (x2)
M6 Washer
(x2)
M8 Washer
(x4)
Dry Wall
Anchor (x2)
Wall Mount
Screw (x2)
M8 Spring
Washer (x4)
Attach the Wire Mount components to the Display
using the hardware supplied.
TOOLS REQUIRED:
UÊ*ÜiÀÊÀ
UÊ*ps Head Screw Driver
UÊ{Ê3/16”) Drill Bit
UÊnÊ5/16”) Masonry Drill Bit
UÊ£äÊ3/8
”) Drill Bit
Ê*>Ìi
(x2)
Support (x1)
Wire Mount (x1)
Spacer Bush (x4)
Top of
Display
Spacer Bush
(x4)
Recessed
Mounting Hole
TWIST
TWIST
M8 Spring
Washer (x4)
M8 Washer
(x4)
M8 x 20mm
Screw (x4)
Display
Cable Access
Support
Support
Wire Mount
Recessed Mounting Holes or
Display with a Curved Rear Panel
If the Mounting Holes are recessed into the
back of the Display, or the Display has a
curved rear panel, use the Spacer Bushes
supplied to pack the Mounting Holes.
NOTE: Use the longer Mounting
Fasteners (M8 x 40mm) supplied.
M8 x 40mm
Screw (x4)
Back of Display
TIP: Ensure that the
Wire Mount is taut by
twisting the ends.

Step 3. Mount the Hook Plates on the Wall
Choose from one of the following Mounting options (see below), , Timber Stud Masonry Wall Dry Wall, or . Fasten the Hook Plates
180-200mm (7-77/8”) apart, using the appropriate Mounting Hardware supplied to suit the type of wall.
Timber Stud Dry Wall
Step 4. Hang the Display on the Wall
180-200mm
(7-77
/8”)
Drill two holes 50mm deep using a
4mm drill bit.
Drill two holes 50mm deep using an
8mm Masonry drill bit.
Hook Plate
(x2)
Wall Mount
Screw (x2)
Hook Plate
(x2)
Nylon Anchor
(x2)
M6 Washer
(x2)
Hook Plate
(x2)
Drill two holes 60mm deep using a
10mm drill bit.
Dry Wall Anchor
(x2)
M6 Washer
(x2)
Step 5. Cable Access
bb
( required)
1. Lift the Display so that the
Wire Mount is above the
Hook Plates.
2. Push the Display in, so
that it touches the wall.
3. Gradually lower the
Display until it is hanging
from the Hook Plates.
Installation Complete
Connect
Cables
Fold out Cable
Access Support
Pull the Display
out from the wall
No portion of this document or any artwork contained herein should be reproduced in any way without the express written consent of Atdec Pty Ltd.
Due to continuing product development, the manufacturer reserves the right to alter specifications without notice. Published: 09.12.09 ©
Wall Mount
Screw (x2)
Fold in Cable
Access Support
Return Display
to flat position
Masonry Wall
1
2
3
Product specificaties
| Merk: | Atdec |
| Categorie: | Niet gecategoriseerd |
| Model: | TH-400-LED |
| Kleur van het product: | Zwart |
| Gewicht: | 50 g |
| Montagewijze: | Muur |
| Montage interface compatibiliteit (min): | 400 x 200 mm |
| Montage interface compatibiliteit (max): | 400 x 400 mm |
Heb je hulp nodig?
Als je hulp nodig hebt met Atdec TH-400-LED stel dan hieronder een vraag en andere gebruikers zullen je antwoorden
Handleiding Niet gecategoriseerd Atdec

30 Januari 2025

7 December 2024

7 December 2024

7 December 2024

17 November 2024

11 Maart 2024

9 Juli 2023

9 Juli 2023

9 Juli 2023

9 Juli 2023
Handleiding Niet gecategoriseerd
- Adastra
- Feelino
- Reginox
- AtomStack
- Heidemann
- Stäubli
- Atomos
- Grotime
- Econ Connect
- Code Mercenaries
- Soler And Palau
- Monogram
- Ritter
- Grandstream
- Sigma
Nieuwste handleidingen voor Niet gecategoriseerd
13 September 2025

13 September 2025

13 September 2025

13 September 2025
13 September 2025
13 September 2025
13 September 2025

13 September 2025

13 September 2025
13 September 2025