Atdec AWMS-NDB Handleiding
Atdec Niet gecategoriseerd AWMS-NDB
Bekijk gratis de handleiding van Atdec AWMS-NDB (7 pagina’s), behorend tot de categorie Niet gecategoriseerd. Deze gids werd als nuttig beoordeeld door 55 mensen en kreeg gemiddeld 4.5 sterren uit 6 reviews. Heb je een vraag over Atdec AWMS-NDB of wil je andere gebruikers van dit product iets vragen? Stel een vraag
Pagina 1/7
AWMS-NDB-F Page 1 of 7
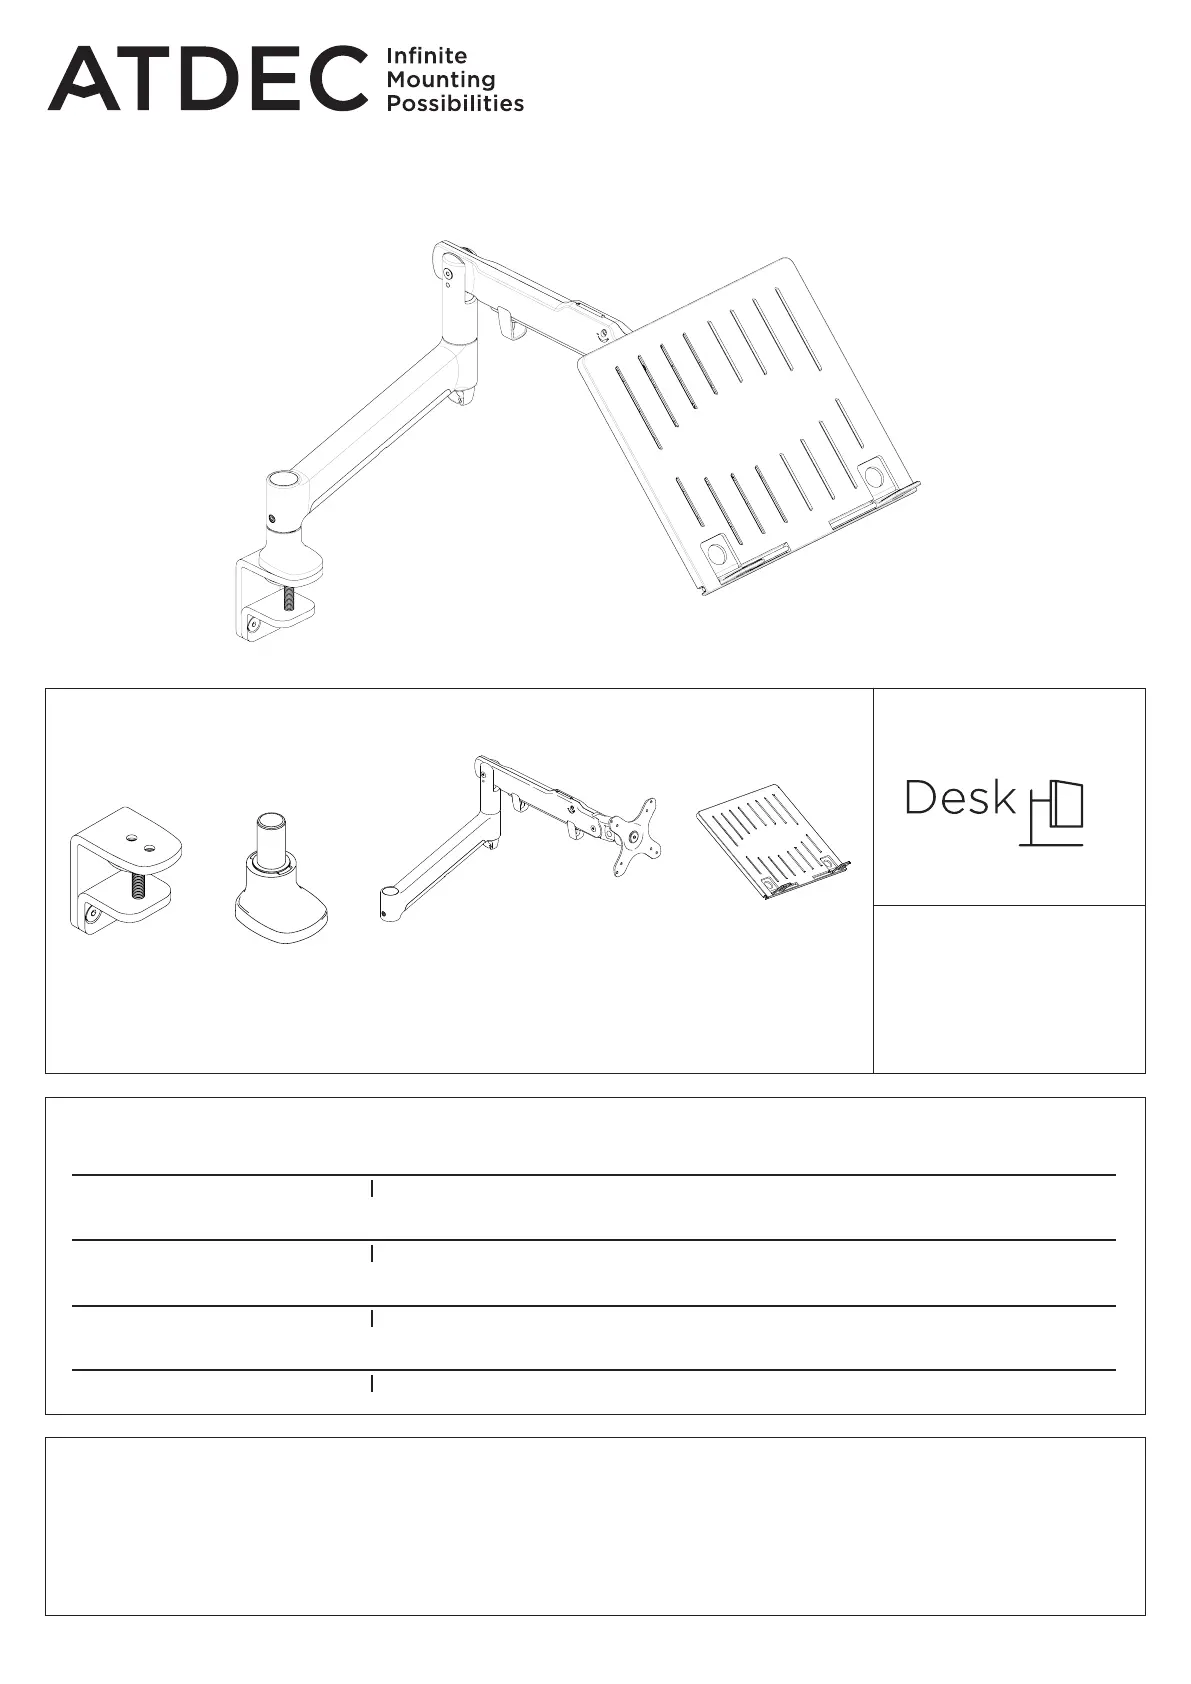
Installation Guide
AWMS-NDB
AWM Dynamic Notebook Arm
IMPORTANT INFORMATION
!Please ensure this product is installed as per these installation instructions.
!Do not remove/ throw away the plastic cap on the base.
!This product is compatible with Atdec AWM Series products.
!Curved monitors, deep devices (such as all-in-one PCs) and offset VESA locations exert additional leverage that can exceed
the capacity of the mount even though the monitor weight may be within the stated range.
!The manufacturer accepts no responsibility for incorrect installation.
CONTENTS
F Clamp
Page 2
Base
Page 3
Dynamic Arm
Page 4
AWM Notebook Tray
Page 4
AWM-FF
Component Checklist + Clamp Installation
AWM-LB
Component Checklist + Base Installation
AWM-AD
Component Checklist + Arm Installation
AWM-HN
Component Checklist + Tray Installation
COMPONENT CHECKLIST
AWM-AD
Dynamic
Arm
(x1)
AWM-HN
AWM
Notebook Tray
(x1)
AWM-FF
F Clamp
(x1)
AWM-LB
Base
(x1)
• Phillips Head
Screwdriver
REQUIRED TOOLS
Product specificaties
| Merk: | Atdec |
| Categorie: | Niet gecategoriseerd |
| Model: | AWMS-NDB |
| Kleur van het product: | Wit |
| In hoogte verstelbaar: | Ja |
| Materiaal: | Aluminium, Metal, Plastic |
| Verstelbaar: | Ja |
| Draaihoek: | 180 ° |
| Draaien: | Ja |
| Verbeterd kabelbeheer: | Ja |
| Type product: | Laptopstandaard |
| Bereik kantelhoek: | 0 - -50 ° |
| Hoogte verstelbaarheidsbereik: | 0 - 618 mm |
| Maximale notebook-schermgrootte compatibiliteit: | 18 " |
| Maximale armverlenging: | 368 mm |
Heb je hulp nodig?
Als je hulp nodig hebt met Atdec AWMS-NDB stel dan hieronder een vraag en andere gebruikers zullen je antwoorden
Handleiding Niet gecategoriseerd Atdec

7 Oktober 2025
7 Oktober 2025
30 Januari 2025
7 December 2024
7 December 2024
7 December 2024
17 November 2024
11 Maart 2024
9 Juli 2023
9 Juli 2023
Handleiding Niet gecategoriseerd
Nieuwste handleidingen voor Niet gecategoriseerd
23 Juli 2026
23 Juli 2026
23 Juli 2026
23 Juli 2026
23 Juli 2026
23 Juli 2026
23 Juli 2026
23 Juli 2026
23 Juli 2026
22 Juli 2026