Atdec AF-AN Handleiding
Atdec Niet gecategoriseerd AF-AN
Bekijk gratis de handleiding van Atdec AF-AN (68 pagina’s), behorend tot de categorie Niet gecategoriseerd. Deze gids werd als nuttig beoordeeld door 63 mensen en kreeg gemiddeld 4.4 sterren uit 7 reviews. Heb je een vraag over Atdec AF-AN of wil je andere gebruikers van dit product iets vragen? Stel een vraag
Pagina 1/68
AF-AN Page 1 of 3
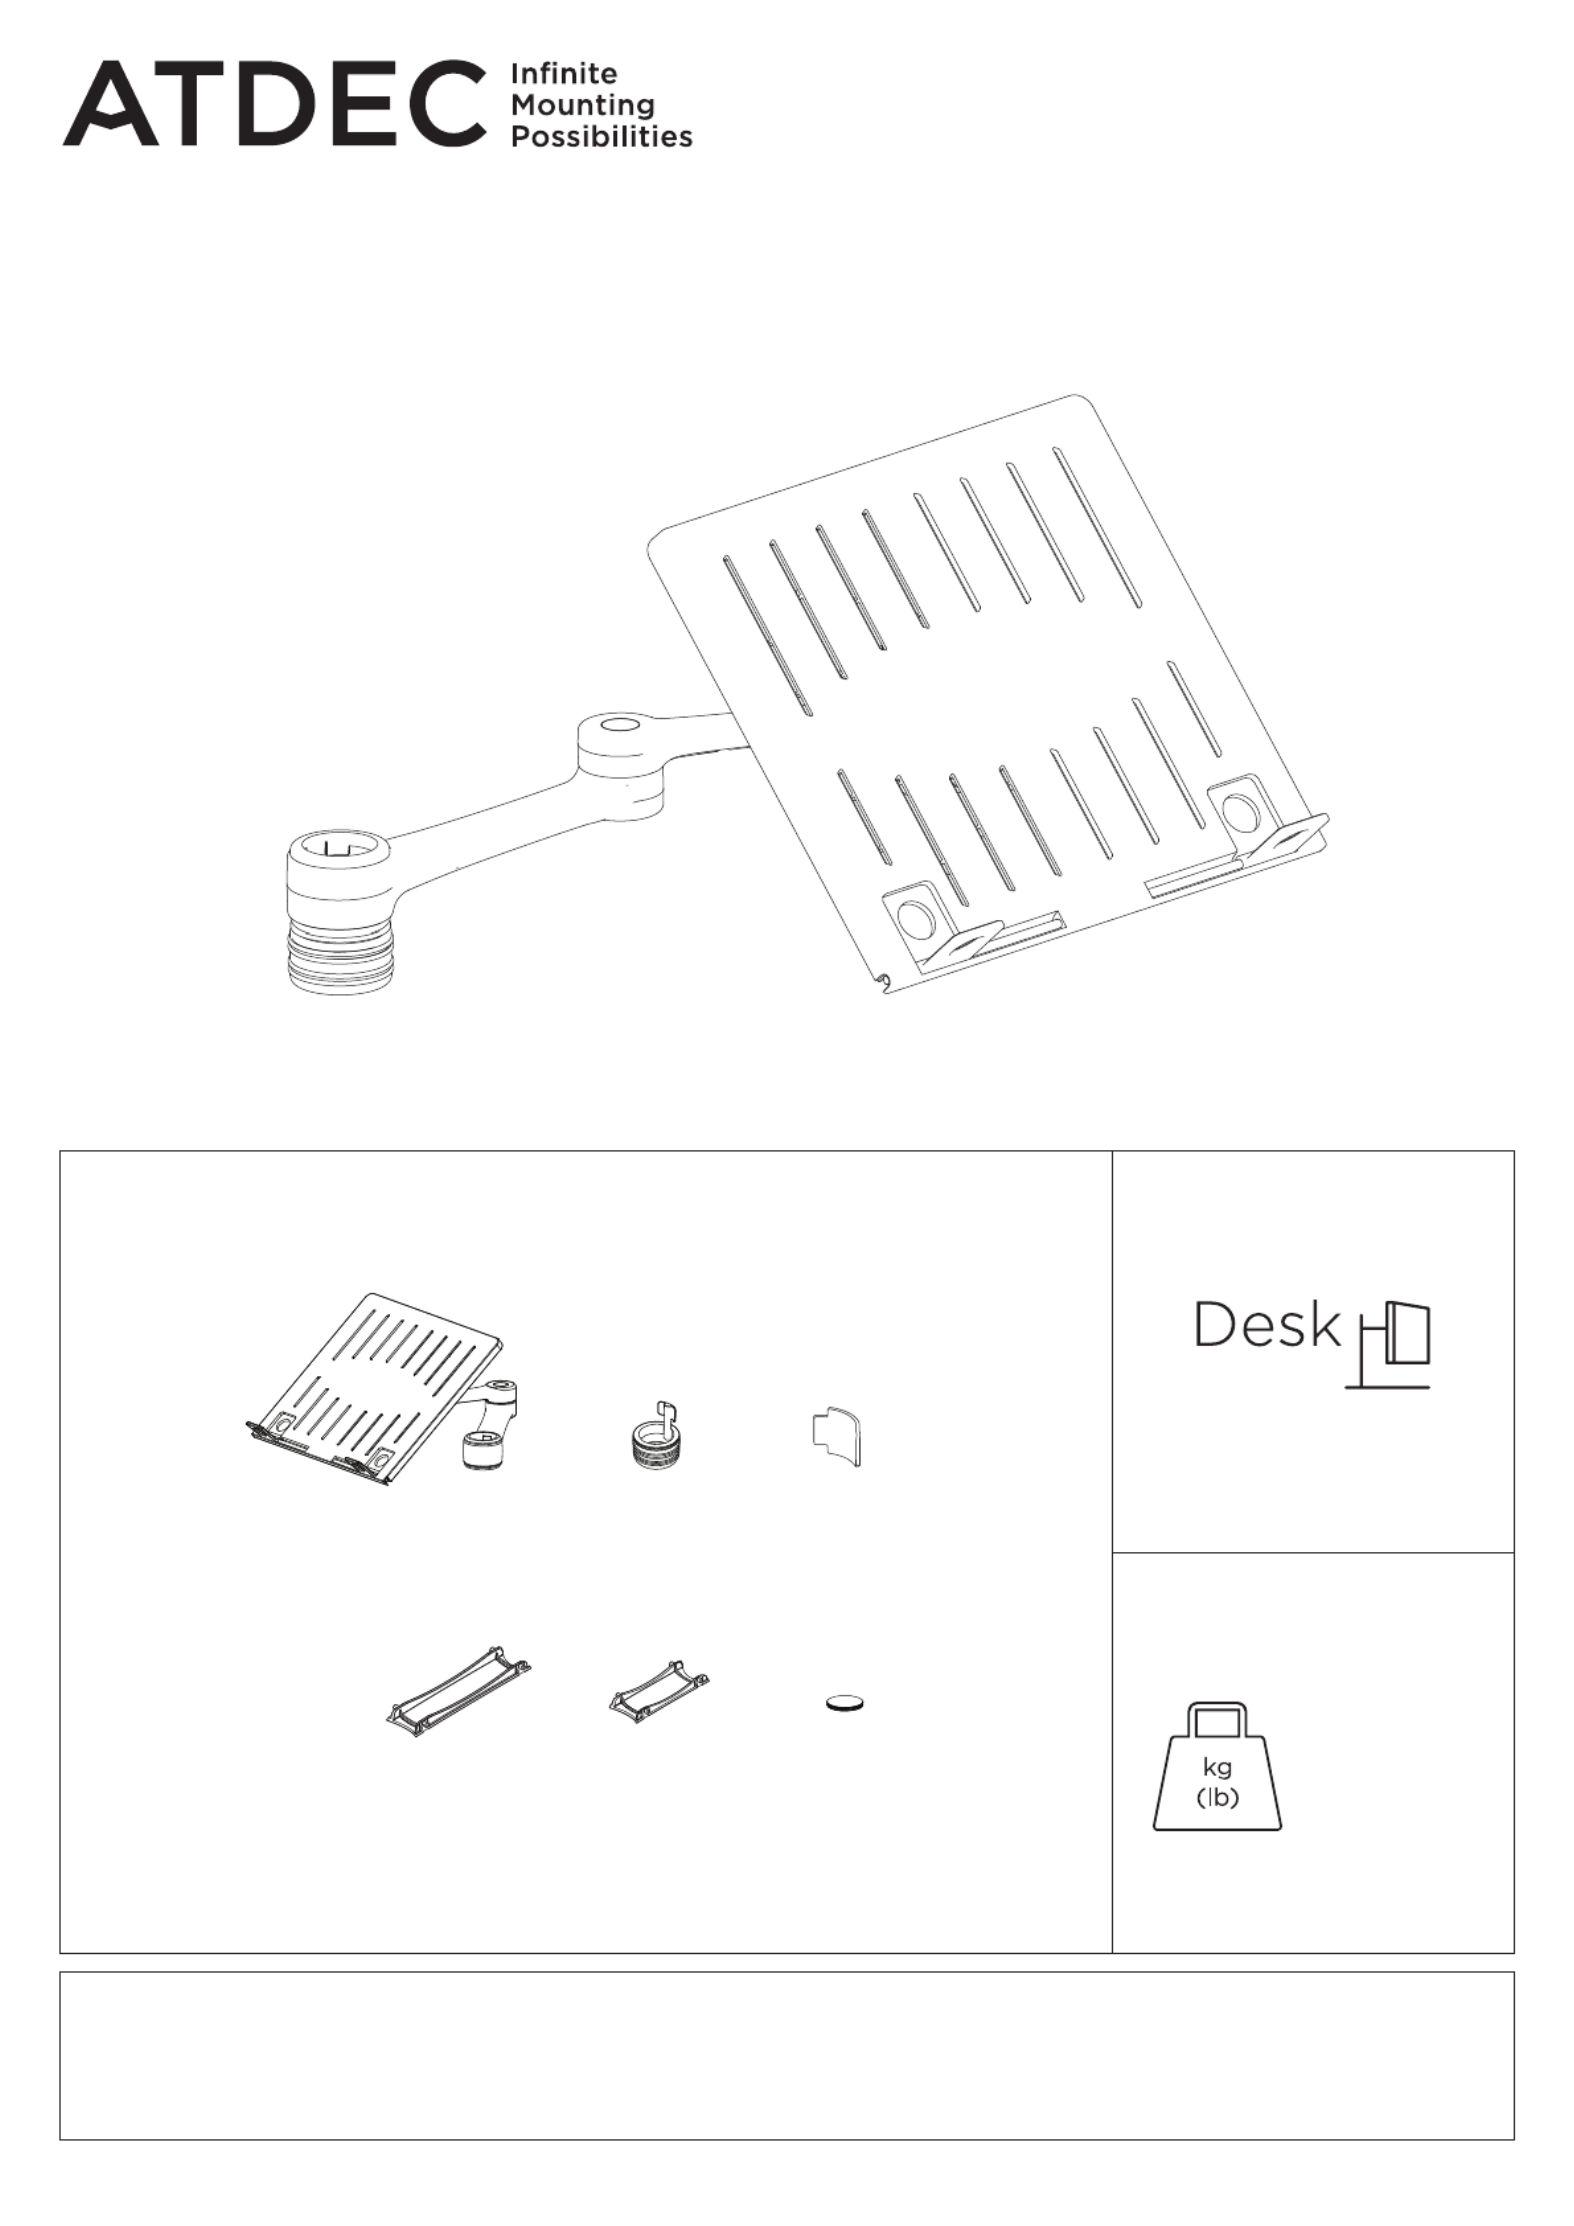
COMPONENT CHECKLIST
A
Notebook tray
assembly
(x1)
B
Hand grip
assembly
(x1)
C
Rotation
limiter
(x1)
D
Primary arm
cable cover
(x1)
E
Secondary arm
cable cover
(x1)
F
Self adhesive
hook & loop
(x4 sets)
Installation Guide
AF-AN
Notebook Arm
IMPORTANT INFORMATION
! Please ensure this product is installed as per these installation instructions.
! This product is designed to be used in conjunction with an external keyboard and mouse.
! This product is compatible with the range of AF poles and arms.
! The manufacturer accepts no responsibility for incorrect installation.
WEIGHT RANGE
0 - 8kg
(0 - 17.6lbs)
Product specificaties
| Merk: | Atdec |
| Categorie: | Niet gecategoriseerd |
| Model: | AF-AN |
Heb je hulp nodig?
Als je hulp nodig hebt met Atdec AF-AN stel dan hieronder een vraag en andere gebruikers zullen je antwoorden
Handleiding Niet gecategoriseerd Atdec

7 Oktober 2025
7 Oktober 2025
30 Januari 2025
7 December 2024
7 December 2024
7 December 2024
17 November 2024
11 Maart 2024
9 Juli 2023
9 Juli 2023
Handleiding Niet gecategoriseerd
Nieuwste handleidingen voor Niet gecategoriseerd
23 Juli 2026
23 Juli 2026
23 Juli 2026
23 Juli 2026
23 Juli 2026
23 Juli 2026
23 Juli 2026
23 Juli 2026
23 Juli 2026
22 Juli 2026