Atdec AD-WF-8060 Handleiding
Atdec Flat panel steun AD-WF-8060
Bekijk gratis de handleiding van Atdec AD-WF-8060 (2 pagina’s), behorend tot de categorie Flat panel steun. Deze gids werd als nuttig beoordeeld door 42 mensen en kreeg gemiddeld 4.7 sterren uit 9 reviews. Heb je een vraag over Atdec AD-WF-8060 of wil je andere gebruikers van dit product iets vragen? Stel een vraag
Pagina 1/2
AD-WF-8060 Page 1 of 2
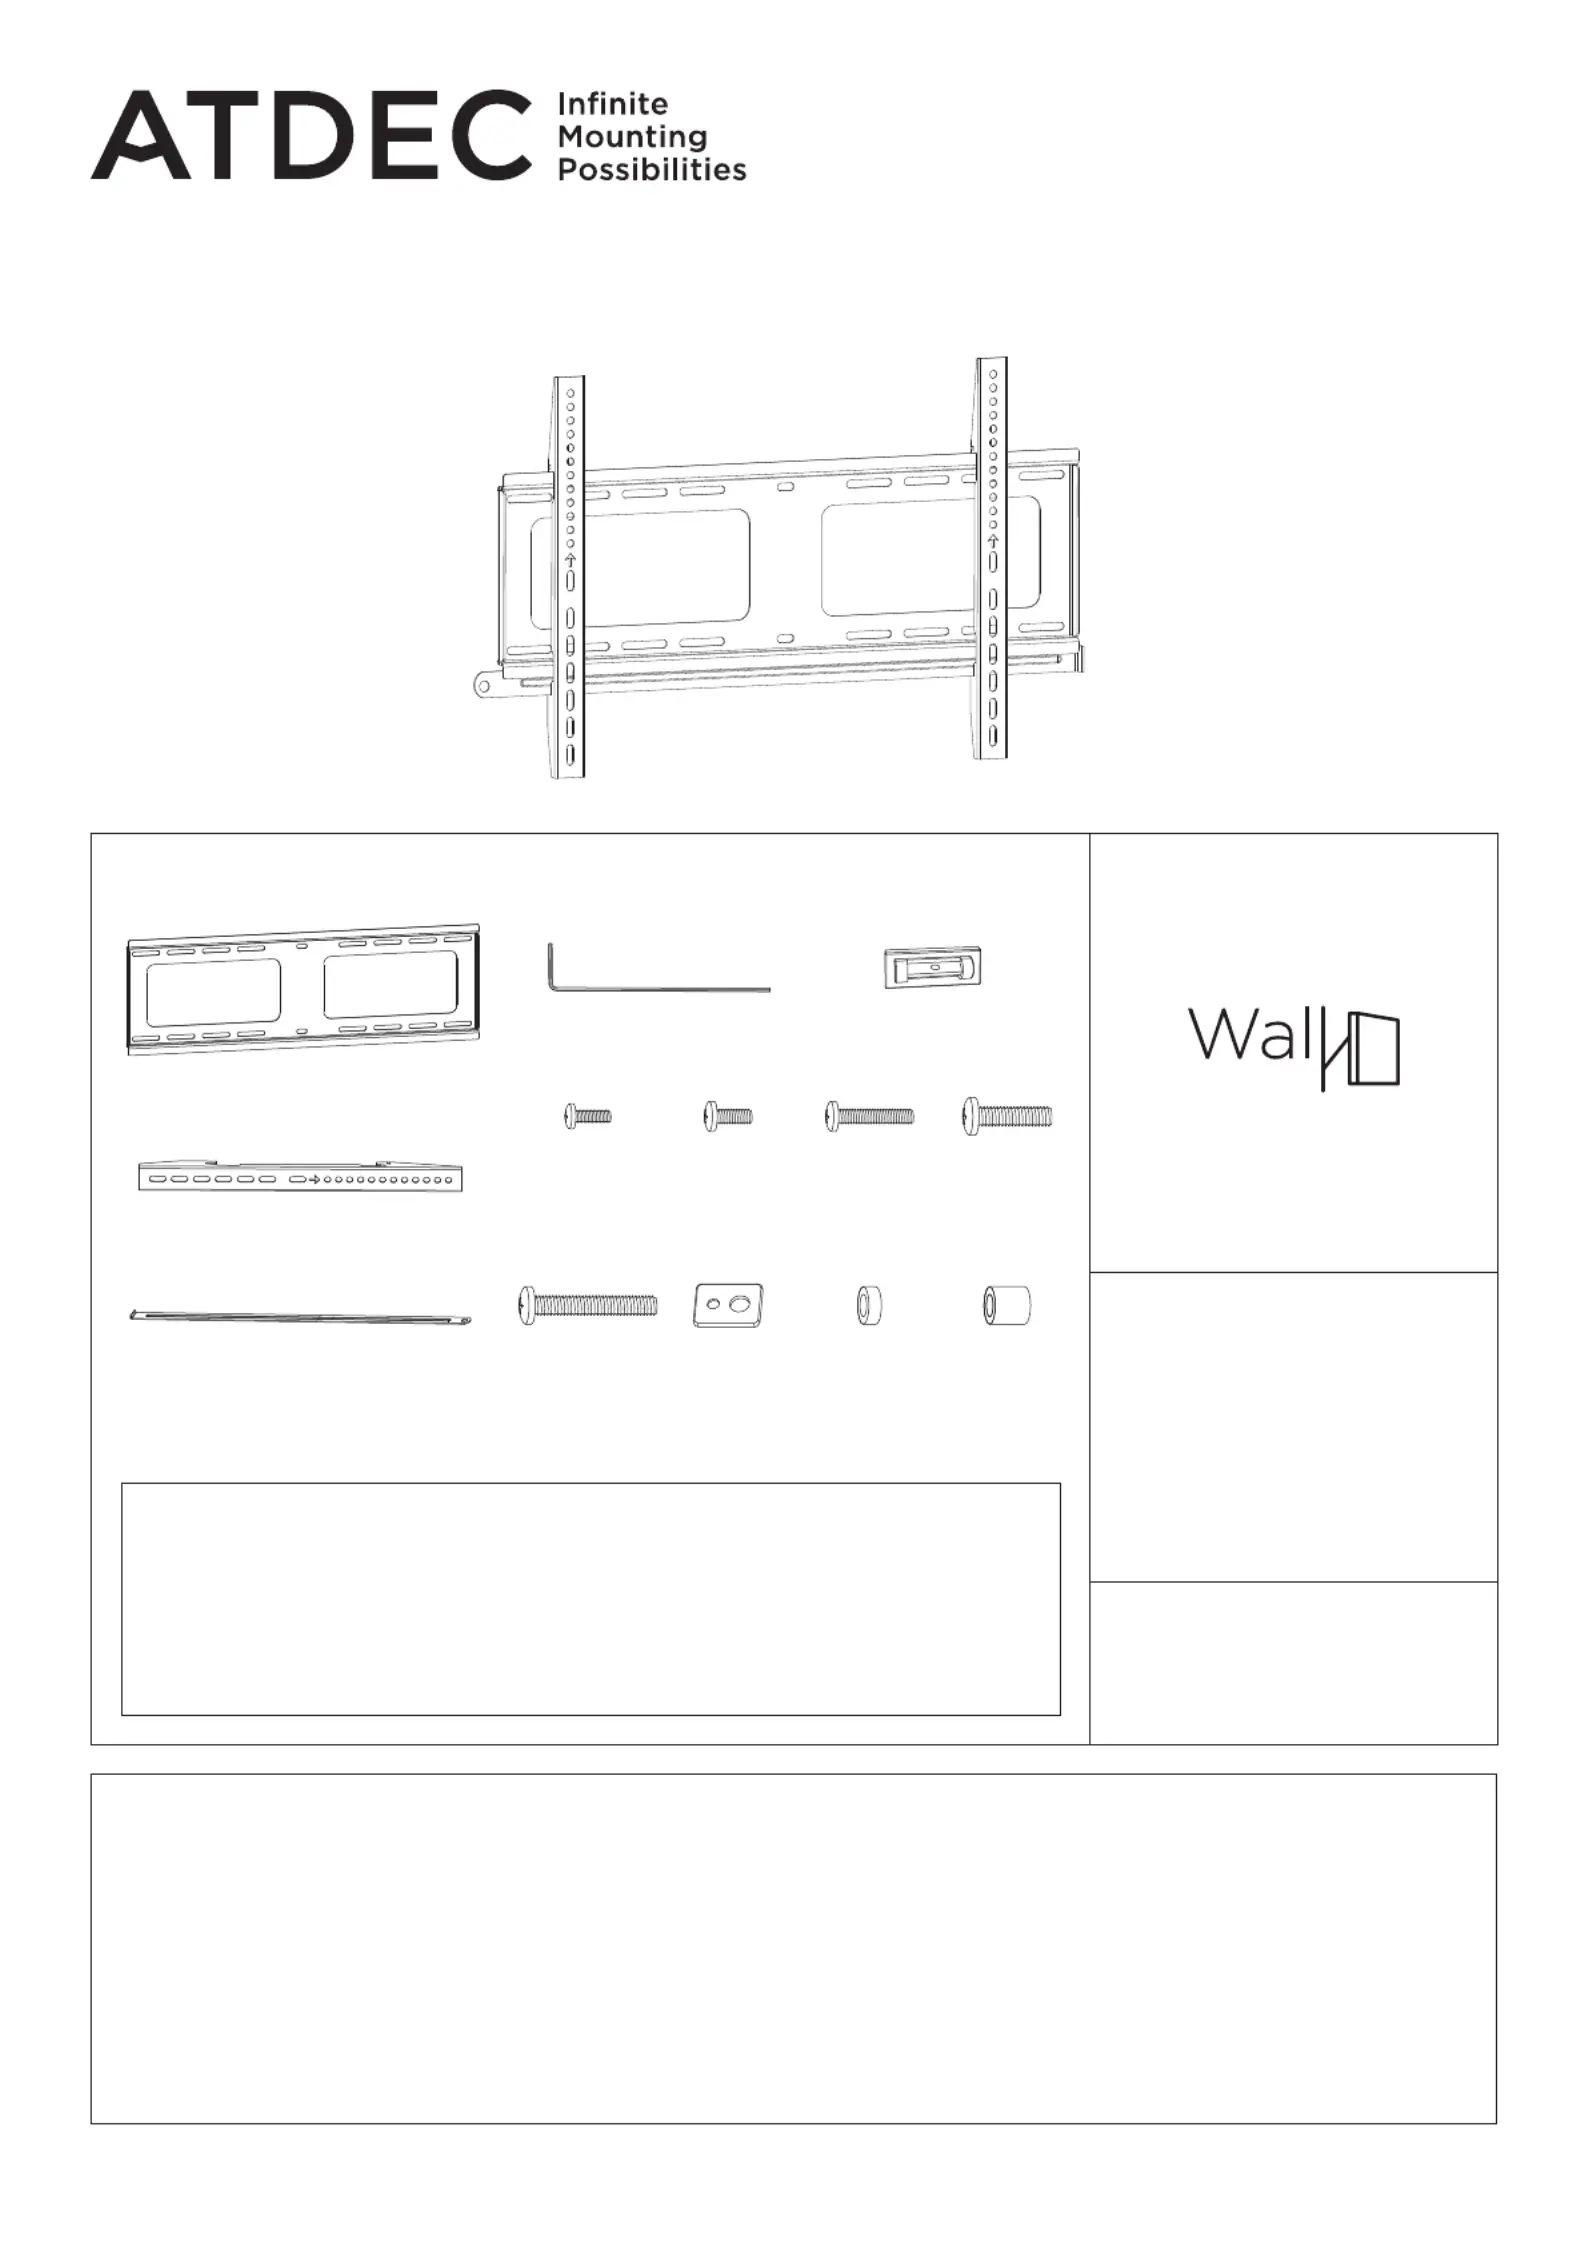
0 - 80kg
(0 - 176lb)
WEIGHT RANGE
Installation Guide
AD-WF-8060
Fixed Wall Mount 8060
A
Wall Plate
D
Hex Key
B
Display Brackets (x2)
C
Security Bar
M-G
Short
Spacer
(x8)
M-H
Long
Spacer
(x8)
M-F
Multi
Washer
(x4)
M-E
M8x50
Screw
(x4)
M-A
M5x14
Screw
(x4)
M-B
M6x14
Screw
(x4)
M-D
M8x30
Screw
(x4)
M-C
M6x30
Screw
(x4)
E
Spirit Level
IMPORTANT INFORMATION
! Please ensure this product is installed as per these installation instructions.
! The manufacturer accepts no responsibility for incorrect installation.
! Failure to mount this product correctly may cause serious injury/death during or following installation.
! This product is not suitable for outdoor use.
! Do not use this product for mobile applications.
! Wall Plate only achieves maximum weight rating when appropriately fastened to a wall of adequate structural capacity.
! Professional installer to ensure adequate structural capacity of wall (including appropriate safety factor) to support total
weight of all equipment being mounted.
! Drilling into electrical wires can cause death - use appropriate equipment and caution when drilling holes in walls to avoid
electrical cables, water pipes and gas pipes. Do not drill into structures unless you have established it’s safe to do so.
COMPONENT CHECKLIST
NOTE:
! Wall Plate Mounting Fasteners are supplied with Wall Mounts. NOT
Professional installer to ensure correct Mounting Fastener type, location &
quantity to suit structure where Wall Mount is installed.
! ALWAYS use a washer between the chosen fastener and the wall plate.
! Mounting fasteners to be used as per manufacturers instructions, including
minimum engagement to achieve necessary performance.
REQUIRED TOOLS
• Phillips head screwdriver
• Power drill
• Suitable drill bit
• Driver bit for selected
wall fasteners
• Stud nder
• Spirit level
Product specificaties
| Merk: | Atdec |
| Categorie: | Flat panel steun |
| Model: | AD-WF-8060 |
| Kleur van het product: | Zwart |
| Breedte: | 701 mm |
| Hoogte: | 440 mm |
| Gewicht verpakking: | 3175 g |
| Breedte verpakking: | 236 mm |
| Diepte verpakking: | 762 mm |
| Hoogte verpakking: | 30 mm |
| Materiaal behuizing: | Staal |
| In hoogte verstelbaar: | Nee |
| Montagewijze: | Muur |
| Maximale gewichtscapaciteit: | 80 kg |
| Paneelmontage-interface: | 300 x 300,300 x 200,100 x 100,100 x 200,100 x 150,120 x 120,120 x 180,400 x 200,400 x 400,400 x 300,600 x 200,200 x 100,600 x 400,200 x 200,200 x 300,200 x 400,280 x 150 mm |
| Draaien: | Nee |
| Montage interface compatibiliteit (min): | 100 x 100 mm |
| Montage interface compatibiliteit (max): | 600 x 400 mm |
| Aantal displays ondersteund: | 1 |
| Maximale schermgrootte: | - " |
| Afstand tot de muur (min): | 21 mm |
| Afstand tot de muur (max.): | 21 mm |
| Diepte (max): | 21 mm |
| kantel aanpassingen: | Nee |
| Aantal per pakket: | 1 paar/paren |
Heb je hulp nodig?
Als je hulp nodig hebt met Atdec AD-WF-8060 stel dan hieronder een vraag en andere gebruikers zullen je antwoorden
Handleiding Flat panel steun Atdec

24 Juni 2026
24 Juni 2026
23 Juni 2026
23 Juni 2026
23 Juni 2026
23 Juni 2026
22 Juni 2026
22 Juni 2026
22 Juni 2026
7 Oktober 2025
Handleiding Flat panel steun
Nieuwste handleidingen voor Flat panel steun
15 Juli 2026
15 Juli 2026
15 Juli 2026
15 Juli 2026
14 Juli 2026
14 Juli 2026
13 Juli 2026
13 Juli 2026
13 Juli 2026
13 Juli 2026