Atdec A-STSWW-A Handleiding
Atdec Niet gecategoriseerd A-STSWW-A
Bekijk gratis de handleiding van Atdec A-STSWW-A (2 pagina’s), behorend tot de categorie Niet gecategoriseerd. Deze gids werd als nuttig beoordeeld door 38 mensen en kreeg gemiddeld 4.0 sterren uit 3 reviews. Heb je een vraag over Atdec A-STSWW-A of wil je andere gebruikers van dit product iets vragen? Stel een vraag
Pagina 1/2
A-STSWW-A Page 1 of 5
Installation Instructions
Wall Mounted
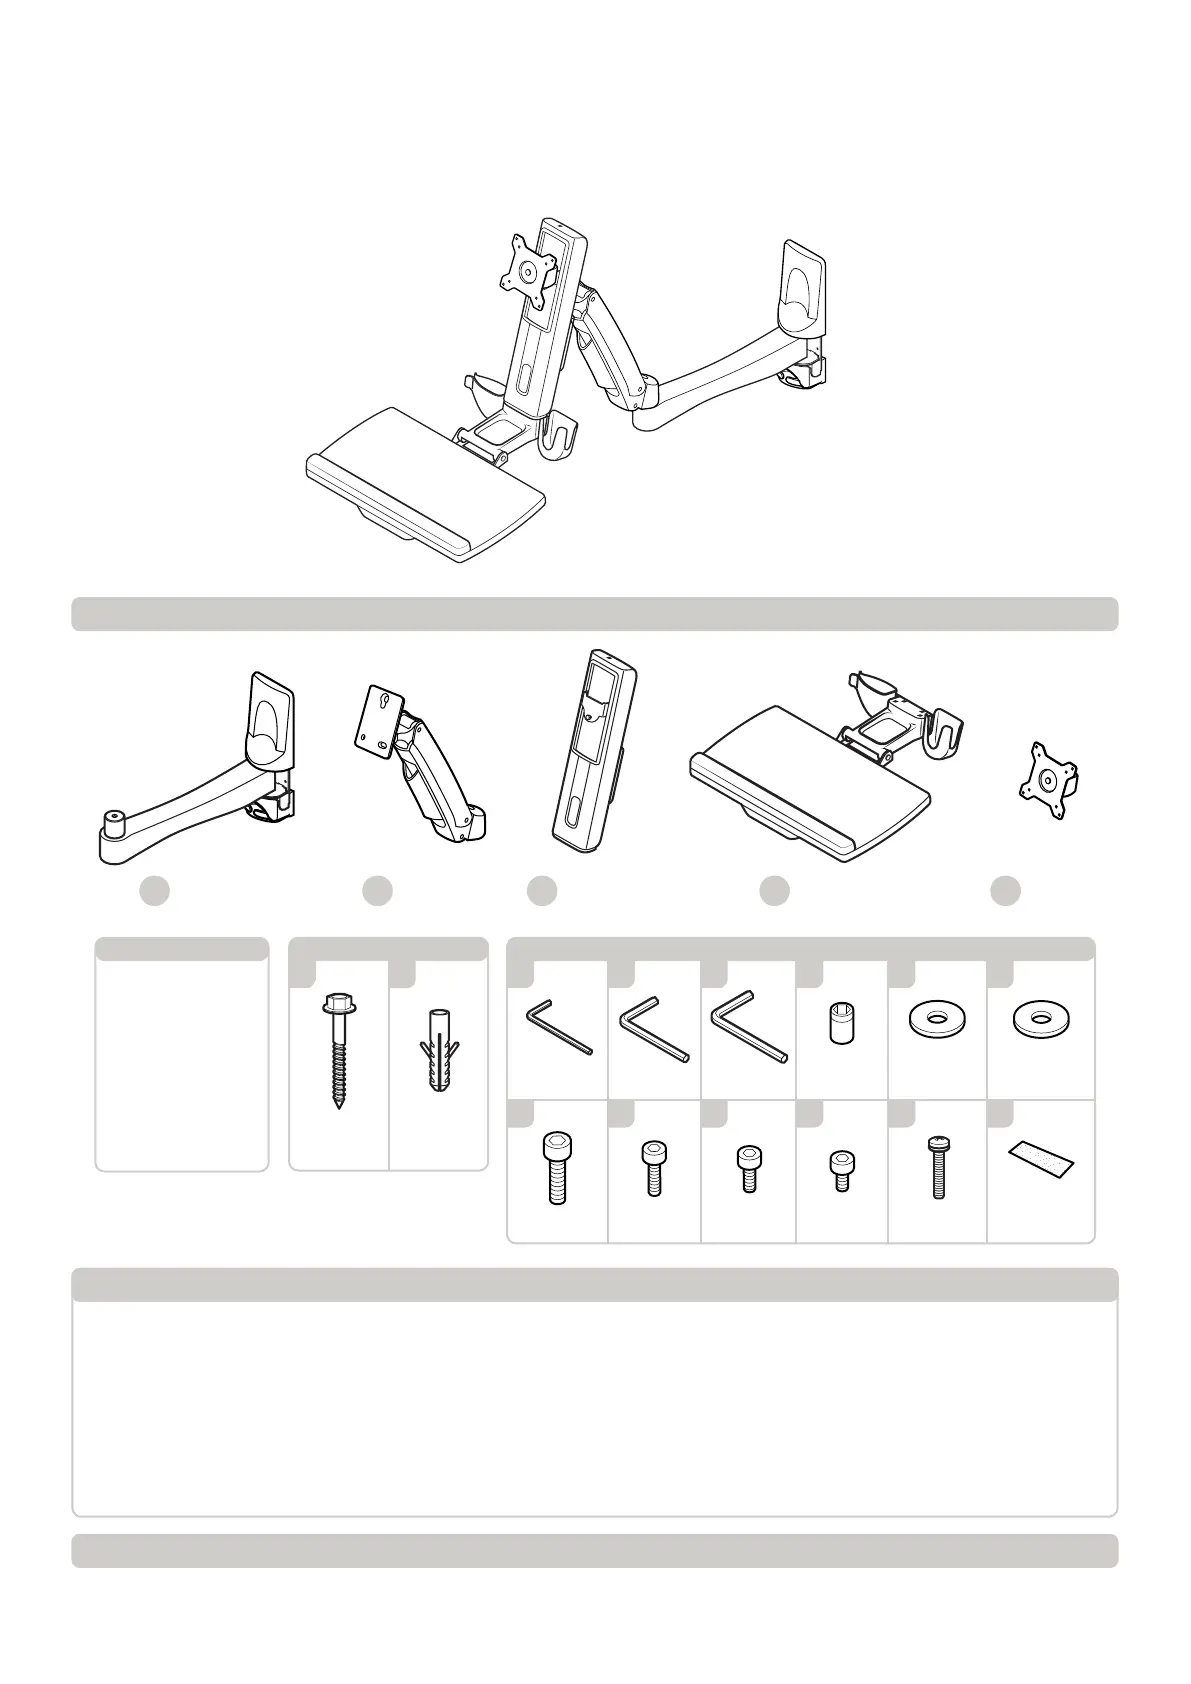
Sit-to-Stand Workstation - Antimicrobial
Component Checklist
Step 1. Check Components
A
B
CDE
Lower ArmUpper Arm
Vertical Screen
Slider
Keyboard TrayTilt Head
A-STSWW-A
• 8mm wrench
• Drill
• 10mm masonry bit
• 4.5mm drill bit
• Ratchet
• Spirit Level
• Stud Finder
• Pencil
5mm Allen6mm Allen2.5mm Allen
M6X8 (x1)M4x10 (x4)M6X12 (x4)M8X20 (x1)
8mm
¼” Drive
Velcro
Strip (x2)
HJKLMN
POQRST
Tools Required
Plastic
Washer (x1)
Coach
Screw (x6)
Nylon
Anchor (x6)
Metal
Washer (x1)
M6X10 (x3)
Hardware
F
G
Wall Mounting Hardware
Check that you have received all parts against the Component Checklist.
! IMPORTANT - Install as per Installation Instructions
! The manufacturer accepts no responsibility for incorrect installation.
! This product supports a maximum load 8Kg (17.6lbs.)
! The wall mount can be installed on vertical, at, solid concrete or brick walls, or timber stud walls only.
! The wall should be strong enough to sustain a weight of at least four times that of the display and wall mount bracket combined.
If in doubt, consult a structural engineer.
! Check wall anchors and screws every 3 months from the time of installation to ensure the workstation is rmly xed to the wall.
! Tighten all screws (do not exert excessive force to avoid breaking the screws or damaging their thread)
IMPORTANT INFORMATION
Product specificaties
| Merk: | Atdec |
| Categorie: | Niet gecategoriseerd |
| Model: | A-STSWW-A |
Heb je hulp nodig?
Als je hulp nodig hebt met Atdec A-STSWW-A stel dan hieronder een vraag en andere gebruikers zullen je antwoorden
Handleiding Niet gecategoriseerd Atdec

7 Oktober 2025
7 Oktober 2025
30 Januari 2025
7 December 2024
7 December 2024
7 December 2024
17 November 2024
11 Maart 2024
9 Juli 2023
9 Juli 2023
Handleiding Niet gecategoriseerd
Nieuwste handleidingen voor Niet gecategoriseerd
8 Juni 2026
8 Juni 2026
8 Juni 2026
8 Juni 2026
8 Juni 2026
8 Juni 2026
8 Juni 2026
8 Juni 2026
8 Juni 2026
8 Juni 2026