Asus TM-551 Handleiding
Asus Computerbehuizing TM-551
Bekijk gratis de handleiding van Asus TM-551 (2 pagina’s), behorend tot de categorie Computerbehuizing. Deze gids werd als nuttig beoordeeld door 33 mensen en kreeg gemiddeld 4.7 sterren uit 6 reviews. Heb je een vraag over Asus TM-551 of wil je andere gebruikers van dit product iets vragen? Stel een vraag
Pagina 1/2
English
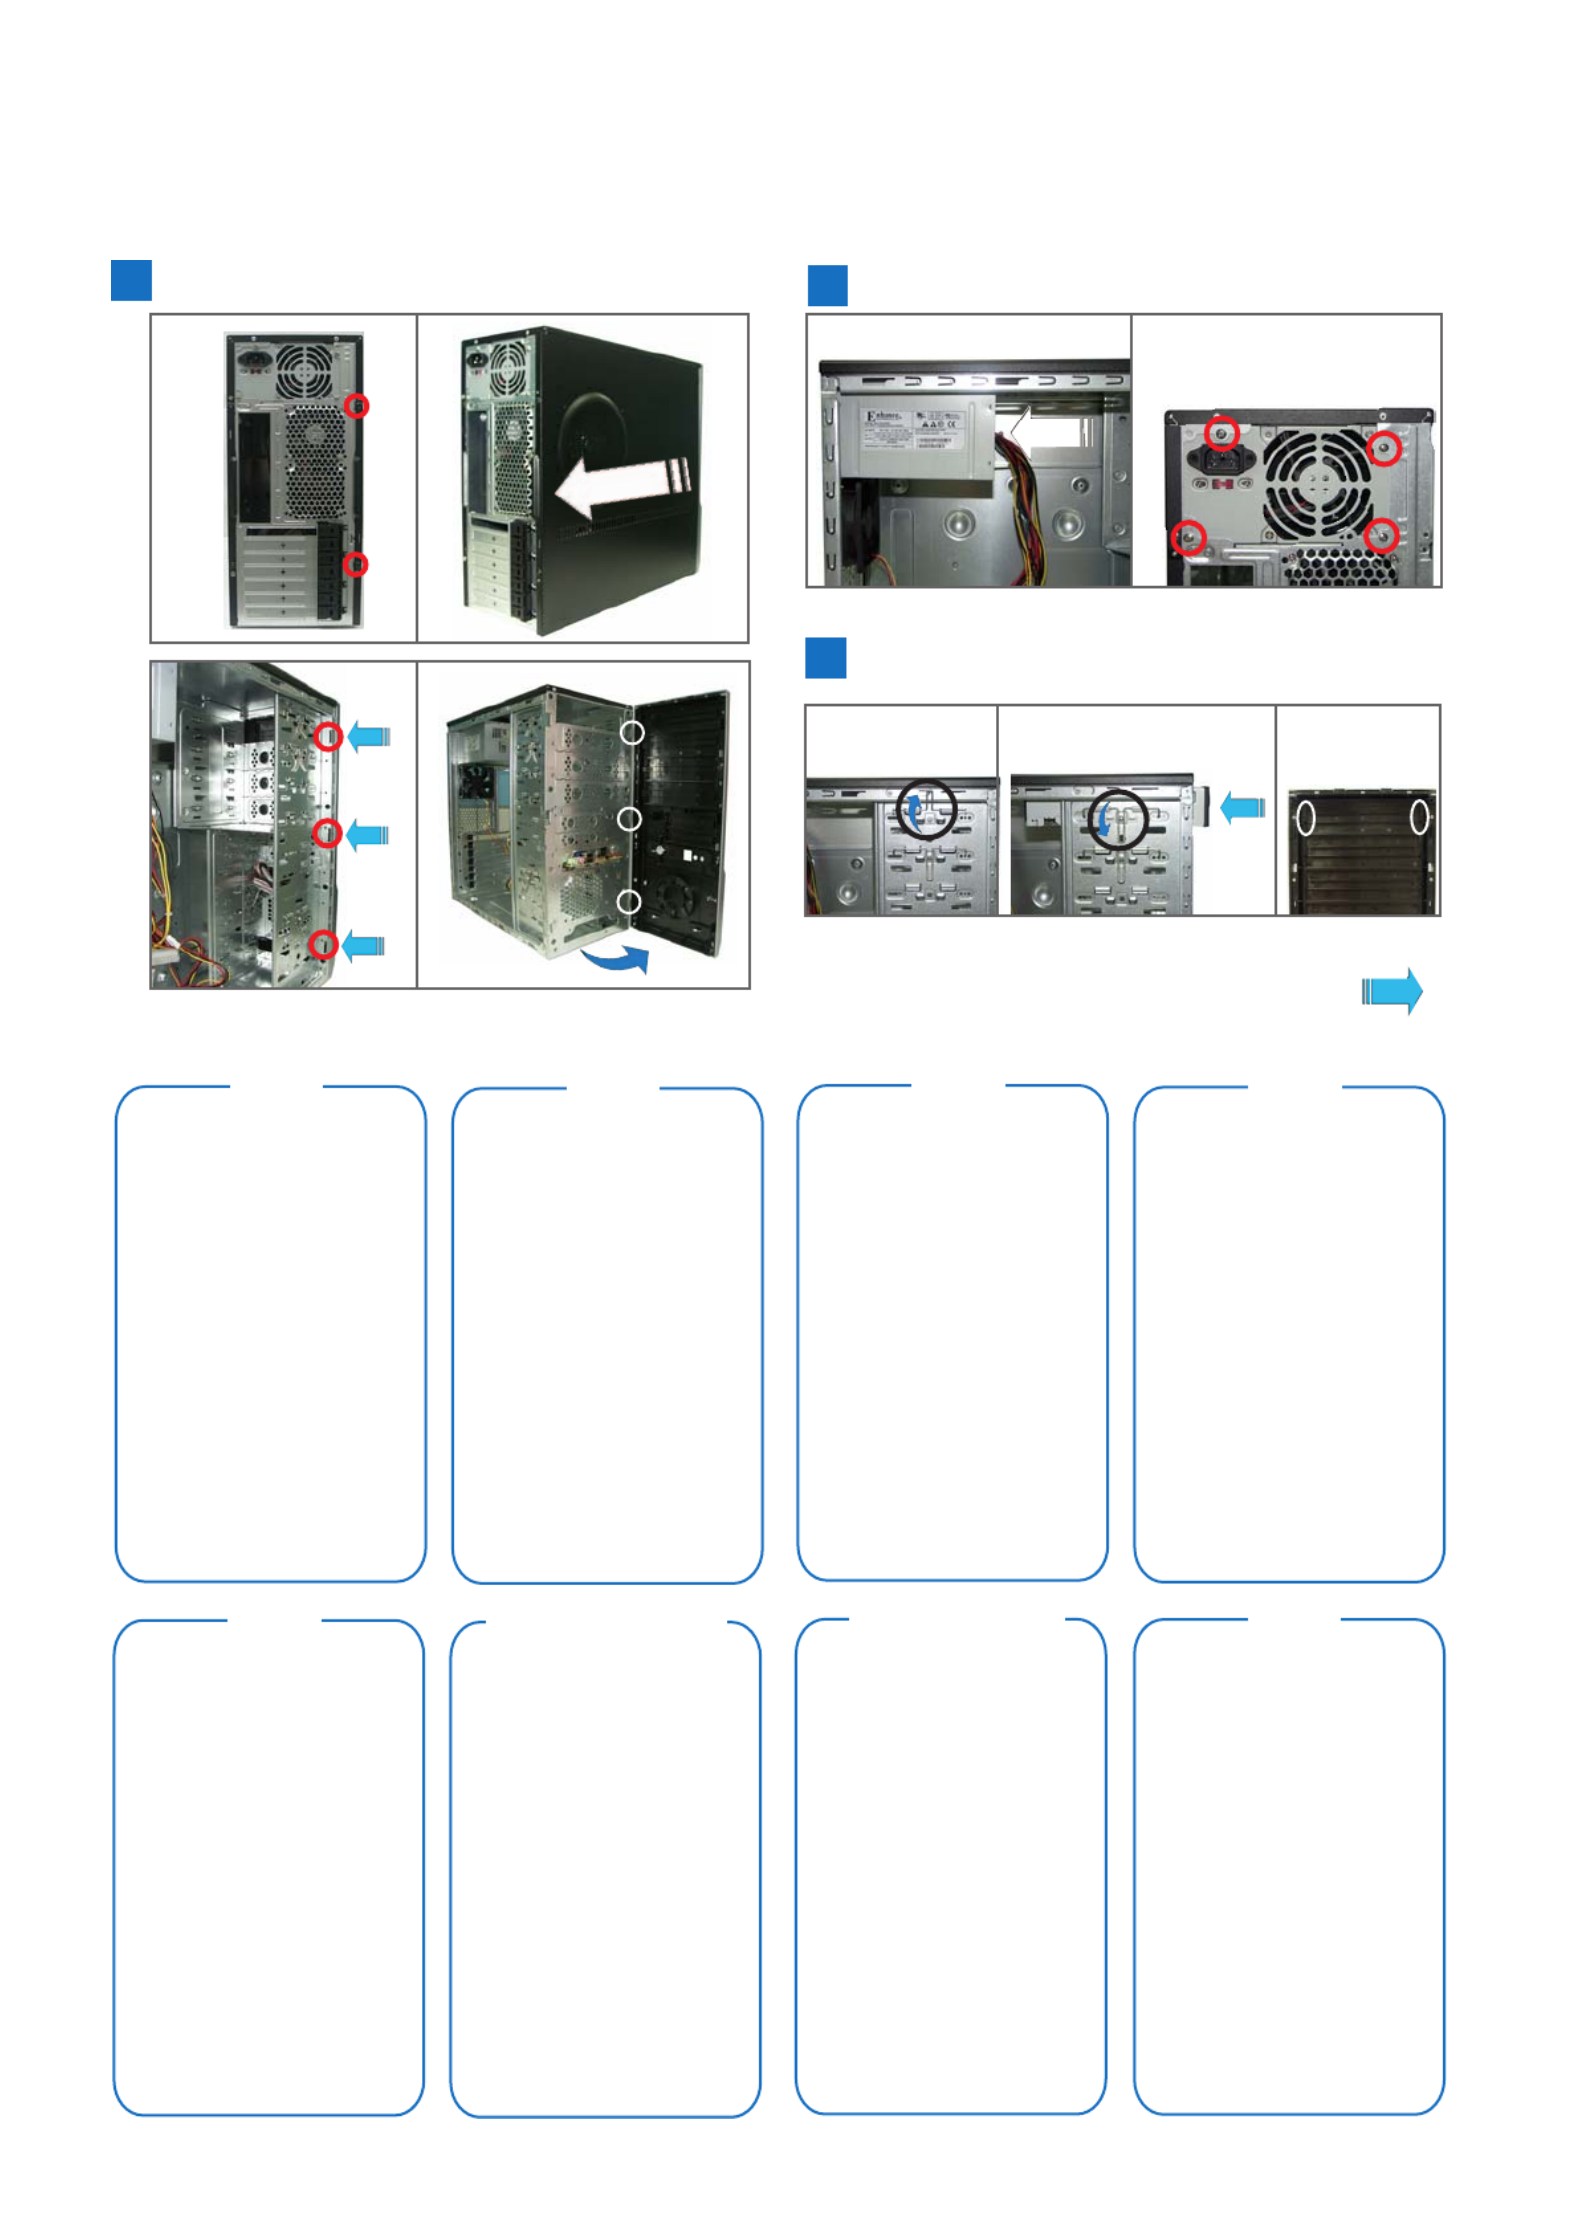
A
1.Remove the screws on the rear panel.
2.Push the side cover towards the rear
panel.
3.Release the side tabs that secure the
front bezel to the chassis.
4.Swing the front bezel in the direction of
the arrow. Unhook the hinge-like tabs.
B
1.Slide the PSU into the slot until it snugly
fits the metal rail.
2.Secure with screws.
C
1.Push the bay lock upward.
2.Insert the ODD into the bay.
3.Align the ODD holes with the bay holes,
then push down the bay lock to secure the
ODD.
4.Release the lock tabs on the front bezel
to disengage the drive cover.
Russian
German
Traditional Chinese
French
Simplified ChineseArabic
Spanish
C Installing an optical disk drive (ODD)
124
3
B Installing the power supply unit (PSU)
21
Continued at the back
A Removing the side cover and front bezel
1 2
34
E2461
TA-TM5 Series (Screwless Model)
Product specificaties
| Merk: | Asus |
| Categorie: | Computerbehuizing |
| Model: | TM-551 |
Heb je hulp nodig?
Als je hulp nodig hebt met Asus TM-551 stel dan hieronder een vraag en andere gebruikers zullen je antwoorden
Handleiding Computerbehuizing Asus

6 Oktober 2025
6 Oktober 2025
6 Oktober 2025
29 September 2025
31 Augustus 2025
25 Mei 2025
2 April 2025
2 April 2025
2 April 2025
26 Februari 2025
Handleiding Computerbehuizing
Nieuwste handleidingen voor Computerbehuizing
20 Mei 2026
14 Mei 2026
12 Mei 2026
12 Mei 2026
11 Mei 2026
8 Mei 2026
8 Mei 2026
7 Mei 2026
6 Mei 2026
6 Mei 2026