Advantech PPC-115W Handleiding
Advantech Niet gecategoriseerd PPC-115W
Bekijk gratis de handleiding van Advantech PPC-115W (11 pagina’s), behorend tot de categorie Niet gecategoriseerd. Deze gids werd als nuttig beoordeeld door 7 mensen en kreeg gemiddeld 5.0 sterren uit 3 reviews. Heb je een vraag over Advantech PPC-115W of wil je andere gebruikers van dit product iets vragen? Stel een vraag
Pagina 1/11
PPC-112W/115W Startup Manual 1
Before installation, ensure that the following items are
included with the shipment:
1. 1 x Panel PC
2. 1 x Startup manual
3. 1 x Adapter
If any of the above items are missing or damaged, contact
your distributor or sales representative immediately.
PPC-112W/115W 11.6”/15.6”All-in-One Panel PC
with Rockchip 3399 Processor and Android 10 OS
Startup Manual
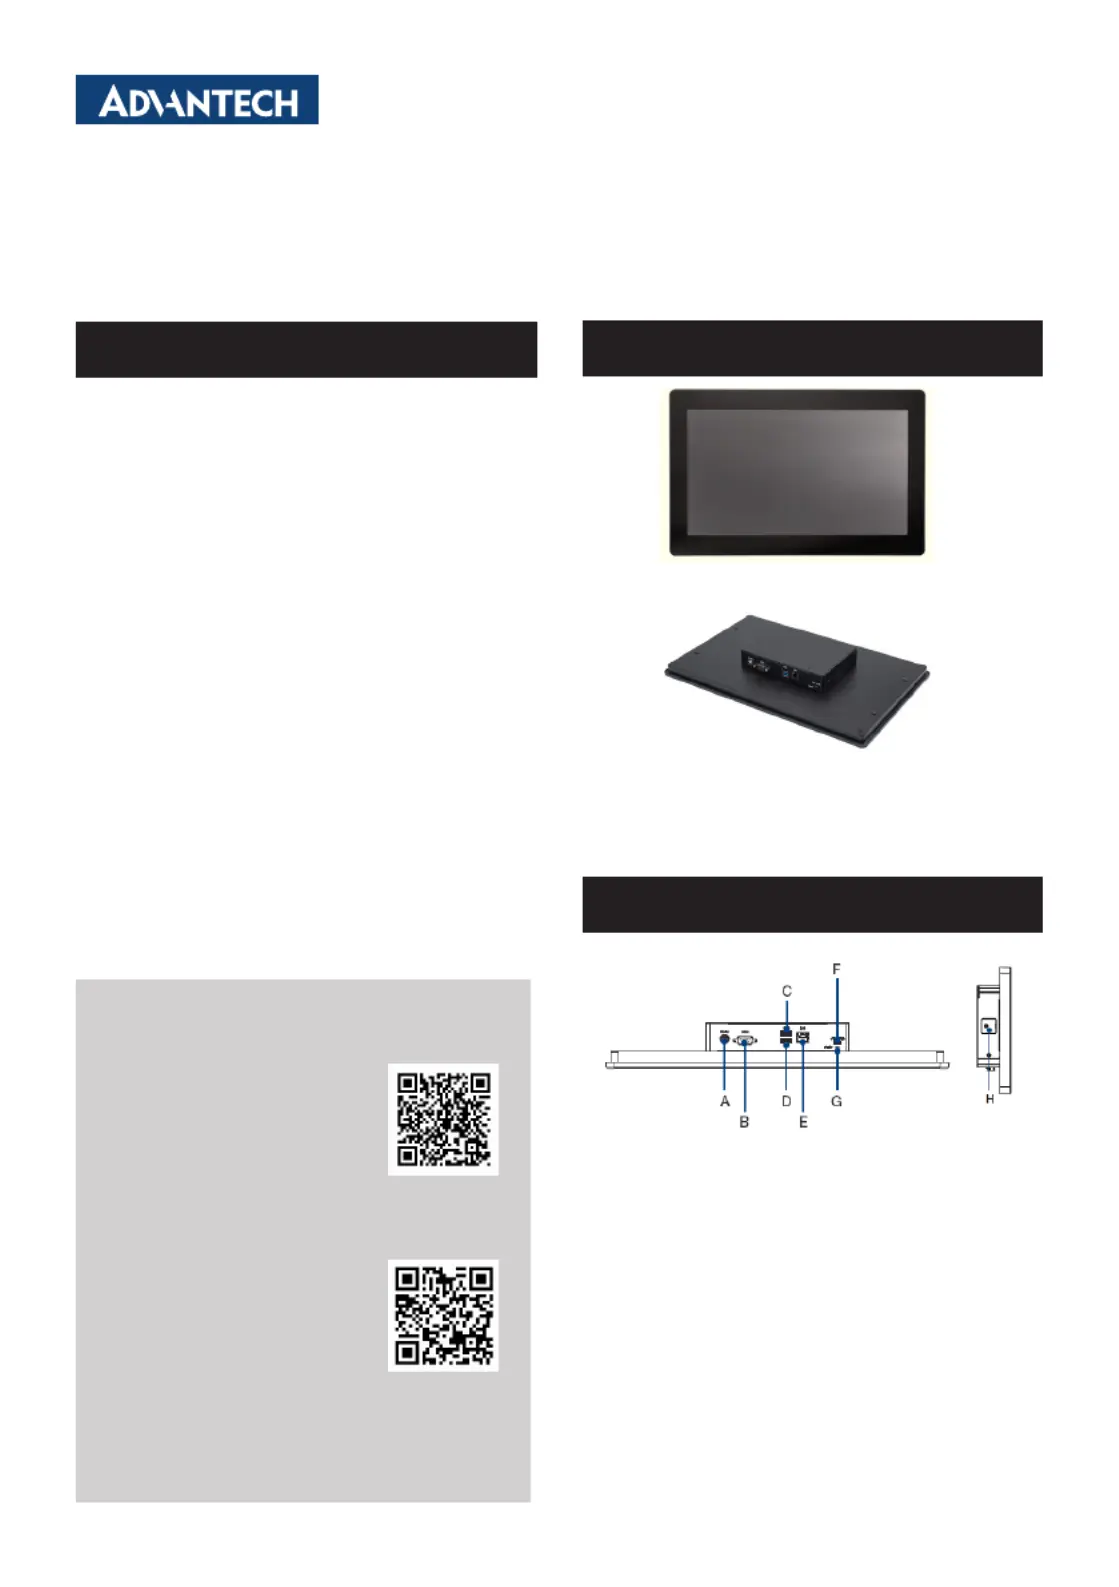
Front View
Rear View
VESA mount screws: 4 x M4 screws
Screw depth: 8 mm/0.31 in (max.)
A. DC-In
B. 1 x RS-232
C. 1 x USB 2.0
D. 1 x USB 3.0
E. 1 x LAN
F. 1 x Micro USB OTG
G. 1 x Reset button
H. 1 x Micro SD slot (with lock catch)
Packing List
For more information about this product, visit the
Advantech website at
http://www.advantech.com/products/fanless-panel-
pcs/sub_1-2jkjm3
For technical support and customer service, visit the
Advantech support website at
http://support.advantech.com/support/new_default.
aspx
This manual is for the PPC-112W/PPC-115W series,
Rev. A0.
Part No. 2044112W00
Printed in China
Edition 1
December 2021
Appearance
I/O Layout
Product specificaties
| Merk: | Advantech |
| Categorie: | Niet gecategoriseerd |
| Model: | PPC-115W |
Heb je hulp nodig?
Als je hulp nodig hebt met Advantech PPC-115W stel dan hieronder een vraag en andere gebruikers zullen je antwoorden
Handleiding Niet gecategoriseerd Advantech

5 Juni 2026
5 Juni 2026
3 Juni 2026
2 Juni 2026
1 Juni 2026
1 Juni 2026
1 Juni 2026
27 Mei 2026
1 Mei 2026
29 April 2026
Handleiding Niet gecategoriseerd
Nieuwste handleidingen voor Niet gecategoriseerd
8 Juni 2026
8 Juni 2026
8 Juni 2026
8 Juni 2026
8 Juni 2026
8 Juni 2026
8 Juni 2026
8 Juni 2026
8 Juni 2026
8 Juni 2026