Advantech ARES-5221O Handleiding
Advantech Niet gecategoriseerd ARES-5221O
Bekijk gratis de handleiding van Advantech ARES-5221O (5 pagina’s), behorend tot de categorie Niet gecategoriseerd. Deze gids werd als nuttig beoordeeld door 6 mensen en kreeg gemiddeld 4.2 sterren uit 5 reviews. Heb je een vraag over Advantech ARES-5221O of wil je andere gebruikers van dit product iets vragen? Stel een vraag
Pagina 1/5
78OEW100201A
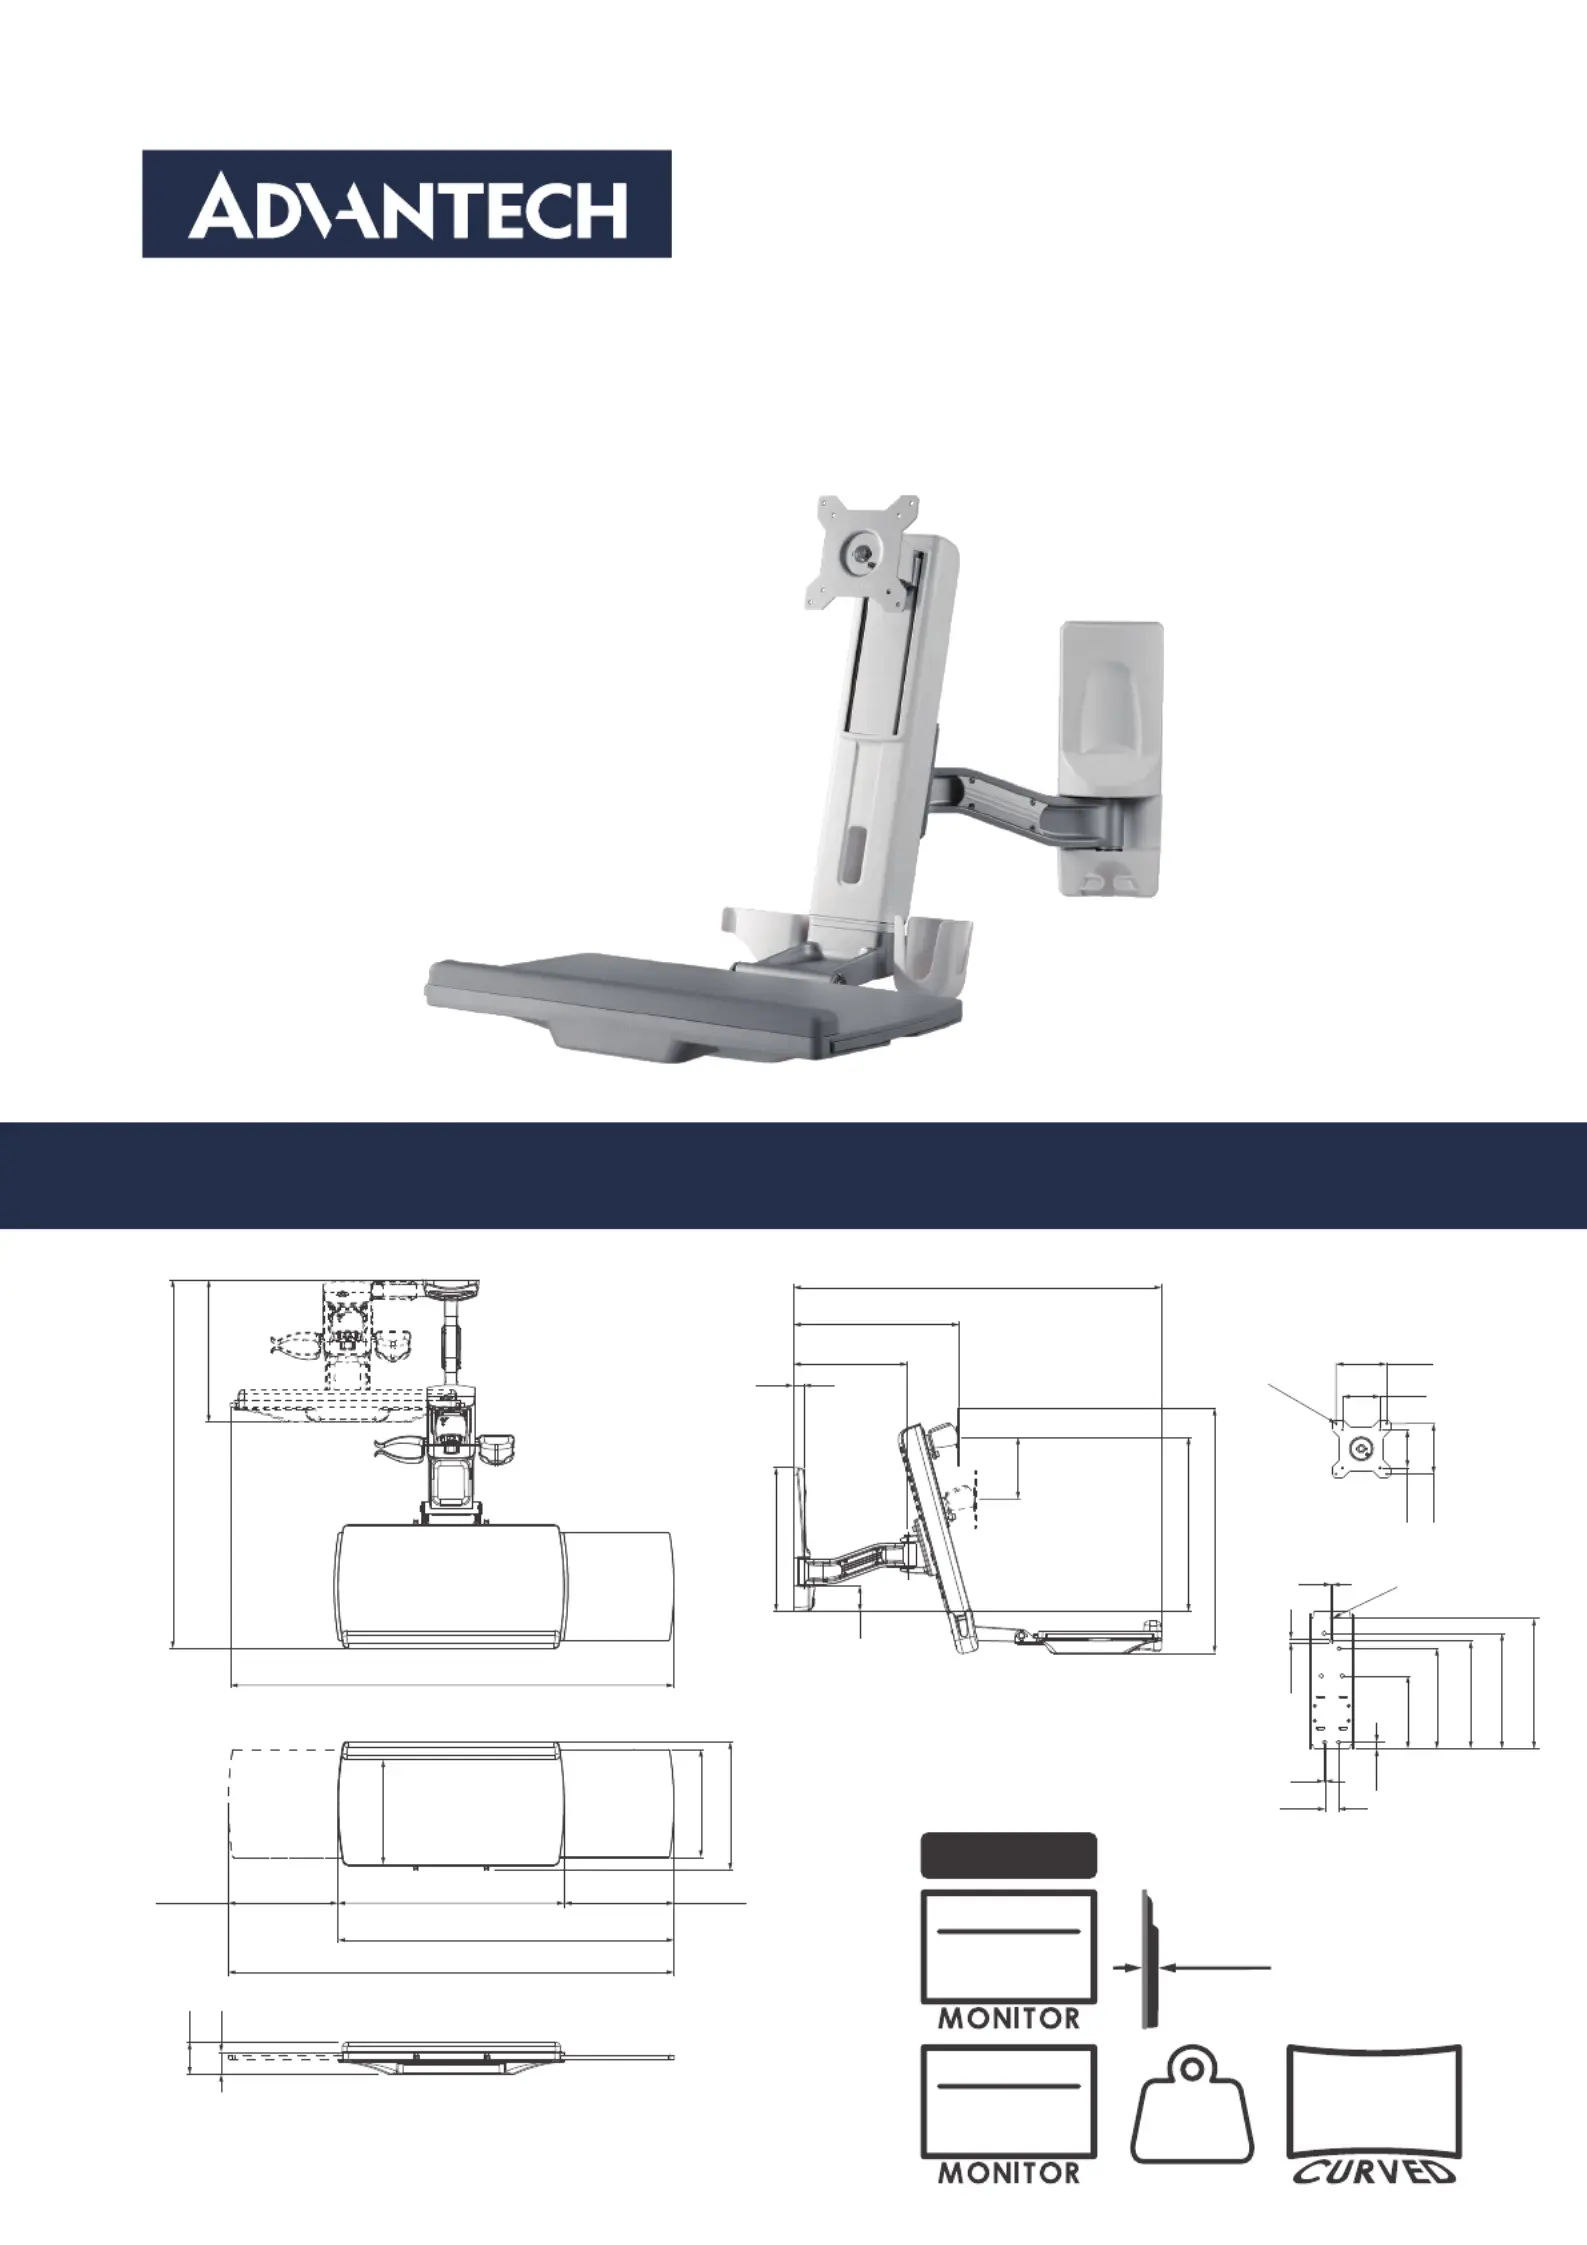
Physical Dimensions (mm)
Installation Manual
ARES-5221O
282
880
730.6
123-328.8
226.2
124
345
486
21
285
51
44
64
207
8-2178-217449
668
884.3
213
255
730.6
2
7.5
13
146
201
216
231
261
2
26
Ø7
100
100
Ø4.5
75
75
5.5 kg
12.13 lb
≤
≤ 27″
2-8 kg
4.41-17.64 lb
≤ 27″
6-12 kg
13.23-26.46 lb
Heavy Duty
≤8.5 cm
Keyboard Tray
2.5 kg
5.51 lb
≤
Product specificaties
| Merk: | Advantech |
| Categorie: | Niet gecategoriseerd |
| Model: | ARES-5221O |
Heb je hulp nodig?
Als je hulp nodig hebt met Advantech ARES-5221O stel dan hieronder een vraag en andere gebruikers zullen je antwoorden
Handleiding Niet gecategoriseerd Advantech

5 Juni 2026
5 Juni 2026
3 Juni 2026
2 Juni 2026
1 Juni 2026
1 Juni 2026
1 Juni 2026
27 Mei 2026
1 Mei 2026
29 April 2026
Handleiding Niet gecategoriseerd
Nieuwste handleidingen voor Niet gecategoriseerd
8 Juni 2026
8 Juni 2026
8 Juni 2026
8 Juni 2026
8 Juni 2026
8 Juni 2026
8 Juni 2026
8 Juni 2026
8 Juni 2026
8 Juni 2026