Advance Tabco 19-18-120-ADA-F Handleiding
Advance Tabco Spoelbak 19-18-120-ADA-F
Bekijk gratis de handleiding van Advance Tabco 19-18-120-ADA-F (2 pagina’s), behorend tot de categorie Spoelbak. Deze gids werd als nuttig beoordeeld door 5 mensen en kreeg gemiddeld 4.8 sterren uit 6 reviews. Heb je een vraag over Advance Tabco 19-18-120-ADA-F of wil je andere gebruikers van dit product iets vragen? Stel een vraag
Pagina 1/2
Sinks manufactured by ADVANCE TABCO
®
are designed and constructed for the use of
liquid containment. Suggested applications include Food Preparation, Manufacturing,
Cooking, Laboratory and Service and the like. ADVANCE TABCO
®
does not recommend
product use for activities employing harsh and active chemicals. Please consult factory
regarding unusual applications.
CHECK FOR CONCEALED DAMAGE
FILE CLAIM WITH DELIVERING FREIGHT CARRIER
EDGEWOOD, NY 11717-8380
© ADVANCE TABCO, OCTOBER 2018
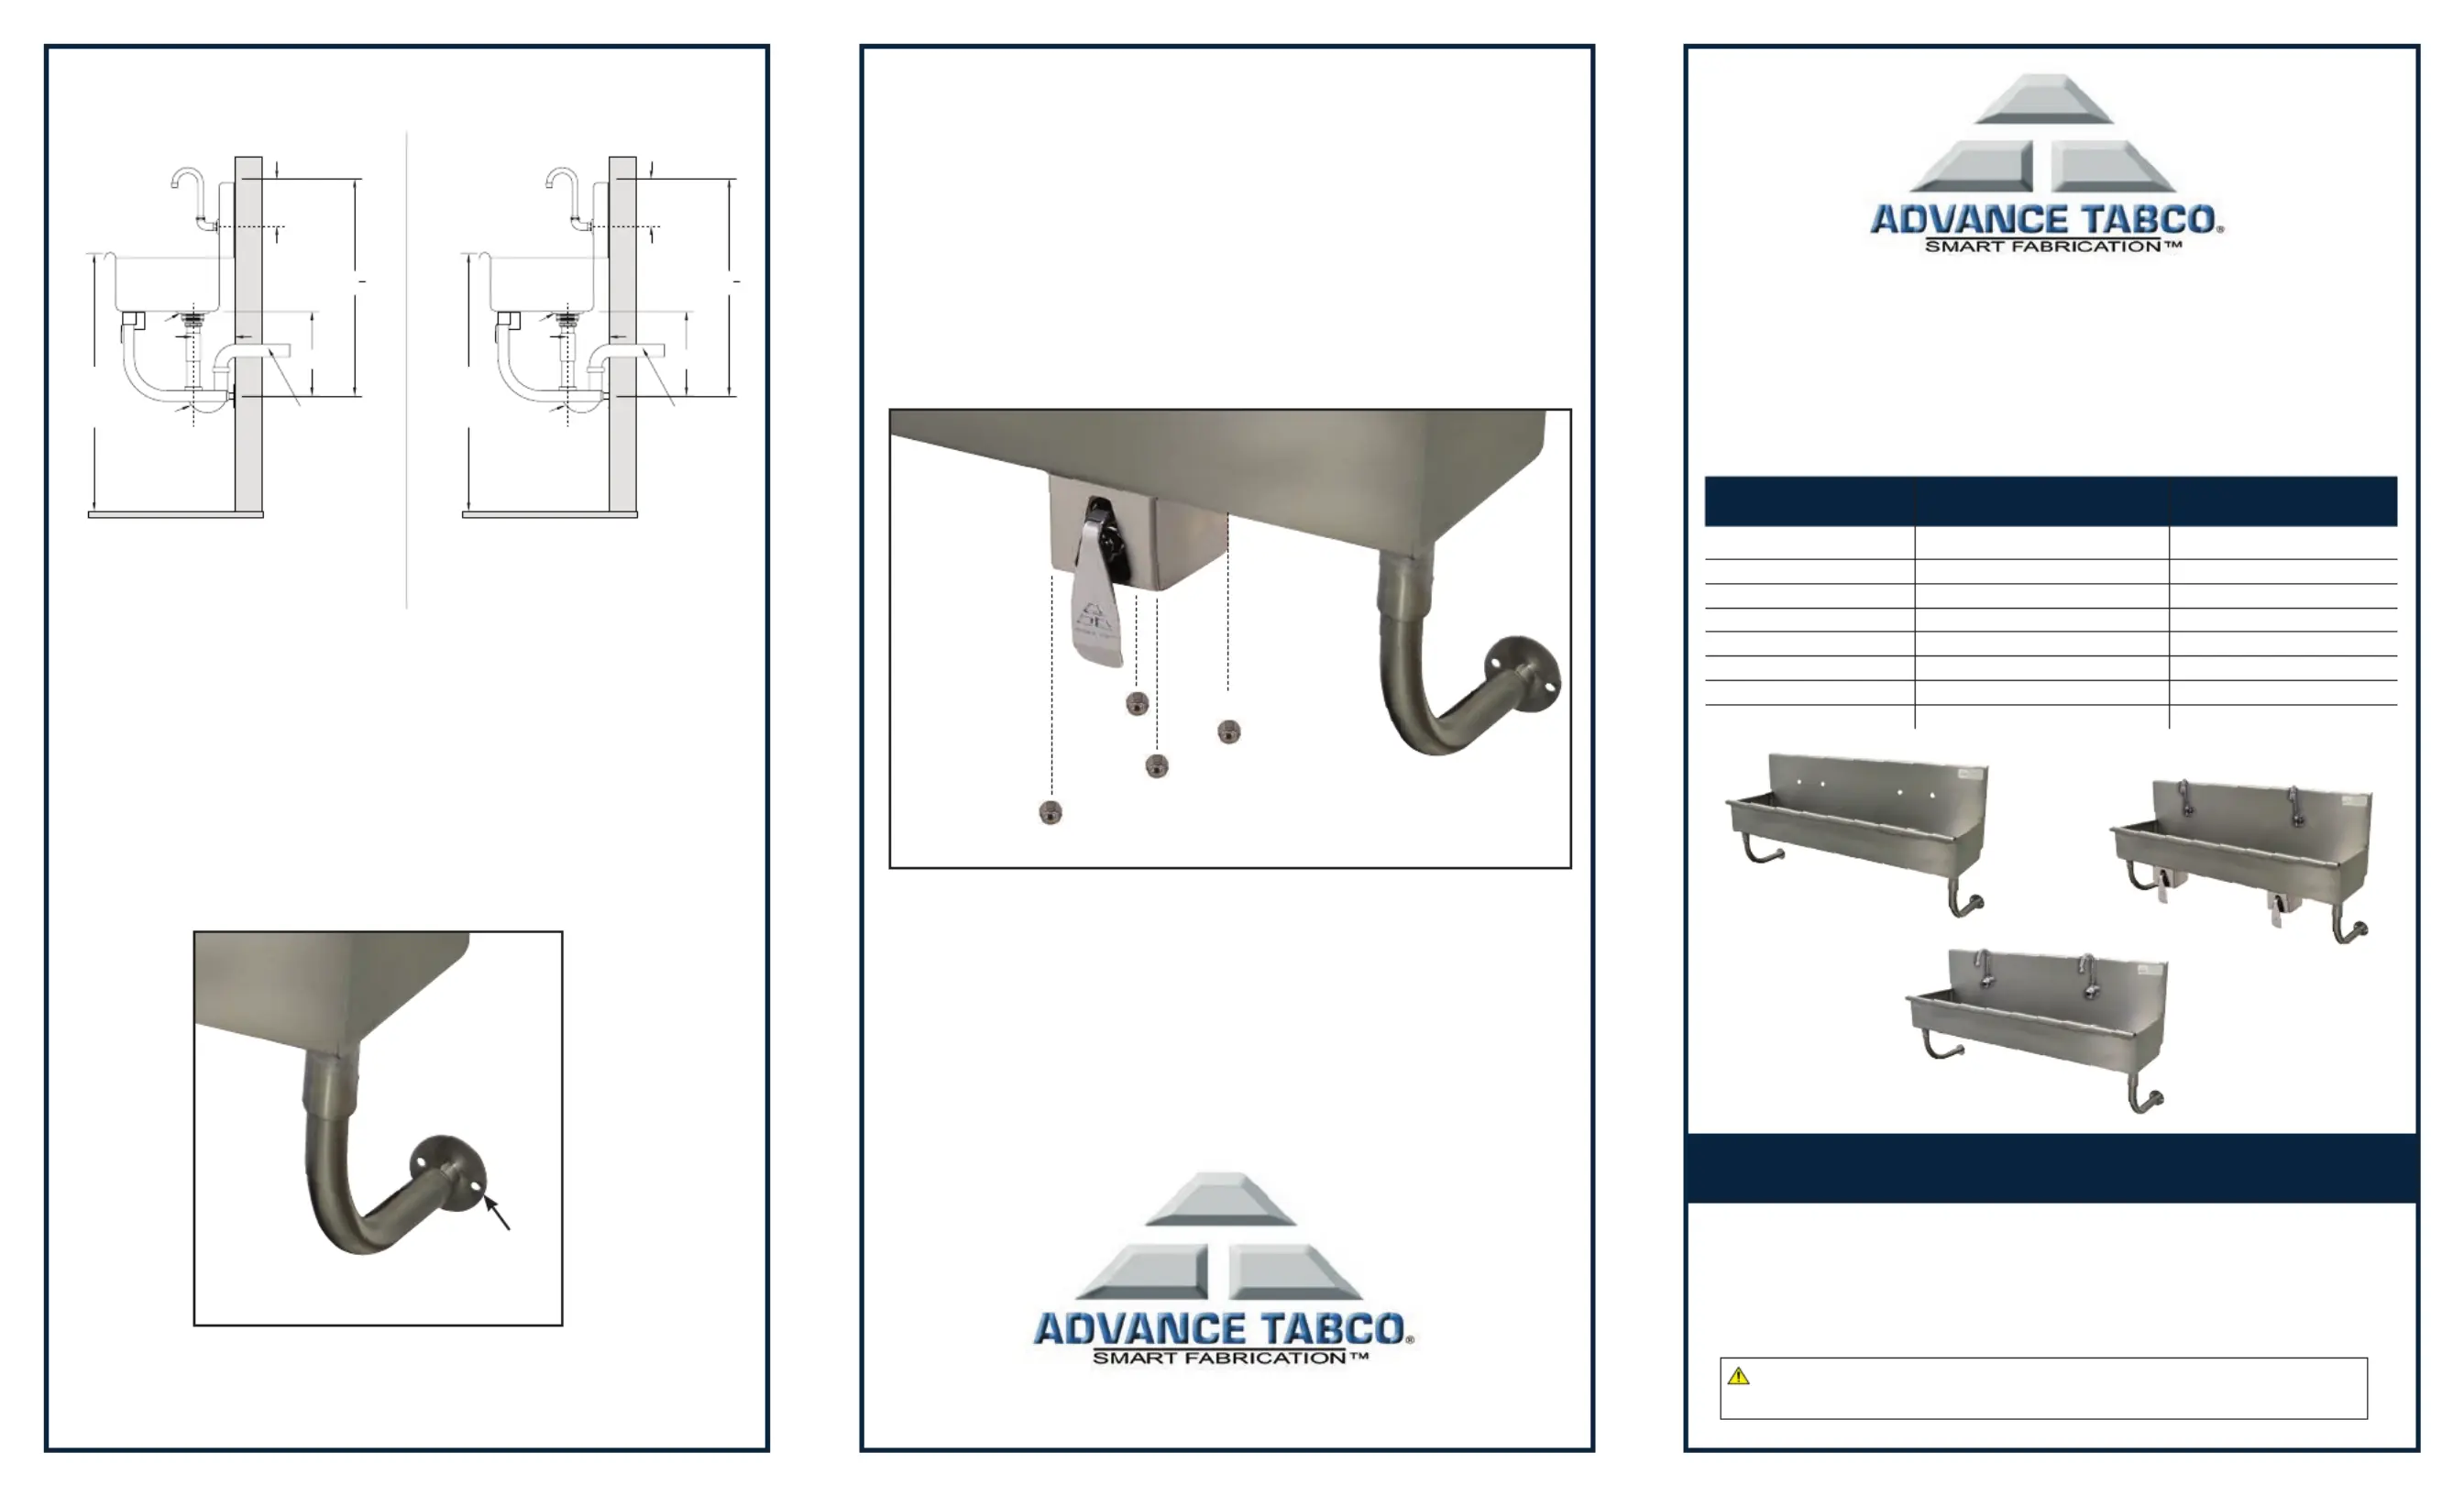
Installation Instructions for
WALL MOUNTED
19-18 SERIES & WSS SERIES SINKS
Suggested Rough-In Plumbing Dimensions
Figure 4
Adjustable
Flange
STEP 5
Adjust the tubular wall support brackets and flanges
to proper alignment. Loosen or tighten each flange
to sit snug against the wall and secure to wall using
screws (Not Included) . Be sure to go (Figure 4)
back and hand tighten the set screws at this time.
P-Trap
Drain
To Waste Line
34”
Suggested
Height
12"
Finished Floor
28
1
2
"
5"
L
C
L
C
L
C
P-Trap
Drain
To Waste Line
34”
Suggested
Height
12"
Finished Floor
25
1
2
"
5"
L
C
L
C
L
C
For Further Assistance
Contact Customer Service at:
800-645-3166
or
MANUAL FAUCET
OPERATED
ELECTRONIC
OPERATED
KNEE
OPERATED
Model #Model #Model #
19-18-1-ADA19-18-1-EFADAN/A
19-18-40/19-18-40-ADA19-18-40EF/19-18-40EFADA19-18-40KV/19-18-40KV
19-18-60/19-18-60-ADA19-18-60EF/19-18-60EFADA19-18-60KV/19-18-60KV
19-18-80/19-18-80-ADA19-18-80EF/19-18-80EFADA19-18-80KV/19-18-80KV
19-18-100/19-18-100-ADA19-18-100EF/19-18-100EFADA19-18-100KV/19-18-100KV
19-18-120/19-18-120-ADA19-18-120EF/19-18-120EFADA19-18-120KV/19-18-120KV
WSS-14-21/WSS-16-25WSS-14-21EF/WSS-16-25EFWSS-14-21KV/WSS-16-25KV
Electronic Operated
Knee Operated
INSTALLING KNEE VALVES FOR KV SERIES
Knee Valves can be installed before or after sink is
mounted to the wall. Attach each Knee Valve onto the
sink by fitting into existing stud welded screws found
underneath the unit.
Use supplied nuts to secure valve(s) to sink. Tighten with
7/16”open end wrench (Figure 5).
Connect supply lines to knee valve(s) and supply line(s)
from knee Valve(s) to Faucet(s). Connect drain(s).
Figure 5
4 Nuts
Per Valve
Manual Operated
(Faucet Not Included)
WARNING: Equipment that includes a faucet may expose you to chemicals, including lead, that are known to the
State of California to cause cancer or birth defects or other productive harm. For more Info.,visit www.p65warnings.ca.gov.re
Manual, Electronic
& Knee Valve Units
A.D.A. Units
Product specificaties
| Merk: | Advance Tabco |
| Categorie: | Spoelbak |
| Model: | 19-18-120-ADA-F |
Heb je hulp nodig?
Als je hulp nodig hebt met Advance Tabco 19-18-120-ADA-F stel dan hieronder een vraag en andere gebruikers zullen je antwoorden
Handleiding Spoelbak Advance Tabco

14 September 2025
14 September 2025
13 September 2025
13 September 2025
13 September 2025
12 September 2025
12 September 2025
12 September 2025
12 September 2025
12 September 2025
Handleiding Spoelbak
Nieuwste handleidingen voor Spoelbak
17 Juli 2026
16 Juli 2026
14 Juli 2026
14 Juli 2026
13 Juli 2026
13 Juli 2026
16 Juni 2026
16 Juni 2026
16 Juni 2026
16 Juni 2026