Whirlpool AKZ9S 8260 FB Handleiding
Bekijk gratis de handleiding van Whirlpool AKZ9S 8260 FB (238 pagina’s), behorend tot de categorie Oven. Deze gids werd als nuttig beoordeeld door 3 mensen en kreeg gemiddeld 4.4 sterren uit 2 reviews. Heb je een vraag over Whirlpool AKZ9S 8260 FB of wil je andere gebruikers van dit product iets vragen? Stel een vraag
Pagina 1/238
EN
Owner’s manual
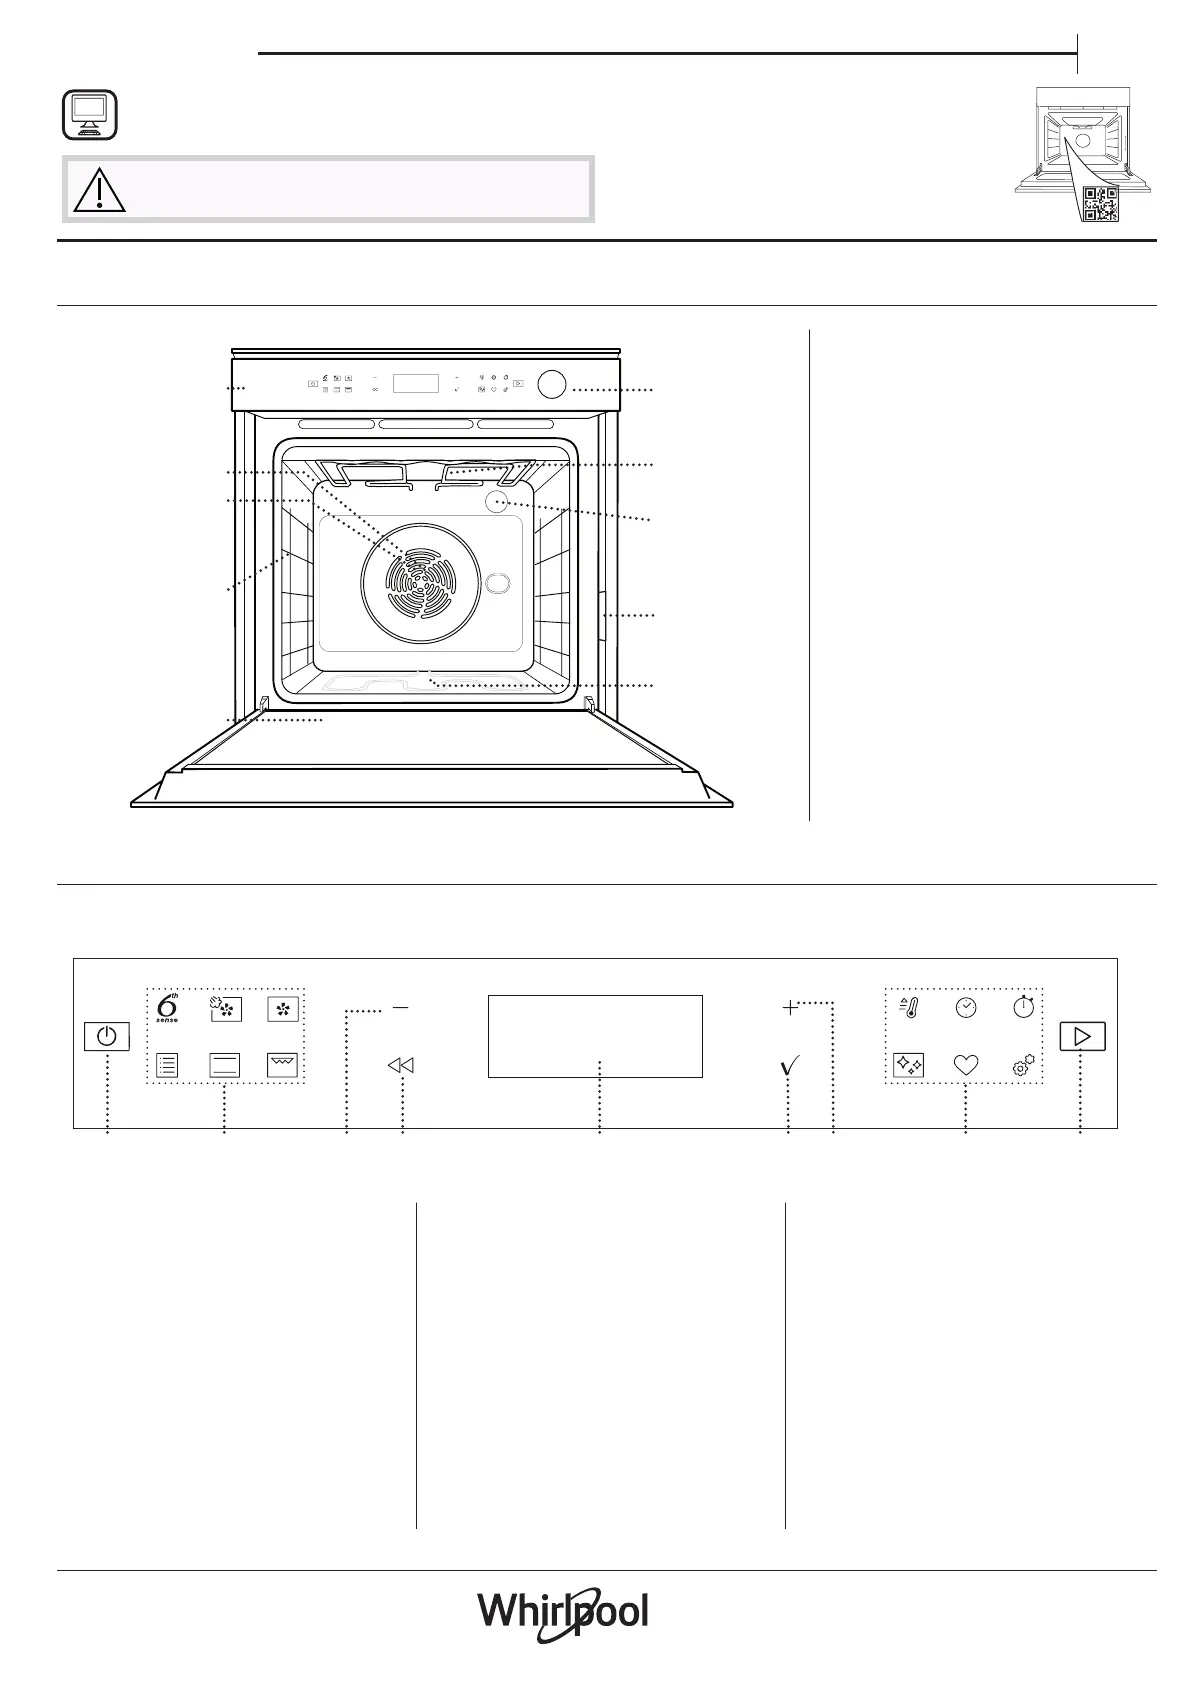
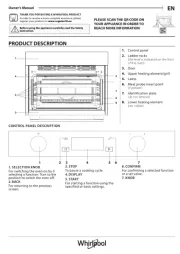
PRODUCT DESCRIPTION
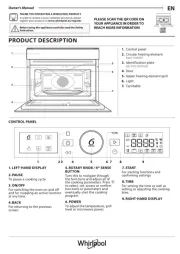
CONTROL PANEL DESCRIPTION
1. Control panel
2. Fan
3. Circular heating element
(not visible)
4. Shelf guides
(the level is indicated on the
front of the oven)
5. Door
6. Water drawer
7. Upper heating element/grill
8. Lamp
9. Identification plate
(do not remove)
10. Lower heating element
(not visible)
1. ON / OFF
For switching the oven on and off
and for stopping an active function,
a long press is needed.
2. FUNCTIONS DIRECT ACCESS
For quick access to the functions
and menu.
3. NAVIGATION BUTTON MINUS
For scrolling through a menu and
decrease the settings or values of a
function.
4. BACK
For returning to the previous screen.
During cooking allows to change
settings.
5. DISPLAY
6. CONFIRM
For confirming a selected function
or a set value.
7. NAVIGATION BUTTON PLUS
For scrolling through a menu and
increasing the settings or values of a
function.
8. OPTIONS / FUNCTIONS DIRECT
ACCESS
For quick access to the functions,
duration, settings and favorites.
9. START
For starting a function using the
specified or basic settings.
5
4
3
2
1
5
4
3
2
1
1
2
3
4
8
9
10
5
7
6
1
2
3 4 5 76 8 9
THANK YOU FOR BUYING A WHIRLPOOL PRODUCT
In order to receive a more complete assistance, please
register your product on www. whirlpool.eu/register
PLEASE SCAN THE QR CODE ON
YOUR APPLIANCE IN ORDER TO
REACH MORE INFORMATION
Before using the appliance carefully read the Safety
Instruction.
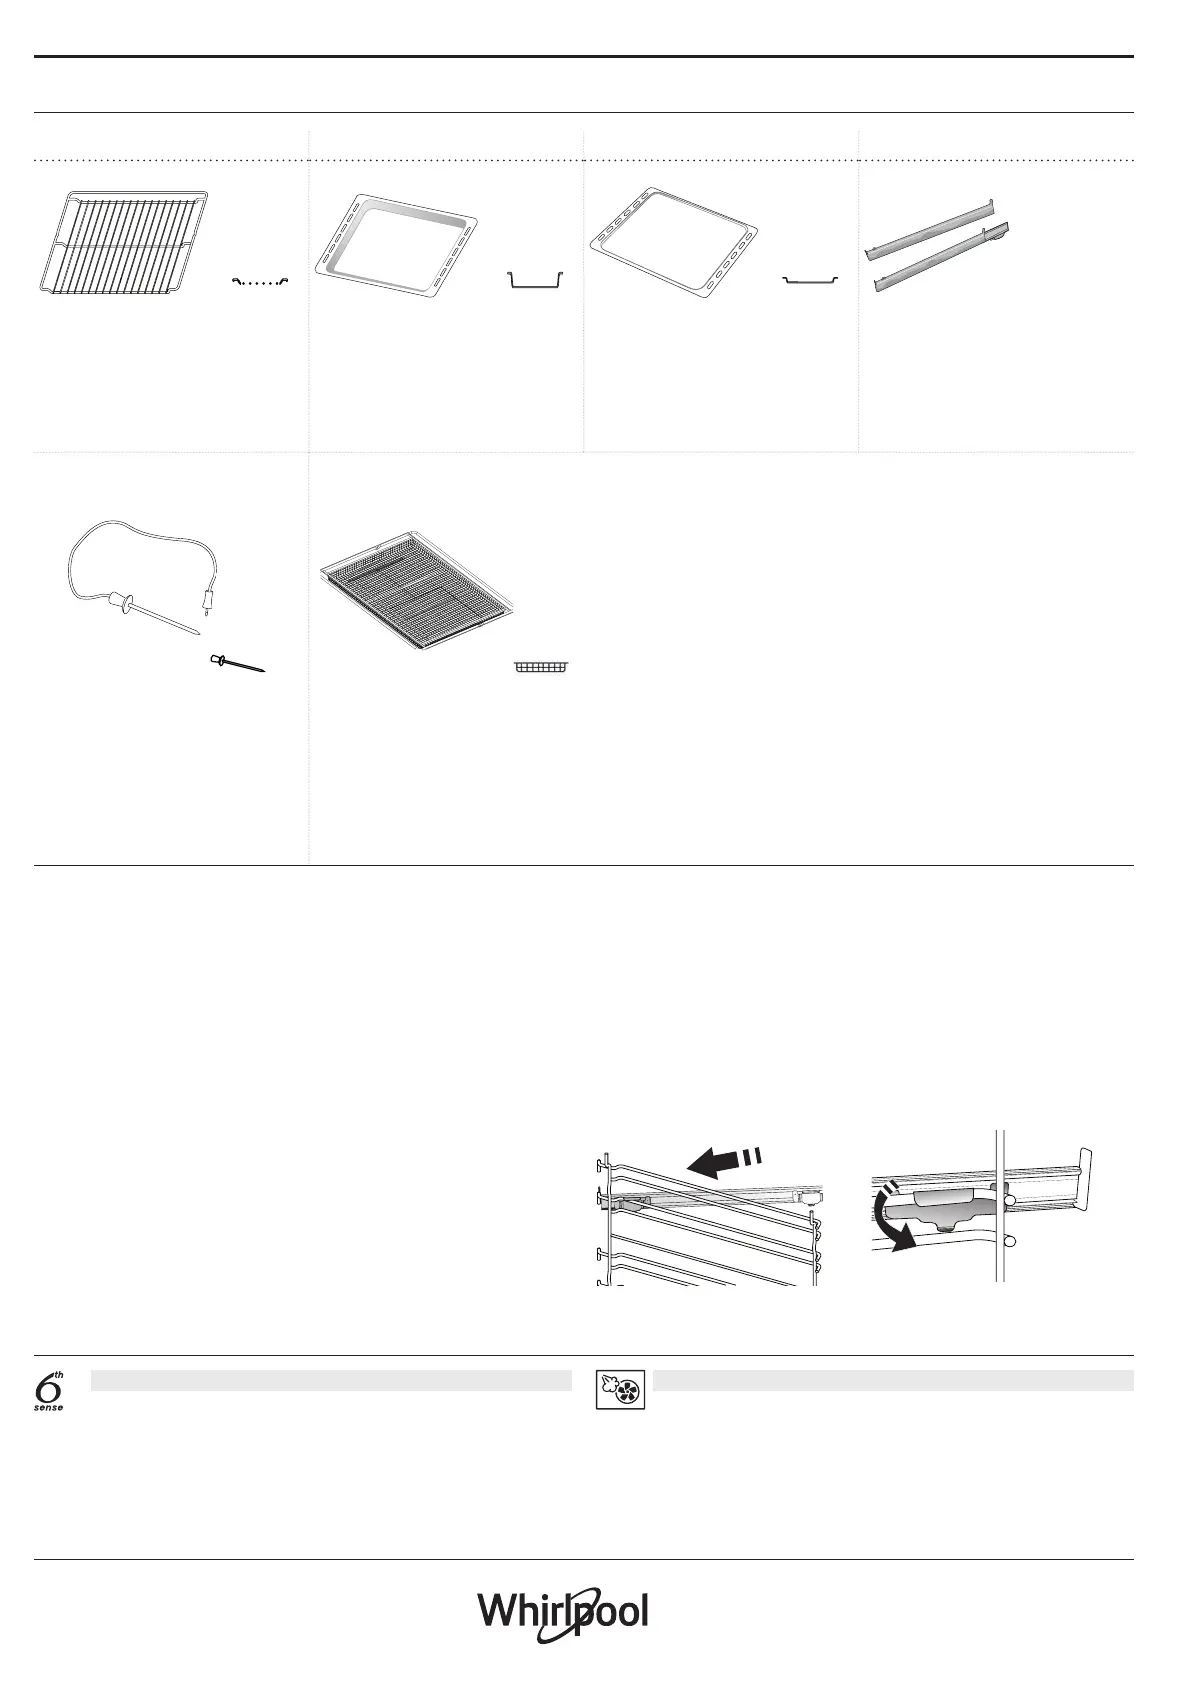
ACCESSORIES
WIRE SHELF DRIP TRAY BAKING TRAY SLIDING RUNNERS *
Use to cook food or as a
support for pans, cake tins
and other ovenproof items of
cookware.
Use as an oven tray for
cooking meat, sh,
vegetables, focaccia, etc. or
position underneath the wire
shelf to collect cooking juices.
Use for cooking all bread and
pastry products, but also for
roasts, sh en papillotte, etc.
To facilitate inserting or
removing accessories.
MEAT PROBE* AIR FRY TRAY *
* Available only on certain models
The number and the type of accessories may vary
depending on which model is purchased.
Other accessories can be purchased separately; for orders
and information contact the after sales service or
www.whirlpool.eu.
To be used when cooking
foods with Air Fry function,
with a baking tray positioned
at a lower level to collect
possible crumbs and drip. It
can be cleaned in the
dishwasher.
INSERTING THE WIRE SHELF AND OTHER
ACCESSORIES
Insert the wire shelf horizontally by sliding it across the
shelf guides, making sure that the side with the raised
edge is facing upwards. Other accessories, such as the
drip tray and the baking tray, are inserted horizontally
in the same way as the wire shelf.
REMOVING AND REFITTING THE SHELF GUIDES
. To remove the shelf guides, lift the guides up and then
gently pull the lower part out of its seating: The shelf
guides can now be removed.
. To refit the shelf guides, first fit them back into their
upper seating. Keeping them held up, slide them
into the cooking compartment, then lower them into
position in the lower seating.
FITTING THE SLIDING RUNNERS (IF PRESENT)
Remove the shelf guides from the oven and remove the
protective plastic from the sliding runners.
Fasten the upper clip of the runner to the shelf guide
and slide it along as far as it will go. Lower the other
clip into position. To secure the guide, press the lower
portion of the clip firmly against the shelf guide. Make
sure that the runners can move freely. Repeat these
steps on the other shelf guide on the same level.
Please note: The sliding runners can be tted on any level.
FUNCTIONS
6
th
SENSE
These allow a fully automatic cooking for all
types of food (Lasagna, Meat, Fish, Vegetables, Cakes &
Pastries, Salty cakes, Bread, Pizza).
To get the best from this function, follow the indications
on the relative cooking table.
FORCED AIR + STEAM
Combining the properties of steam with those of the
forced air, this function allows you to cook dishes pleasantly
crispy and browned outside, but at the same time tender
and succulent inside. To achieve the best cooking results,
we recommend to select STEAM 1 level for bread and
desserts, and STEAM 2 for meat, sh and vegetables.
Product specificaties
| Merk: | Whirlpool |
| Categorie: | Oven |
| Model: | AKZ9S 8260 FB |
Heb je hulp nodig?
Als je hulp nodig hebt met Whirlpool AKZ9S 8260 FB stel dan hieronder een vraag en andere gebruikers zullen je antwoorden
Handleiding Oven Whirlpool

2 September 2025
19 Augustus 2025
18 Augustus 2025
18 Augustus 2025
18 Augustus 2025

18 Augustus 2025
18 Augustus 2025
18 Augustus 2025

18 Augustus 2025

18 Augustus 2025
Handleiding Oven
- Kluge
- Zoppas
- Bourgini
- Team
- Prima
- Masterpro
- Valberg
- Nutrichef
- Pit Boss
- MPM
- Waring Commercial
- IKEA
- Turbotronic
- Brentwood
- Kaiser
Nieuwste handleidingen voor Oven
21 September 2025
21 September 2025
21 September 2025
21 September 2025
21 September 2025

21 September 2025

21 September 2025
21 September 2025
21 September 2025

21 September 2025