Techno Line WS6620 Handleiding
Techno Line Asztali WS6620
Bekijk gratis de handleiding van Techno Line WS6620 (71 pagina’s), behorend tot de categorie Asztali. Deze gids werd als nuttig beoordeeld door 54 mensen en kreeg gemiddeld 4.7 sterren uit 9 reviews. Heb je een vraag over Techno Line WS6620 of wil je andere gebruikers van dit product iets vragen? Stel een vraag
Pagina 1/71
WS6620 Schreibtisch-Wetterstation
Bedienungsanleitung
Einführung
Diese Schreibtisch-Wetterstation besitzt folgende Funktionen: barometrische
Wettervorhersage, Uhr, Kalender, Außen- und Innentemperatur und
Feuchtigkeitsanzeige. Sie wird mit einer Batterie, bzw. über einen Netzadapter mit Strom
versorgt. Es wird empfohlen, den Netzadapter stets zu verwenden.
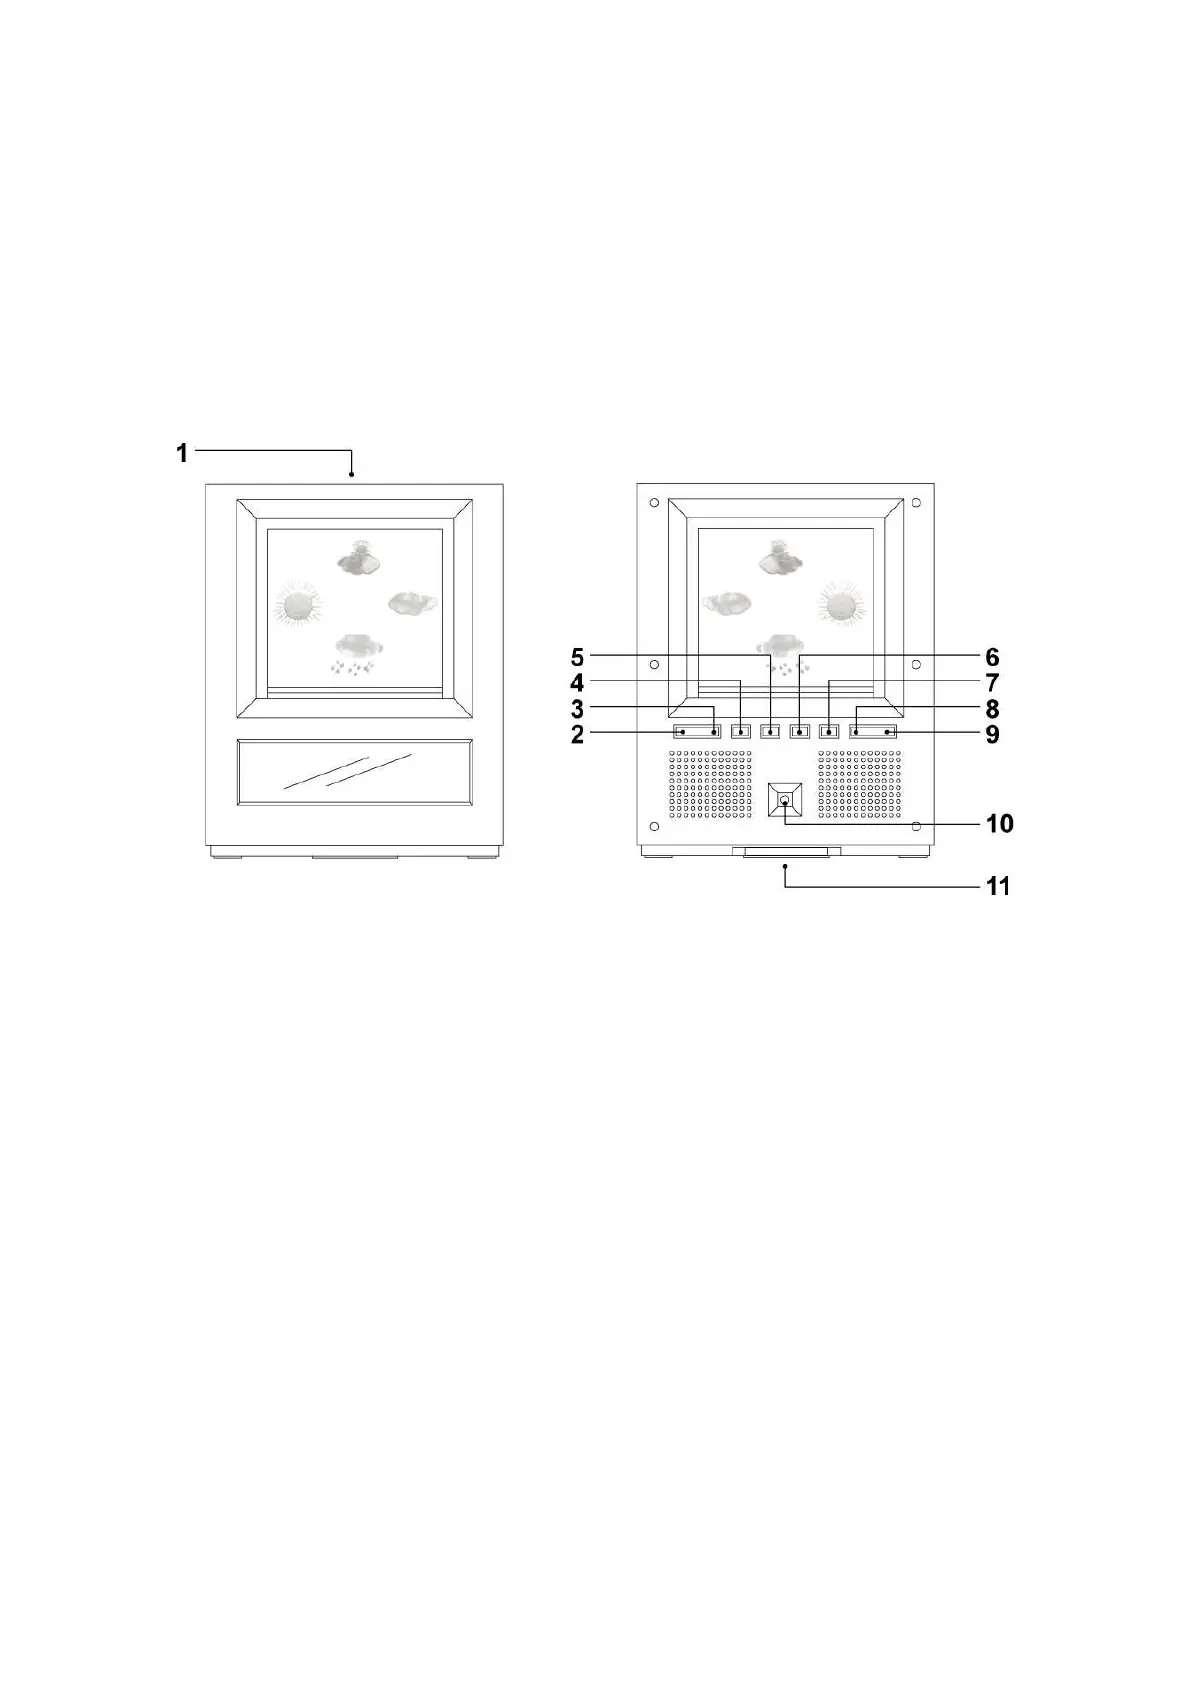
Abbildung 1 Frontansicht Abbildung 2 Rückansicht
1. „SNOOZE/LIGHT“-Taste
2. „MODE“-Taste
3. „SET/AL“-Taste
4. „HISTORY“-Taste
5. „+/C/F“-Taste
6. „-/RCC“-Taste
7. „LIGHT“-Taste
8. „MAX/MIN“-Taste
9. „IN/CH“-Taste
10. DC-Eingangsbuchse
11. Batteriefach
Allgemeine Hinweise:
1. Vor dem Einrichten des Außensensors empfiehlt es sich, die Wetterstation/Uhr
einzustellen. Siehe „Konfigurieren des (der) Außensensors(en)“ für weitere
Informationen. Batterien und Netzadapter sollten gleichzeitig benutzt werden.
2. Bitte beachten Sie, dass alle anderen Uhr/Wetterstationseinstellungen blockiert
sind, wenn die Uhr sich im RCC-Synchronisationsmodus (Funkuhrempfang)
befindet. Für zusätzliche Informationen siehe „RCC-Synchronisierung“.
3.
Bei der Erstinstallation kann der Temperatur- und Feuchtigkeitssensor bis zu eine
Stunde benötigen, um sich zu akklimatisieren.
Product specificaties
| Merk: | Techno Line |
| Categorie: | Asztali |
| Model: | WS6620 |
Heb je hulp nodig?
Als je hulp nodig hebt met Techno Line WS6620 stel dan hieronder een vraag en andere gebruikers zullen je antwoorden
Handleiding Asztali Techno Line

16 Maart 2026
9 Maart 2026
25 November 2025
25 November 2025
3 December 2024
3 December 2024
3 December 2024
3 December 2024
3 December 2024
3 December 2024
Handleiding Asztali
Nieuwste handleidingen voor Asztali
12 Mei 2026
28 April 2026
23 April 2026
20 April 2026
13 Maart 2026
12 Maart 2026
12 Maart 2026
12 Maart 2026
12 Maart 2026
3 Maart 2026