Techno Line WS 7394 Handleiding
Techno Line Asztali WS 7394
Bekijk gratis de handleiding van Techno Line WS 7394 (32 pagina’s), behorend tot de categorie Asztali. Deze gids werd als nuttig beoordeeld door 38 mensen en kreeg gemiddeld 4.1 sterren uit 9 reviews. Heb je een vraag over Techno Line WS 7394 of wil je andere gebruikers van dit product iets vragen? Stel een vraag
Pagina 1/32
1
WETTERSTATION
Betriebsanleitung
EINFÜHRUNG:
Herzlichen Glückwunsch zum Erwerb dieser modernen Wetterstation,
einem Beispiel für hervorragendes Design und feine Handwerkskunst. Die
Station bietet Ihnen funkgesteuerte Zeitanzeige, Anzeige von Datum,
Kalender, Raum- und Außentemperatur, Raumluftfeuchtigkeit sowie eine
Luftdruckstatistik. Das Gerät wird Sie nie wieder über aktuelle oder
kommende Wetterkonditionen im Unklaren lassen. Der Betrieb des
Produkts ist einfach und leicht verständlich. Lesen Sie bitte für besseres
Verständnis der Wetterstation und optimale Ausnutzung aller ihrer
Vorzüge diese Betriebsanleitung trotzdem aufmerksam durch.
MERKMALE:
Die Wetterstation
• Funkgesteuerte DCF77-Zeitanzeige mit manueller Einstelloption
• Zeitempfang EIN/AUS (ON/OFF), vom Benutzer wählbar
• 12-/24-Stunden-Zeitanzeigeformat
• Zeitzone einstellbar (±12 Stunden)
• Anzeige von Wochentag und Tagesdatum (Jahr und Monat nur im
Einstellmodus)
• Wettervorhersage mit Wettertendenzanzeige
• Anzeige der Raumkomfortstufe
• Temperaturanzeige in ºC / ºF
• Raum- und Außentemperaturanzeige mit Speicherung der Minimal-
und Maximalwerte sowie des Zeitpunkts der Speicherung
• Anzeige der Raumluftfeuchtigkeit als RH% (Relative Humidity) mit
Speicherung der Minimal- und Maximalwerte
• Anzeige des Relativen Luftdrucks in hPa / inHg mit einstellbarem
Referenzwert
• Wettersymbol-Empfindlichkeitseinstellung
• Statistik des Relativen Luftdrucks für die letzten 12 Stunden
(Elektronisches Barometer mit Trendanzeige des barometrischen
Drucks)
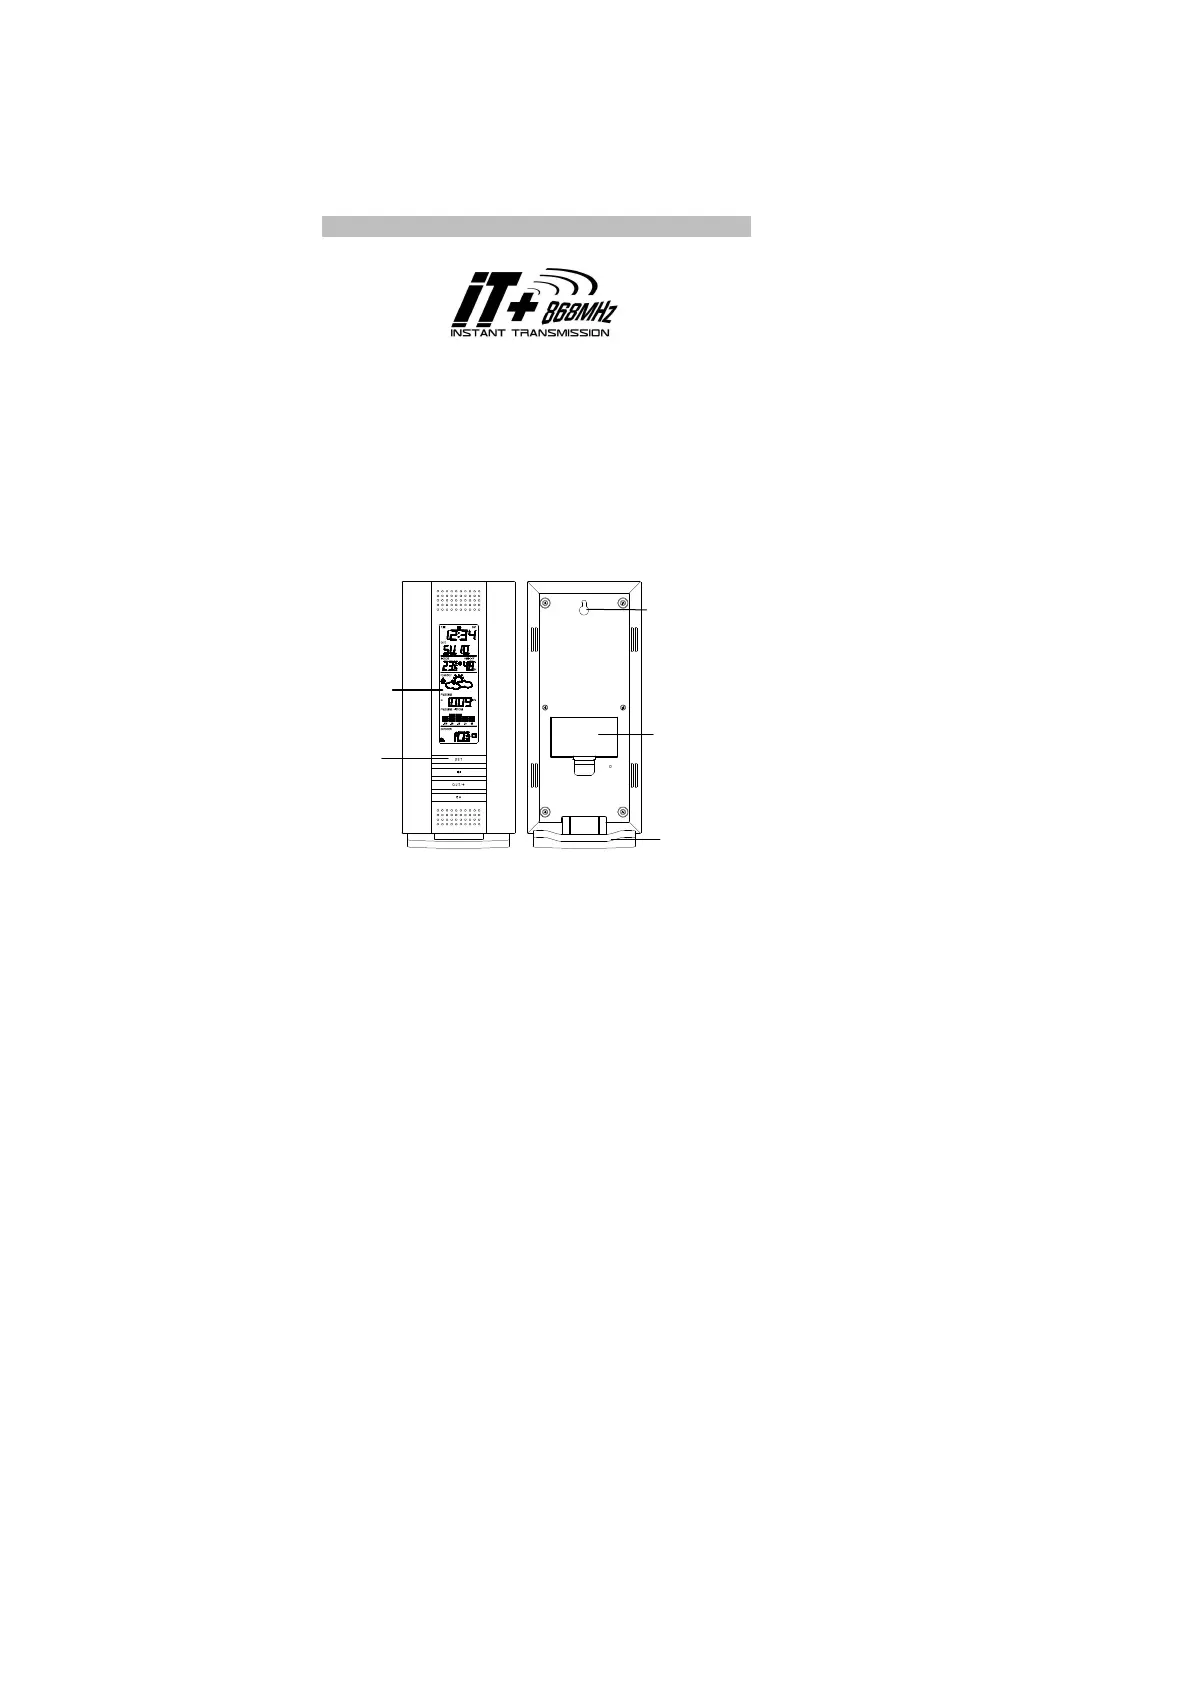
Stände
r
LCD
-
Anzeige
Funktions-
tasten
Batteriefach
Aufhängeöse
Product specificaties
| Merk: | Techno Line |
| Categorie: | Asztali |
| Model: | WS 7394 |
Heb je hulp nodig?
Als je hulp nodig hebt met Techno Line WS 7394 stel dan hieronder een vraag en andere gebruikers zullen je antwoorden
Handleiding Asztali Techno Line

16 Maart 2026
9 Maart 2026
25 November 2025
25 November 2025
3 December 2024
3 December 2024
3 December 2024
3 December 2024
3 December 2024
3 December 2024
Handleiding Asztali
Nieuwste handleidingen voor Asztali
12 Mei 2026
28 April 2026
23 April 2026
20 April 2026
13 Maart 2026
12 Maart 2026
12 Maart 2026
12 Maart 2026
12 Maart 2026
3 Maart 2026