StarTech.com SDOCK1EU3P Handleiding


Lees hieronder de 📖 handleiding in het Nederlandse voor StarTech.com SDOCK1EU3P (2 pagina's) in de categorie Niet gecategoriseerd. Deze handleiding was nuttig voor 10 personen en werd door 2 gebruikers gemiddeld met 4.5 sterren beoordeeld

Pagina 1/2
Quick start guide
DE: Bedienungsanleitung - de.startech.com
FR: Guide de l'utilisateur - fr.startech.com
ES: Guía del usuario - es.startech.com
IT: Guida per l'uso - it.startech.com
NL: Gebruiksaanwijzing - nl.startech.com
PT: Guia do usuário - pt.startech.com
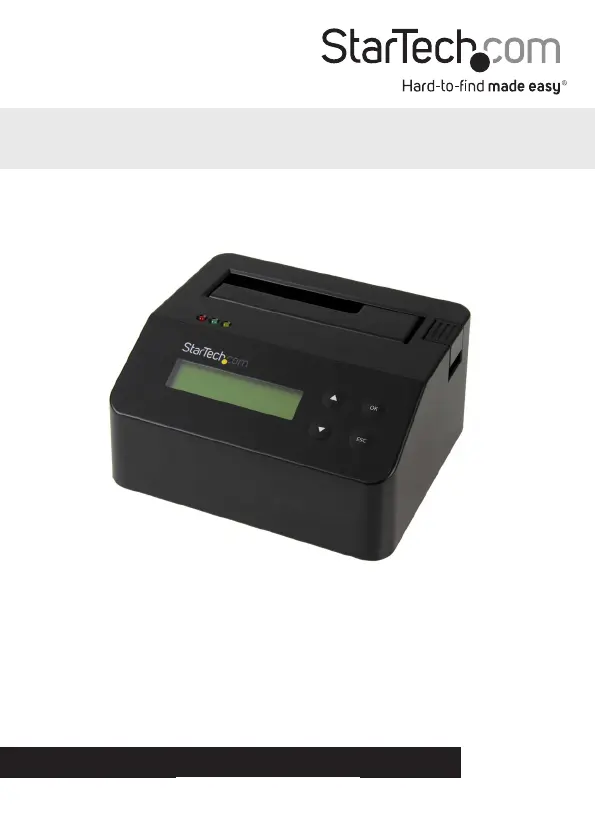
Manual Revision: 06/29/2015
For the latest information, technical specications, and support for
this product, please visit www.startech.com/SDOCK1EU3P.
Packaging contents
1 x hard drive eraser and USB 3.0 dock
1 x USB 3.0 cable
1 x universal power adapter
4 x power adapter plug (NA/EU/UK/AU)
1 x quick start guide
SDOCK1EU3P
Standalone Hard Drive Eraser and USB 3.0 Dock
*actual product may vary from photos
Product diagram
Front view
OK button
ESC button
Menu navigation buttonsLCD display
Error LED
Activity LED
Power and link LED
Eject button
Drive bay
Rear view
RS232 serial-based printer port
USB 3.0 port Power jack
Power
button
About USB 3.0 and USB 3.1 Gen 1
USB 3.0 is also known as USB 3.1 Gen 1. This connectivity standard
oers speeds up to 5 Gbps.
About available erase modes
SDOCK1EU3P features the following nine erase modes:
Erase option Description of the process
Quick Erase The partition table is quickly erased.
1-Pass Erase A full disk overwrite (all zeroes)
is completed.
3-Pass (DoD 5220.22-M) A multi-pass overwrite based on
DOD 5220.22-M specications
is performed.
3-Pass (CSEC ITSG-06) A multi-pass overwrite based on
CSEC ITSG-06 specications
is completed.
3-Pass (HMG Enhanced IS 5) A multi-pass overwrite based on
HMG Enhanced IS5 specications
is completed.
7-Pass (VSITR) A multi-pass overwrite based on
VSITR Specications is completed.
Custom Erase The user species the number of
passes and the pattern used.
Secure Erase The HDD/SSD ATA drive’s internal
Secure Erase command is executed.
Enhanced Secure Erase The HDD/SSD ATA drive’s internal
Enhanced Secure Erase command
is executed.
Erase a drive
1. Plug one end of the universal power adapter into the power jack
on the back of the eraser and the other end into a power source.
2. Use the button on the back of the eraser to turn it on.Power
3. Place the drive that you want to erase in the drive bay. Make sure
to push down on the drive to make sure that it’s secure in the
eraser.
4. To select an erase mode, use the buttons on Menu navigation
the front of the eraser to move up and down in the Erase mode
menu.
5. Press the button.OK
Warning! OK After you press the button, don’t remove the drive
from the eraser until it has nished erasing. Removing the drive
before the erase is complete may result in damage to the drive.
6. When the drive is erased, the LCD display will indicate that the
process is complete. If a serial printer is connected to the eraser, a
receipt will be printed.
7. To remove the drive, press the button.Eject
FCC Compliance Statement
This equipment has been tested and found to comply with the limits for a Class B digital device, pursuant to part 15 of the FCC Rules. These limits are designed to provide reasonable protection against
harmful interference in a residential installation. This equipment generates, uses and can radiate radio frequency energy and, if not installed and used in accordance with the instructions, may cause
harmful interference to radio communications. However, there is no guarantee that interference will not occur in a particular installation. If this equipment does cause harmful interference to radio or
television reception, which can be determined by turning the equipment o and on, the user is encouraged to try to correct the interference by one or more of the following measures:
Reorient or relocate the receiving antenna.
Increase the separation between the equipment and receiver.
Connect the equipment into an outlet on a circuit dierent from that to which the receiver is connected.
Consult the dealer or an experienced radio/TV technician for help
This device complies with part 15 of the FCC Rules. Operation is subject to the following two conditions: (1) This device may not cause harmful interference, and (2) this device must accept any
interference received, including interference that may cause undesired operation. Changes or modications not expressly approved by StarTech.com could void the user’s authority to operate the
equipment.
Industry Canada Statement
This Class B digital apparatus complies with Canadian ICES-003.
Cet appareil numérique de la classe [B] est conforme à la norme NMB-003 du Canada.
CAN ICES-3 (B)/NMB-3(B)
Use of Trademarks, Registered Trademarks, and other Protected Names and Symbols
This manual may make reference to trademarks, registered trademarks, and other protected names and/or symbols of third-party companies not related in any way to
StarTech.com. Where they occur these references are for illustrative purposes only and do not represent an endorsement of a product or service by StarTech.com, or an endorsement of the product(s)
to which this manual applies by the third-party company in question. Regardless of any direct acknowledgement elsewhere in the body of this document, StarTech.com hereby acknowledges that all
trademarks, registered trademarks, service marks, and other protected names and/or symbols contained in this manual and related documents are the property of their respective holders.
Technical Support
StarTech.coms lifetime technical support is an integral part of our commitment to provide industry-leading solutions. If you ever need help with your product, visit www.startech.com/support and
access our comprehensive selection of online tools, documentation, and downloads.
For the latest drivers/software, please visit www.startech.com/downloads
Warranty Information
This product is backed by a two-year warranty.
StarTech.com warrants its products against defects in materials and workmanship for the periods noted, following the initial date of purchase. During this period, the products may be returned for
repair, or replacement with equivalent products at our discretion. The warranty covers parts and labor costs only. StarTech.com does not warrant its products from defects or damages arising from
misuse, abuse, alteration, or normal wear and tear.
Limitation of Liability
In no event shall the liability of StarTech.com Ltd. and StarTech.com USA LLP (or their ocers, directors, employees or agents) for any damages (whether direct or indirect, special, punitive, incidental,
consequential, or otherwise), loss of prots, loss of business, or any pecuniary loss, arising out of or related to the use of the product exceed the actual price paid for the product. Some states do not
allow the exclusion or limitation of incidental or consequential damages. If such laws apply, the limitations or exclusions contained in this statement may not apply to you.
Print a receipt
You can use SDOCK1EU3P with a serial printer to print an erase
record with details of the process, including the date and time that
the drive was erased, the erase mode used, and more. The receipt
also includes an area for a signature.
Note: The RS232 serial-based printer port uses 9600 baud.
1. Use the RS232 serial-based printer port to connect a serial printer
to the eraser.
2. Congure the connected serial printer to work on 9600 baud.
Consult the documentation that came with the serial printer for
more information about how to congure it.
When a process is complete, a receipt automatically prints on the
connected serial printer.
Connect the eraser to your computer
1. Connect a USB 3.0 cable between your computer and the USB 3.0
port on the back of the eraser.
2. Use the button on the back of the eraser to turn it on.Power
3. To select an erase mode, use the buttons on Menu navigation
the front of the eraser to move up and down in the Erase mode
menu.
4. Select the option, and press the button.Link to PC OK
5. When Are you sure? appears on the LCD display, press the
OK button.
To disconnect the eraser from your computer, press the button. ESC
When Are you sure? appears on the LCD display, press the OK
button.
About the LED indicators
SDOCK1EU3P comes with three LEDs that are located on the top of
the unit. See the tables below for more information about what the
LED behaviors signify.
Red error LED
LED behavior Signies
Red LED is illuminated An error is occurring.
For more information about the
error that is occurring, consult the
LCD display and use the Menu
navigation buttons to navigate.
Green activity LED
LED behavior Signies
Green LED is slowly blinking The erase request is being
processed.
Green LED is rapidly blinking The drive is being erased.
Yellow power and link LED
LED behavior Signies
Yellow LED is briey
illuminated
The dock was turned on.
Yellow LED is illuminated The drive is being erased. When the
process is complete, the yellow LED
will no longer be illuminated.


Product specificaties

Merk: StarTech.com
Categorie: Niet gecategoriseerd
Model: SDOCK1EU3P
Kleur van het product: Zwart
Gewicht: 656 g
Breedte: 123 mm
Diepte: 140 mm
Hoogte: 70 mm
Gewicht verpakking: 2000 g
Breedte verpakking: 189 mm
Diepte verpakking: 376 mm
Hoogte verpakking: 91 mm
Materiaal behuizing: Kunststof
Vermogen: 60 W
Stroom: 1.4 A
Stroomuitvoer (volt): 12
Meegeleverde kabels: USB
Snelstartgids: Ja
Inclusief AC-adapter: Ja
Certificering: CE, FCC, TAA, REACH
Temperatuur bij opslag: -10 - 65 °C
Output current: 5 A
SSD interfaces: IDE, M.2
Hostinterface: USB 2.0 Type B
HDD interface: Serial ATA, Serial ATA II
Seriële poort(en): 1
(Buitenste) hoofdverpakking hoogte: 306 mm
(Buitenste) hoofdverpakking breedte: 396 mm
(Buitenste) hoofdverpakking lengte: 469 mm
Hoeveelheid per (buitenste) hoofdverpakking: 7 stuk(s)
AC-ingangsspanning: 100 - 240 V
Bedrijfstemperatuur (T-T): 0 - 40 °C
Relatieve vochtigheid in bedrijf (V-V): 10 - 90 procent
Inbegrepen soorten voedingsstekkers: AU, EU, NA, UK
Dockingstation ondersteund HDD-formaat: 2.5, 3.5 "
Snel wissen: Ja

Heb je hulp nodig?

Als je hulp nodig hebt met StarTech.com SDOCK1EU3P stel dan hieronder een vraag en andere gebruikers zullen je antwoorden


Handleiding Niet gecategoriseerd StarTech.com

Handleiding Niet gecategoriseerd

Nieuwste handleidingen voor Niet gecategoriseerd