Smeg SOU330X1 Handleiding
Bekijk gratis de handleiding van Smeg SOU330X1 (9 pagina’s), behorend tot de categorie Oven. Deze gids werd als nuttig beoordeeld door 59 mensen en kreeg gemiddeld 4.4 sterren uit 30 reviews. Heb je een vraag over Smeg SOU330X1 of wil je andere gebruikers van dit product iets vragen? Stel een vraag
Pagina 1/9

INSTALLATION INSTRUCTIONS
INSTRUCTIONS POUR L’INSTALLATION
INSTRUCCIONES DE MONTAJE
BUILT-IN OVEN
FOUR ENCASTRABLE
HORNO EMPOTRADO

ENGLISH 1 - 6
THANK YOU FOR YOUR TRUST AND FOR BUYING THIS APPLIANCE.
PLEASE READ THIS MANUAL CAREFULLY. IT CONTAINS ALL NECESSARY INSTRUCTIONS TO CONVERT
THE GAS SUPPLY OF THIS PRODUCT.
FRANÇAIS 7 - 12
NOUS VOUS REMERCIONS DE VOTRE CONFIANCE ET DE L’ACHAT DE CET APPAREIL.
S’IL VOUS PLAÎT, LISEZ CE MANUEL ATTENTIVEMENT. IL CONTIENT TOUTES LES INSTRUCTIONS
NECESSAIRES POUR CONVERTIR L'ALIMENTATION EN GAZ DE CE PRODUIT.
ESPAÑOL 8 - 18
GRACIAS POR LA CONFIANZA QUE HA DEPOSITADO EN NOSOTROS CON LA COMPRA DE ESTE
APARATO.
LEA ESTE MANUAL ATENTAMENTE. CONTIENE LAS INSTRUCCIONES NECESARIAS PARA LA
CONVERSIÓN DEL SUMINISTRO DE GAS DE ESTE PRODUCTO.
IMPORTANT:
Save for the local electric inspector's
use
Installer: Leave installation instructions
with the homeowner
Homeowner: Keep installation
instructions for future reference.
IMPORTANT :
Conserver pour l’inspecteur en
électricité
Installateur : Laisser les instructions
pour l’installation au propriétaire
Propriétaire : Garder les instructions
pour l’installation pour référence future.
IMPORTANTE:
Guardar estas instrucciones para uso
del inspector local de electricidad
Instalador: Dejar las instrucciones de
montaje al propietario de la casa
Propietario de la casa: Guardar las
instrucciones de montaje para futura
referencia.
Write down the model and serial
numbers before installing the
range.
Both numbers are found on the
model/serial ID plate, located on
the oven door frame.
Notez le numéro de modèle et le
numéro de série avant d'installer
la cuisinière.
Les deux numéros se trouvent
sur la fiche signalétique du
modèle et du numéro de série,
située sur le cadre de la porte du
four.
Anote el número de modelo y de
serie antes de instalar la cocina.
Ambos números aparecen en la
placa de identificación del
modelo/serie, ubicada en el
marco de la puerta del horno.
Model # _______________________
Serial # _______________________
No Modèle ____________________
No Série _____________________
Modelo # ______________________
Nº de serie # ___________________

OVEN INSTALLATION MANUAL
ENGLISH
1
TABLE OF CONTENTS page page page
1 noitcudortnI Installation notes 2 Connecting to 120/208V circuit 5
Tools you will need 1 Wall or under counter installation, single oven 3 Electrical connections 6
Power requirements 1 Wall installation double oven 3 3-wire branch circuit 6
Choosing oven location tiucric hcnarb eriw-4 4 noitallatsni hsulF 1 6
Steps for installation 1 Electrical supply 5 Final check list 6
Technical data 2 Wiring requirement 5
WARNING
If the information in this manual is not followed exactly,
a re or explosion may result causing property damage,
personal injury or death.
INTRODUCTION
Please read these instructions COMPLETELY AND
CAREFULLY . They will save you time and eort and help to
ensure optimum oven performance.
Be sure to observe all WARNINGS. These installation
instructions are intended for use by a qualied installer.
In addition to these instructions, the oven shall be installed:
In the United States, in accordance with the National
Electric Code/State and Municipal codes and/or local
codes.
In Canada, in accordance wi th Canadian Electric
Code C22.1-latest edition/Pro vincial and Municipal
codes and/ or local codes.
These shall be carefully followed at all times.
NOTE: IF INSTALLING YOUR OVEN IN
CANADA PLEASE CHECK TO MAKE
SURE THAT YOU HAVE A MODEL
WITH THE US AND CANADIAN LISTING
MARK, AS SHOWN ABOVE:
Mark as shown above means the oven complies with both
US and CANADIAN Standards.
TOOLS YOU WILL NEED
The following tools are needed to install your new oven:
Tape measure and straightedge or ruler
Pencil
Phillips screwdriver
Level
Wire cutters and wire stripper
Hand or saber saw
1” (2,5cm) Hole saw
Drill and drill bit
Safety gloves and goggles
Volt meter (0-250VAC)
PACKAGING
Remove all tape and packaging before using the oven.
Destroy the packaging after unpacking the oven following
the rules in force in your town. Never allow children to play
with packaging material.
POWER REQUIREMENTS
The oven must be supplied with the proper voltage and
frequency. The oven is manufactured to be connected to a
three-wire or four-wire, single phase, 120/240 Volt, 60 Hz AC
electrical supply on a sepa rate circuit fused on both sides of
the line. If a 208 Volt circuit must be used, see Connecting to 120/
120/208 Volt Circuit, in this manual. A circuit breaker or time delay
fuse, sized not to exceed the circuit rating of the appliance
specied on the rating plate located on the frame behind the
door of the oven is recommended (see gure at page 5).
It is recommended that you have the electrical wiring and
hook-up of your oven performed by a qualied electrician.
After installation is complete have the electrician show you
where the main disconnect is and which of the circuit
breakers/fuses are for the oven.
CHOOSING OVEN LOCATION
Carefully select the location where the oven will be placed.
The oven should be located for convenient use in the
kitchen, but away from strong drafts.
Strong drafts may be caused by open doors or windows, or by
heating and/or air conditioning vents or fans. Make sure that
electrical power can be provided to the location selected.
STEPS FOR INSTALLATION
The following pages provide the necessary information for
proper installation of the oven and are arranged as follows:
Technical Data
Installation Cutout Dimensions, Required Clearances and
Mounting instructions for:
- Under counter Installation, Single Oven
- Wall Installation, Single Oven
- Wall Installation, Double Oven
Electrical Supply and Wiring Requirements, Programming
required if connecting to 208 Volt Circuit. Electrical 120/
Connections for 3-wire or 4-wire Branch Circuit.
Final Checklist
The oven must be supplied with copper or alumimum wires.
If aluminum wire is provided to connect oven to branch
circuit, UL listed connectors for joining copper and aluminum
must be used. Follow instructions provided with connectors.
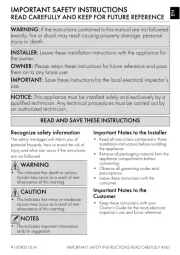
IMPORTANT: Save these instructions for the local electrical inspector use.
INSTALLER: Please leave this manual with owner for future reference.
OWNER: Please keep this manual for future reference.
Product specificaties
| Merk: | Smeg |
| Categorie: | Oven |
| Model: | SOU330X1 |
Heb je hulp nodig?
Als je hulp nodig hebt met Smeg SOU330X1 stel dan hieronder een vraag en andere gebruikers zullen je antwoorden
Handleiding Oven Smeg

30 Augustus 2025

30 Augustus 2025
11 Augustus 2025

17 Juni 2025
16 Juni 2025
16 Juni 2025

15 Juni 2025
15 Juni 2025
15 Juni 2025

15 Juni 2025
Handleiding Oven
- Silver Style
- Godrej
- Kaiser
- Saturn
- Termozeta
- Saba
- Barbecook
- Eurotech
- Black And Decker
- Thermex
- Porter & Charles
- BlueStar
- Cres Cor
- Optimum
- Weber
Nieuwste handleidingen voor Oven
17 September 2025
17 September 2025

15 September 2025
15 September 2025

15 September 2025
15 September 2025
15 September 2025
15 September 2025
13 September 2025
13 September 2025