Skandika Esbjerg Travel Handleiding
Bekijk gratis de handleiding van Skandika Esbjerg Travel (8 pagina’s), behorend tot de categorie Tent. Deze gids werd als nuttig beoordeeld door 129 mensen en kreeg gemiddeld 4.1 sterren uit 8 reviews. Heb je een vraag over Skandika Esbjerg Travel of wil je andere gebruikers van dit product iets vragen? Stel een vraag
Pagina 1/8
Esbjerg Travel 2
16096
BRAUCHEN SIE HILFE?
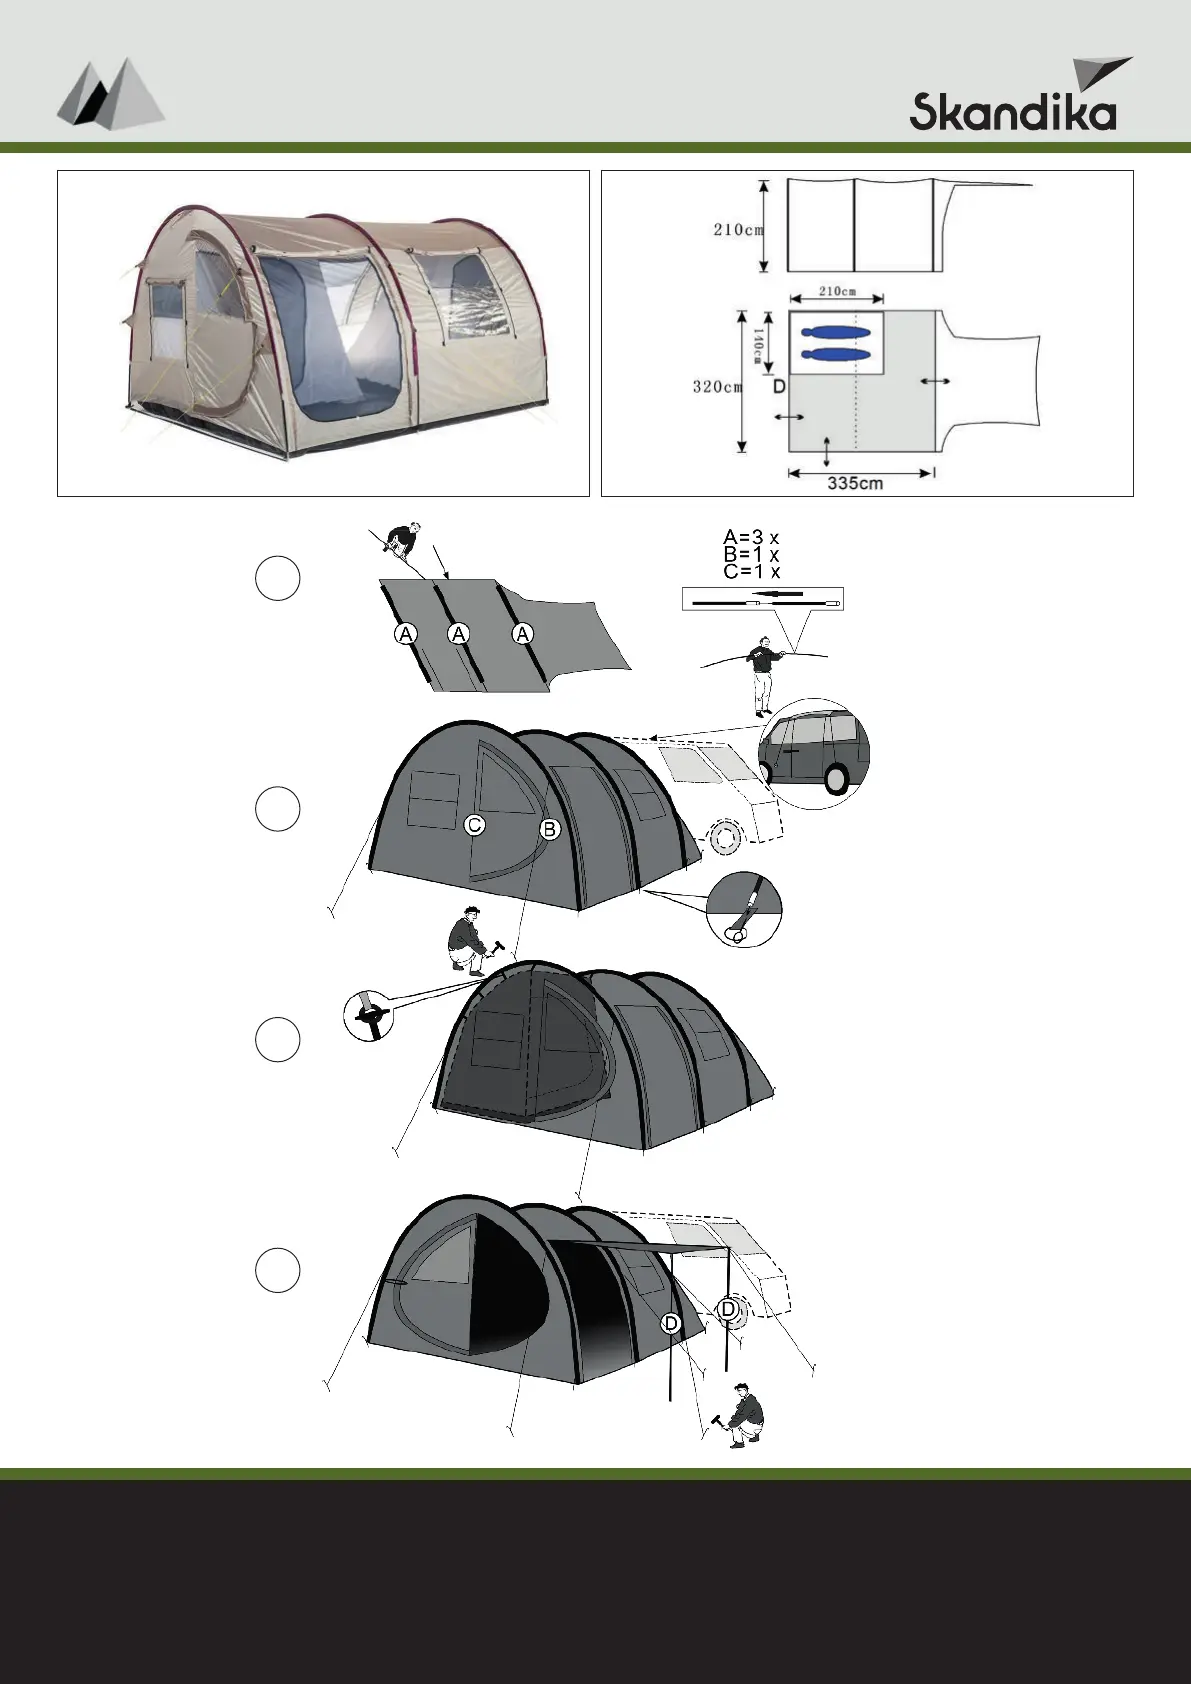
Sehen Sie sich unsere Aufbau-Videos mit einer
visuellen Schritt-für-Schritt-Präsentation an,
die sie beim Aufbau begleiten.
www.skandika.com/zeltaufbau
Wenn Sie weitere Fragen haben, kontaktieren
Sie uns bitte unter service@skandika.com
NEED HELP?
See our set-up videos with a step by step
visual presentation to guide you along.
www.skandika.com/tentsetup
If you have any further questions, please
contact us at service@skandika.com
1
2
3
4
BESOIN D‘AIDE ?
Visionnez nos vidéos d‘installation avec une
présentation visuelle étape par étape pour vous
guider.
www.skandika.com/montagetente
Si vous avez d‘autres questions, n‘hésitez pas à
nous contacter à service@skandika.com
Product specificaties
| Merk: | Skandika |
| Categorie: | Tent |
| Model: | Esbjerg Travel |
Heb je hulp nodig?
Als je hulp nodig hebt met Skandika Esbjerg Travel stel dan hieronder een vraag en andere gebruikers zullen je antwoorden
Handleiding Tent Skandika

6 Oktober 2025
5 Juli 2025
2 Juli 2025
2 Juli 2025
1 Juli 2025
1 Juli 2025
1 Juli 2025
1 Juli 2025
1 Juli 2025
1 Juli 2025
Handleiding Tent
Nieuwste handleidingen voor Tent
18 Juli 2026
18 Juli 2026
23 Juni 2026
20 Juni 2026
19 Juni 2026
16 Juni 2026
16 Juni 2026
16 Juni 2026
16 Juni 2026
15 Juni 2026