Sanus MFIWG1 Handleiding
Sanus Niet gecategoriseerd MFIWG1
Bekijk gratis de handleiding van Sanus MFIWG1 (60 pagina’s), behorend tot de categorie Niet gecategoriseerd. Deze gids werd als nuttig beoordeeld door 236 mensen en kreeg gemiddeld 4.1 sterren uit 6 reviews. Heb je een vraag over Sanus MFIWG1 of wil je andere gebruikers van dit product iets vragen? Stel een vraag
Pagina 1/60
IMPORTANT SAFETY INSTRUCTIONS
PLEASE READ ENTIRE MANUAL PRIOR TO USE
SAVE THESE INSTRUCTIONS
CAUTION:Avoid potential personal injuries and property damage!
●For low voltage cabling only (HDMI, audio, coax or data cabling), DO NOT
run power cords in-wall.
●Please read through these instructions completely to be sure you’re comfortable
with this easy install process.
●Do not use this product for any purpose not explicitly specified by manufacturer.
●Manufacturer is not responsible for damage or injury caused by incorrect
assembly or use.
●If you do not understand these instructions or have doubts about the safety of the
installation, assembly or use of this product, contact Customer Service.
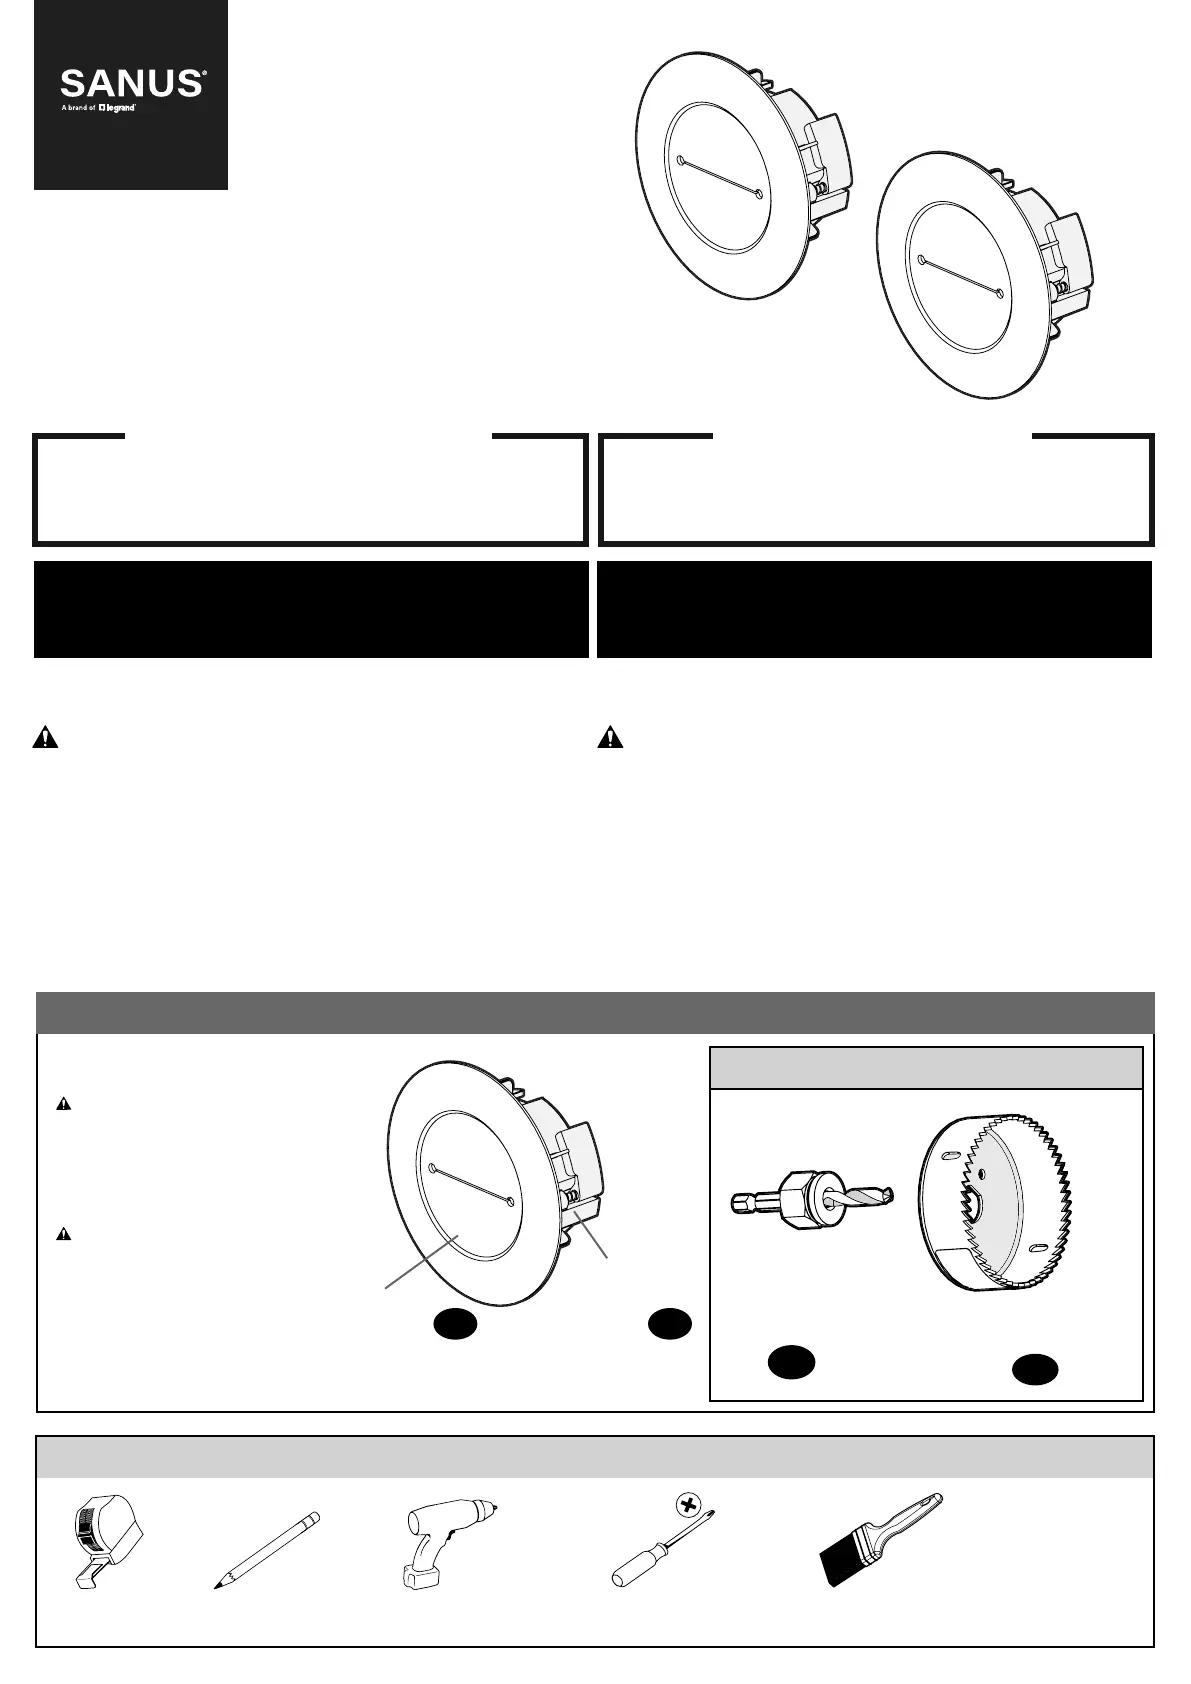
Grommet
Qty. 2
Bracket
(attached)
Qty. 2
IN-WALL
CABLE MANAGEMENT GROMMETS
SUPPLIED PARTS • PIÈCES FOURNIES
TOOLS REQUIRED • OUTILS NÉCESSAIRES
0102
Driver Bit
(hole saw)
Hole Saw
3 in.
03
04
1027241 5/21 • 6901-602774
Model
MFIWG1
INSTALLATION INSTRUCTIONS
MANUAL D’INSTRUCTIONS
Quanity shown for one (1) set
Quantité indiquée pour un (1) ensemble
Before getting started, let’s make sure this product is
perfect for you!
INCLUDED • INCLUS
We’ll Make It Stress-Free
If you have any questions along the way, just give us a call. We’re ready to help!
US: +1 (800) 359-5520; or chat at: SANUS.com/chatSP
EMEA: +31 (0) 495 580 852 • UK: +44 (0) 800 056 2853 • AUS: +61 (0) 7 3299 7000
Nous ferons en sorte que
tout soit simple pour vous
Si vous avez des questions pendant l’installation, appelez-nous. Nous sommes là pour vous aider!
US: +1 (800) 359-5520
EMEA: +31 (0) 495 580 852 • UK: +44 (0) 800 056 2853 • AUS: +61 (0) 7 3299 7000
WARNING:This product contains small
items that could be a choking hazard if
swallowed. Before starting assembly, verify
all parts are included and undamaged. If any
parts are missing or damaged, do not return the
damaged item to your dealer; contact Customer
Service. Never use damaged parts!
AVERTISSEMENT:Ce produit contient
de petites pièces qui peuvent représenter un
risque d’étouement. Avant de commencer
l’assemblage, assurez-vous que toutes les
pièces sont présentes et qu’elles ne sont pas
endommagées. Si une pièce est manquante ou
endommagée, contactez le Service à la clientèle
et non le détaillant. N’utilisez jamais de pièces
endommagées!
Tape Measure
Ruban à mesurer
Pencil
Crayon
Phillips Screwdriver
Tournevis
Paint (optional)
Peinture (optionnel)
Electric Drill
Perceuse électrique
Les surfaces peuvent être
peintes pour correspondre à
votre décor
Surfaces are paintable
to match your decor
Oeillet
Qté. 2
Support
(Attaché)
Qté. 2
Embout d’entraînement
(Scie cloche)
INFORMATIONS IMPORTANTES CONCERNANT LA SÉCURITÉ
VEUILLEZ LIRE ATTENTIVEMENT LE MANUEL AVANT
D’UTILISER CE PRODUIT CONSERVEZ CES INSTRUCTIONS
ATTENTION :Évitez les risques de blessures corporelles ou de dommages matériels!
●Pour le câblage basse tension uniquement (câble HDMI, audio, coaxial ou
de données), NE PAS faire passer les cordons d'alimentation dans le mur.
●Veuillez lire au complet ces instructions pour vous assurer d’être à l’aise avec ce
processus d’installation facile.
●N’utilisez pas ce produit à d’autres fins que celles spécifiées par le fabricant.
●Le fabricant n’est pas responsable des blessures ou des dommages causés par
une mauvaise utilisation ou un montage incorrect.
●Si vous ne comprenez pas toutes ces instructions ou si vous avez des doutes sur
la sécurité de l’installation, du montage ou de l’utilisation de ce produit, veuillez
contacter le service à la clientèle.
Avant de commencer, assurons-nous que ce support
vous convient parfaitement!
Scie cloche
3 pouces
Product specificaties
| Merk: | Sanus |
| Categorie: | Niet gecategoriseerd |
| Model: | MFIWG1 |
Heb je hulp nodig?
Als je hulp nodig hebt met Sanus MFIWG1 stel dan hieronder een vraag en andere gebruikers zullen je antwoorden
Handleiding Niet gecategoriseerd Sanus

30 December 2026
19 December 2025
17 December 2025
9 November 2025
2 September 2025
1 September 2025
1 September 2025
1 September 2025
11 Augustus 2025
1 April 2025
Handleiding Niet gecategoriseerd
Nieuwste handleidingen voor Niet gecategoriseerd
23 Juli 2026
23 Juli 2026
23 Juli 2026
23 Juli 2026
23 Juli 2026
22 Juli 2026
22 Juli 2026
22 Juli 2026
22 Juli 2026
22 Juli 2026