Russound KPSC Handleiding
Russound Hifi systeem KPSC
Bekijk gratis de handleiding van Russound KPSC (11 pagina’s), behorend tot de categorie Hifi systeem. Deze gids werd als nuttig beoordeeld door 69 mensen en kreeg gemiddeld 4.7 sterren uit 3 reviews. Heb je een vraag over Russound KPSC of wil je andere gebruikers van dit product iets vragen? Stel een vraag
Pagina 1/11
KPSC
Keypad
The
KPSC
keypad
is
an
in-wall,
Decora
®
style
single-gang
keypad
accessory
designed
to
connect
to
a
KP6
or
KPL
keypad
(wall
plate
not
included}.
The
KPSC
keypad
provides
source
control
and
numeric
control
capability
to
the
CAA66
system
keypads.
It
has
amber
backlit,
soft-touch
control
buttons.
Note:
The
KPSC
keypad
cannot
be
used
with
a
CAS44
controller
system
.
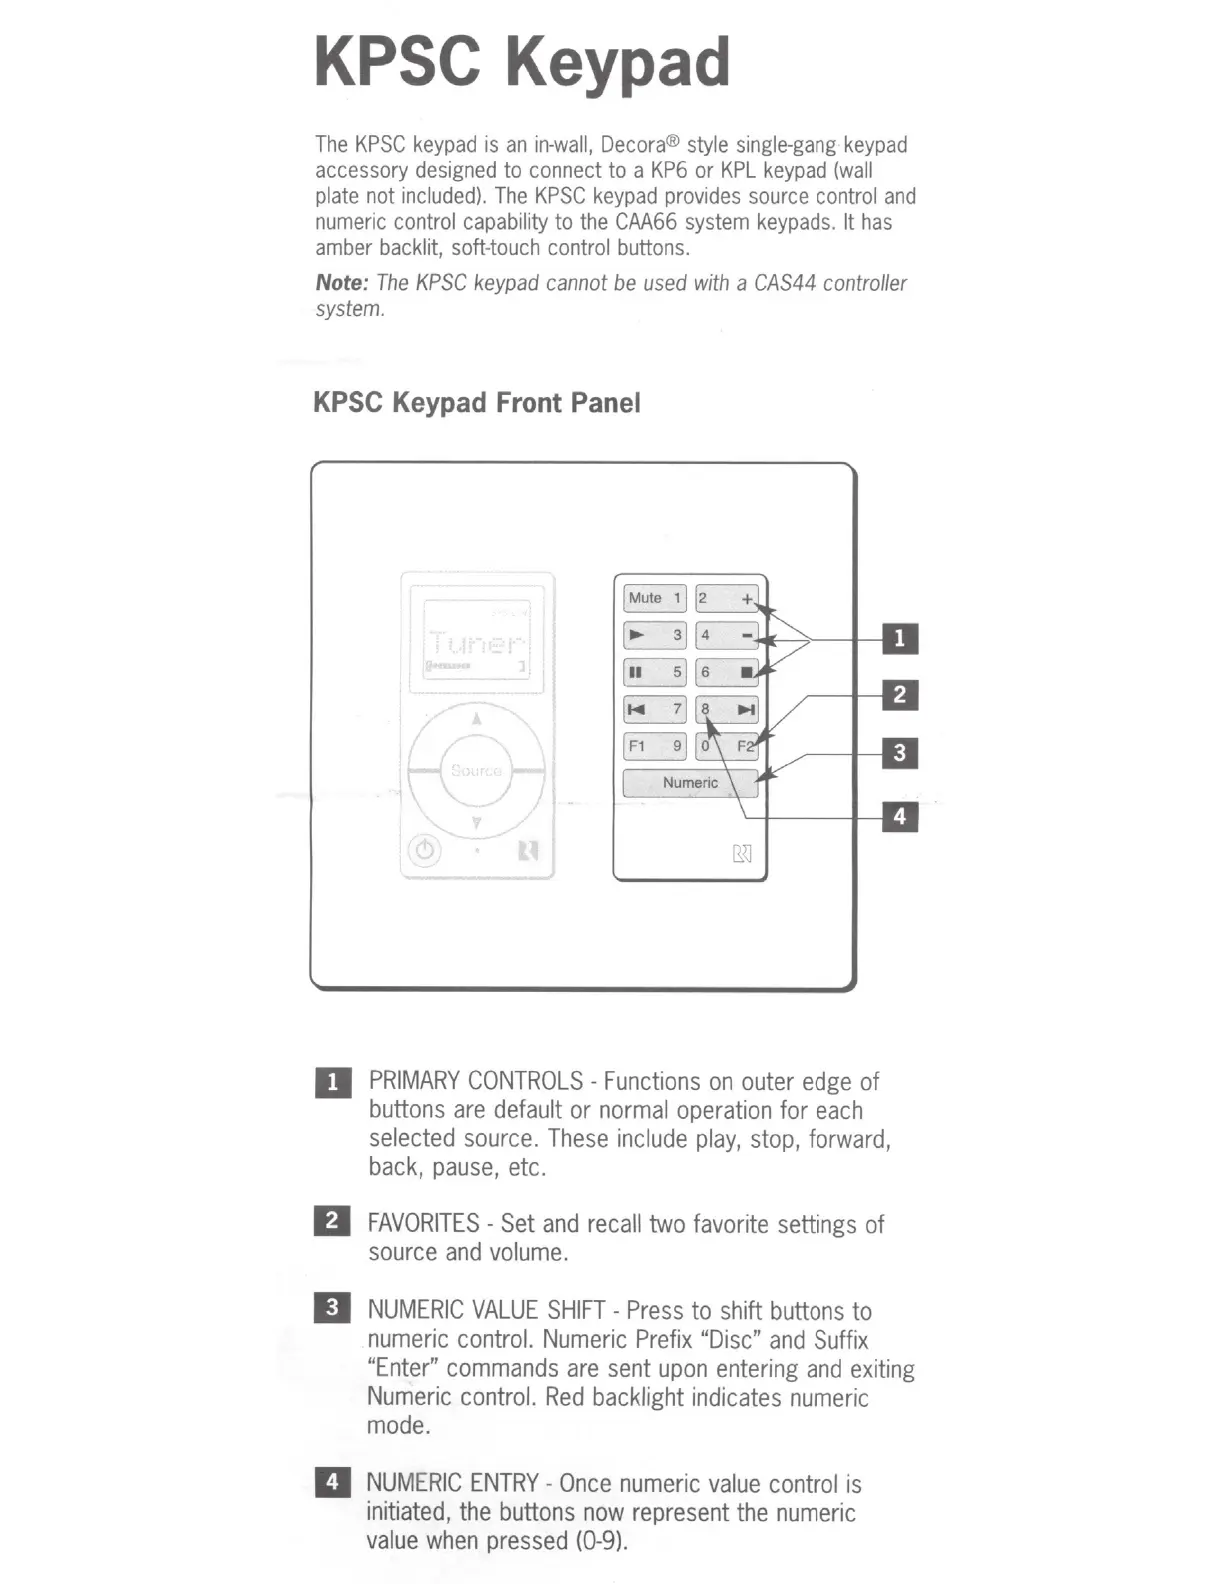
KPSC
Keypad
Front
Panel
J,
[
11
,r
A
I
~
K
nl
1...:)
uj
mJ
D
PRIMARY
CONTROLS
-
Functions
on
outer
edge
of
buttons
are
default
or
normal
operation
for
each
selected
source.
These
include
play,
stop,
forward,
back,
pause,
etc.
fl
FAVORITES-
Set
and
recall
two
favorite
settings
of
source
and
volume.
II
NUMERIC
VALUE
SHIFT-
Press
to
shift
buttons
to
numeric
control.
Numeric
Prefix
"Disc"
and
Suffix
"Enter"
commands
are
sent
upon
entering
and
exiting
Numeric
control.
Red
backlight
indicates
numeric
mode.
II
NUMERIC
ENTRY
-
Once
numeric
value
control
is
initiated,
the
buttons
now
represent
the
numeric
value
when
pressed
{0-9).
Product specificaties
| Merk: | Russound |
| Categorie: | Hifi systeem |
| Model: | KPSC |
| Gewicht: | 85 g |
| Breedte: | 4.7 mm |
| Diepte: | 6.9 mm |
| Hoogte: | 2.5 mm |
| Aantal knoppen: | 10 |
| Backlight toetsen: | Ja |
| Backlight-kleur: | Amber |
| Afmetingen (B x D x H): | 4.7 x 6.9 x 2.5 mm |
Heb je hulp nodig?
Als je hulp nodig hebt met Russound KPSC stel dan hieronder een vraag en andere gebruikers zullen je antwoorden
Handleiding Hifi systeem Russound

15 Juli 2025
14 Juli 2025
14 Juli 2025
21 Februari 2025
21 Februari 2025
6 April 2024
6 April 2024
6 April 2024
6 April 2024
6 April 2024
Handleiding Hifi systeem
Nieuwste handleidingen voor Hifi systeem
25 Juli 2026
14 Juli 2026
12 Juli 2026
10 Juli 2026
8 Juli 2026
6 Juli 2026
3 Juli 2026
2 Juli 2026
30 Juni 2026
30 Juni 2026