RCA RCR612N Handleiding

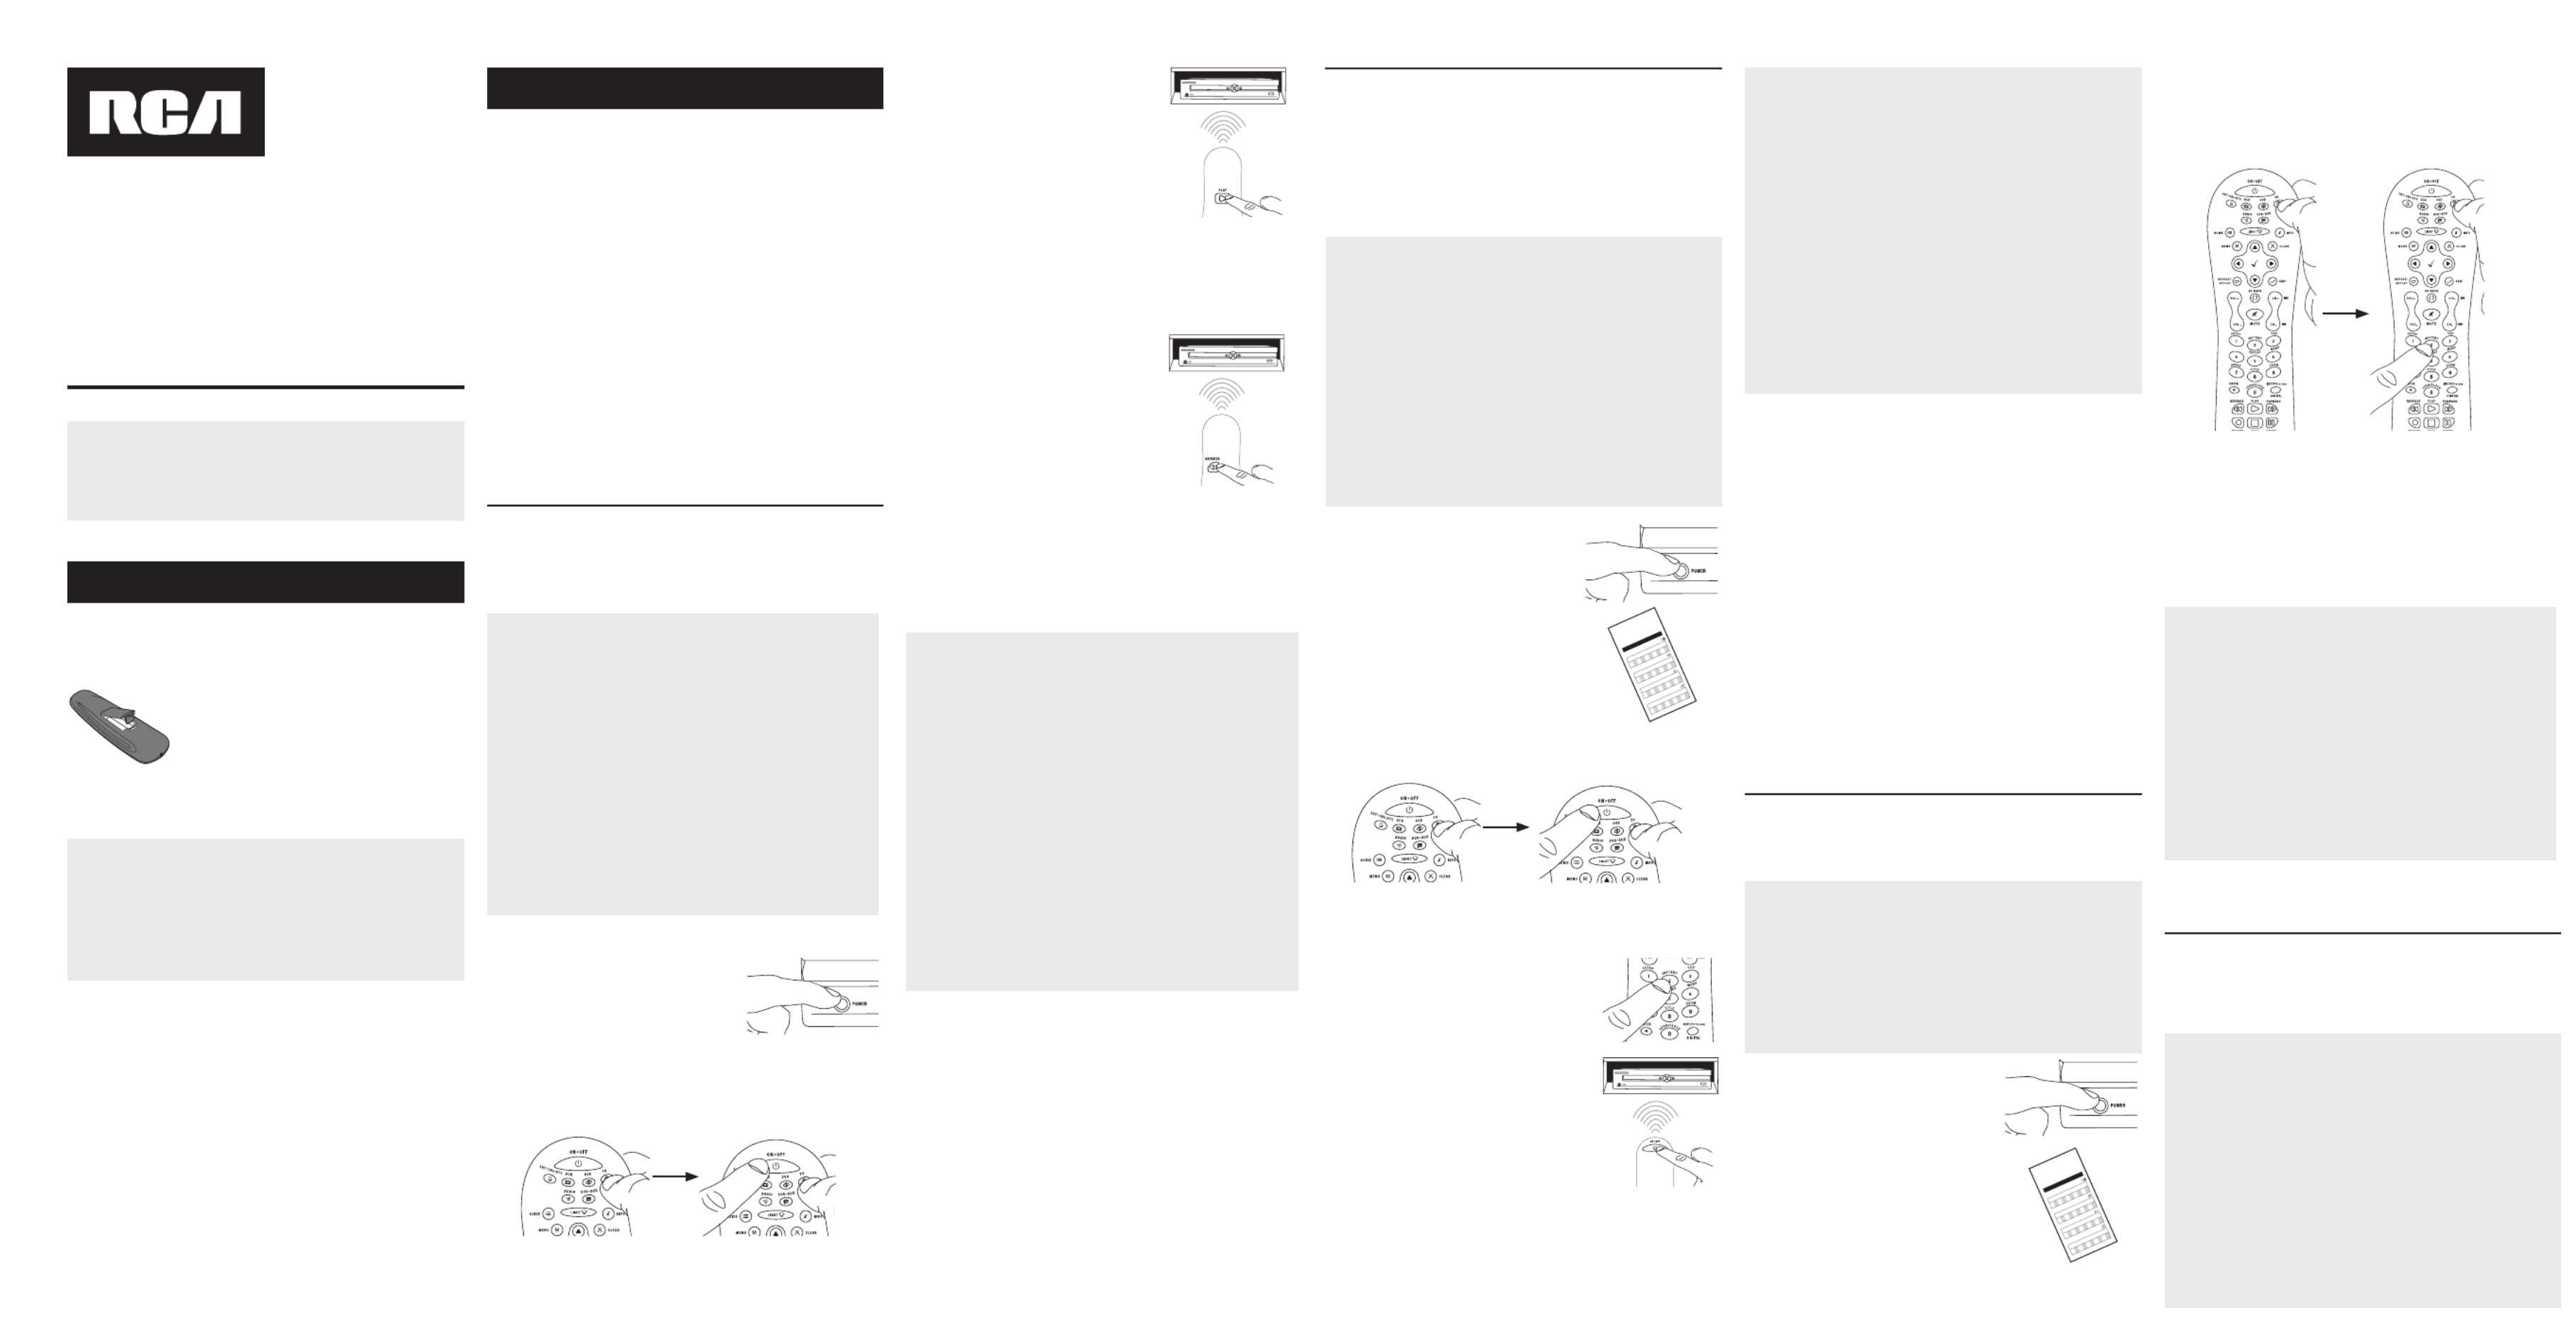
RCA Controller RCR612N

Lees hieronder de 📖 handleiding in het Nederlandse voor RCA RCR612N (4 pagina's) in de categorie Controller. Deze handleiding was nuttig voor 42 personen en werd door 2 gebruikers gemiddeld met 4.5 sterren beoordeeld

Pagina 1/4
Battery Saver
Your universal remote control saves battery power by
automatically turning off if any key is pressed for more than
60 seconds. This saves your battery life should your remote
get stuck in a place where the keys remain depressed, such as
between sofa cushions.
RCR612N
Universal Remote Control
Owner’s Manual
Manual del Propietario (parte posterior)
Tip: This remote is already programmed to operate most
RCA-branded TVs, VCRs, DVD players, and satellite
receivers. Just press the corresponding key—DVD
for a DVD player, TV for a television, VCR for a VCR,
SAT•CBL•DTC for a satellite receiver, DVR•AUX for a DVR.
Your universal remote requires two AA alkaline batteries (not
included).
To install the batteries:
1. Remove the battery compartment
cover.
2. Insert the batteries, matching the
(+) and (–) marks inside the battery
compartment.
3. Push the battery cover back into place.
Battery Precautions:
• Do not mix old and new batteries.
• Do not mix alkaline, standard (carbon-zinc) or
rechargeable (nickel-cadmium) batteries.
• Always remove old, weak or worn-out batteries promptly
and recycle or dispose of them in accordance with Local
and National Regulations.
To use this universal remote with your home entertainment
system, rst you need to program it to control your devices.
There are four ways you can program the universal remote to
operate your devices:
• The Auto Code Search goes automatically through all the
codes for the device you’re trying to control. It’s the easiest
method, but it can sometimes take longer than some of the
other programming methods.
• The Brand Code Search searches through the codes for
select brands of devices. It’s not as easy as the auto code
search, but it can be faster.
• The Direct Code Entry lets you enter a code from the
accompanying code list for your brand of device. It’s
not as easy as the other methods, but it’s potentially the
fastest method. Direct Code Entry is usually the best Note:
method to use for audio devices.
• The Manual Code Search lets you manually go through
all the codes for the device you’re trying to control.
Testing the Code for Maximum Functionality
1. Try a variety of the device’s functions with the remote. If
some device features don’t work, go to the next step to try
a different code.
2. Repeat the Auto Code Search Method from the beginning.
When your device turns off, do not stop searching.
Instead, with the unit now off, continue to press the PLAY
key every 5 seconds until the unit turns back on.
3. Once the unit turns back on, press the REVERSE key on the
remote every 2 seconds until your device turns off again.
When your device turns off again, press the STOP key.
4. Test the key’s functionality again by attempting to control
a variety of the device’s functions. If the code that has
been stored controls the majority of the device’s functions,
programming is complete. If the code stored does not give
maximum functionality, try another code.
Auto Code Search
The Auto Code Search goes automatically through all the
codes for the device you’re trying to control. When you nd
the one that operates your device, you can stop the search and
store that code.
TIPS: Each device key is associated with a type of device—
the TV is preset to search for TVs, SAT•CBL•DTC for satellite
receivers, digital TV converters, or cable boxes, DVD for DVD
players, and DVR•AUX for DVRs, AUDIO for audio receivers,
and VCR for VCRs. To program a device key for a different
type of device, see the Programming the DVR•AUX Key to
Control Other Devices section.
To control combo devices, like TV/DVDs and TV/VCRs, you
need to program each key separately. Each key will control
that part of the combo device.
If the original remote control that came with your device has
separate ON and OFF keys (instead of a single ON•OFF key),
the Auto Code Search might not work with that device. Try
the Direct Code Entry method described later in this manual.
To exit without saving a new code at any point in the Auto
Code Search, press the CLEAR key.
1. Manually turn on the device you
want to control.
2. Press and hold the device key you want to program. While
you’re holding down the device key, use your other hand
to press and hold the remote’s ON•OFF key at the same
time.
3. Wait until the ON•OFF key comes on and stays on. Then
release both keys.
4. Point the remote directly at the
front panel of the device you
want to control. Press PLAY on
the remote and wait 5 seconds.
The remote is testing a batch of
10 codes on your device.
Did your device turn off?
YES: Go to step 5.
NO: Press PLAY again. The remote tests the next batch of
10 codes.
Keep pressing PLAY every 5 seconds until your device turns
off.
5. When your device turns off, press
the REVERSE key on the remote
and wait at least 2 seconds.
The remote tries the last of the
previous ten codes.
Did your device turn on?
YES: Press the STOP key. You’re
done! You’ve programmed this
device key.
NO: Press REVERSE again. The remote tests the next
code in the batch.
Keep pressing REVERSE every 2 seconds until your device
turns back on. When it does, press STOP.
Note: If you accidentally press the REVERSE key after your
device turns on, press the FORWARD key. Then, wait two
seconds to see if your device turns off again.
NOTES
Throughout the programming of each key, be sure to keep
the remote pointed at the IR sensor of the device you are
currently programming the remote to control.
Test the remote with the device to make sure the
device key is programmed with the correct code for
maximum functionality. If some features don’t work, try
a different code. See the “Testing the Code for Maximum
Functionality” section below for more information.
During the Auto Code Search, the remote ignores
keypresses that aren’t part of the search.
The search times out after two minutes (the ON•OFF key
blinks four times and the last programmed code under that
device key is retained).
The ON•OFF key blinks four times when the remote has
gone through all the codes. The remote exits the Auto Code
Search. If your device hasn’t turned off yet, try a different
search method.
Testing the Code for Maximum Functionality
1. Try a variety of the device’s functions with the remote. If
some device features don’t work, go to the next step to try
a different code.
2. Repeat the Brand Code Search from the beginning. When
the device turns off for the first time, don’t press the STOP
key, which would store the same code. Instead, with the
unit now off, continue to press the ON•OFF key repeatedly
until the unit turns back on.
3. Once the unit turns back on, you have found another code
that operates the device. Press the STOP key.
4. Test the key’s functionality again by attempting to control
a variety of the device’s functions. If the code that has
been stored controls the majority of the device’s functions,
programming is complete. If the code stored does not give
maximum functionality, try another code.
Brand Code Search
The Brand Code Search goes through only the codes for one of
the select brands listed in the accompanying code list. If your
brand of device is listed, this search can be very quick and easy.
IMPORTANT: The Brand Code Search works for TVs, VCRs, DVD
players, satellite receivers and cable boxes. The Brand Code
Search does not work for programming this remote to control
audio devices, DVRs, and digital TV converter boxes. Use a
different programming method for these kinds of devices.
TIPS: Each device key is associated with a type of device—
the TV is preset to search for TVs, SAT•CBL•DTC for satellite
receivers, digital TV converters, or cable boxes, DVD for DVD
players, and DVR•AUX for DVRs, AUDIO for audio receivers,
and VCR for VCRs. To program a device key for a different
type of device, see the Programming the DVR•AUX Key to
Control Other Devices section.
To control combo devices, like TV/DVDs and TV/VCRs, you
need to program each key separately. Each key will control
that part of the combo device.
If the original remote control that came with your device has
separate ON and OFF keys (instead of a single ON•OFF key),
the Brand Code Search might not work with that device. Try
the Direct Code Entry method described later in this manual.
To exit without saving a new code at any point in the Brand
Code Search, press the CLEAR key.
1. Manually turn on the device you
want to control.
3. Press and hold the device key you want to program. While
you’re holding down the device key, use your other hand to
press and hold the remote’s ON•OFF key at the same time.
4. Wait until the ON•OFF key comes on and stays on. Then
release both keys.
6. Point the remote directly at the
front panel of the device you want
to control. Press ON•OFF on the
remote and wait 2 seconds. The
remote is testing a single code for
your device’s brand.
Did your device turn off?
YES: Press the STOP key to store the code. You’re done!
You’ve programmed this device key.
NO: Press ON•OFF again. The remote tests the next code
for your brand.
Keep pressing ON•OFF every 2 seconds until your device
turns back on. When it does, press STOP.
2. Find your device’s brand in the
Brand Code list section of the
accompanying code list. Circle
the number for your brand and
keep the list handy.
Co d e L i t s
Li s ta de CĂł di g os
0
1
2 3
4
5 6
789
V
VC R
0
1
2 3
4
5 6
789
DVD
SA /C AB LE
0
1
2 3
4
5 6
789
0
1
2 3
4
5 6
789
5. Look at the number you circled for your
device’s brand code number. Press that
number on the remote keypad.
NOTES
Throughout the programming of each key, be sure to keep
the remote pointed at the IR sensor of the device you are
currently programming the remote to control.
Test the remote with the device to make sure the device
key is programmed with the correct code for maximum
functionality. If some features don’t work, try a different
code. See the “Testing the Code for Maximum Functionality”
section below for more information.
During the Brand Code Search, the remote ignores
keypresses that aren’t part of the search.
The search times out after two minutes (the ON•OFF key
blinks four times and the last programmed code under that
device key is retained).
The ON•OFF key blinks four times when the remote has
gone through all the codes. The remote exits the Brand Code
Search. If your device hasn’t turned off yet, try a different
search method.
Direct Code Entry
Direct Code Entry lets you enter a code from the accompanying
code list for your brand of device. It’s not as easy as the other
methods, but it’s potentially the fastest method.
TIPS: Each device key is associated with a type of device—the
TV is preset for TVs, SAT•CBL•DTC for satellite receivers, digital
TV converters, or cable boxes, DVD for DVD players, and
DVR•AUX for DVRs, AUDIO for audio receivers, and VCR for
VCRs. To program a device key for a different type of device, see
the Programming the DVR•AUX Key to Control Other Devices
section.
To control combo devices, like TV/DVDs and TV/VCRs, you need
to program each key separately. Each key will control that part
of the combo device.
1. Manually turn on the device you
want to control.
3. Press and hold the device key you want to program (the
ON•OFF key comes on).
While you’re holding down the device key, use your other
hand enter the rst ve-digit code for your brand in the
code list (the ON•OFF key goes off after the rst digit).
2. Find the Code List that came with
the remote. Locate the section for
the type of device you’re trying to
program, and nd your brand in
that section. Circle the codes for
your brand and keep them handy.
Co d e L is ts
Li s ta de CĂł di g os
0
1
2 3
4
5 6
789
T V
VC R
0
1
2 3
4
5 6
789
DVD
SA CAB LE
0
1
2 3
4
5 6
789
0
1
2 3
4
5 6
789
NOTES
Remember to enter the code for future reference in the box
provided in the Code Retrieval section of this manual.
If your brand isn’t listed in the code list, use one of the Code
Search methods to program the remote control. (Refer to the
Auto and Manual Code Search methods.)
If you release the device key any time during the Direct Code
Entry procedure, the ON•OFF key blinks four times and the
process is exited. The last programmed code under the
device key is retained.
Test the remote with the device to make sure the device
key is programmed with the correct code for maximum
functionality. If some features don’t work, try a different code
in the list.
4. When you’ve nished entering the ve-digit code, keep
holding down the device key and look at the ON•OFF key.
 IstheON•OFFkeyilluminated?
YES: You’re done! You’ve programmed this device key.
 NO,itblinkedfourtimesandturnedoff:You have
either entered a code number that is not in the code lists
or missed a step in the code entry procedure. Try step 3
again.
Manual Code Search
The Manual Code Search takes you one-by-one through all the
codes for the device you’re trying to control. When you nd the
one that operates your device, you stop the search and store that
code.
TIPS: The Manual Code Search method may take a long time
because the remote searches through all of the codes in its
memory one-by-one. If your brand is listed in the Brand Codes
or the Code Lists, rst try the Brand Code Search or the Direct
Code Entry method.
Each device key is associated with a type of device—the TV is
preset to search for TVs, SAT•CBL•DTC for satellite receivers,
digital TV converters, or cable boxes, DVD for DVD players, and
DVR•AUX for DVRs, AUDIO for audio receivers, and VCR for
VCRs. To program a device key for a different type of device, see
the section.Reassigning the DVR•AUX and VCR Keys
To control combo devices, like TV/DVDs and TV/VCRs, you need
to program each key separately. Each key will control that part
of the combo device.
To exit without saving a new code at any point in the Manual
Code Search, press the CLEAR key.
Step 1: Install your batteries
Step 2: Program your remote
-
-
-
In most cases, the keys on
this remote perform the same
functions as the keys on your
original remotes once you’ve
programmed this remote to
operate your components.
Many keys on this remote
have other functions as well.
Illuminated key ON•OFF
serves as an indicator light to
provide feedback.
Device keys ( , TV
SAT•CBL•DTC DVD, ,
DVR•AUX AUDIO VCR, , ) put
the remote in the right mode
to control your device.
Backlight key ( ) turns
backlighting on/off.
GUIDE MENU and put the
remote in menu/guide mode;
they also access the same
features as the keys on your
original remotes.
CLEAR exits remote
programming; it also
performs the same functions
as on your original remotes.
Arrow keys act as navigation
keys in device guides and
menu systems.
Select/OK key ( ) selects
your menu choices.
The and dash key INPUT — ( )
has three functions: (1) it
toggles through all the video
or audio sources connected
to your TV or audio device;
(2) when the remote is in
VCR mode, this button
toggles between VCR and
the TV input; (3) when you’re
entering digital channel
numbers directly, this button
lets you separate the main
channel number from the
sub-channel number (such
as 59.1).
SLEEP key lets you set a
time to turn off your TV
automatically.
Actual model may vary from illustration
Care and Maintenance
• Keep the remote dry. If it gets wet, wipe it dry immediately.
• Use and store the remote only in normal temperature
environments.
• Handle the remote gently and carefully. Don’t drop it.
• Keep the remote away from dust and dirt.
• Wipe the remote with a damp cloth occasionally to keep it
looking new.
• Modifying or tampering with the remote’s internal devices can
cause malfunction and invalidate its warranty.
1. Manually turn on the device you
want to control.
2. Press and hold the device key you want to program. While
you’re holding down the device key, use your other hand to
press and hold the remote’s ON•OFF key at the same time.
3. Wait until the remote’s ON•OFF key comes on and stays
on. Then release both keys.
4. Point the remote directly at the front panel of the device you
want to control. Press ON•OFF on the remote and wait 2
seconds. The remote is testing a single code for your device.
Did your device turn off?
Press the STOP key to store YES:
the code. You’re done! You’ve
programmed this device key.
NO: Press ON•OFF again. The
remote tests the next code for your
device.
Keep pressing ON•OFF every 2 seconds until your device turns
back on. When it does, press STOP.
TIP: Because there are so many codes, you may have to press
the ON•OFF key many times—possibly hundreds of times.
NOTES
Throughout the programming of each key, keep the remote
pointed at the IR sensor of the device you are programming
the remote to control.
Test the remote with the device to make sure the device
key is programmed with the correct code for maximum
functionality. If some features don’t work, try a different
code. See the “Testing the Code for Maximum Functionality”
section below for more information.
During the Manual Code Search, the remote ignores
keypresses that aren’t part of the search.
The search times out after two minutes (the ON•OFF key
blinks four times and the last programmed code under that
device key is retained).
The ON•OFF key blinks four times when the remote has
gone through all the codes. The remote exits the Manual
Code Search. If your device hasn’t turned off yet, try a
different search method.
Testing the Code for Maximum Functionality
1. Try a variety of the device’s functions with the remote. If
some features of your devices don’t work, go to the next
step to try a different code.
2. Repeat the Manual Code Search and Entry Method from
the beginning. When the device turns off for the rst time,
don’t press the STOP key, which would store the same
code. Instead, with the unit now off, continue to press the
ON•OFF key repeatedly until the unit turns back on.
3. Once the unit turns back on, you have found another code
that operates the device. Press the STOP key.
4. Test the key’s functionality again by trying a variety of
functions. If the code controls the majority of the device’s
functions, programming is complete. If the code stored
does not give maximum functionality, try another code.
ProgrammingtheDVR•AUXKeyToControl
Other Devices
The DVR•AUX key defaults to control a DVR. If you want this
keys to control a different kind of device (an additional TV,
DVD, satellite or cable box, for example), you must reassign it.
1. Press and hold the DVR•AUX key. The ON•OFF key turns on.
2. While holding down the DVR•AUX key, press and release
the number key on the keypad for the device you want to
control (see the chart below). The ON•OFF key turns off.
Code Retrieval
Once you’ve programmed the remote to control your devices,
you may want to record the codes for future reference. If you used
the Direct Code Entry method, this is easy. Just nd the codes
you entered and make a note of them in the boxes below. If you
used one of the Code Search methods to program your remote or
if you used the Direct Entry method but don’t remember the code,
you will need to retrieve each device’s five-digit code. Retrieving
the actual code and writing it down will save you time if you ever
need to program the remote again. If the codes are recorded, you
can use the Direct Entry method to reprogram your remote to
control your devices, which is quick and easy.
IMPORTANT
Because this remote controls more than one device, you
must rst “tell” the remote which device you wish to operate.
That means, if you wish to operate your TV, you must rst
press the TV key to put the remote in the TV Mode. The
remote stays in that device mode until you press a different
device key. For example, if your remote is in TV Mode and
you want to operate the DVD player, you must press the DVD
key to change device modes.
Problem: The remote does not operate your device.
• Make sure the remote is in the correct mode by pressing the
corresponding device key (TV, SAT•CBL•DTC, DVD, DVR•AUX,
AUDIO, VCR). This tells the remote which device to operate.
• Remove any obstacles between the remote and the device. Make
sure you’re aiming the remote at the device’s IR sensor.
• Make sure the batteries are fresh and are properly installed.
Replace the batteries with two new AA batteries, if necessary
(see the Battery Installation section).
Problem: The remote can’t be programmed to operate your
device.
• If you are testing the remote while programming it, you may be
too far away from the device or at a wrong angle. There must be
an unobstructed path between the remote and the IR sensor on
the device. Move closer and make sure you point the remote at the
device you’re trying to control.
• If you’re using the Direct Entry programming method to enter
the codes for your brand and the unit is still not functioning
properly, try the auto, brand, or manual search method.
• To control combo units, like TV/VCRs or TV/DVDs, you must
program the individual corresponding device keys to control
each part of the combo unit. Once programmed successfully,
the TV key controls the TV functions, and the DVD or VCR key
controls the DVD or VCR functions.
• Make sure the batteries are fresh and are properly installed.
Problem: The remote doesn’t perform commands properly.
• Make sure the remote is in the correct mode by pressing the
corresponding device key (TV, SAT•CBL•DTC, DVD, DVR•AUX,
AUDIO, VCR). This tells the remote which device to operate.
• Make sure device is ready (for example, the DVD player has a
disc loaded).
• You may have pressed an invalid key for the mode the remote is in.
• If you’re trying to enter a channel number directly, try pressing
the ENTER key after entering the channel number as this is a
requirement of certain models and brands.
• There is a possibility that a programmed code may only be
able to control some of your device features (for example, only
turns a device on and off). To conrm that the device key is
programmed with the correct code for maximum functionality,
test the device. Attempt to control a variety of the device’s
functions with the remote. If some of the features of your
devices don’t work, try programming the remote with a different
code in the list using the Direct Code Entry Method, until you
nd the code that allows the remote to control the majority of
your device’s functions. Different codes can provide different
levels of functionality.
Problem: The ON•OFF key does not illuminate when you press
a key.
• You may have pressed an invalid key for the mode the remote is
in.
• Make sure the remote is in the correct mode by pressing the
corresponding device key (TV, SAT•CBL•DTC, DVD, DVR•AUX,
AUDIO, VCR). This tells the remote which device to operate.
• Make sure the batteries are fresh and are properly installed.
Replace the batteries with two new AA batteries, if necessary
(see the Battery Installation section).
Problem: The remote will not change channels on device.
• Make sure the remote is in the correct mode by pressing the
corresponding device key (TV, SAT•CBL•DTC, DVD, DVR•AUX,
AUDIO, VCR). This tells the remote which device to operate.
• Press the ENTER key after you enter a channel number.
• Remove any obstacles between the remote and the device. Make
sure to aim the remote at the IR sensor on the device.
Problem: The device’s menu does not appear on the TV screen.
• Make sure you have connected the device to your TV properly and
selected the correct input. (See your devices’ Owner’s Manuals for
proper connection procedures.)
• Make sure the remote is in the correct mode by pressing the
corresponding device key (TV, SAT•CBL•DTC, DVD, DVR•AUX,
AUDIO, VCR). This tells the remote which device to operate.
• Menu access isn’t supported for all brands. You may need to use
your original remote control to access menu functions for some
devices.
For more information, please visit www.rcaaccessories.com
Consumer Help Line: 1-800-420-7968
Audiovox Electronics Corporation (the “Company”) warrants to you the
original retail purchaser of this product that should it, under normal use
and conditions, be proven defective in material or workmanship during
its lifetime while you own it, such defect(s) will be repaired or replaced
(at the Company’s option) without charge for parts and repair labor. To
obtain repair or replacement within the terms of this Warranty, the product
is to be delivered with proof of warranty coverage (e.g. dated bill of sale),
specication of defect(s), transportation prepaid, to the Company at the
address shown below.
This Warranty does not cover product purchased, serviced or used outside
the United States or Canada. This Warranty is not transferable and does
not extend to costs incurred for installation, removal or reinstallation of
the product. This Warranty does not apply if in the Company’s opinion,
the product has been damaged through alteration, improper installation,
mishandling, misuse, neglect, accident, or the simultaneous use of different
battery types (e.g. alkaline, standard or rechargeable).
THE EXTENT OF THE COMPANY’S LIABILITY UNDER THIS WARRANTY IS
LIMITED TO THE REPAIR OR REPLACEMENT PROVIDED ABOVE AND, IN NO
EVENT, SHALL THE COMPANY’S LIABILITY EXCEED THE PURCHASE PRICE
PAID BY PURCHASER FOR THE PRODUCT.
This Warranty is in lieu of all other express warranties or liabilities. ANY
IMPLIED WARRANTIES, INCLUDING ANY IMPLIED WARRANTY OF
MERCHANTABILITY OR FITNESS FOR A PARTICULAR PURPOSE SHALL
BE LIMITED TO DURATION OF THIS WARRANTY. IN NO CASE SHALL
THE COMPANY BE LIABLE FOR ANY CONSEQUENTIAL OR INCIDENTAL
DAMAGES WHATSOEVER. No person or representative is authorized
to assume for the Company any liability other than expressed herein in
connection with the sale of this product.
Some states/provinces do not allow limitations on how long an implied
warranty lasts or the exclusion or limitation of incidental or consequential
damage so the above limitations or exclusions may not apply to you. This
Warranty gives you specic legal rights and you may also have other rights,
which vary from state/province to state/province.
U.S A.: Audiovox Electronics Corporation, 150 Marcus Blvd., Hauppauge,
New York 11788
CANADA: Audiovox Return Center, c/o Genco, 6685 Kennedy Road,
Unit 3, Door 16, Mississauga, Ontario L5T 3A5
Trademark(s) ÂŽ Registered
RCR612N US 00
Š2009 Audiovox Accessories Corporation
111 Congressional Blvd., Suite 350
Carmel, IN 46032
Tour of the Remote Advanced Functions
Troubleshooting
Limited Lifetime Warranty
-
DVR•AUX KEY CONTROLS:
Additional TV press 1
VCR or DVR press 2
Additional DVD press 3
Additional audio device press 4
Additional satellite receiver,
cable box, or DTV converter
press 5
3. Release the DVR•AUX key. The ON•OFF key blinks four
times and then turns off. The DVR•AUX key is now set to
control the device type you selected.
4. Follow the directions in the auto, brand, direct entry, or
manual code search to program the DVR•AUX key.
Volume Punch-Through
Volume Punch-Through allows the VOL and MUTE keys, when
pressed in SAT•CBL•DTC, DVD, DVR or VCR modes, to “punch
through” to either TV or AUDIO, whichever was accessed last.
Volume Punch-Through occurs automatically and allows you
to control the volume without exiting the current mode. (If the
DVR•AUX key has been programmed with a TV or AUDIO code,
volume can punch through to these devices as well.)
Note: Volume Punch-Through does not occur in cases where
the component code has its own volume/mute controls, such
as some satellite receivers.
Advanced Punch-Through
Volume Punch-Through, as described above, occurs
automatically. If you want to specify whether Volume Punch-
Through is directed to the TV or AUDIO while in SAT•CBL•DTC,
DVD, DVR•AUX or VCR modes, follow the steps below.
Note: This option can also be enabled for the DVR•AUX key, if
it is programmed with a VCR, DVR, DVD, CD, SAT or TV code.
1. Press and hold the key whose volume commands you want
to send to the TV or audio device. The ON•OFF key turns on.
2. While holding down the device key, press and hold the VOL
up key. The ON•OFF key turns off.
3. After holding down both keys for 3 seconds, the ON•OFF
key turns on and stays on. Release both keys.
4. Press and release the device key you want the Volume
Punch-Through to be directed to from the selected mode (TV,
AUDIO or DVR•AUX key). The ON•OFF key ashes.
Note: The device key pressed in step 4 must be programmed
with a TV or AUDIO component. If an invalid key is pressed,
the ON•OFF key ashes four times, then turns off.
Important: Once you have programmed any device with a
specied Volume Punch-Through, the Volume Punch-Through
for all other devices defaults to AUDIO. If you do not want
other components’ Volume Punch-Through to default to
AUDIO, you must manually program them, using steps 1-4.
5
sat•cbl•dtc code
SAT DTV CONVERTER CABLE
dvr•aux1 code
DVD TV SAT•CBL•DTC
1
tv code
3
dvd code
Backlighting
Backlight illumination helps you see the remote control keys
better in the dark. You can turn backlight illumination on or off
by pressing the backlight key ( ). Backlighting stays on as
long as keys are being pressed and turns off six seconds after
the last keypress. Once the backlight time has timed out, any
keypress will reactivate it. If the backlight illumination is on,
and you press the backlight key, the backlight turns off.
TransportKeyPunch-Through
Transport Key Punch Through allows the transport keys
(REVERSE, PLAY, FORWARD, RECORD, STOP, and PAUSE),
when pressed in TV, SAT, CABLE and AUDIO modes, to “punch
through” to VCR, DVR or DVD/CD mode, whichever was accessed
last. Transport Key Punch-Through occurs automatically and
allows you to use the transport keys without exiting the current
mode. For example, if the transport keys were last used in DVD
mode and accessed again after pressing the TV key, they will
punch through to the DVD. The default Transport Key Punch
Through is set to DVD for TV, SAT, CABLE, and AUDIO.
Note: Transport Key Punch Through does not occur in cases
where the component code has its own transport key data,
such as a satellite receiver with a built-in DVR.
Sleep Timer
This feature automatically turns off your TV at a duration you
choose from 1 to 99 minutes. The Sleep Timer only works if you
have found a code that controls your TV. The timing mechanism
for the Sleep Timer is built into your universal remote control.
To program the Sleep Timer:
1. Press the TV key.
2. Press and hold the SLEEP key for three seconds. The
ON•OFF key turns on. Then release the SLEEP key.
3. Using the number keys, enter the desired time in minutes
(from 1-99 minutes). To set the timer to a number under 10
minutes, press 0 and then the desired number (e.g., 05 for
ve minutes). The ON•OFF key blinks with each keypress.
Once the second number is entered, the ON•OFF key turns
off and the Sleep Timer is now set.
TIPS: All TV codes start with the number 1; all VCR and DVR
codes start with the number 2; all DVD player codes, the number
3; all audio device codes, the number 4; and all satellite receiver,
cable box, and digital TV converters, the number 5.
To exit the Code Retrieval Mode at any time, press the CLEAR
key.
If you press an invalid key during the Code Retrieval process,
the remote will not respond. If you do not press a valid Code
Retrieval key (TV, SAT•CBL•DTC, DVD, DVR•AUX, AUDIO, VCR,
INFO, CLEAR), Code Retrieval times out after 15 seconds. The
ON•OFF key blinks four times, and then turns off.
1. Press and hold the device key (TV, SAT•CBL•DTC, DVD,
AUDIO, VCR, DVR•AUX) whose code you wish to retrieve.
The ON•OFF key illuminates. Keep pressing the device key.
2. While holding the device key down, press and hold the
INFO key. The ON•OFF key illumination turns off. After
holding down both keys for three seconds, it turns back on.
3. Release both keys. The ON•OFF key remains illuminated.
4. Starting with the number 1 key, press and release each
number key on the keypad in the following order: 1-9, then
0. The number that causes the ON•OFF key to blink is the
rst number of the code. As you nd each number of the
code, write it down for future reference. Then start with the
number 1 key again.
5. Repeat step 4 until you have retrieved all ve numbers in
the code. After the fth number is retrieved, the ON•OFF
key blinks briey, then turns off.
4
audIo code vcr code
Any keypress other than the number keys is ignored. If the
sleep time is not entered within 15 seconds after pressing the
SLEEP key, the ON•OFF key blinks four times, indicating the
attempt to program the Sleep Timer has been unsuccessful.
4. Leave the remote aimed at the TV. Once the Sleep Timer is
set, you can continue to use the remote without affecting
the Sleep Timer. However, the remote must be put back in
TV mode and pointed at the TV to activate the Sleep Timer.
Note: If the ON•OFF key is pressed, the Sleep Timer is canceled.
AUDIO DVR/VCR
Ahorro de BaterĂ­a
Su control remoto universal ahorra la potencia de las baterĂ­as al
apagar automĂĄticamente cualquier tecla que se oprima por mĂĄs
de 60 segundos. Esta acciĂłn prolonga la vida Ăştil de las baterĂ­as
en caso de que el control remoto quede pillado en un lugar donde
las teclas permanezcan oprimidas, tal como entre los cojines de un
sofĂĄ.
RCR612N
Manual del Propietario del
Control Remoto Universal
Owner’sManual(Englishonback)
Consejo: Este control remoto p3-ya estĂĄ programado para la
mayorĂ­a de televisores, VCR, lectores de DVD y receptores de
satélite RCA. Sencillamente oprima la tecla correspondiente—
DVD para un Lector de DVD, TV para un televisor, VCR para una
VCR, SAT•CBL•DTC para un receptor de satélite, DVR•AUX para
una unidad DVR.
El control remoto necesita dos baterĂ­as alcalinas AA (no
suministradas).
Para instalar las baterĂ­as:
1. Retire la tapa del compartimiento de las
baterĂ­as.
2. Inserte las baterĂ­as, cerciorĂĄndose de que
las polaridades (+) y (–) correspondan
con el diagrama que aparece en el
compartimiento de las baterĂ­as.
3. Vuelva a colocar la tapa del
compartimiento de las baterĂ­as en su
posiciĂłn.
Precauciones sobre las BaterĂ­as:
• No combine baterías nuevas y viejas.
• No combine diferentes tipos de baterías: alcalinas, estándar
(carbĂłn-zinc) o recargables (nĂ­quel-cadmio).
• Siempre remueva de inmediato baterías viejas, débiles o
desgastadas, y recĂ­clelas o desĂŠchelas segĂşn lo disponen las
normas locales y nacionales.
Para utilizar este control remoto universal con su sistema de
entretenimiento en el hogar, necesitarĂĄ primero programarlo
para manejar sus dispositivos. Para programar el control remoto
universal para manejar sus dispositivos, utilice uno de los cuatro
mĂŠtodos a continuaciĂłn.
• La Búsqueda Automática de Códigos recorre
automĂĄticamente todos los cĂłdigos del dispositivo que desea
manejar. Éste es el método más fácil, pero a veces toma más
tiempo que algunos de los demĂĄs mĂŠtodos de programaciĂłn.
• La Búsqueda de Códigos por Marca busca a través de los
cĂłdigos segĂşn la marca de dispositivos seleccionada. No es tan
fĂĄcil como la bĂşsqueda de cĂłdigos automĂĄtica, pero muchas
veces puede ser mĂĄs rĂĄpida.
• La Entrada Directa de Códigos le permite ingresar un
cĂłdigo de la lista de cĂłdigos suministrada para la marca de
su dispositivo. No es tan fĂĄcil como los otros mĂŠtodos, pero
es posiblemente el mĂĄs rĂĄpido. Aviso: Por lo general, la
Entrada Directa de CĂłdigos es el mejor mĂŠtodo para utilizar con
dispositivos de audio.
• La Búsqueda Manual de Códigos le permite recorrer
manualmente todos los cĂłdigos del dispositivo que desea
manejar.
CĂłmo Probar el CĂłdigo para Obtener MĂĄxima Funcionalidad
1. Pruebe una variedad de funciones del dispositivo con el
control remoto. Si no puede utilizar alguna de las funciones del
dispositivo, vaya al prĂłximo paso e intente un cĂłdigo diferente.
2. Repita la BĂşsqueda AutomĂĄtica de CĂłdigos desde el comienzo.
Cuando su dispositivo se apague, no detenga la bĂşsqueda. En
vez, con la unidad apagada, continĂşe oprimiendo la tecla PLAY
cada 5 segundos hasta que la unidad se vuelva a encender.
3. Cuando se vuelva a encender la unidad, oprima la tecla
REVERSE en el control remoto cada 2 segundos hasta que el
dispositivo se vuelva a apagar. Cuando el dispositivo se vuelva
a apagar, oprima la tecla STOP.
4. Nuevamente, pruebe la funcionalidad de la tecla intentando
controlar una variedad de funciones del dispositivo. Si el cĂłdigo
que se p3-ha almacenado controla la mayorĂ­a de las funciones del
dispositivo, entonces habrĂĄ concluido la programaciĂłn. Si el
cĂłdigo guardado no brinda una mĂĄxima funcionalidad, intente
otro cĂłdigo.
BĂşsqueda AutomĂĄtica de CĂłdigos
La BĂşsqueda AutomĂĄtica de CĂłdigos recorre automĂĄticamente
todos los cĂłdigos del dispositivo que desea manejar. Cuando
encuentre el que maneja su dispositivo, puede detener la bĂşsqueda
y guardar el cĂłdigo.
CONSEJOS: Cada tecla de dispositivo estĂĄ asociada a un
tipo de dispositivo—TV está congurada para buscar TV,
SAT•CBL•DTC para receptores de satélite, convertidores de
TV digital o aparatos de cable, DVD para lectores de DVD y
DVR•AUX para unidades DVR, AUDIO para receptores de audio
y VCR para VCR. Para programar una tecla de dispositivo para
un tipo de dispositivo diferente, consulte la secciĂłn CĂłmo
Programar la Tecla DVR•AUX para Manejar Otros Dispositivos.
Para manejar dispositivos de combinaciĂłn tales como TV/DVD
y TV/VCR, necesitarĂĄ programar cada tecla por separado. Cada
tecla manejarĂĄ dicha parte del dispositivo de combinaciĂłn.
Si el control remoto original incluido con su dispositivo incluye
teclas ON y OFF separadas (en lugar de una sola tecla ON•OFF),
la BĂşsqueda AutomĂĄtica de CĂłdigos quizĂĄ no funcione con ese
dispositivo. Intente el mĂŠtodo de Entrada Directa de CĂłdigos
descrito mĂĄs adelante en este manual.
Para salir en cualquier momento de la BĂşsqueda AutomĂĄtica de
CĂłdigos sin guardar un cĂłdigo nuevo, oprima la tecla CLEAR.
1. Encienda manualmente el
dispositivo que desea manejar.
2. Oprima y sostenga la tecla de dispositivo que desea programar.
A la vez que sostiene la tecla de dispositivo, utilice la otra mano
para oprimir y sostener simultáneamente la tecla ON•OFF del
control remoto.
3. Espere hasta que la tecla ON•OFF se ilumine y permanezca
iluminada. Luego, suelte ambas teclas.
4. Mantenga el control remoto
apuntado directamente al panel
frontal del dispositivo que desea
manejar. Oprima la tecla PLAY del
control remoto y espere 5 segundos.
El control remoto estĂĄ probando
un grupo de 10 cĂłdigos para el
dispositivo.
ÂżSe apagĂł el dispositivo?
SÍ: Vaya al Paso 5.
NO: Oprima PLAY nuevamente. El control remoto prueba el
prĂłximo grupo de 10 cĂłdigos.
ContinĂşe oprimiendo PLAY cada 5 segundos hasta que el
dispositivo se apague.
5. Cuando el dispositivo se apague,
oprima la tecla REVERSE del control
remoto y espere por lo menos 2
segundos. El control remoto prueba el
Ăşltimo cĂłdigo del grupo anterior de 10
cĂłdigos.
ÂżSe encendiĂł el dispositivo?
SÍ: Oprima la tecla STOP. ¡Listo! La
tecla de dispositivo estĂĄ programada.
NO: Oprima REVERSE nuevamente. El control remoto prueba el
prĂłximo cĂłdigo en el grupo de cĂłdigos.
ContinĂşe oprimiendo REVERSE cada 2 segundos hasta que el
dispositivo se encienda. Cuando se encienda, oprima STOP.
Aviso: Si oprime accidentalmente la tecla REVERSE luego de
que el dispositivo se encienda, oprima la tecla FORWARD. Luego,
espere dos segundos para ver si su dispositivo se vuelve a apagar.
NOTAS
A travĂŠs de la programaciĂłn de cada tecla, asegĂşrese de
mantener el control remoto apuntado directamente al sensor
infrarrojo del dispositivo que estĂĄ actualmente programando
con el control remoto.
Pruebe el control remoto con el dispositivo para asegurarse que
la tecla de dispositivo estĂŠ programada con el cĂłdigo correcto
y garantizar asĂ­ su mĂĄxima funcionalidad. Si no puede utilizar
alguna de las funciones, intente con otro cĂłdigo. Para obtener
mayor información, consulte la sección “Cómo Probar el Código
para Obtener Máxima Funcionalidad” a continuación.
Durante la BĂşsqueda AutomĂĄtica de CĂłdigos, el control remoto
ignora la opresiĂłn de teclas que no son parte de la bĂşsqueda.
La bĂşsqueda se detendrĂĄ luego de dos minutos (la tecla
ON•OFF parpadea cuatro veces, y se retiene el último código
programado bajo la tecla de dispositivo).
La tecla ON•OFF parpadea cuatro veces cuando el control
remoto p3-ha recorrido todos los cĂłdigos. El control remoto
sale del mĂŠtodo de BĂşsqueda AutomĂĄtica de CĂłdigos. Si
su dispositivo aĂşn no se p3-ha apagado, intente un mĂŠtodo de
bĂşsqueda diferente.
CĂłmo Probar el CĂłdigo para Obtener MĂĄxima Funcionalidad
1. Pruebe una variedad de funciones del dispositivo con el control
remoto. Si no puede utilizar alguna de las funciones de sus
dispositivos, vaya al prĂłximo paso e intente un cĂłdigo diferente.
2. Repita la BĂşsqueda de CĂłdigos por Marca desde el comienzo.
Cuando el dispositivo se apague por primera vez, no oprima la
tecla STOP, con la cual quedarĂ­a guardado . En el mismo cĂłdigo
vez, con la unidad apagada, continúe oprimiendo la tecla ON•OFF
repetidamente hasta que la unidad se vuelva a encender.
3. Si se vuelve a encender la unidad, habrĂĄ encontrado otro cĂłdigo
que puede manejar ese dispositivo. Oprima STOP.
4. Pruebe la funcionalidad de la tecla nuevamente intentando
una variedad de funciones. Si el cĂłdigo controla la mayorĂ­a
de las funciones del dispositivo, entonces habrĂĄ concluido la
programaciĂłn. Si el cĂłdigo guardado no brinda una mĂĄxima
funcionalidad, intente otro cĂłdigo.
BĂşsqueda de CĂłdigos por Marca
La BĂşsqueda de CĂłdigos por Marca recorre sĂłlo los cĂłdigos
de una de las marcas seleccionadas que aparecen en la lista de
cĂłdigos suministrada. Si la marca del dispositivo aparece en la lista,
posiblemente la bĂşsqueda se llevarĂĄ a cabo de manera fĂĄcil y rĂĄpida.
IMPORTANTE: La BĂşsqueda de CĂłdigos por Marca funciona con
televisores, VCR, lectores de DVD, receptores de satĂŠlite y aparatos
de cable. La BĂşsqueda de CĂłdigos por Marca no funciona para
programar este control remoto con el n de manejar dispositivos
de audio, DVR y convertidores de TV digital. Utilice un mĂŠtodo de
programaciĂłn diferente para estos tipos de dispositivos.
CONSEJOS: Cada tecla de dispositivo estĂĄ asociada a un tipo de
dispositivo—TV está congurada para buscar TV, SAT•CBL•DTC
para receptores de satĂŠlite, convertidores de TV digital o aparatos
de cable, DVD para lectores de DVD y DVR•AUX para unidades DVR,
AUDIO para receptores de audio y VCR para VCR. Para programar
una tecla de dispositivo para un tipo de dispositivo diferente,
consulte la sección Cómo Programar la Tecla DVR•AUX para Manejar
Otros Dispositivos.
Para manejar dispositivos de combinaciĂłn tales como TV/DVD y
TV/VCR, necesitarĂĄ programar cada tecla por separado. Cada tecla
manejarĂĄ dicha parte del dispositivo de combinaciĂłn.
Si el control remoto original incluido con su dispositivo incluye
teclas ON y OFF separadas (en lugar de una sola tecla ON•OFF),
la BĂşsqueda de CĂłdigos por Marca quizĂĄ no funcione con ese
dispositivo. Intente el mĂŠtodo de Entrada Directa de CĂłdigos
descrito mĂĄs adelante en este manual.
Para salir en cualquier momento de la BĂşsqueda de CĂłdigos por
Marca sin guardar un cĂłdigo nuevo, oprima la tecla CLEAR.
1. Encienda manualmente el
dispositivo que desea manejar.
3. Oprima y sostenga la tecla de dispositivo que desea programar.
A la vez que sostiene la tecla de dispositivo, utilice la otra mano
para oprimir y sostener simultáneamente la tecla ON•OFF del
control remoto.
4. Espere hasta que la tecla ON•OFF se ilumine y permanezca
iluminada. Luego, suelte ambas teclas.
6. Mantenga el control remoto apuntado
directamente al panel frontal del
dispositivo que desea manejar. Oprima
la tecla ON•OFF del control remoto y
espere 2 segundos. El control remoto
estĂĄ probando un cĂłdigo para la marca
del dispositivo.
ÂżSe apagĂł el dispositivo?
SÍ: Oprima la tecla STOP para guardar el código. ¡Listo! La tecla
de dispositivo estĂĄ programada.
NO: Oprima ON•OFF nuevamente. El control remoto prueba el
prĂłximo cĂłdigo para su marca.
Continúe oprimiendo ON•OFF cada 2 segundos hasta que el
dispositivo se encienda. Cuando se encienda, oprima STOP.
2. Encuentre la marca del dispositivo en
la secciĂłn de CĂłdigos por Marca de la
lista de cĂłdigos suministrada. Marque
con un cĂ­rculo el nĂşmero de la marca y
mantenga la lista a mano.
Co d e L st s
Li t a de C Ăł di g o s
0 1 2 3
4
567
8
9
0 1 2 3
4
567
8
9
0 1 2 3
4
567
8
9
0 1 2 3
4
567
8
9
5. FĂ­jese en el nĂşmero que marcĂł para
el nĂşmero de cĂłdigo de la marca del
dispositivo. Oprima dicho nĂşmero en el
teclado del control remoto.
NOTAS
A travĂŠs de la programaciĂłn de cada tecla, asegĂşrese de
mantener el control remoto apuntado directamente al sensor
infrarrojo del dispositivo que estĂĄ actualmente programando con
el control remoto.
Pruebe el control remoto con el dispositivo para asegurarse que
la tecla de dispositivo estĂŠ programada con el cĂłdigo correcto
y garantizar asĂ­ su mĂĄxima funcionalidad. Si no puede utilizar
alguna de las funciones, intente con otro cĂłdigo. Para obtener
mayor información, consulte la sección “Cómo Probar el Código
para Obtener Máxima Funcionalidad” a continuación.
Durante la BĂşsqueda de CĂłdigos por Marca, el control remoto
ignora la opresiĂłn de teclas que no son parte de la bĂşsqueda.
La búsqueda se detendrá luego de dos minutos (la tecla ON•OFF
parpadea cuatro veces, y se retiene el Ăşltimo cĂłdigo programado
bajo la tecla de dispositivo).
La tecla ON•OFF parpadea cuatro veces cuando el control remoto
ha recorrido todos los cĂłdigos. El control remoto sale del mĂŠtodo
de BĂşsqueda de CĂłdigos por Marca. Si su dispositivo aĂşn no se
ha apagado, intente un mĂŠtodo de bĂşsqueda diferente.
Entrada Directa de CĂłdigos
La Entrada Directa de CĂłdigos le permite ingresar un cĂłdigo de la
lista de cĂłdigos suministrada para la marca de su dispositivo. No
es tan fĂĄcil como los otros mĂŠtodos, pero es posiblemente el mĂĄs
rĂĄpido.
CONSEJO: Cada tecla de dispositivo estĂĄ asociada a un tipo
de dispositivo—TV está congurada TV, SAT•CBL•DTC para
receptores de satĂŠlite, convertidores de TV digital o aparatos
de cable, DVD para lectores de DVD y DVR•AUX para unidades
DVR, AUDIO para receptores de audio y VCR para VCR. Para
programar una tecla de dispositivo para un tipo de dispositivo
diferente, consulte la secciĂłn CĂłmo Programar la Tecla
DVR•AUX para Manejar Otros Dispositivos.
Para manejar dispositivos de combinaciĂłn tales como TV/DVD
y TV/VCR, necesitarĂĄ programar cada tecla por separado. Cada
tecla manejarĂĄ dicha parte del dispositivo de combinaciĂłn.
1. Encienda manualmente el dispositivo
que desea manejar.
3. Oprima y sostenga la tecla de dispositivo que desea programar
(la tecla ON•OFF se ilumina).
Mientras oprime la tecla de dispositivo, ingrese con la otra mano
el primer cĂłdigo de cinco dĂ­gitos para la marca de la lista de
códigos (la tecla ON•OFF se apaga luego del primer dígito).
2. Encuentre la Lista de CĂłdigos
suministrada con el control remoto.
Encuentre la secciĂłn para el tipo de
dispositivo que desea programar,
y localice la marca en esa secciĂłn.
Marque con un cĂ­rculo los cĂłdigos para
la marca y mantĂŠngalos a mano.
Co d e L is ts
Li s ta de CĂł di g os
0
1
2 3
4
5 6
7 8 9
V
VCR
0
1
2 3
4
5 6
7 8 9
DVD
S T CABLE
0
1
2 3
4
5 6
7 8 9
0
1
2 3
4
5 6
7 8 9
NOTAS
Recuerde ingresar el cĂłdigo para referencia futura en el
recuadro provisto en la secciĂłn RecuperaciĂłn de CĂłdigos de
este manual.
Si la marca de su dispositivo no aparece en la lista de cĂłdigos,
utilice uno de los mĂŠtodos de BĂşsqueda de CĂłdigos para
programar el control remoto. (Consulte los mĂŠtodos de
BĂşsqueda AutomĂĄtica y Manual de CĂłdigos)
Si suelta la tecla de dispositivo en cualquier momento durante
el proceso de Entrada Directa de Códigos, la tecla ON•OFF
parpadea cuatro veces, y se sale del proceso. Se retendrĂĄ el
Ăşltimo cĂłdigo programado bajo la tecla de dispositivo.
Pruebe el control remoto con el dispositivo para asegurarse que
la tecla de dispositivo estĂŠ programada con el cĂłdigo correcto
y garantizar asĂ­ su mĂĄxima funcionalidad. Si no puede utilizar
alguna de las funciones, intente con otro cĂłdigo de la lista.
4. Cuando haya ingresado el cĂłdigo de cinco dĂ­gitos, continĂşe
oprimiendo la tecla de dispositivo y observe la tecla ON•OFF.
¿SeiluminólateclaON•OFF?
SÍ: ¡Listo! La tecla de dispositivo está programada.
No, parpadeĂł cuatro veces : y se apagĂł Ha ingresado un
nĂşmero de cĂłdigo que no se encuentra en las listas de cĂłdigos
u omitiĂł un paso en el procedimiento de entrada de cĂłdigos.
Intente el paso 3 nuevamente.
BĂşsqueda Manual de CĂłdigos
La BĂşsqueda Manual de CĂłdigos le permite recorrer uno por uno
todos los cĂłdigos del dispositivo que desea manejar. Cuando
encuentre el que maneja su dispositivo, puede detener la bĂşsqueda y
guardar el cĂłdigo.
CONSEJOS: El mĂŠtodo de BĂşsqueda Manual de CĂłdigos podrĂ­a
tomar mĂĄs tiempo porque el control remoto busca a travĂŠs de
todos los cĂłdigos en su memoria uno por uno. Si su marca aparece
en las Listas de CĂłdigos por Marca o Listas de CĂłdigos, intente
primero la BĂşsqueda de CĂłdigos por Marca o el mĂŠtodo de Entrada
Directa de CĂłdigos.
Cada tecla de dispositivo está asociada a un tipo de dispositivo—TV
está congurada para buscar TV, SAT•CBL•DTC para receptores
de satĂŠlite, convertidores de TV digital o aparatos de cable, DVD
para lectores de DVD y DVR•AUX para unidades DVR, AUDIO para
receptores de audio y VCR para VCR. Para programar una tecla
de dispositivo para un tipo de dispositivo diferente, consulte la
sección Cómo Programar la Tecla DVR•AUX para Manejar Otros
Dispositivos.
Para manejar dispositivos de combinaciĂłn tales como TV/DVD y
TV/VCR, necesitarĂĄ programar cada tecla por separado. Cada tecla
manejarĂĄ dicha parte del dispositivo de combinaciĂłn.
Para salir en cualquier momento de la BĂşsqueda Manual de
CĂłdigos sin guardar un cĂłdigo nuevo, oprima la tecla CLEAR.
Paso 1: Instale las baterĂ­as
Paso 2: Programe el control remoto
-
-


Product specificaties

Merk: RCA
Categorie: Controller
Model: RCR612N

Heb je hulp nodig?

Als je hulp nodig hebt met RCA RCR612N stel dan hieronder een vraag en andere gebruikers zullen je antwoorden


Handleiding Controller RCA

Handleiding Controller

Nieuwste handleidingen voor Controller