Primera PTLink Handleiding

Primera Printer PTLink

Lees hieronder de 📖 handleiding in het Nederlandse voor Primera PTLink (6 pagina's) in de categorie Printer. Deze handleiding was nuttig voor 70 personen en werd door 2 gebruikers gemiddeld met 4.5 sterren beoordeeld

Pagina 1/6
1
Secon 1: Overview
The PTLink IP60 wireless print module is a print server that allows the Primera IP60 Photo
Printer to receive prints from IPhone/IPad devices. It features two separate network modes:
1. Hotspot network mode (default) allows the iPhone/iPad to connect and print directly to
the IP60 with no other network present. This is great for events where you will not
necessarily have access to a wi network.
2. Wi network mode allows users to connect the IP60 to their own wireless network,
making it accessible throughout their personal network infrastructure. This is ideal for
an oce where you want easy access to print to the IP60 just by connecng your device
to the same wi network.
Secon 2: First Time Setup
1. Connect PTLink to power using the included micro USB power supply.
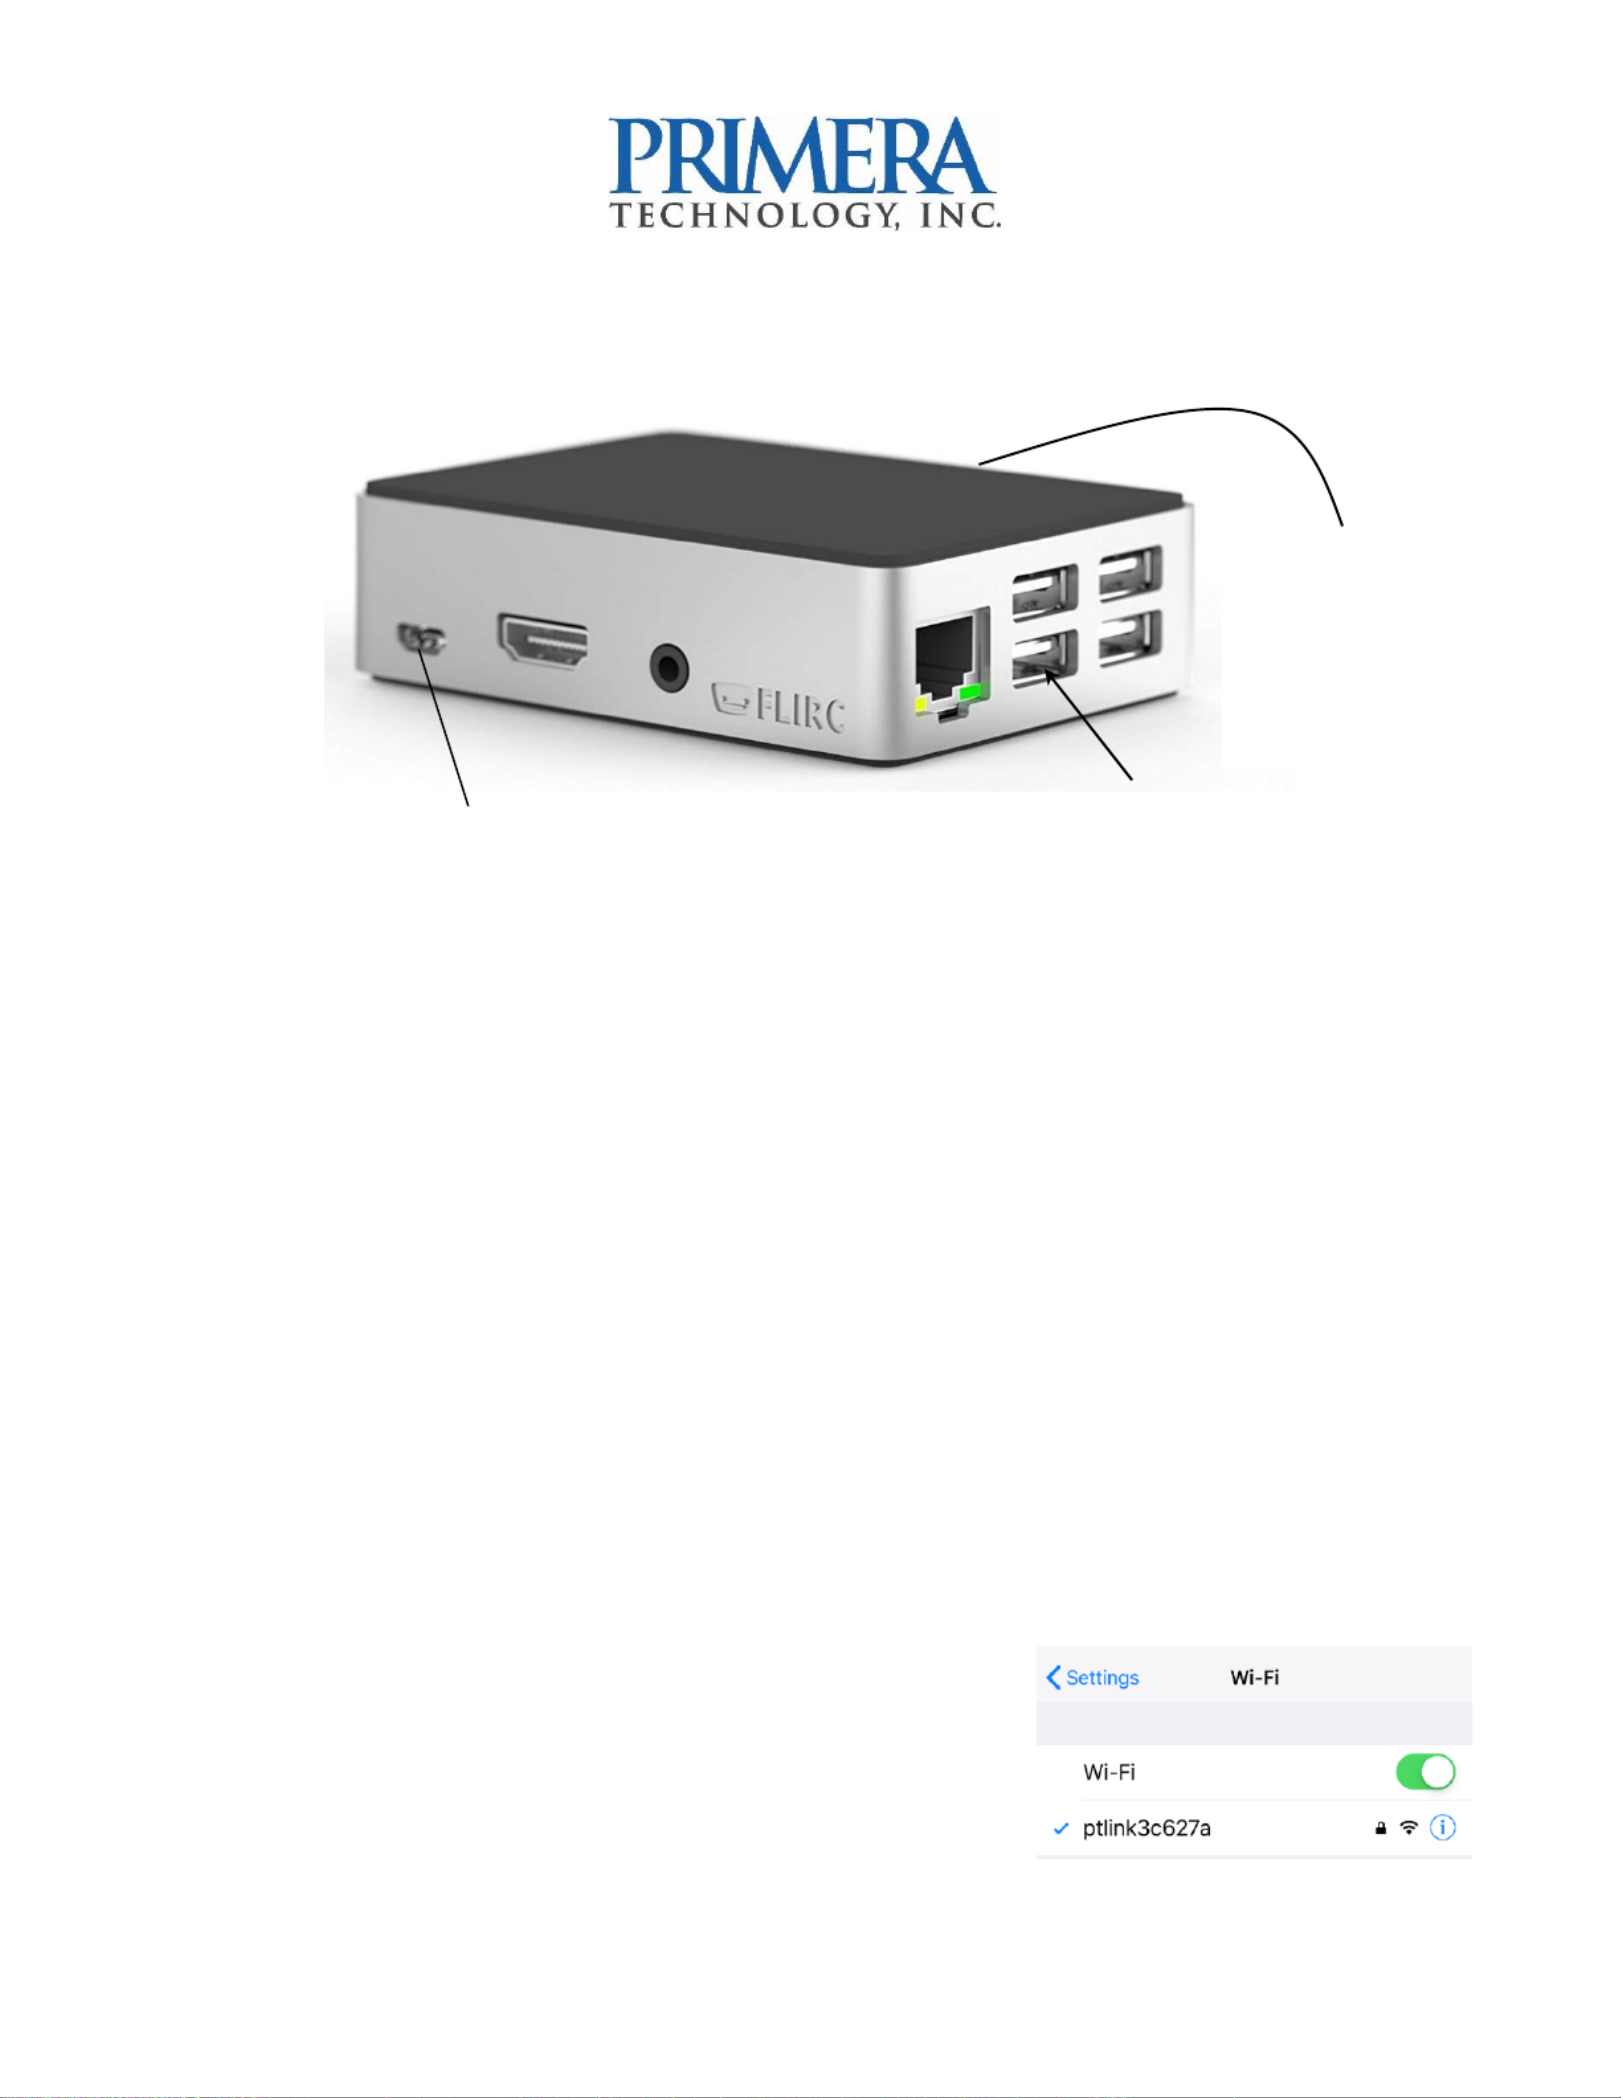
2. Connect the IP60 printer to the PTLink module using the included USB cable - (a b).
3. The hotspot network will be acvated and PTLink will
create its own - network. Wi Fi
4. Go to Sengs Wi on your iPhone/iPad. Choose the
new network name that appears in the following
format: (The Network Name = ptlink-xxxxxx
Micro USB Power
Quick Start: PTLink for IP60 Print Server
USB (Connect cable from
Primera IP60 here)
Network Name is
printed on a label
found on the back
2
numbers/characters which are represented by the xx xx will be dierent for each xx
PTLink module and will be printed on a label aached to your PTLink.)
5. You will be prompted for a password: Default Password = primera1
6. You are now connected. To print see secon 5.
Secon 3: Connecng to Personal -Wi Fi
If you would like to connect the Primera IP60 wireless print module to your personal network
infrastructure follow these steps:
1. Starng connected to -hoc wireless network, navigate using your Safari web PTLink’s ad
browser to (The numbers/characters which are represented by the ptlink-xxxxxx.local
xxxxxx will be dierent for each PTLink module and will be printed on a label aached to
your PTLink.)
2. The web portal will appear and ask for login info. Default user and password is:
User: admin
Pass: primera1
3. The web portal will open and present you with local networks it can connect to. Once
you have found the network you would like to connect to, click/tap the name on the
screen.
4. A dropdown will appear asking for either your chosen network - password, or it s Wi Fi
will display a warning that there are security risks associated with connecng to open
Wi Wi- networks. For a password secured Fi - network, enter your password and press Fi
connect.
For an open Wi-Fi network, view the warning message and press either to connect or ok
close to exit and choose another.
5. Aer choosing your network and pressing connect, the web portal will show you a
message that a connecon is being aempted. Switch to the chosen Wi-Fi network on
the iPhone/iPad to connue prinng. Aer switching networks, you can verify that the
unit is now connected to the chosen network by accessing ptlink-xxxxxx.local on Safari.
If the password has been accepted and the switch has occurred, you will see “You are
currently connected to: <userwi>”
displayed above the network choices. You are now ready to print to your IP60 unit from
your local Wi-Fi connecon, and ptlink-xxxxxx.local will be accessible from any
iPhone/iPad connected to the network. *
*Note: Users must authencate before having access to the web portal. Anyone
aempng to access ptlink-xxxxxx.local from inside the network will be unable to access
3
it unless they login using admin credenals, or user credenals set up by the device
admin.
Note 2: Once the device (iPad/iPhone) is connected to the ad-hoc network it will not be
able to connect to any other wi network to access the internet. iPads/iPhones with a
mobile wireless connecon will not have this problem they will automacally use the ;
mobile carrier wireless signal to connect to the internet.
Secon 4: Hotspot Mode
4A: Manually Reverng to Hotspot
If you would like to set PTLink back to its original hotspot -Fi network, follow these steps: Wi
1. From an iPhone/iPad device on the same network as the Primera IP60 wireless print
module, navigate using the safari web browser to and type in your ptlink- .localxxxxxx
password. (The numbers/characters which are represented by the xxxxxx will be
dierent for each PTLink module and will be printed on a label aached to your PTLink.)
2. Click the menu Icon to reveal addional sengs.
3. Click/Tap . HotSpot
4. You will receive a message that the module is switching back to hotspot.
5. Go to the -Fi seng your iPad/iPhone device, it may take up to a minute for the Wi on
hotspot SSID(Network name) to appear in your Wi-Fi network list.
6. Once your IP60 hotspot network name reappears, connect using the default password
(primera1).
7. The IP60 wireless print module is now ready to print.
Note: Users can also quickly switch back to their previously connected infrastructure -Wi
Fi network by pressing the buon in the navigaon bar of the web portal. WiFi
4B: Reverng to Hotspot by Restart.
1. Unplug all Primera units from PTLink
2. Power cycle PTLink and wait 1 minute.
3. PTLink will automacally fall back to hotspot.


Product specificaties

Merk: Primera
Categorie: Printer
Model: PTLink

Heb je hulp nodig?

Als je hulp nodig hebt met Primera PTLink stel dan hieronder een vraag en andere gebruikers zullen je antwoorden


Handleiding Printer Primera

Handleiding Printer

Nieuwste handleidingen voor Printer