Panasonic NV-MX3 Handleiding
Bekijk gratis de handleiding van Panasonic NV-MX3 (54 pagina’s), behorend tot de categorie Camcorder. Deze gids werd als nuttig beoordeeld door 85 mensen en kreeg gemiddeld 4.8 sterren uit 43 reviews. Heb je een vraag over Panasonic NV-MX3 of wil je andere gebruikers van dit product iets vragen? Stel een vraag
Pagina 1/54

Card Functions
(MultiMediaCard, SD Memory Card)
External Input Recording
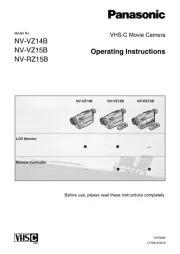
NV-MX1B NV-MX5B NV-MX7B
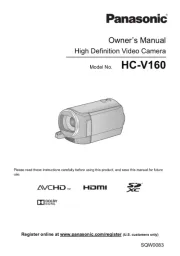
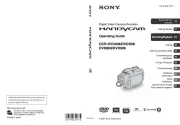
Digital Video Camera
Operating Instructions
VQT8901
Before use, please read these instructions completely.
Model No.
NV-MX1B
NV-MX5B
NV-MX7B

Basic Operations
32
AC Adaptor Set
. . . . . . AC Adaptor
. . . . . .
. . . . . . AC Mains Lead
. . . . . . (VJA0940)
. . . . . . DC Input Lead
(K2GJ2DZ00010)
. . . . . . Battery Pack
(VSB0418)
. . . . . . AV Cable
(K2KC4CB00001)
. . . . . . . . . S-Video Cable
(K2KZ9BA00001)
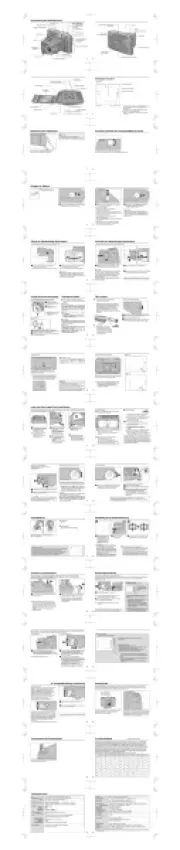
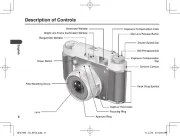
Controls and Functions
For more details, see the pages indicated in brackets.
543
6 7 8 9 : ;
<
@
?
=
A
B
>
12
1Smart Accessory Shoe (NV-MX5, NV-MX7 only)
The Video Flash (VW-FLH3E: optional) (p. 117) or
the Stereo Microphone (VW-VMS2E: optional), etc.
can be attached here. Power is supplied directly from
the Movie Camera when using an accessory
supported by the Smart Accessory Shoe. Remove
the Shoe Cover to attach these accessories.
≥Do not touch the connector part of the Smart
Accessory Shoe.
Accessory Shoe (NV-MX1 only)
Stereo Microphone (VW-VMS2E: optional), etc. is
attached here.
2Shoe Cover
When using the Shoe, remove the Shoe Cover by
sliding it in the direction of the arrow.
3Fade Button [FADE] (p. 48)
4Backlight Button [BLC] (p. 28)
5Still Button [STILL] (p. 35)
6LCD Monitor Open Button [PUSH OPEN] (p. 14)
7LCD Monitor (p. 14, 23, 117)
8Speaker (p. 39)
9Title Button [TITLE] (p. 90)
(NV-MX5, NV-MX7 only)
:Multi-Picture Button [MULTI]
(p. 54, 56, 68– 73, 88)
Picture-in-Picture Button [P-IN-P] (p. 58)
; Battery Holder (p. 8, 10)
<Mode Selector Switch [AUTO/MNL]
(p. 26, 30, 50, 62, 64)
=Focus Button [FOCUS] (p. 30)
>Lens Hood (p. 117)
Be sure to keep the Lens Hood attached in
order to block out excess light.
?Lens
@Recording Indicating (Tally) Lamp (p. 27)
AWhite Balance Sensor (p. 119)
Remote Control Sensor (p. 106)
BMicrophone (built-in, stereo)
. . . . . . Remote Controller
(N2QAEC000003)
. . . . . . Button-Type Battery (CR2025)
. . . . . . Lens Hood (VYQ1988)
. . . . . . Lens Cap (VYP7852)
Lens Cap Cord (VGQ5138)
. . . . . . Shoulder Strap (VFC3506)
. . . . . . Digital Video Head Cleaner
(VFK1451)
. . . . . . MultiMediaCard (VFA0324)
(NV-MX5, NV-MX7 only)
Check List for the Standard Accessories
≥For purchasing additional Battery Packs, see the list of optional accessories on p. 131.
Due to limitations in LCD production technology,
there may be some tiny bright or dark spots on
the LCD Monitor screen. However, this is not a
malfunction and does not affect the recorded
picture.
≥Order accessory and consumable items for all Audio Visual Products with ease and confidence either by
telephoning our Customer Care Centre on 08705 357357 Mon Friday 9:00am 6:00pm and Sat 9:00am 1:00pm– – –
≥Or go on line through our Internet Accessory ordering application at www.panasonic.co.uk.
≥Most major credit and debit cards accepted.
≥All enquires transactions and distribution facilities are provided directly by Panasonic UK Ltd.
≥It couldn’t be simpler!

Basic Operations
54
Controls and Functions
(Continued)
L
M
N
U
K
O
R
S
T
H
F
E
C
D
G
J
SEARCH
MENU
PUSH
W.B/SHUTTER/IRIS/VOL/JOG
12
I
V
W
Z
Y
X
\
]
[
^
_`
a
g
b
c
d
e
f
S-VIDEO
IN/OUT
D.STILL
PICTURE
EDIT
D
(MINI)
AV IN/OUT
PHONES
MIC
P
Q
SCassette Compartment Window (p. 12)
TGrip Belt
You can adjust the Grip Belt to the size of your hand.
When you open or close the Cassette Compartment,
push down the buckle of the Grip Belt so that it does
not prevent the Cassette Compartment from opening
and closing completely.
UShoulder Strap Holders
Before you go recording outside, it is recommended
that you attach the Shoulder Strap to prevent the
Movie Camera from dropping accidentally.
Pull the end of the Shoulder Strap through the
Shoulder Strap Holder on the Movie Camera.
Fold the end of the Shoulder Strap back, pull it
through the Shoulder Strap Length Adjuster.
Pull it out more than 2 cm 1 from the Shoulder Strap
Length Adjuster so that it cannot slip off.
Pass your hand through
the Grip Belt and adjust
its length. Fold back the
end of the Grip Belt to
securely fasten the
velcro tape closure.
VUpper Cassette Compartment Cover (p. 12)
WZoom Lever [W/T] (p. 32)
XOperation Mode Lamps
[CAMERA/VCR/CARD P.B] (p. 26, 38, 88)
(Only the NV-MX5 and NV-MX7 models come with
[CARD P.B] Lamp.)
YOff/On Mode Selector Switch [OFF/ON/MODE]
(p. 14, 26, 38, 42, 88)
Z Eyecup
[Viewfinder (p. 14, 23, 117)
cEdit Socket [EDITD (MINI)] (p. 111, 112)
dAudio-Video Input/Output Socket [AV IN/OUT]
(p. 42, 108, 111, 114) (Only the NV-MX7 model
comes with an input function.)
Headphone Socket [PHONES] (p. 43)
When a cable is connected to this socket, the Movie
Camera’s built-in speaker is turned off.
eMicrophone Socket [MIC] (p. 117)
To connect an external microphone or audio
equipment. (Connecting to this socket deactivates the
built-in microphone.)
fDigital Still Picture Terminal [D.STILL PICTURE]
(p. 114)
gFocus Ring (p. 30)
Due to limitations in LCD production technology,
there may be some tiny bright or dark spots on
the Viewfinder screen. However, this is not a
malfunction and does not affect the recorded
picture.
\Eyepiece Corrector Knob (p. 14)
]Recording Start/Stop Button (p. 26)
^Cassette Eject Lever [OPEN/EJECT] (p. 12, 42)
_Lower Cassette Compartment Cover (p. 12)
` Tripod Receptacle
To mount the Movie Camera on an optional tripod.
aCassette Holder (p. 12)
bS-Video Input/Output Socket [S-VIDEO IN/OUT]
(p. 42, 108, 111, 112, 114)
(Only the NV-MX7 model comes with an input
function.)
Connect the S-Video Cable to this socket to record
clearer pictures or view on the TV screen.
1
CPlay Button [1] (p. 38, 89, 94)
DRewind/Review Button [6] (p. 38, 94)
Recording Check Button [S] (p. 28)
Reverse Search Button [sSEARCH] (p. 44, 88)
EStop Button [∫] (p. 38, 89, 94)
FFast Forward/Cue Button [5] (p. 38, 94)
Forward Search Button [SEARCHr] (p. 44, 88)
GPause Button [;] (p. 40, 89, 94)
HDV Terminal (i.LINK) [¥] (p. 110)
Connect it to digital video equipment.
“ ”i.LINK is the name of the connector in accordance
with the IEEE1394-1995.
“ ”¥ is the logo marked on products conforming with
the i.LINK“ ” specifications.
(It is only possible to input digital signals with model
NV-MX7.)
IMenu Button [MENU] (p. 16)
JMulti-Function Dial [PUSH]
(p. 16, 23, 24, 39, 41, 62, 64)
KPhotoshot Button [PHOTO SHOT]
(p. 34, 82–87, 90, 92, 96)
L Battery Eject Button [BATT. EJECT] (p. 11)
MTape/Card Photoshot Selector [TAPE/CARD]
(p. 34, 82–87) (NV-MX5, NV-MX7 only)
NReset Button [RESET] (p. 128)
OCard Access Lamp [ACCESS] (p. 81)
(NV-MX5, NV-MX7 only)
PCard Slot Cover (p. 80) (NV-MX5, NV-MX7 only)
QCard Slot (p. 80) (NV-MX5, NV-MX7 only)
RCard Slot Cover Open Lever [OPEN] (p. 80)
(NV-MX5, NV-MX7 only)
Product specificaties
| Merk: | Panasonic |
| Categorie: | Camcorder |
| Model: | NV-MX3 |
Heb je hulp nodig?
Als je hulp nodig hebt met Panasonic NV-MX3 stel dan hieronder een vraag en andere gebruikers zullen je antwoorden
Handleiding Camcorder Panasonic
10 April 2025
4 April 2025
4 April 2025
4 April 2025
4 April 2025
2 April 2025

27 Maart 2025

27 Maart 2025
25 Februari 2025
25 Februari 2025
Handleiding Camcorder
- Dnt
- RCA
- Aiptek
- Rollei
- Nilox
- Braun Phototechnik
- Leica
- BenQ
- Praktica
- Naxa
- Nedis
- EE
- Ion
- Marshall
- Midland
Nieuwste handleidingen voor Camcorder

15 September 2025
8 September 2025
1 September 2025
6 Augustus 2025
9 Juli 2025
9 Juli 2025
6 Juli 2025
5 Juli 2025

5 Juli 2025
4 Juli 2025