Netgear WNDR37AV Handleiding
Netgear processzor WNDR37AV
Bekijk gratis de handleiding van Netgear WNDR37AV (2 pagina’s), behorend tot de categorie processzor. Deze gids werd als nuttig beoordeeld door 39 mensen en kreeg gemiddeld 4.5 sterren uit 8 reviews. Heb je een vraag over Netgear WNDR37AV of wil je andere gebruikers van dit product iets vragen? Stel een vraag
Pagina 1/2
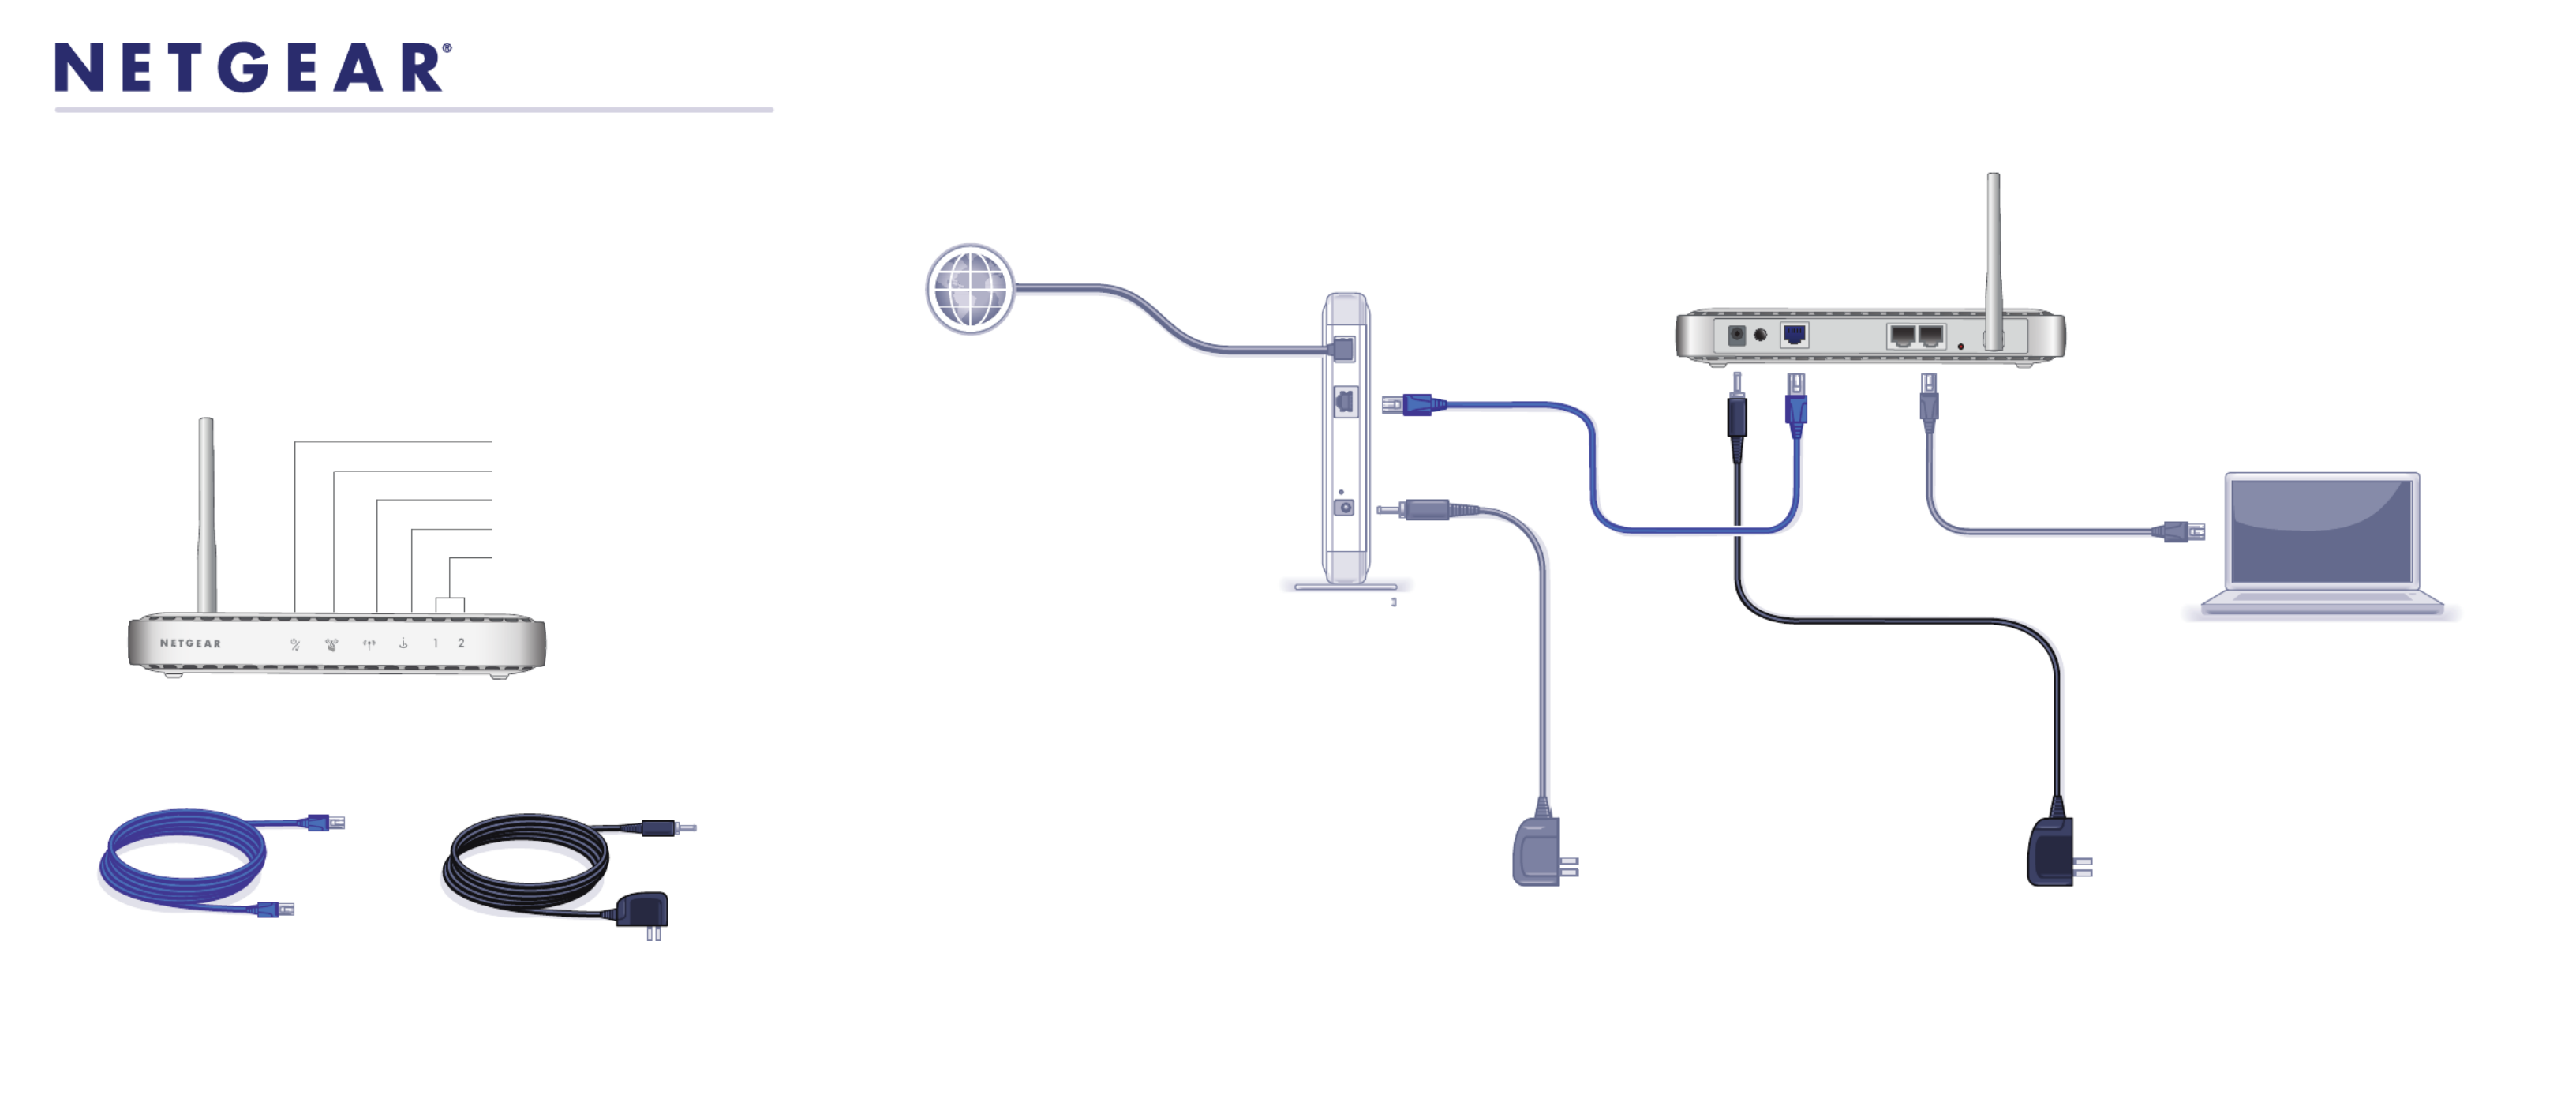
Step 1:
Connect your modem.
Step 2:
Connect your router.Step 3:
Connect your computer.
Step 6:
Configure settings.
Open a browser, such as
Internet Explorer, and enter
www.routerlogin.net
to complete the setup.
Step 5:
Power on your router.
Wait until the power LED
turns solid green.
Step 4:
Power on your modem.
Wait until your modem cycles on
(approximately 2 minutes).
Note:If you have a battery-backed modem,
press the reset button. (In some cases, you may
need to remove, then re-insert, the battery to recycle
your modem.)
CAUTION:
MAKE SURE YOUR MODEM IS
TURNED OFF OR UNPLUGGED
BEFORE STARTING THE
INSTALLATION.
DSL or Cable
Wireless Router
(back)
Modem Laptop or Desktop
Computer
Wireless Router
(front)
Package Contents:
Basic Wireless Router
WNR612
Installation Guide
Power Adapter
Ethernet Cable
Ethernet cable
(not included)
(not included)
Power/Test LED
Push ‘N’ Connect Security LED
Wireless LED
Internet LED
LAN Ports 1 & 2 LED
Product specificaties
| Merk: | Netgear |
| Categorie: | processzor |
| Model: | WNDR37AV |
| Kleur van het product: | Zwart |
| Gewicht: | 500 g |
| LED-indicatoren: | Ja |
| Frequentie van processor: | 680 MHz |
| Wi-Fi-standaarden: | 802.11a, 802.11b, 802.11g |
| Ethernet LAN: | Ja |
| Meegeleverde kabels: | LAN (RJ-45) |
| Inclusief AC-adapter: | Ja |
| Aantal Ethernet LAN (RJ-45)-poorten: | 5 |
| Aantal USB-aansluitingen: | 1 |
| Certificering: | CEC\nRoHS\nWEEE\nDLNA |
| Aansluiting voor netstroomadapter: | Ja |
| Intern geheugen: | 64 MB |
| Processor architectuur: | MIPS32 |
| Type processor: | Ja |
| Wifi-standaard: | Wi-Fi 4 (802.11n) |
| WLAN gegevensoverdrachtsnelheid (max): | 150 Mbit/s |
| Interfacetype Ethernet LAN: | Fast Ethernet |
| Ethernet LAN, data-overdrachtsnelheden: | 10, 100 Mbit/s |
| Bekabelingstechnologie: | 10/100Base-T(X) |
| Netwerkstandaard: | IEEE 802.11a, IEEE 802.11b, IEEE 802.11g, IEEE 802.11n |
| Ondersteunde beveiligingsalgoritmen: | WEP, WPA-PSK, WPA2-PSK |
| Compatibele besturingssystemen: | Microsoft Windows 7, Vista, XP, 2000, Mac OS, UNIX, Linux |
| Web-gebaseerd management: | Ja |
| Ondersteunde WLAN data-overdrachtsnelheden: | 11, 54, 150 Mbit/s |
| xDSL-verbinding: | Ja |
| Ethernet WAN: | Ja |
| Flash memory: | 8 MB |
| Universal Plug and Play ( UPnP ): | Ja |
| Compatibiliteit: | WNDA3100 |
| Quality of Service (QoS): | Ja |
| Power over Ethernet (PoE): | Nee |
| Afmetingen (B x D x H): | 223 x 153 x 31 mm |
| Network address translation (NAT): | Ja |
| Bandbreedte: | 2.4 GHz |
| Stateful Packet Inspection (SPI): | Ja |
Heb je hulp nodig?
Als je hulp nodig hebt met Netgear WNDR37AV stel dan hieronder een vraag en andere gebruikers zullen je antwoorden
Handleiding processzor Netgear

22 September 2025
23 Februari 2025
13 Januari 2025
9 December 2024
21 November 2024
5 November 2024
5 November 2024
11 September 2024
11 September 2024
11 September 2024
Handleiding processzor
Nieuwste handleidingen voor processzor
29 Mei 2026
26 Mei 2026
21 Mei 2026
19 Mei 2026
19 Mei 2026
18 Mei 2026
12 Mei 2026
11 Mei 2026
11 Mei 2026
5 Mei 2026