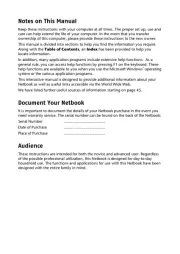
Medion Akoya MD 96850 Handleiding
Bekijk gratis de handleiding van Medion Akoya MD 96850 (2 pagina’s), behorend tot de categorie Laptop. Deze gids werd als nuttig beoordeeld door 6 mensen en kreeg gemiddeld 4.9 sterren uit 3.5 reviews. Heb je een vraag over Medion Akoya MD 96850 of wil je andere gebruikers van dit product iets vragen? Stel een vraag
Pagina 1/2

Kurzanleitung DE_EN ME2L RC1.FH11 Tue Apr 22 10:53:32 2008 Seite 1
Probedruck
C M Y CM MY CY CMY K
Kurzübersicht Kurzanleitung
MSN 4002 5530
i
Starten
Notebookübersicht
Weiterführende Informationen entnehmen Sie
bitte der beigefügten Dokumentation.
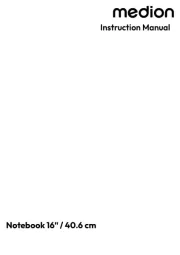
Stromversorgung
Bitte beachten Sie die ausführlichen Hinweise in Ihrer Bedienungsanleitung!
1. Legen Sie den mitgelieferten Akku in das Notebook
ein. Verriegeln Sie unbedingt den Akku, um ein
ungewolltes Herausfallen des Akkus zu vermeiden.
2. Schließen Sie den mitgelieferten Netzadapter an das
Notebook [ ] an.13
3. Verbinden Sie dann das Netzkabel mit dem Adapter
und schließen es anschließend an einer Steckdose an.
Stellen Sie den Schalter am Netzadapter auf die Stellung
I, um das Notebook mit Strom zu versorgen und den
Akku aufzuladen. (Stellen Sie diesen Schalter auf 0, um
die Stromzufuhr zu unterbrechen.)
Bitte laden und entladen Sie den neuen Akku zwei- bis
dreimal hintereinander vollständig, damit dieser seine
volle Leistung erreicht!
Es darf sich keine bootfähige Disk im optischen Laufwerk
[20] befinden, da sonst das Betriebssystem nicht von der
Festplatte geladen werden kann.
*Anschlüsse mit Doppelbelegung. Konfiguration erfolgt über Software.
Linke Seite
Rechte Seite
Vorderseite
Geöffnetes Notebook
Vorsicht!
Um Beschädigungen zu vermeiden, legen Sie keine Gegenstände
auf das Notebook und üben Sie keinen Druck auf das Display aus.
4. Öffnen Sie das Display und klappen Sie es bis zur
gewünschten Position auf. Das Display sollte nicht um
mehr als 120° aufgeklappt werden.
5. Schalten Sie das Notebook ein, indem Sie den Ein-
/Ausschalter [2] kurz gedrückt halten. Das Notebook startet
und durchläuft nun verschiedene Phasen.
6. Folgen Sie nach Erscheinen des Windowsbegrüßungs-
bildschirms den Anweisungen. Die einzelnen Dialoge
erklären die durchzuführenden Schritte.
English version
Antiviren Software aktivieren
Auf Ihrem Notebook ist eine Antiviren-Software installiert. Nach der Ersteinrichtung Ihres Notebooks werden
Sie beim nächsten Neustart aufgefordert die Antiviren-Software zu registrieren.
Nehmen Sie diese kostenlose online Registrierung vor, um die Software freizuschalten und 90 Tage kostenlose
Updates zu bekommen. Lesen Sie in der Bedienungsanleitung, wie Sie Ihr Notebook nach Ablauf der 90 Tage
schützen können.
Hinweis:
Installieren Sie keine weitere Antiviren-Software, da dadurch die Leistung des Notebooks beeinträchtigt werden
kann.
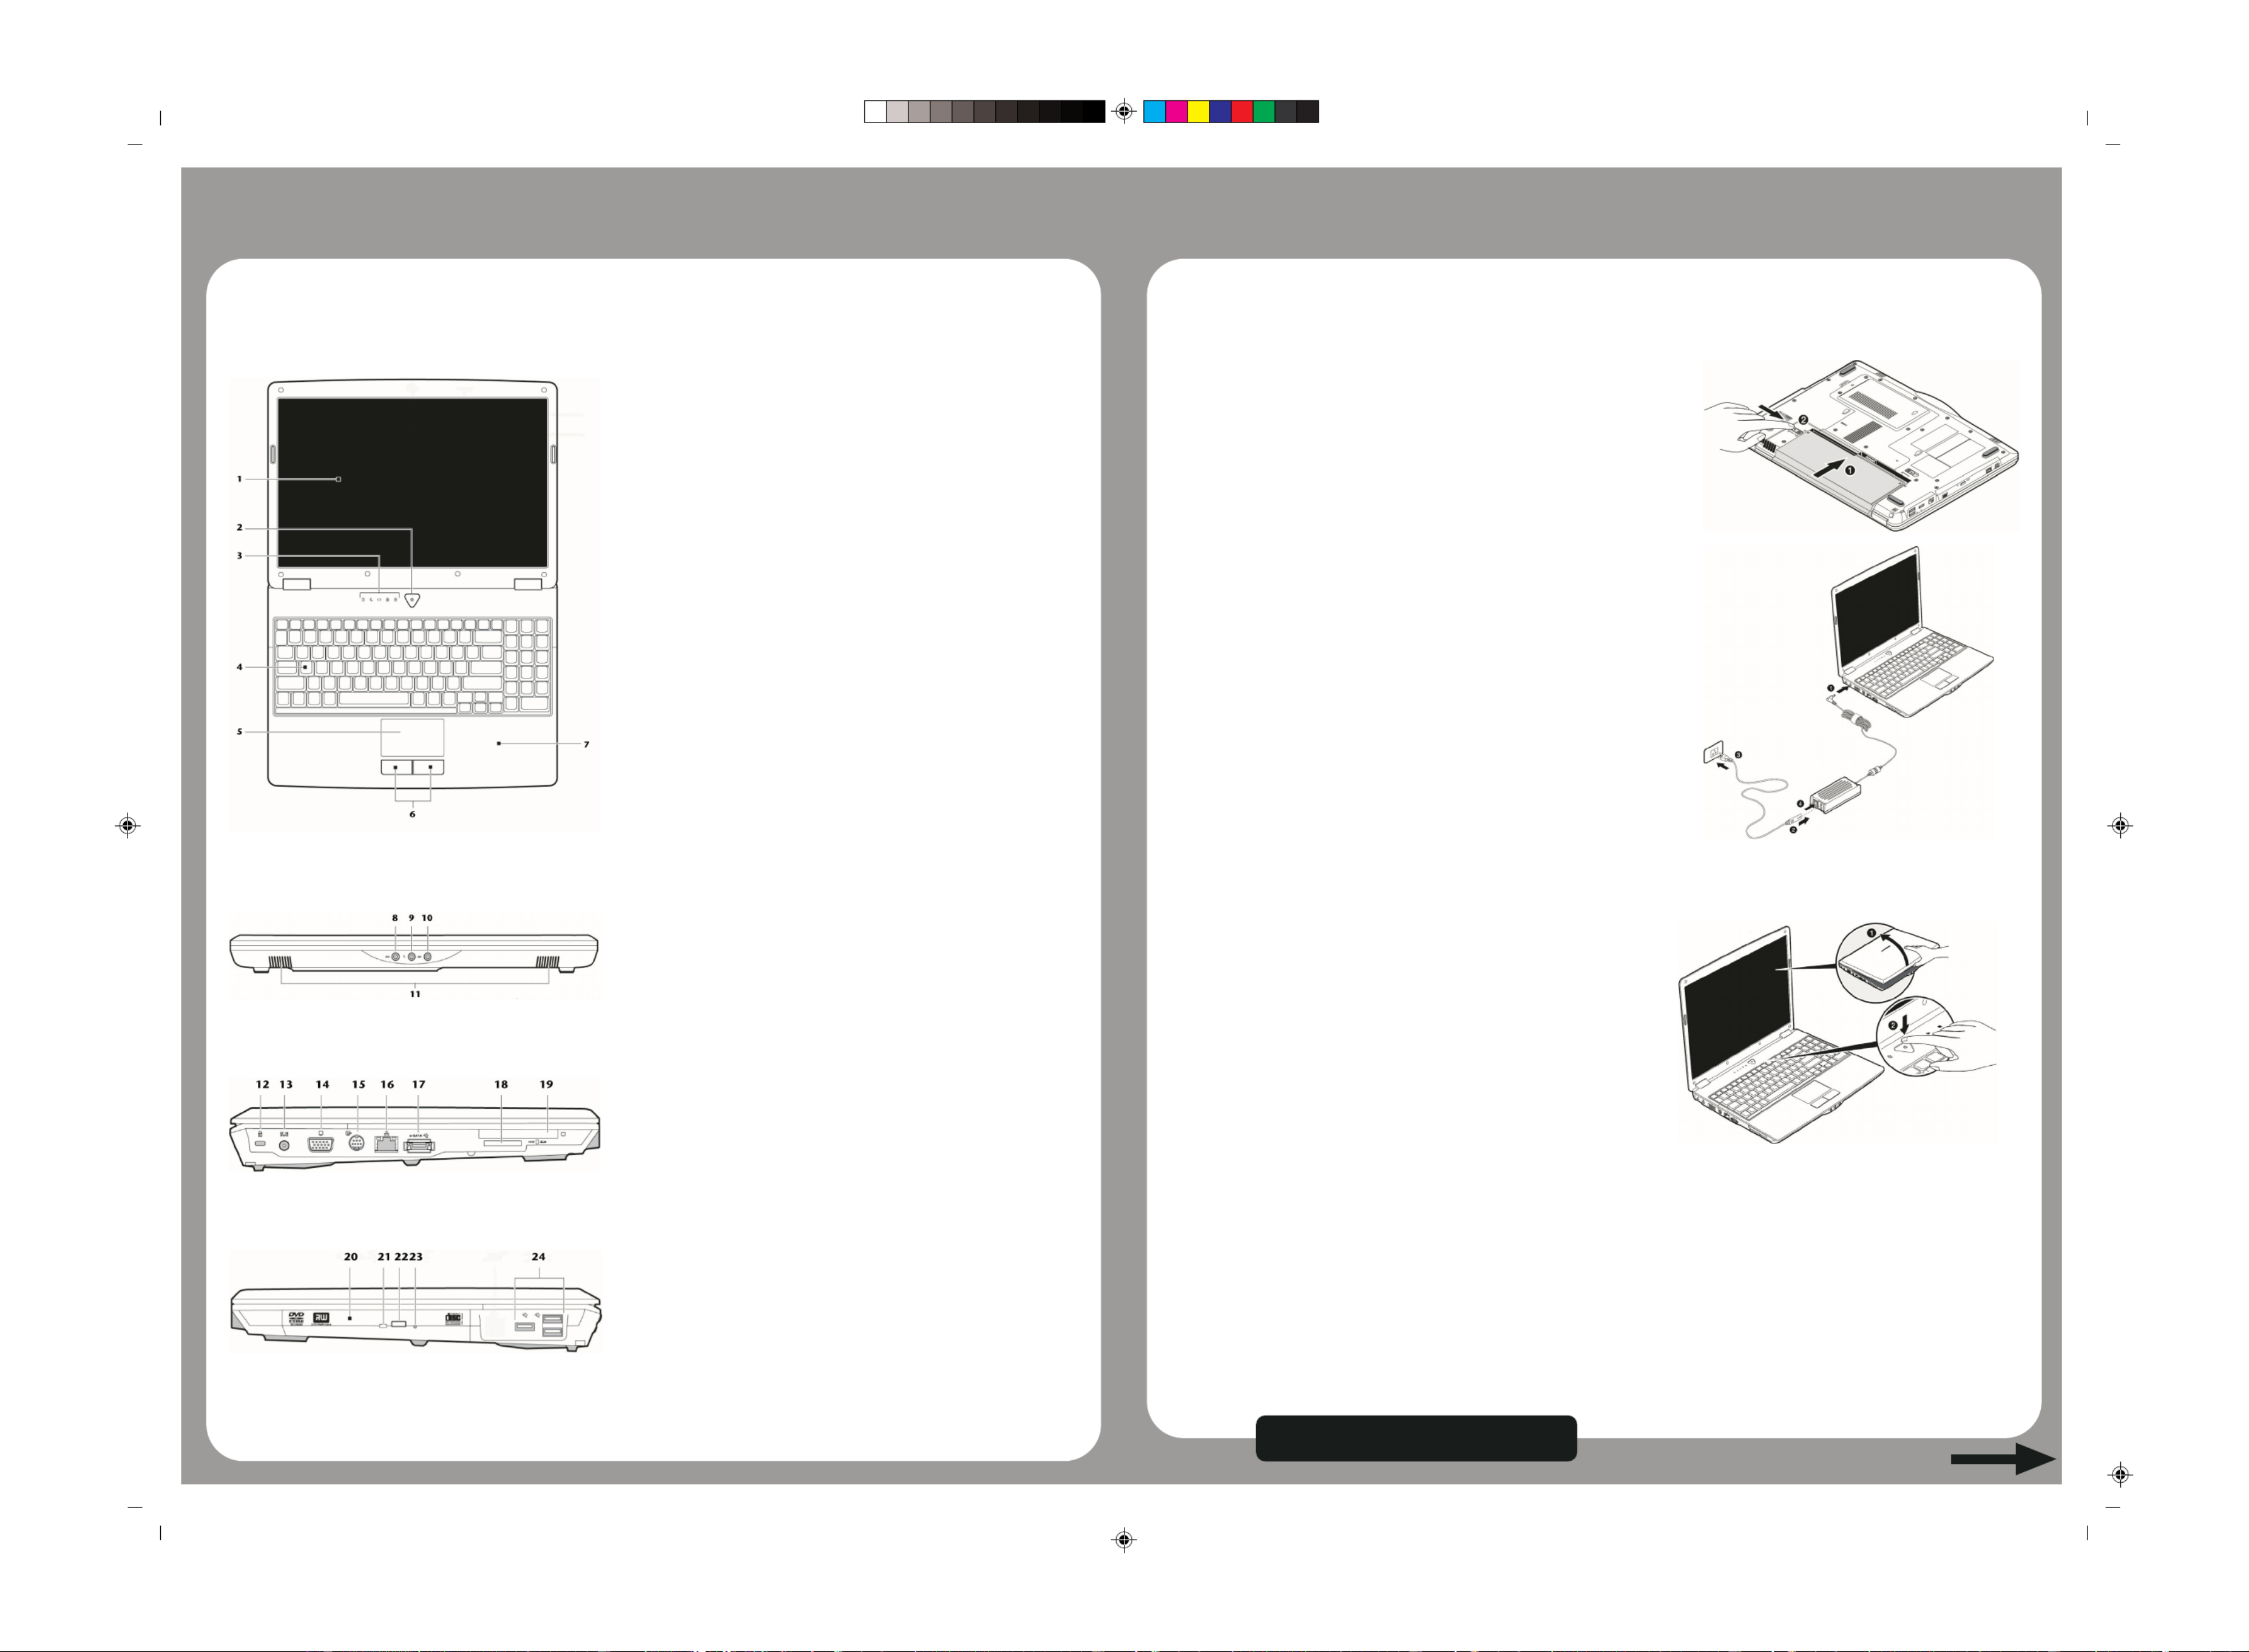
1- Display
2- Ein-/Ausschalter
3- Geräteanzeigen
4- Tastatur
5- Touchpad
6- Touchpad Tasten
7- Handablage
8- Audioausgang* /
Digital Audioausgang*
(S/P-DIF, optisch)
9- Mikrofonanschluss*
10 - Audioeingang*
11 - Stereo Lautsprecher
12 - Öffnung für Kensingtonschloss®
13 - Netzadapteranschluss
14 - Externer Monitor Anschluss (VGA)
15 - Video Ausgang TV-Out (S-Video)
16 - Netzwerkanschluss LAN RJ-45
17 - e-SATA- / USB-Anschluss
18 - Multimedia Kartenleser
19 - Express Card/54
20 - Optisches Laufwerk
21 - Zugriffsanzeige optisches Laufwerk
22 - Auswurftaste optisches Laufwerk
23 - Notentnahmeöffnung
24 - USB 2.0 Anschluss
Kurzanleitung DE_EN ME2L RC1.FH11 Tue Apr 22 10:53:32 2008 Seite 2
Probedruck
C M Y CM MY CY CMY K
Deutsche Version
MSN 4002 5530
Quick Reference Quick Start Guide
i
Starting up
Notebook connections and features
Please find further, more detailed setup
instructions in the supplied "User's Guide".
Top open
1- Display
2- Power ON/OFF
3- Device indicators
4- Keyboard
5- Touchpad
6- Touchpad buttons
7- Palm rest
8- Line out /
Digital audio out*
(S/P-DIF, optical)
9- Microphone in*
10 - Line in*
11 - Stereo speakers
12 - Kensington® lock
13 - Power socket
14 - Ext. monitor port (VGA)
15 - TV-out port (S-Video)
16 - LAN port RJ-45
17 - e-SATA / USB port
18 - Multimedia card reader
19 - Express Card/54
20 - Optical drive
21 - Activity LED optical drive
22 - Disc eject button
23 - Emergency ejection
24 - USB 2.0 port
Power supply
Please take special notice of the warnings in the main user manual!
1. Insert the supplied battery carefully into the notebook.
Lock the battery under all circumstances, in order to
avoid it falling out unintentionally.
2. Connect the supplied power adapter to the notebook
at the notebook power socket [13].
3. Connect the power adapter via a power cable to a free
AC power outlet. Set the switch on the mains adapter
to position I, to provide the notebook with electricity
and to charge the battery.
(Set this switch to 0, in order to interrupt the electricity
supply.)
For full battery performance please charge and discharge
the new battery two or three times consecutively!
4. Open the display to the required position. To avoid damage
to the TFT display, never open it at full 120°.
5. Switch the notebook on by pushing the ON/OFF button
[2]. The notebook computer will start.
6. The "Welcome" procedure will guide you through a series
of dialogue boxes. The information in each dialogue box
will explain the steps that need to be taken. Follow the
instructions carefully on-screen.
CAUTION!
To avoid damage to the display, never place objects on top
of the notebook that would exert any pressure on it. There
is a danger that even slight pressure may break the display.
Before switching on your notebook computer ensure that
there is not a disc (CD, DVD, etc) in the optical drive [20].
Some discs may prevent the operating system booting
correctly from the hard drive.
*Ports with dual function. Configuration is set with the included software.
Left side
Right side
Front view
Activating your antivirus software
AntiVirus software will have been installed on your notebook. You will be asked to register the AntiVirus
software after the first restart after setting up your notebook for the first time.
Carry out this free of charge online registration to release the software and to receive 90 days free updates.
Read about how you can protect your notebook after the expiry of these 90 days in the Operating Instructions.
PLEASE TAKE NOTE:
Do not install additional antivirus software as this will degrade the performance of your notebook
computer.
Product specificaties
| Merk: | Medion |
| Categorie: | Laptop |
| Model: | Akoya MD 96850 |
Heb je hulp nodig?
Als je hulp nodig hebt met Medion Akoya MD 96850 stel dan hieronder een vraag en andere gebruikers zullen je antwoorden
Handleiding Laptop Medion
29 Juli 2025
28 Juli 2025

28 Juli 2025
28 Juli 2025
28 Juli 2025
28 Juli 2025
6 Juli 2025
17 Juni 2025

29 Maart 2025
10 Februari 2025
Handleiding Laptop
Nieuwste handleidingen voor Laptop
16 September 2025

16 September 2025
15 September 2025

15 September 2025
15 September 2025

15 September 2025

15 September 2025
15 September 2025
15 September 2025

15 September 2025