Lynx Professional LCB2-3 Handleiding
Lynx Niet gecategoriseerd Professional LCB2-3
Bekijk gratis de handleiding van Lynx Professional LCB2-3 (16 pagina’s), behorend tot de categorie Niet gecategoriseerd. Deze gids werd als nuttig beoordeeld door 130 mensen en kreeg gemiddeld 4.7 sterren uit 8 reviews. Heb je een vraag over Lynx Professional LCB2-3 of wil je andere gebruikers van dit product iets vragen? Stel een vraag
Pagina 1/16
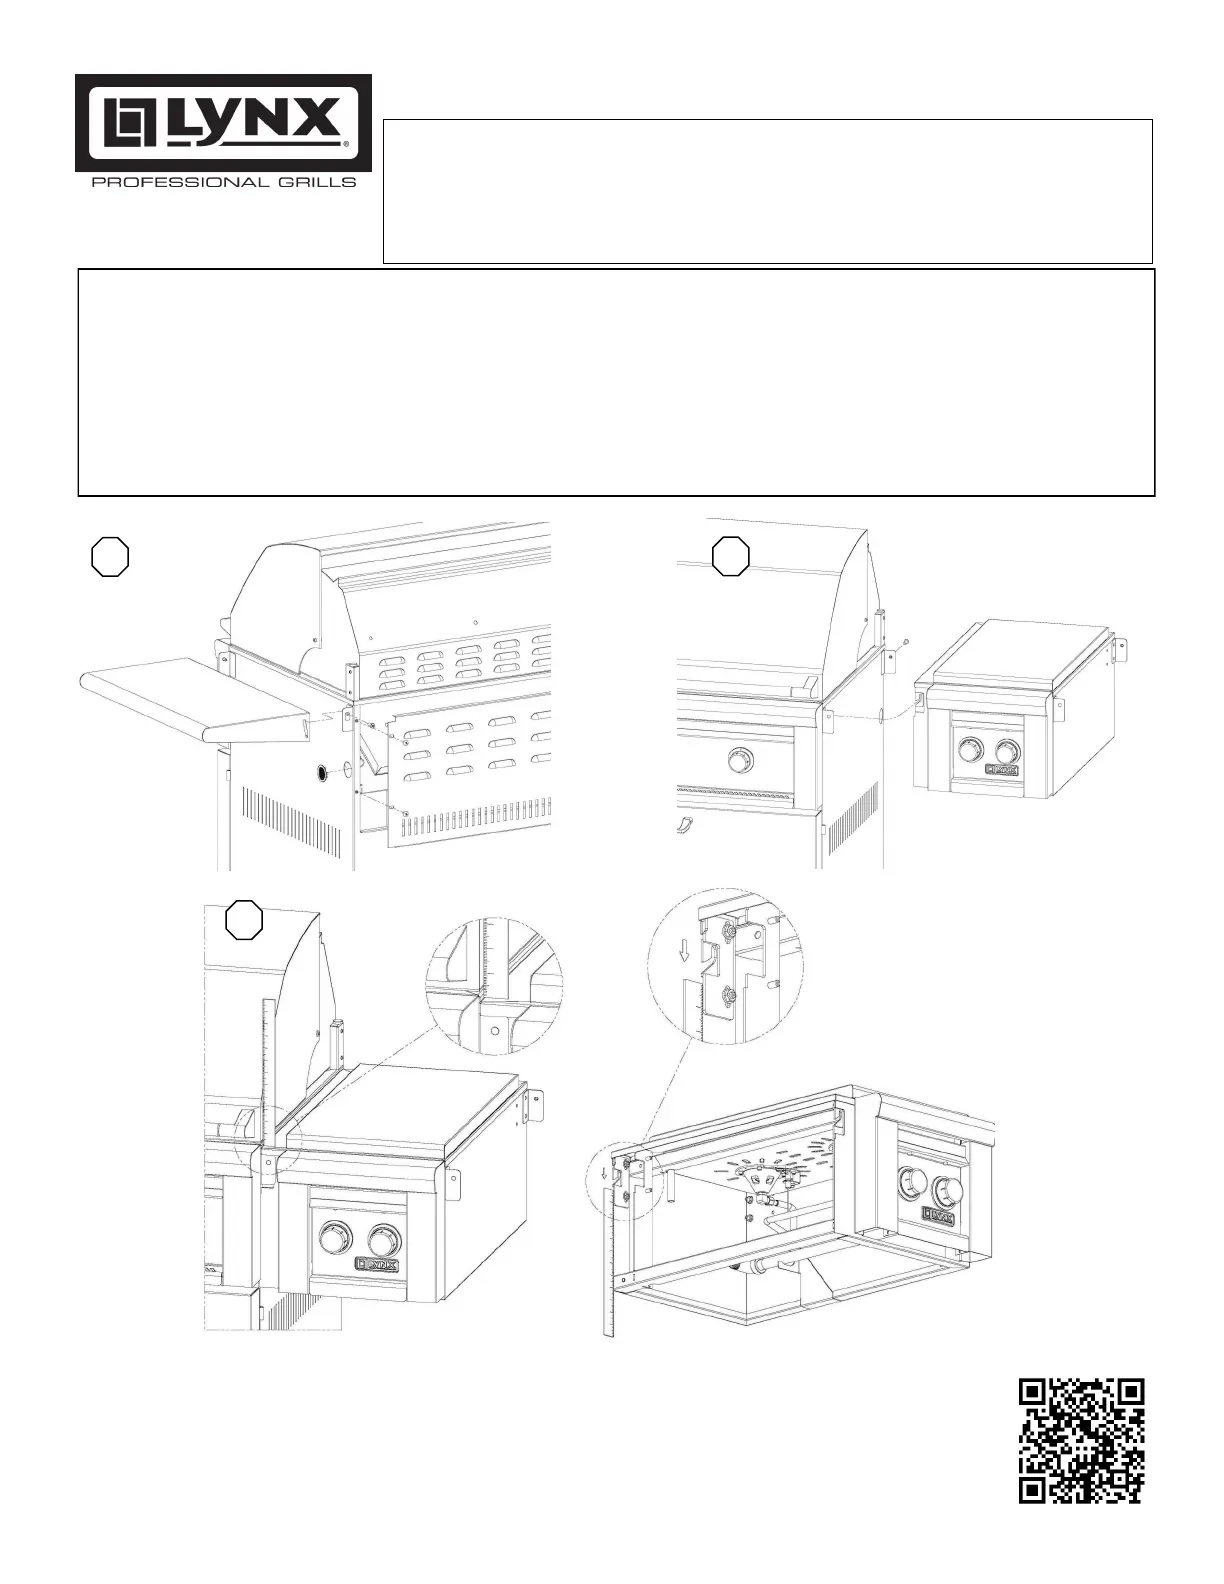
LCB2-3 INSTALLATION INSTRUCTIONS
TOOLS REQUIRED: 7/16 Wrench
CONTENTS OF KIT: An adjustable side burner mounting bracket
Side shelf mounting bracket with 7/16 fasteners
Decorative cover for the L27 and L36 models
The side burner support bracket comes preassembled for the L27 and L36
Lynx Grills, 7300 Flores St., Downey, CA 90242
P/N 34912 8/14
INSTRUCTIONS FOR MODELS L36 and L27:
1.Remove the right hand side shelf and the cabinet back panel (fig. 1)
2.Mount the LCB2-3 side burner to the supports (fig. 2)
3.If needed, any misalignment can be corrected by 1st measuring the amount of misalignment, 2nd loosening the
bracket support fasteners. 3rd raise or lower the bracket according to your measurements.
Tighten the fasteners. (fig 3)
4.Hang the side shelf removed in step 1 on the right side shelf support pins of the side burner (Fig. 6, pg. 2)
P/N 34912. 8/14
Rear View
1
2
3
Product specificaties
| Merk: | Lynx |
| Categorie: | Niet gecategoriseerd |
| Model: | Professional LCB2-3 |
Heb je hulp nodig?
Als je hulp nodig hebt met Lynx Professional LCB2-3 stel dan hieronder een vraag en andere gebruikers zullen je antwoorden
Handleiding Niet gecategoriseerd Lynx

10 April 2025
10 April 2025
29 Maart 2025
25 Februari 2025
28 Februari 2024
19 Februari 2024
9 Februari 2024
9 Februari 2024
9 Februari 2024
9 Februari 2024
Handleiding Niet gecategoriseerd
Nieuwste handleidingen voor Niet gecategoriseerd
23 Juli 2026
23 Juli 2026
23 Juli 2026
23 Juli 2026
23 Juli 2026
23 Juli 2026
23 Juli 2026
23 Juli 2026
23 Juli 2026
22 Juli 2026