Lorex ACCYARD1 Handleiding
Lorex Niet gecategoriseerd ACCYARD1
Bekijk gratis de handleiding van Lorex ACCYARD1 (1 pagina’s), behorend tot de categorie Niet gecategoriseerd. Deze gids werd als nuttig beoordeeld door 12 mensen en kreeg gemiddeld 4.6 sterren uit 9 reviews. Heb je een vraag over Lorex ACCYARD1 of wil je andere gebruikers van dit product iets vragen? Stel een vraag
Pagina 1/1
Package Contents
• Yard Sign with Solar LED Light and Rechargeable Battery
• Mounting Screws & Drywall Anchors (×2)
• Sign Post (3 pieces; 1 pre-attached to sign)
Dimensions
9.2"
233mm
11.8" / 300mm
Installation (YARD SIGN)
Getting Started
• Before installing the sign, press the power button on the underside of the solar
LED light. This will allow the battery to charge during the day and turn on the
light at night. It is recommended to check that the light comes on in a dark room
before installing the sign.
• Choose a location for the sign with plenty of direct sunlight exposure. Do not
install in a covered or shaded area.
• The solar panel requires at least 3-4 hours of direct sunlight per day.
Performance dependent on temperature and light exposure.
• For wall mounting, ensure you can safely drill into your selected mounting
location.
33.6"
853mm
1. Wearing protective
work gloves, push the
pointed end of Bar #3
into the ground. The
pointed side of the
bar should point the
opposite direction that
the sign will face.
NOTE: If the ground is
especially solid, tap the
bar into place using a
rubber mallet.
2. Press the spring-
loaded button on the
bottom of Bar #2 to
insert into the top of
Bar #3. Be careful not
to pinch your fingers
between the bars.
3. Press the spring-
loaded button on the
top of Bar #2 to insert
into the top of Bar #1
(pre-attached to the
back of the sign). Be
careful not to pinch
your fingers between
the bars.
To install the sign in the ground:
ATTENTION:
Choose a location for the sign with plenty of direct sunlight exposure.
Do not install in a covered or shaded area.
Bar #2
Bar #3
Bar #1
Spring-loaded
buttons
Installation (WALL SIGN)
To install the sign on a wall:
ATTENTION:
Choose a location for the sign with plenty of direct sunlight exposure.
Do not install in a covered or shaded area.
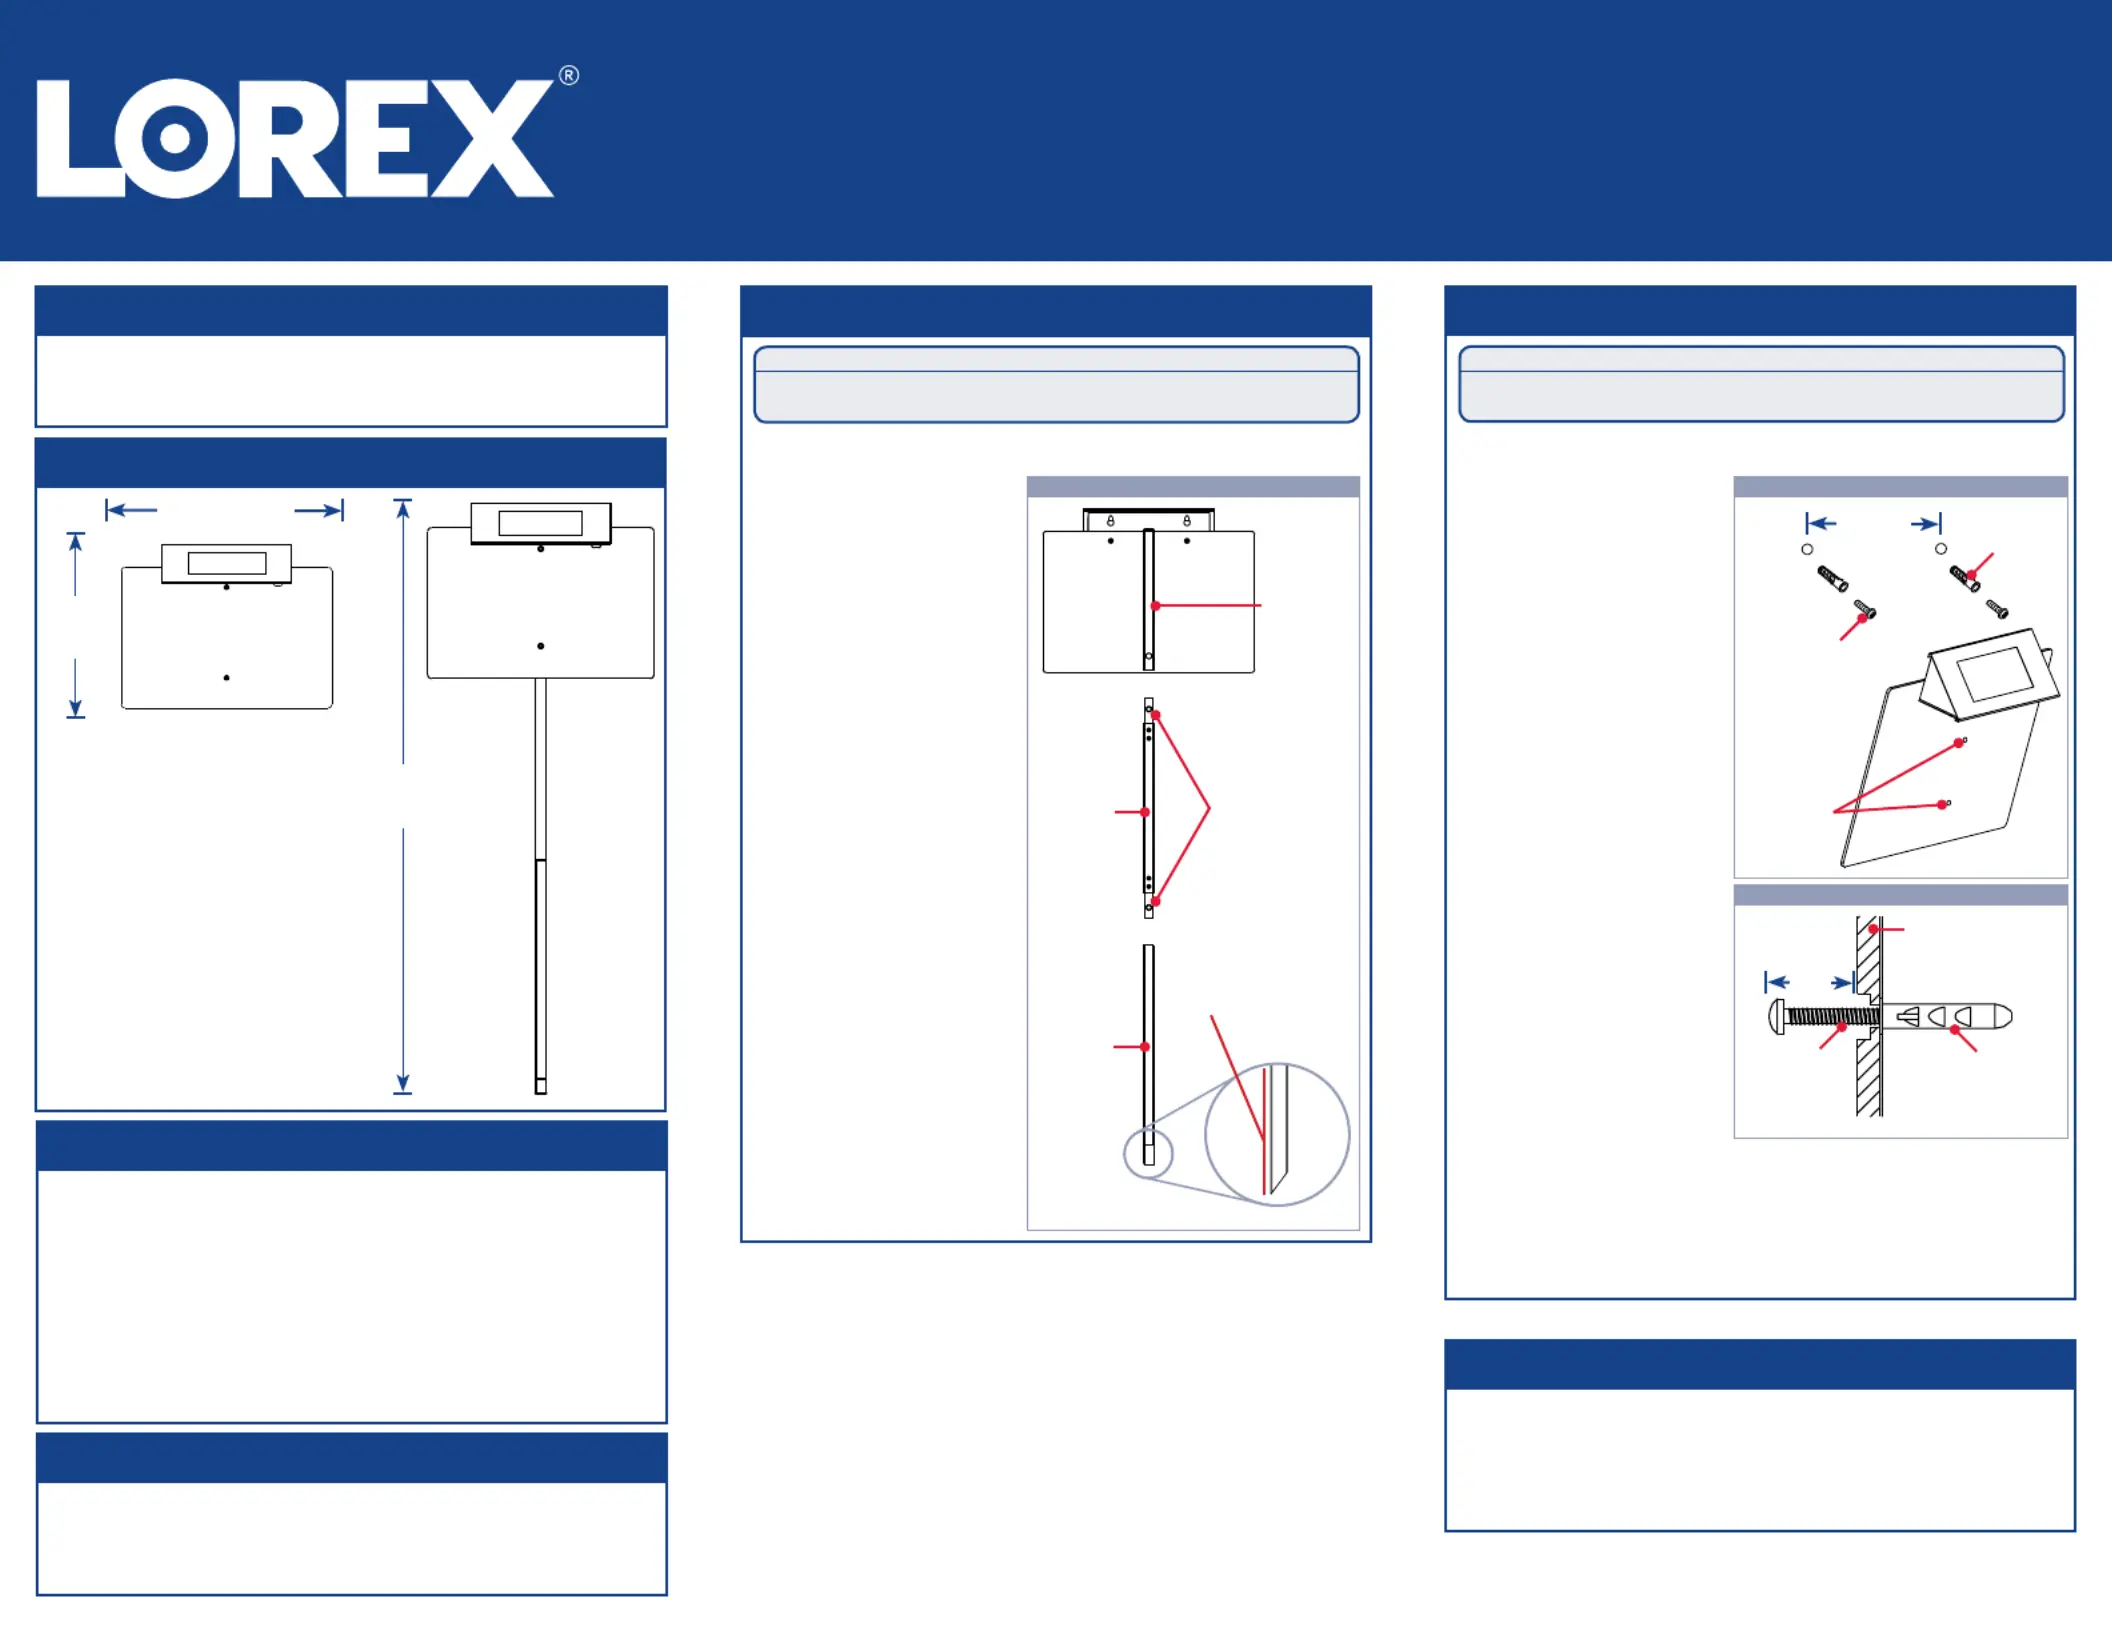
1. Remove the fastening
screws (see ) Figure 2
from the front of the
sign using a Phillips
head screwdriver (not
included). This removes
the back bar
to prepare the sign for
wall-mounting.
2. Drill holes for the
mounting screws and
plastic anchors (×2). The
holes must be level and
4.25” (108mm) apart
center-to-center.
3. Insert the anchors
firmly into the holes
(recommended to tap
anchors into place using
a rubber mallet).
4. Use a Phillips
screwdriver to insert
the mounting screws
into the anchors. Leave
approximately 5mm of
each screw outside of
4.25"
108mm
Mounting surface
Mounting
screw
Plastic
anchor
5mm
Mounting
screws (×2)
Plastic
anchors (×2)
Fastening
screws (×2)
Pointed side should face
the opposite direction of
the sign
*
* Side view
Figure 1Figure 2
Figure 3
5. Line up the notches on the back of the solar LED light with
the protruding screws and push down on the sign to secure
it in place.
the anchor (see ).Figure 3
Safety Precautions
• The solar panel may require periodic cleaning to ensure it is capturing light
effectively. Use a damp cloth only. Do not use chemical cleaners.
• Do not dispose of the battery in regular garbage. Handle as hazardous waste.
Dispose according to local hazardous waste programs.
ACCYARD1_QSG_EN_R2
Copyright © 2018 Lorex Corporation
As our products are subject to continuous improvement, Lorex
reserves the right to modify product design, specifications and
prices, without notice and without incurring any obligation.
E&OE. All rights reserved.
www.lorex.com
Quick Start Guide
Security Yard Sign
ACCYARD1
Product specificaties
| Merk: | Lorex |
| Categorie: | Niet gecategoriseerd |
| Model: | ACCYARD1 |
Heb je hulp nodig?
Als je hulp nodig hebt met Lorex ACCYARD1 stel dan hieronder een vraag en andere gebruikers zullen je antwoorden
Handleiding Niet gecategoriseerd Lorex

30 April 2026
30 April 2026
29 April 2026
28 April 2026
1 April 2026
31 Maart 2026
5 Maart 2026
8 Januari 2026
3 Januari 2026
26 Augustus 2025
Handleiding Niet gecategoriseerd
Nieuwste handleidingen voor Niet gecategoriseerd
8 Juni 2026
8 Juni 2026
8 Juni 2026
7 Juni 2026
7 Juni 2026
7 Juni 2026
7 Juni 2026
7 Juni 2026
6 Juni 2026
6 Juni 2026