Festo VABF-S4-1-A2G2-N14 Handleiding
Festo Niet gecategoriseerd VABF-S4-1-A2G2-N14
Bekijk gratis de handleiding van Festo VABF-S4-1-A2G2-N14 (2 pagina’s), behorend tot de categorie Niet gecategoriseerd. Deze gids werd als nuttig beoordeeld door 11 mensen en kreeg gemiddeld 4.5 sterren uit 6 reviews. Heb je een vraag over Festo VABF-S4-1-A2G2-N14 of wil je andere gebruikers van dit product iets vragen? Stel een vraag
Pagina 1/2
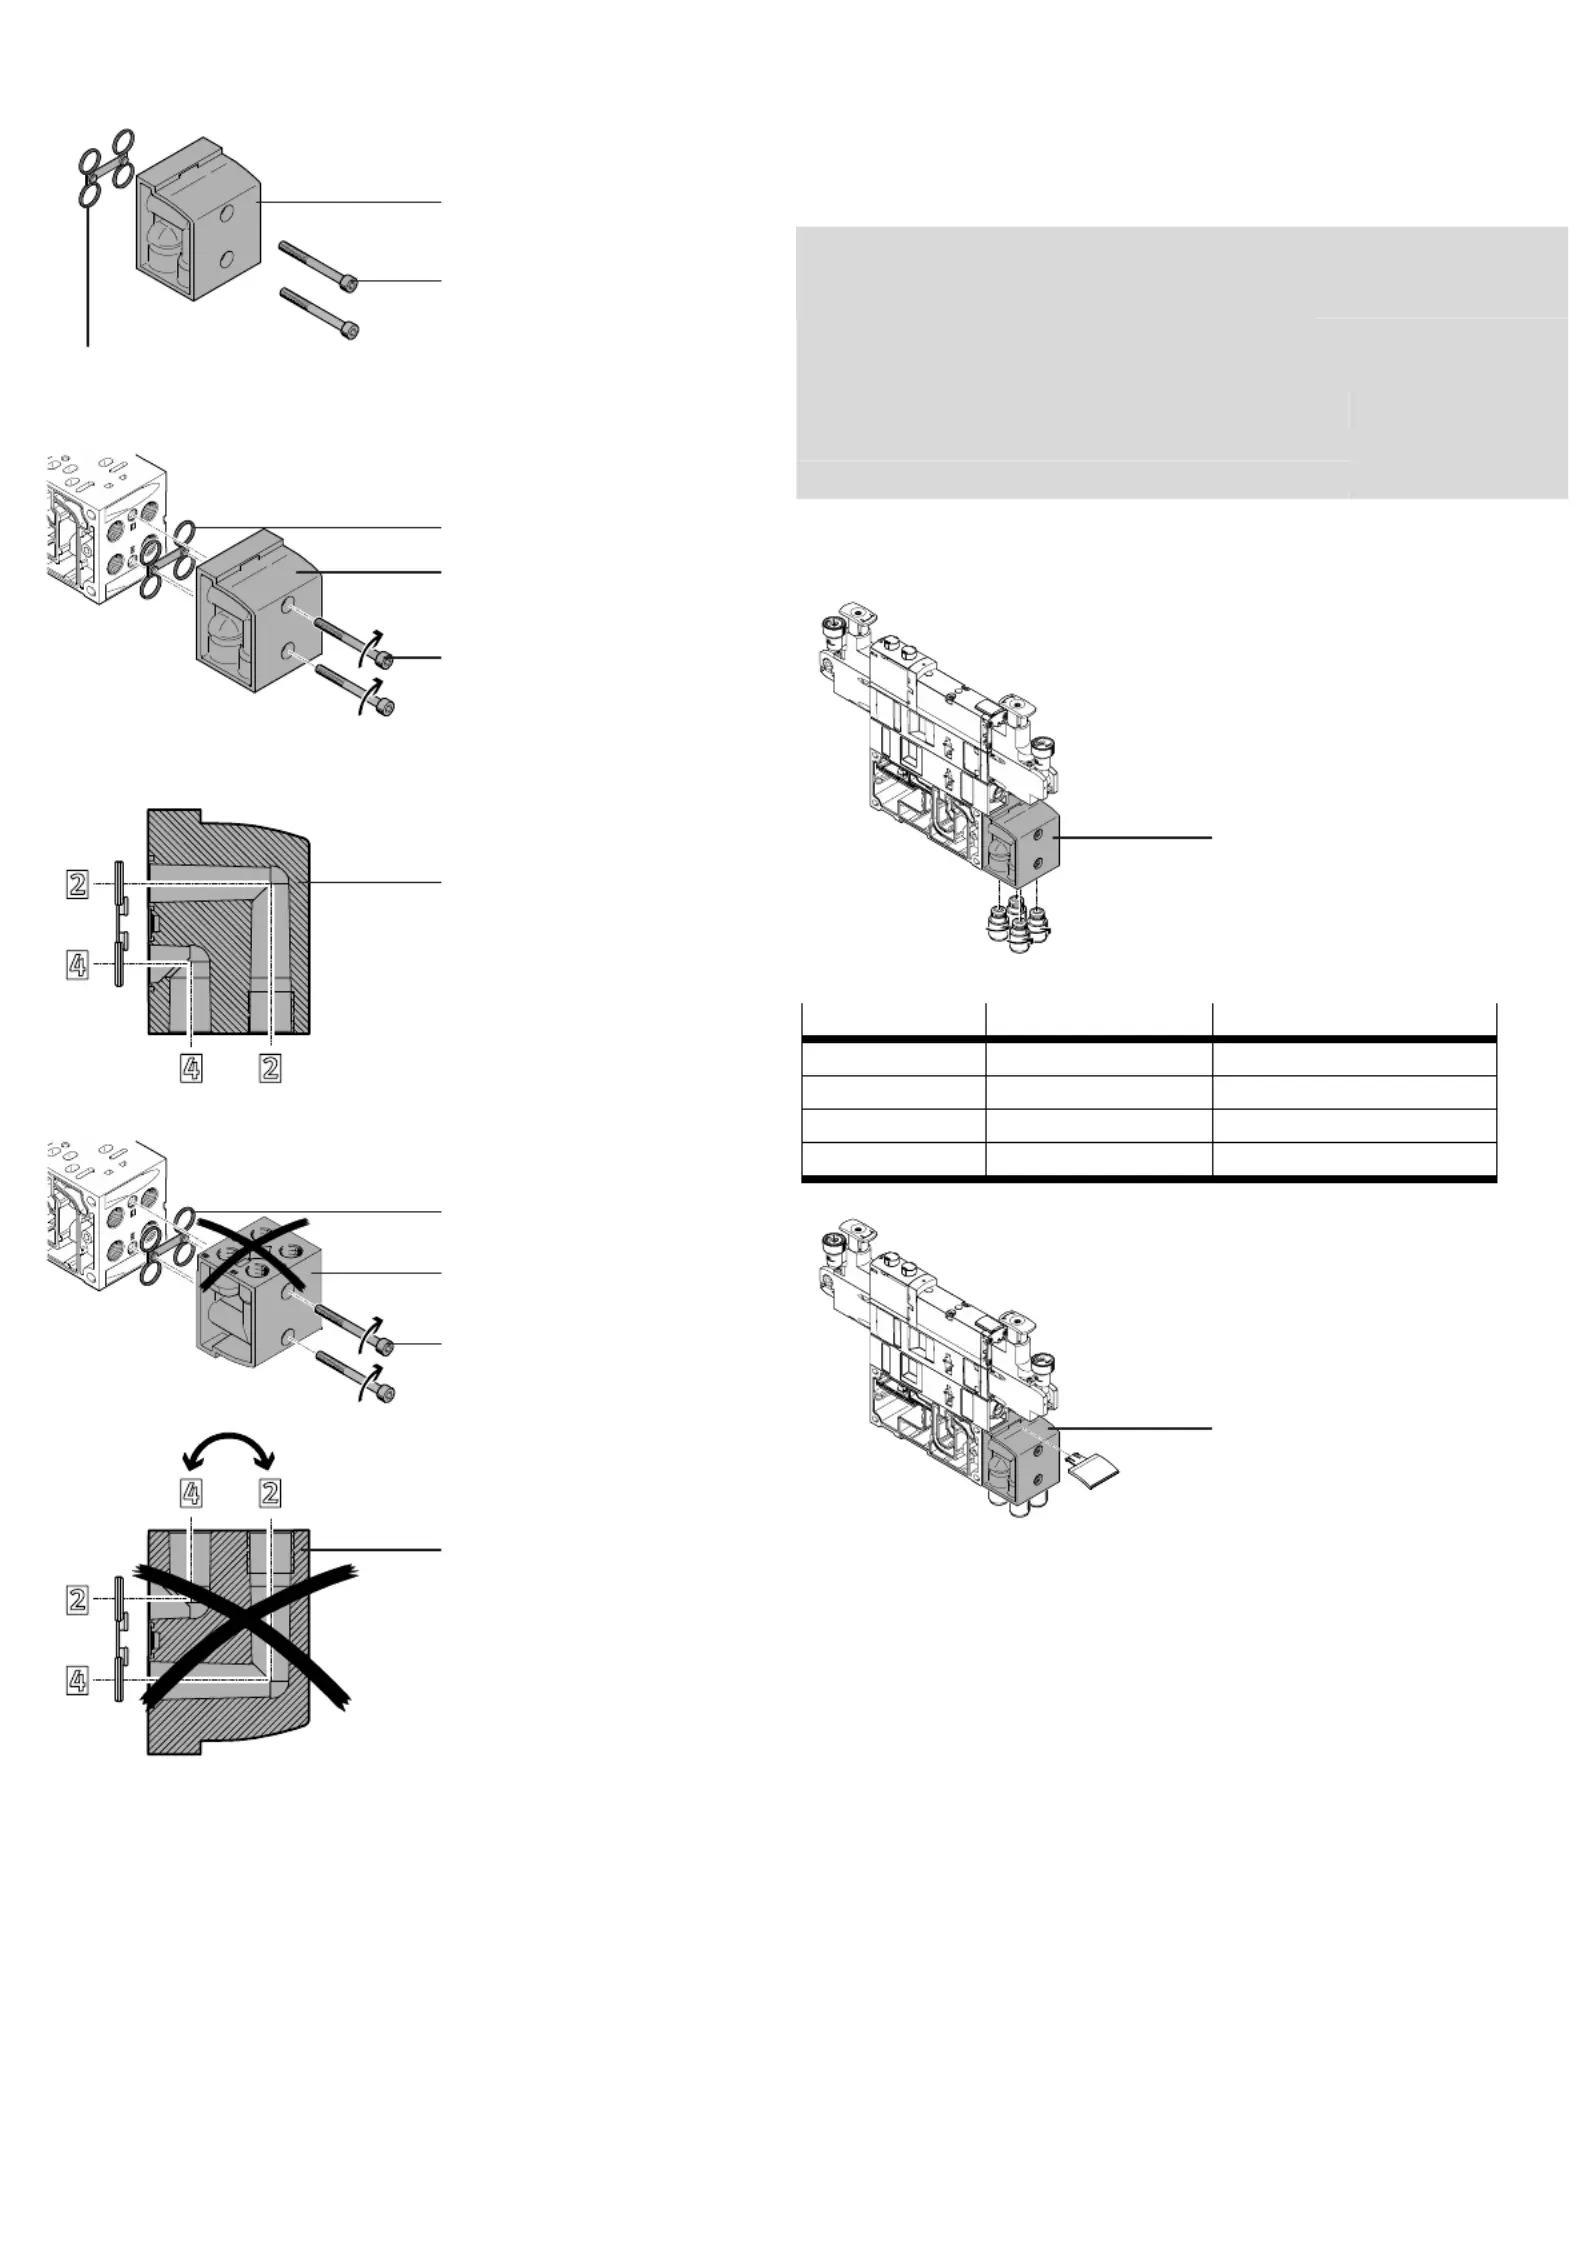
1.Teileliste
9329d_1
1 Winkelanschlussplatte
VABF-S4-..-A2G2-…
2 Selbstschneidende
Schraube (2x)
3 Dichtung
VABF-S4-..-A2G2
2.Montage
9329d_2
•Befestigen Sie die
Winkelanschlussplatte 1
an der Verkettungsplatte
VTSA mit den beiliegen-
den Schrauben 2. Achten
Sie darauf, dass die An-
schlüsse dabei nach unten
zeigen.
•Beachten Sie das zulässi-
ge Anzugsdrehmoment.
9329d_3
9329d_4
•Beachten Sie, dass eine
Befestigung mit den
Anschlüssen nach oben
nicht vorgesehen ist.
9329d_5
Die Anschlüsse und
Anschlussbezeichnungen
wären dann vertauscht.
0
2
46
8
10
9329d_6
•Drehen Sie die passenden
QS-Verschraubungen in
die Anschlussgewinde
(siehe Tabelle).
•Beachten Sie das
zulässige Anzugs-
drehmoment (siehe
Tabelle).
Typ
Anschlussgewinde Max. Anzugsdrehmoment
VABF-…-G14 G ¼ 15 Nm
VABF-…-N14 ¼ NPT 14 Nm
1)
VABF-…-G18 G x10Nm
VABF-…-N18 x NPT 8 Nm
1)
0
2
4
6
8
10
9329d_7
Zur Beschriftung:
•Drücken Sie einen
beschrifteten
Schilderträger ASCF-M-S6
in die Öffnung wie
abgebildet.
1) Drehen Sie die QS-Verschraubungen von Hand ein und drehen Sie die Verschraubungen
mit 1 bis 2 Umdrehungen fest.
Montageanleitung (de)
702 672 / 2006-06NH
†‡
Winkelanschlussplatte
VABF-S4-..-A2G2-...
Festo SE &G Co. K
Postfach
73726 Esslingen
++49/(0)711/347-0
www.festo.com
2
1
3
2
1
M
A
=6,1 Nm _ 15 %
1
1
3
3
2
1
1
1
Product specificaties
| Merk: | Festo |
| Categorie: | Niet gecategoriseerd |
| Model: | VABF-S4-1-A2G2-N14 |
Heb je hulp nodig?
Als je hulp nodig hebt met Festo VABF-S4-1-A2G2-N14 stel dan hieronder een vraag en andere gebruikers zullen je antwoorden
Handleiding Niet gecategoriseerd Festo

3 Mei 2026
30 April 2026
29 April 2026
29 April 2026
29 April 2026
29 April 2026
28 April 2026
28 April 2026
28 April 2026
28 April 2026
Handleiding Niet gecategoriseerd
Nieuwste handleidingen voor Niet gecategoriseerd
4 Juni 2026
4 Juni 2026
4 Juni 2026
4 Juni 2026
4 Juni 2026
4 Juni 2026
4 Juni 2026
4 Juni 2026
4 Juni 2026
4 Juni 2026