Festo SAMH-F12-MK Handleiding
Festo Niet gecategoriseerd SAMH-F12-MK
Bekijk gratis de handleiding van Festo SAMH-F12-MK (2 pagina’s), behorend tot de categorie Niet gecategoriseerd. Deze gids werd als nuttig beoordeeld door 13 mensen en kreeg gemiddeld 4.0 sterren uit 5 reviews. Heb je een vraag over Festo SAMH-F12-MK of wil je andere gebruikers van dit product iets vragen? Stel een vraag
Pagina 1/2
Translation of the original instructions
© 2020 all rights reserved to Festo SE & Co. KG
LOCTITE
®
is a registered trademark of its respective trademark holder in certain
countries.
1Applicable documents
DocumentsProductContents
InstructionsAngle seat valve VZXAOperating
Addendum documentAngle seat valve VZXAOperating conditions
Safety data sheetAdhesive from the original manu
facturer
e.g. LOCTITE270
Tab. 1
2Safety
2.1Safety instructions
–Before carrying out any work on the product, switch off the compressed air
supply and secure it against being switched back on.
–Observe the safety data sheet for the adhesive from the original manufac
turer.
–The magnet is fragile and strongly magnetic.1
–Handle the magnet carefully.
–Store the magnet at least 20cm away from magnetisable objects.
2.2Intended use
Installation of a position indicator on an angle seat valve VZXA.
3Product Range Overview
3.1Scope of delivery
1
Magnet (1x)
2
Rod (1x)
3
Sensor bracket (1x)
Fig. 1
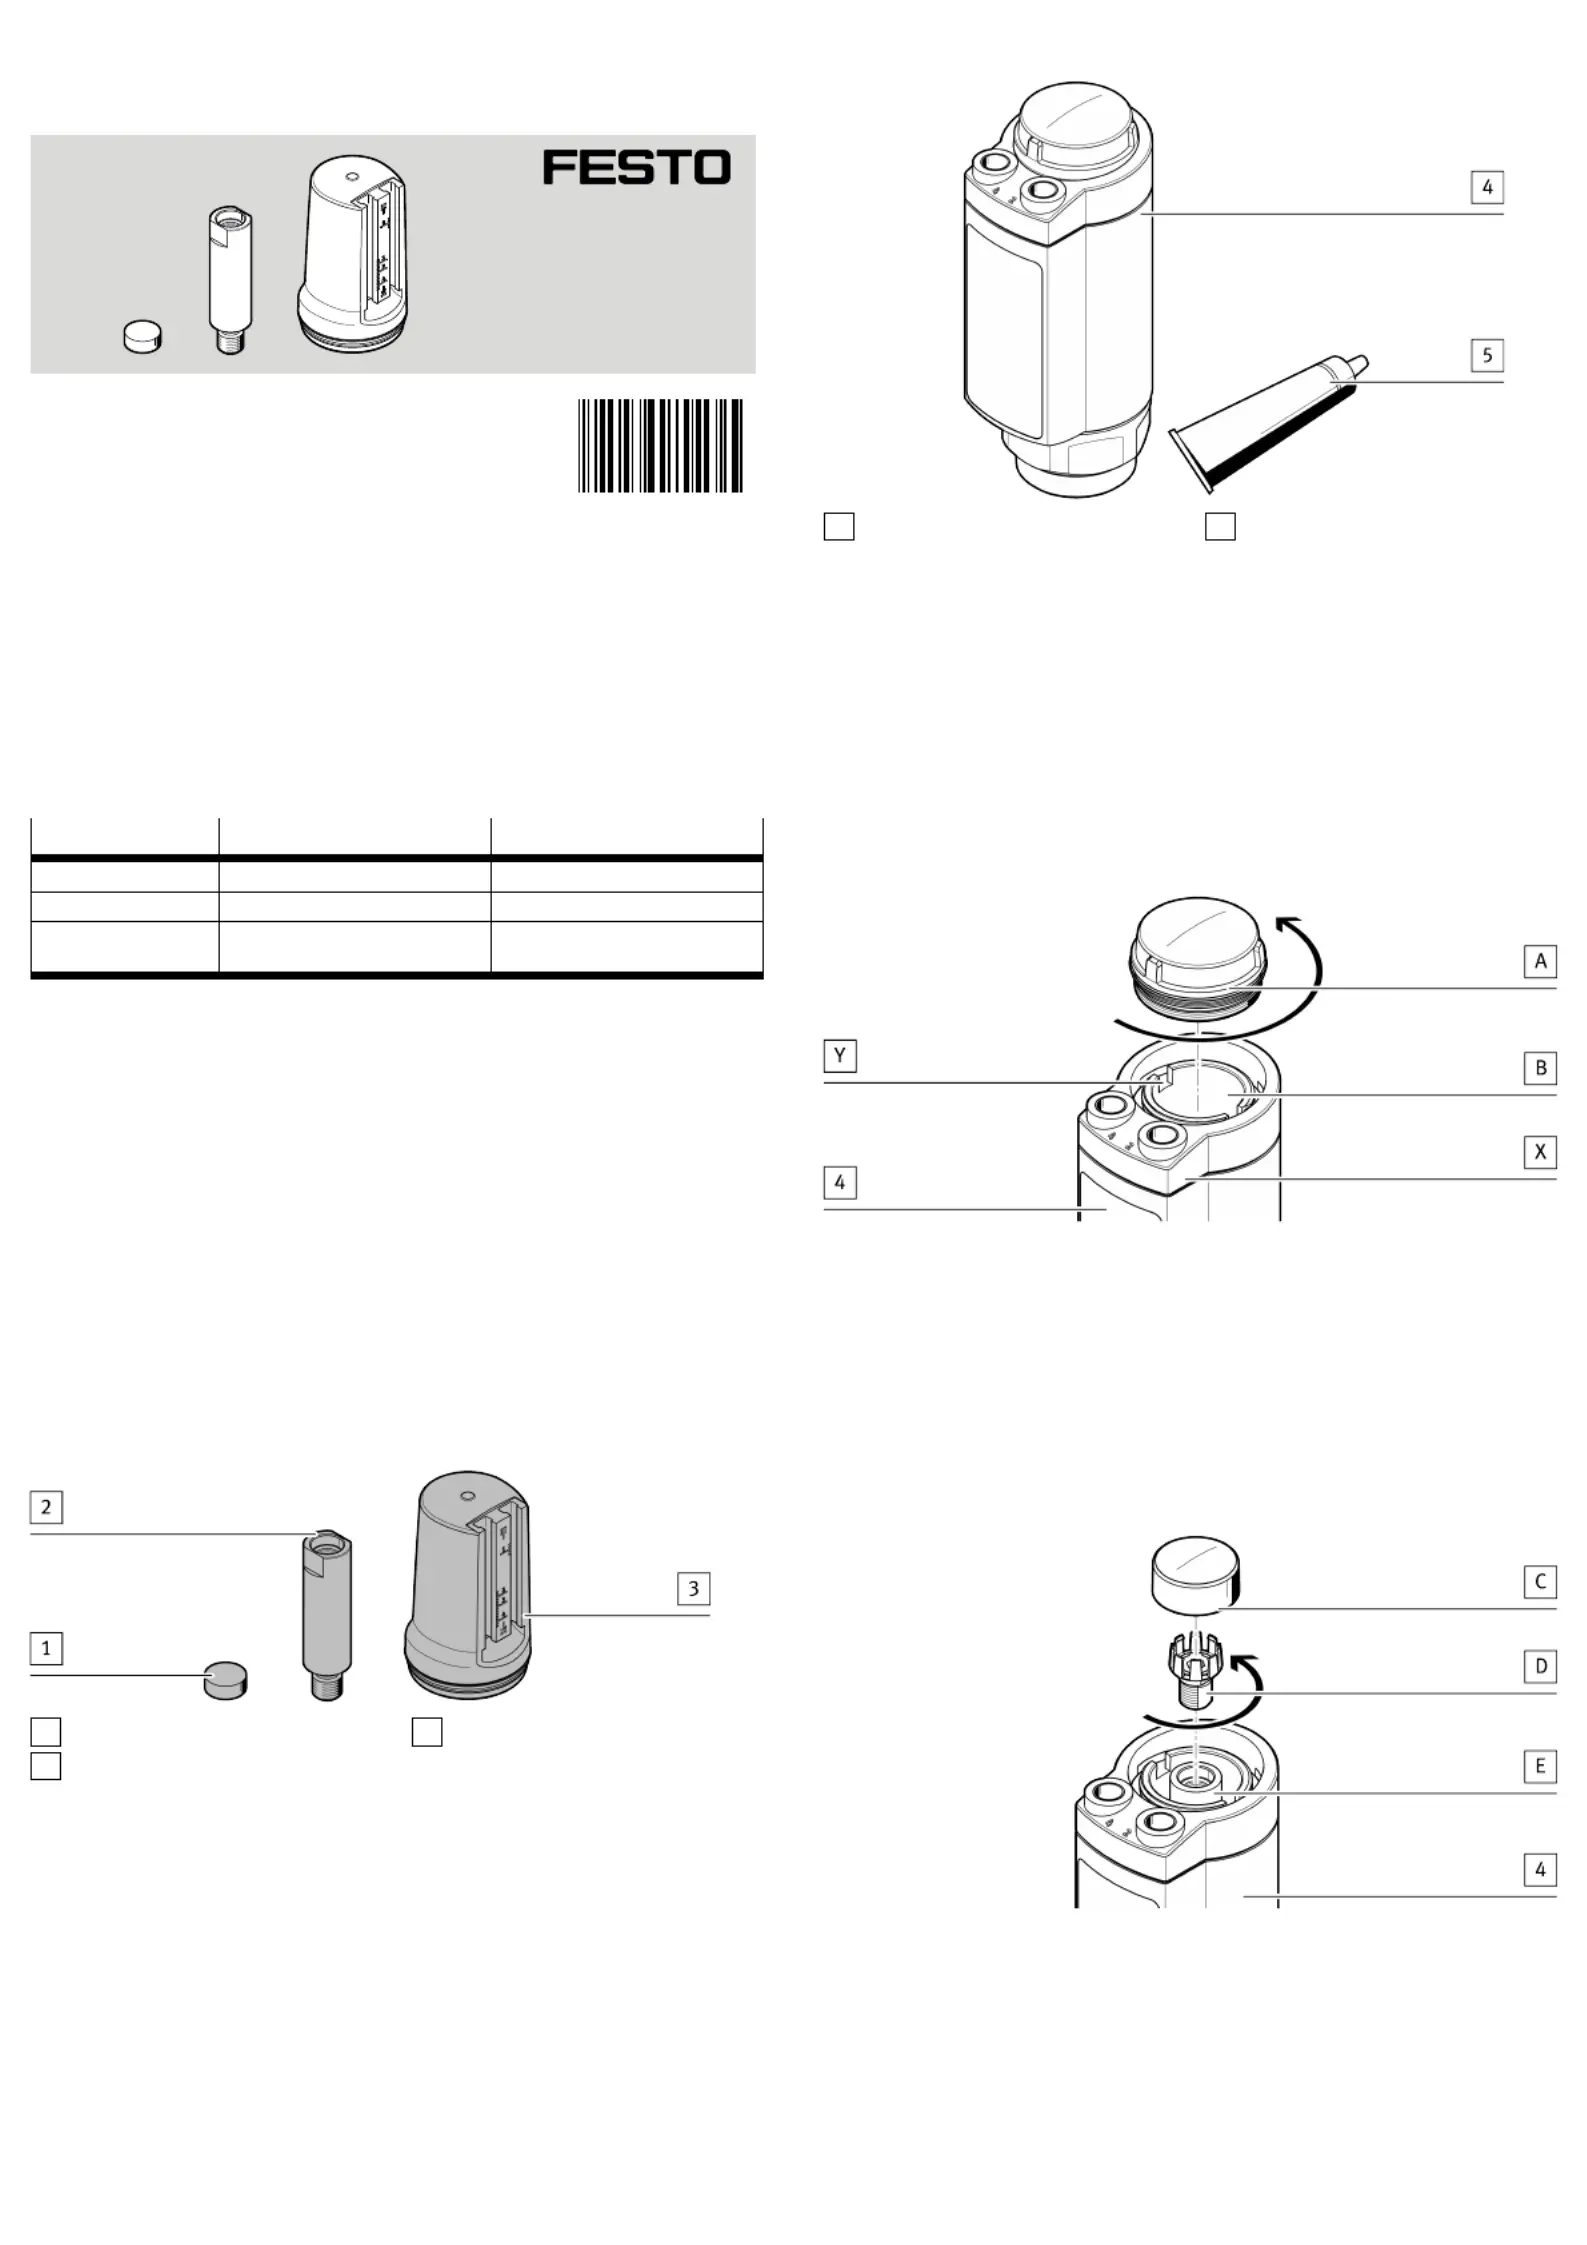
3.2Not in scope of delivery
4
Angle seat valve (1x)
VZXA
5
Locking agent (1x)
e.g.LOCTITE270
Fig. 2
4Assembly
A distinction is made between the following control functions of the angle seat
valve:4
–Double acting (D/A)
–Normally closed (N/C)
–Normally open (N/O)
4.1Preparation
4.1.1For angle seat valves with D/A and N/C control function
Fig. 3
1.Clamp the angle seat valve in a vice on the edges[X] of the spine.4
2.Remove the sight cap[A].
3.If the connector[B] was unscrewed together with the inspection cap[A],
detach it from the inspection cap[A].
–Do not damage the thread of the connector[B].
–Screw the connector[B] back into the angle seat valve.4
4.Use an auxiliary tool to engage into the slots[Y].
Auxiliary tool: 5mm thick, 35mm wide
5.Tighten connector[B]. Tightening torque: 20Nm±10%
Fig. 4
1.Pressurise the angle seat valve with compressed air at port 2.4
Ä
The piston rod[E] travels to the top end position.
2.Pull off display part[C].
3.Unscrew the retaining bracket[D] from the piston rod[E]. Hexagon: 5mm
4.If necessary, remove objects from the angle seat valve. Clean coarse con4
tamination. Objects: e.g.thread abrasion
8128632
SAMH-F12-MK
Position indicator
8128632
202008
[8128634]
Assembly instructions
Festo SE & Co. KG
Ruiter Straße 82
73734 Esslingen
Germany
+49 711 3470
www.festo.com
Product specificaties
| Merk: | Festo |
| Categorie: | Niet gecategoriseerd |
| Model: | SAMH-F12-MK |
Heb je hulp nodig?
Als je hulp nodig hebt met Festo SAMH-F12-MK stel dan hieronder een vraag en andere gebruikers zullen je antwoorden
Handleiding Niet gecategoriseerd Festo

3 Mei 2026
30 April 2026
29 April 2026
29 April 2026
29 April 2026
29 April 2026
28 April 2026
28 April 2026
28 April 2026
28 April 2026
Handleiding Niet gecategoriseerd
Nieuwste handleidingen voor Niet gecategoriseerd
23 Juli 2026
23 Juli 2026
23 Juli 2026
23 Juli 2026
23 Juli 2026
23 Juli 2026
23 Juli 2026
23 Juli 2026
23 Juli 2026
22 Juli 2026