Festo EAHF-E24-60-P-D5 Handleiding
Festo Niet gecategoriseerd EAHF-E24-60-P-D5
Bekijk gratis de handleiding van Festo EAHF-E24-60-P-D5 (1 pagina’s), behorend tot de categorie Niet gecategoriseerd. Deze gids werd als nuttig beoordeeld door 43 mensen en kreeg gemiddeld 4.7 sterren uit 6 reviews. Heb je een vraag over Festo EAHF-E24-60-P-D5 of wil je andere gebruikers van dit product iets vragen? Stel een vraag
Pagina 1/1
EAHF-E24-...-P-D
Profile mounting
Festo SE & Co. KG
Ruiter Straße 82
73734 Esslingen
Germany
+49 711 347-0
www.festo.com
Assembly instructions
8203093
2023-12
[8203095]
8203093
Translation of the original instructions
© 2024 all rights reserved to Festo SE & Co. KG
1
Applicable documents
All available documents for the product
è
www.festo.com/sp.
DocumentProductContent
Operating instructionAxis ELGD–
Tab. 1:
Applicable documents
2Safety
2.1Safety instructions
–Only mount the product on components that are in a condition to be safely
operated.
2.2
Intended use
The profile mounting fastens an axis ELGD to the slide of an axis ELGD of the next
larger size by the basic profile.
2.3Training of qualified personnel
Work on the product may only be carried out by qualified personnel who can eval-
uate the work and detect dangers. Personnel must have the relevant mechanical
training.
3
Additional information
–Contact the regional Festo contact if you have technical problems
è
www.festo.com.
–Accessories
è
www.festo.com/catalogue.
4Product Range Overview
4.1Scope of delivery
1
2
Fig. 1:
Scope of delivery
1
Profile mounting (2x)
2
Screw (4x)
4.2
Not in scope of delivery
3
4
Fig. 2:
Not included in the scope of
delivery
3
Base axis ELGD (1x)
4
Assembly axis ELGD (1x)
5
Assembly
3
A
2
1
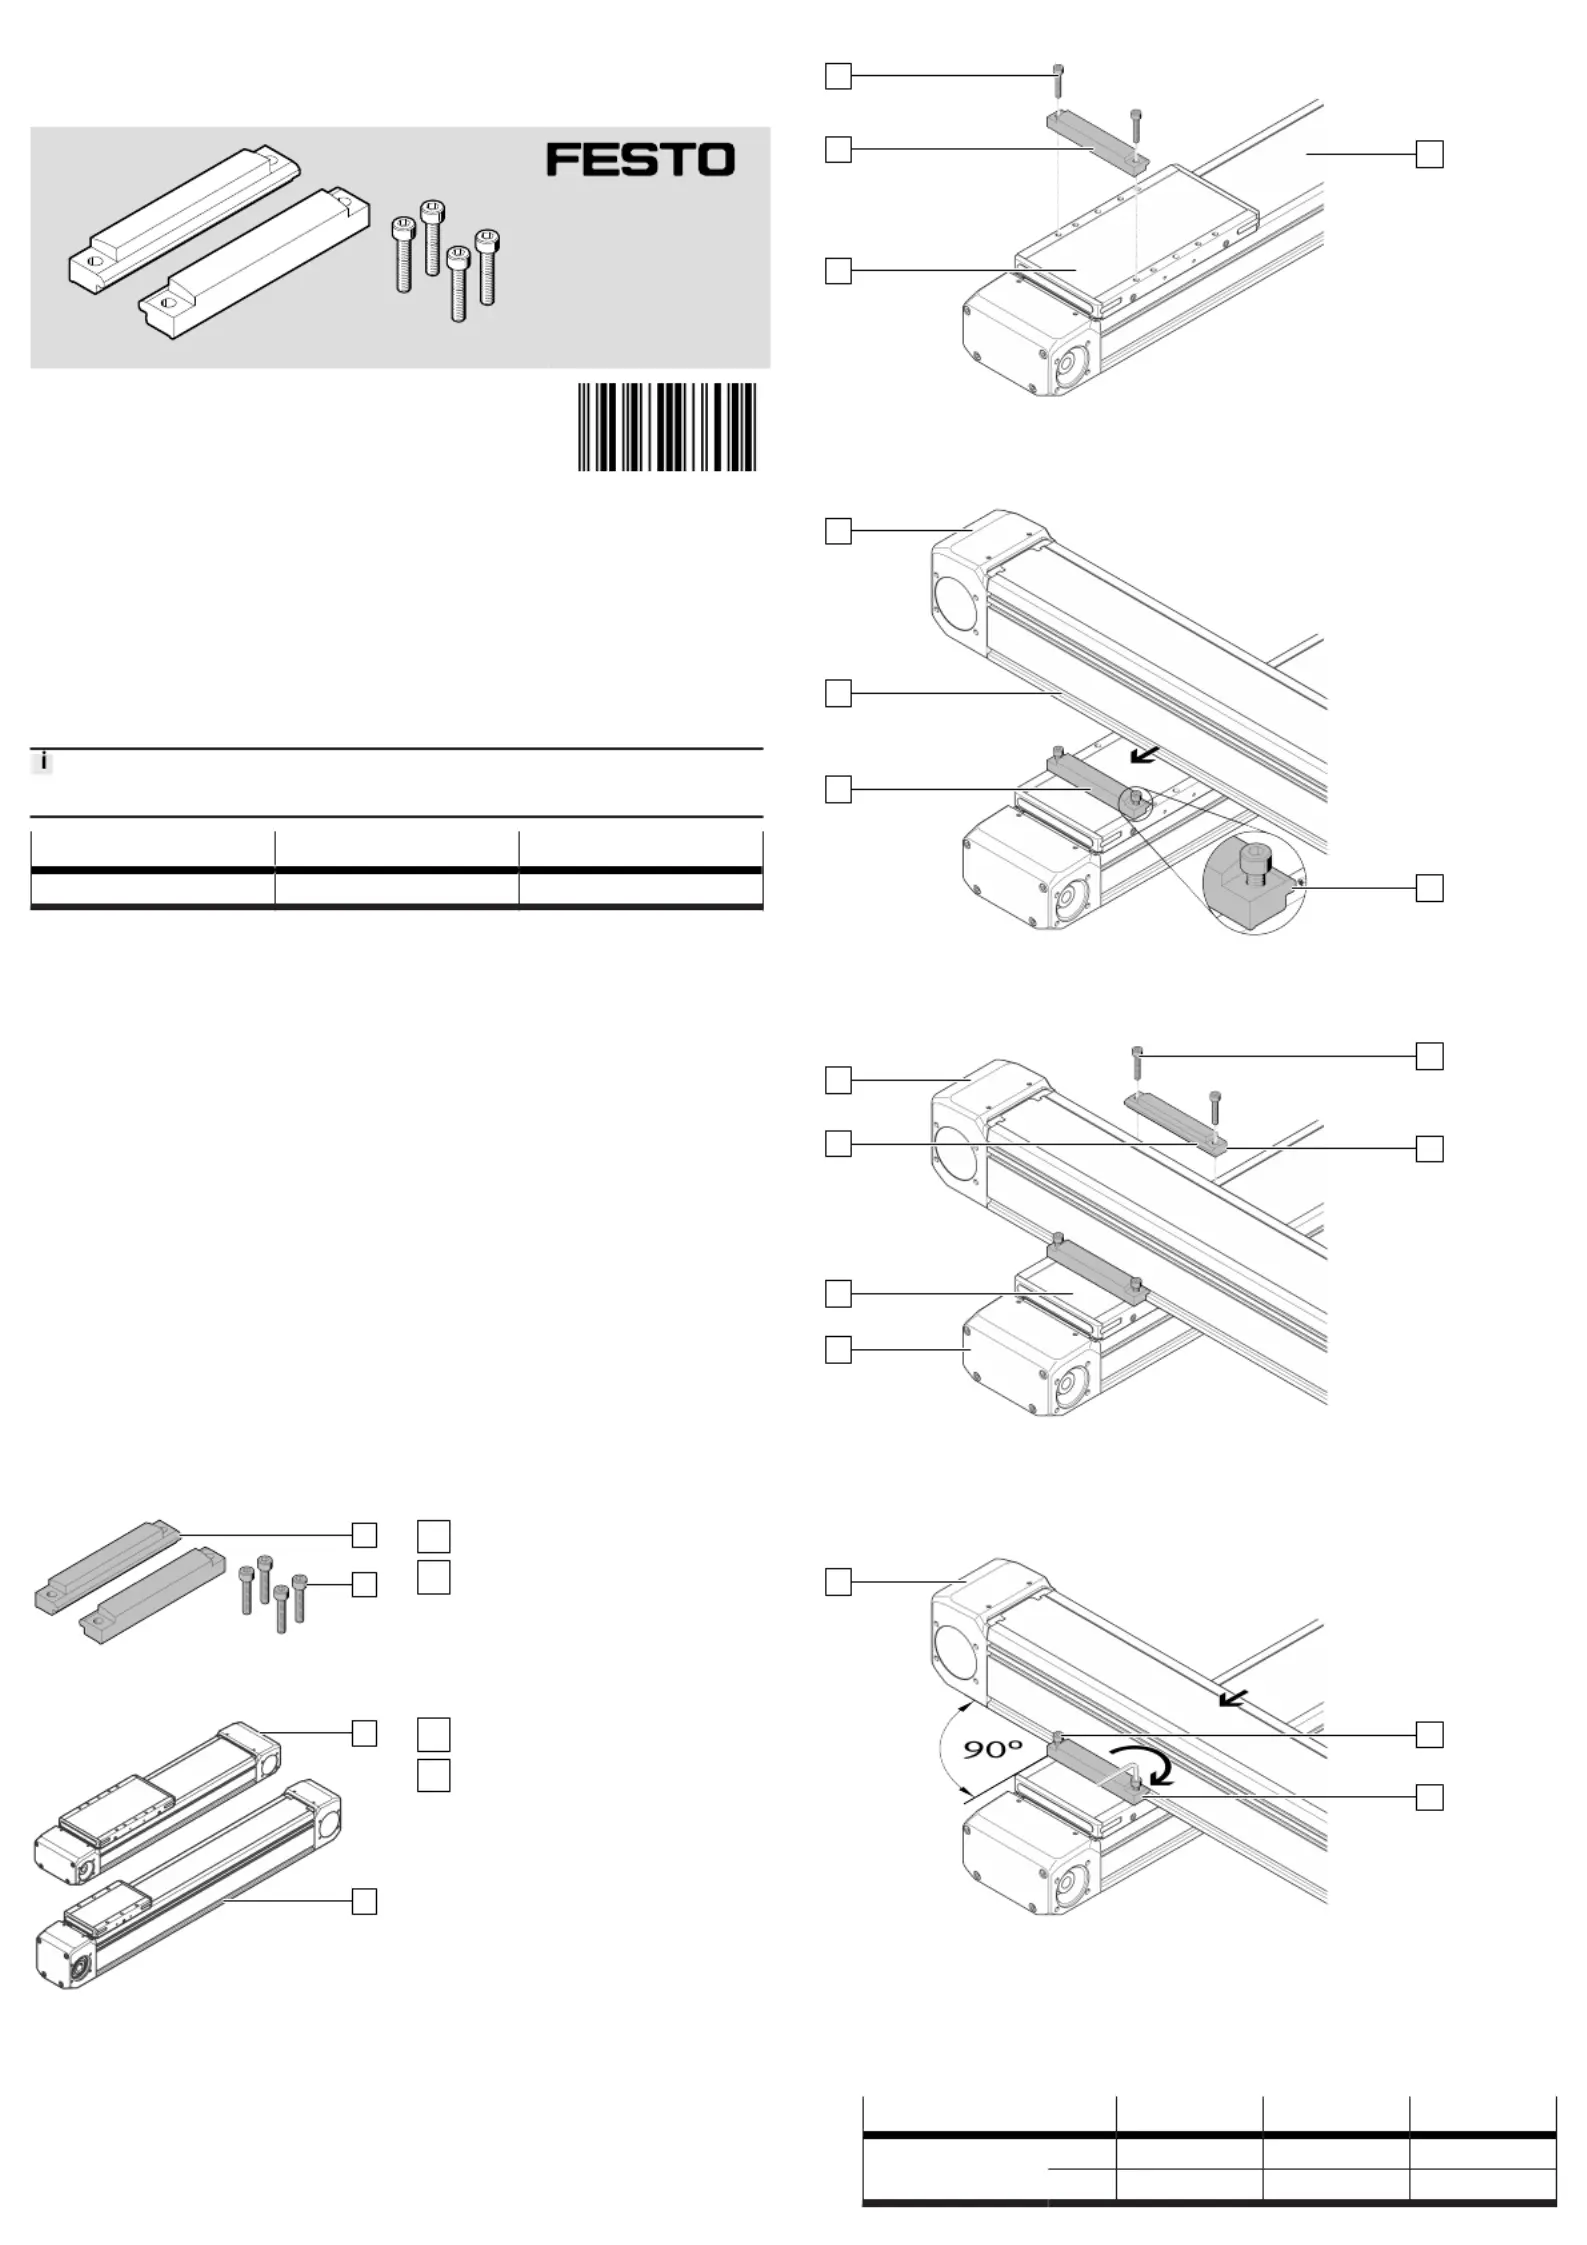
Fig. 3:Fastening first profile mounting
•Loosely attach the profile mounting[1] with the screws[2] to the slide[A] of
the base axis[3].
4
1
C
B
Fig. 4:Positioning assembly axis
•
Position the assembly axis[4] on the profile mounting[1].
Ä
The lug[B] lies in the slot[C] of the assembly axis[4].
1
2
A
4
B
3
Fig. 5:
Fastening second profile mounting
•
Loosely attach the profile mounting[1] with the screws[2] to the slide[A] of
the base axis[3].
Ä
The lug[B] lies in the slot of the assembly axis[4].
4
1
2
Fig. 6:
Mounting assembly axis
1.
Press the assembly axis[4] against the profile mounting[1].
Ä
The assembly axis[4] is aligned at the right angle.
2.
Press the profile mountings[1] against the assembly axis[4].
Ä
The profile mountings[1] are flush with the assembly axis[4].
3.
Tighten the four screws[2]. Observe tightening torque.
EAHF-E24-...-P-...-D4-D5-D6
ScrewM6x25M5x25M5x25
[Nm]7.6±20%5.0±20%5.0±20%
Product specificaties
| Merk: | Festo |
| Categorie: | Niet gecategoriseerd |
| Model: | EAHF-E24-60-P-D5 |
Heb je hulp nodig?
Als je hulp nodig hebt met Festo EAHF-E24-60-P-D5 stel dan hieronder een vraag en andere gebruikers zullen je antwoorden
Handleiding Niet gecategoriseerd Festo

3 Mei 2026
30 April 2026
29 April 2026
29 April 2026
29 April 2026
29 April 2026
28 April 2026
28 April 2026
28 April 2026
28 April 2026
Handleiding Niet gecategoriseerd
Nieuwste handleidingen voor Niet gecategoriseerd
4 Juni 2026
4 Juni 2026
4 Juni 2026
4 Juni 2026
4 Juni 2026
4 Juni 2026
4 Juni 2026
4 Juni 2026
4 Juni 2026
4 Juni 2026