Crestron TSW-732-B-S Handleiding
Crestron Niet gecategoriseerd TSW-732-B-S
Bekijk gratis de handleiding van Crestron TSW-732-B-S (2 pagina’s), behorend tot de categorie Niet gecategoriseerd. Deze gids werd als nuttig beoordeeld door 55 mensen en kreeg gemiddeld 4.0 sterren uit 2 reviews. Heb je een vraag over Crestron TSW-732-B-S of wil je andere gebruikers van dit product iets vragen? Stel een vraag
Pagina 1/2
DOGUIDE
DO Check the Box
QUANTITYPRODUCTCOLORPART NUMBER
1Bit, Torx, T82025915
1Cover, Plastic, No Buttons, Left Side, 4.5"x 1" x 0.625"
1Black 2033452
1Cover, Plastic, No Buttons, Left Side, 4.5" x 1" x 0.625"
2White 2033451
1Cover, Plastic, No Buttons, Right Side, 4.5" x 1" x 0.625"
1Black 2033450
1Cover, Plastic, No Buttons, Right Side, 4.5" x 1" x 0.625"
2White 2033449
2Screw, 4B x 3/4", Flat Head, Phillips2019088
2Screw, 4-40 x 1/4", Undercut Head, Phillips1Black 2007152
2Screw, 4-40 x 1/4", Undercut Head, Phillips22007160
2Screw, 4-40 x 1/4", Flat Head, Torx1Black 2025311
2Screw, 4-40 x 1/4", Flat Head, Torx22025312
4Screw, 6-32 x 1-1/2", Flat Head, Phillips2031703
1. This part ships with the TSW-732-B-S.
2. This part ships with the TSW-732-W-S.
TSW-732
7” Room Scheduling Touch Screen
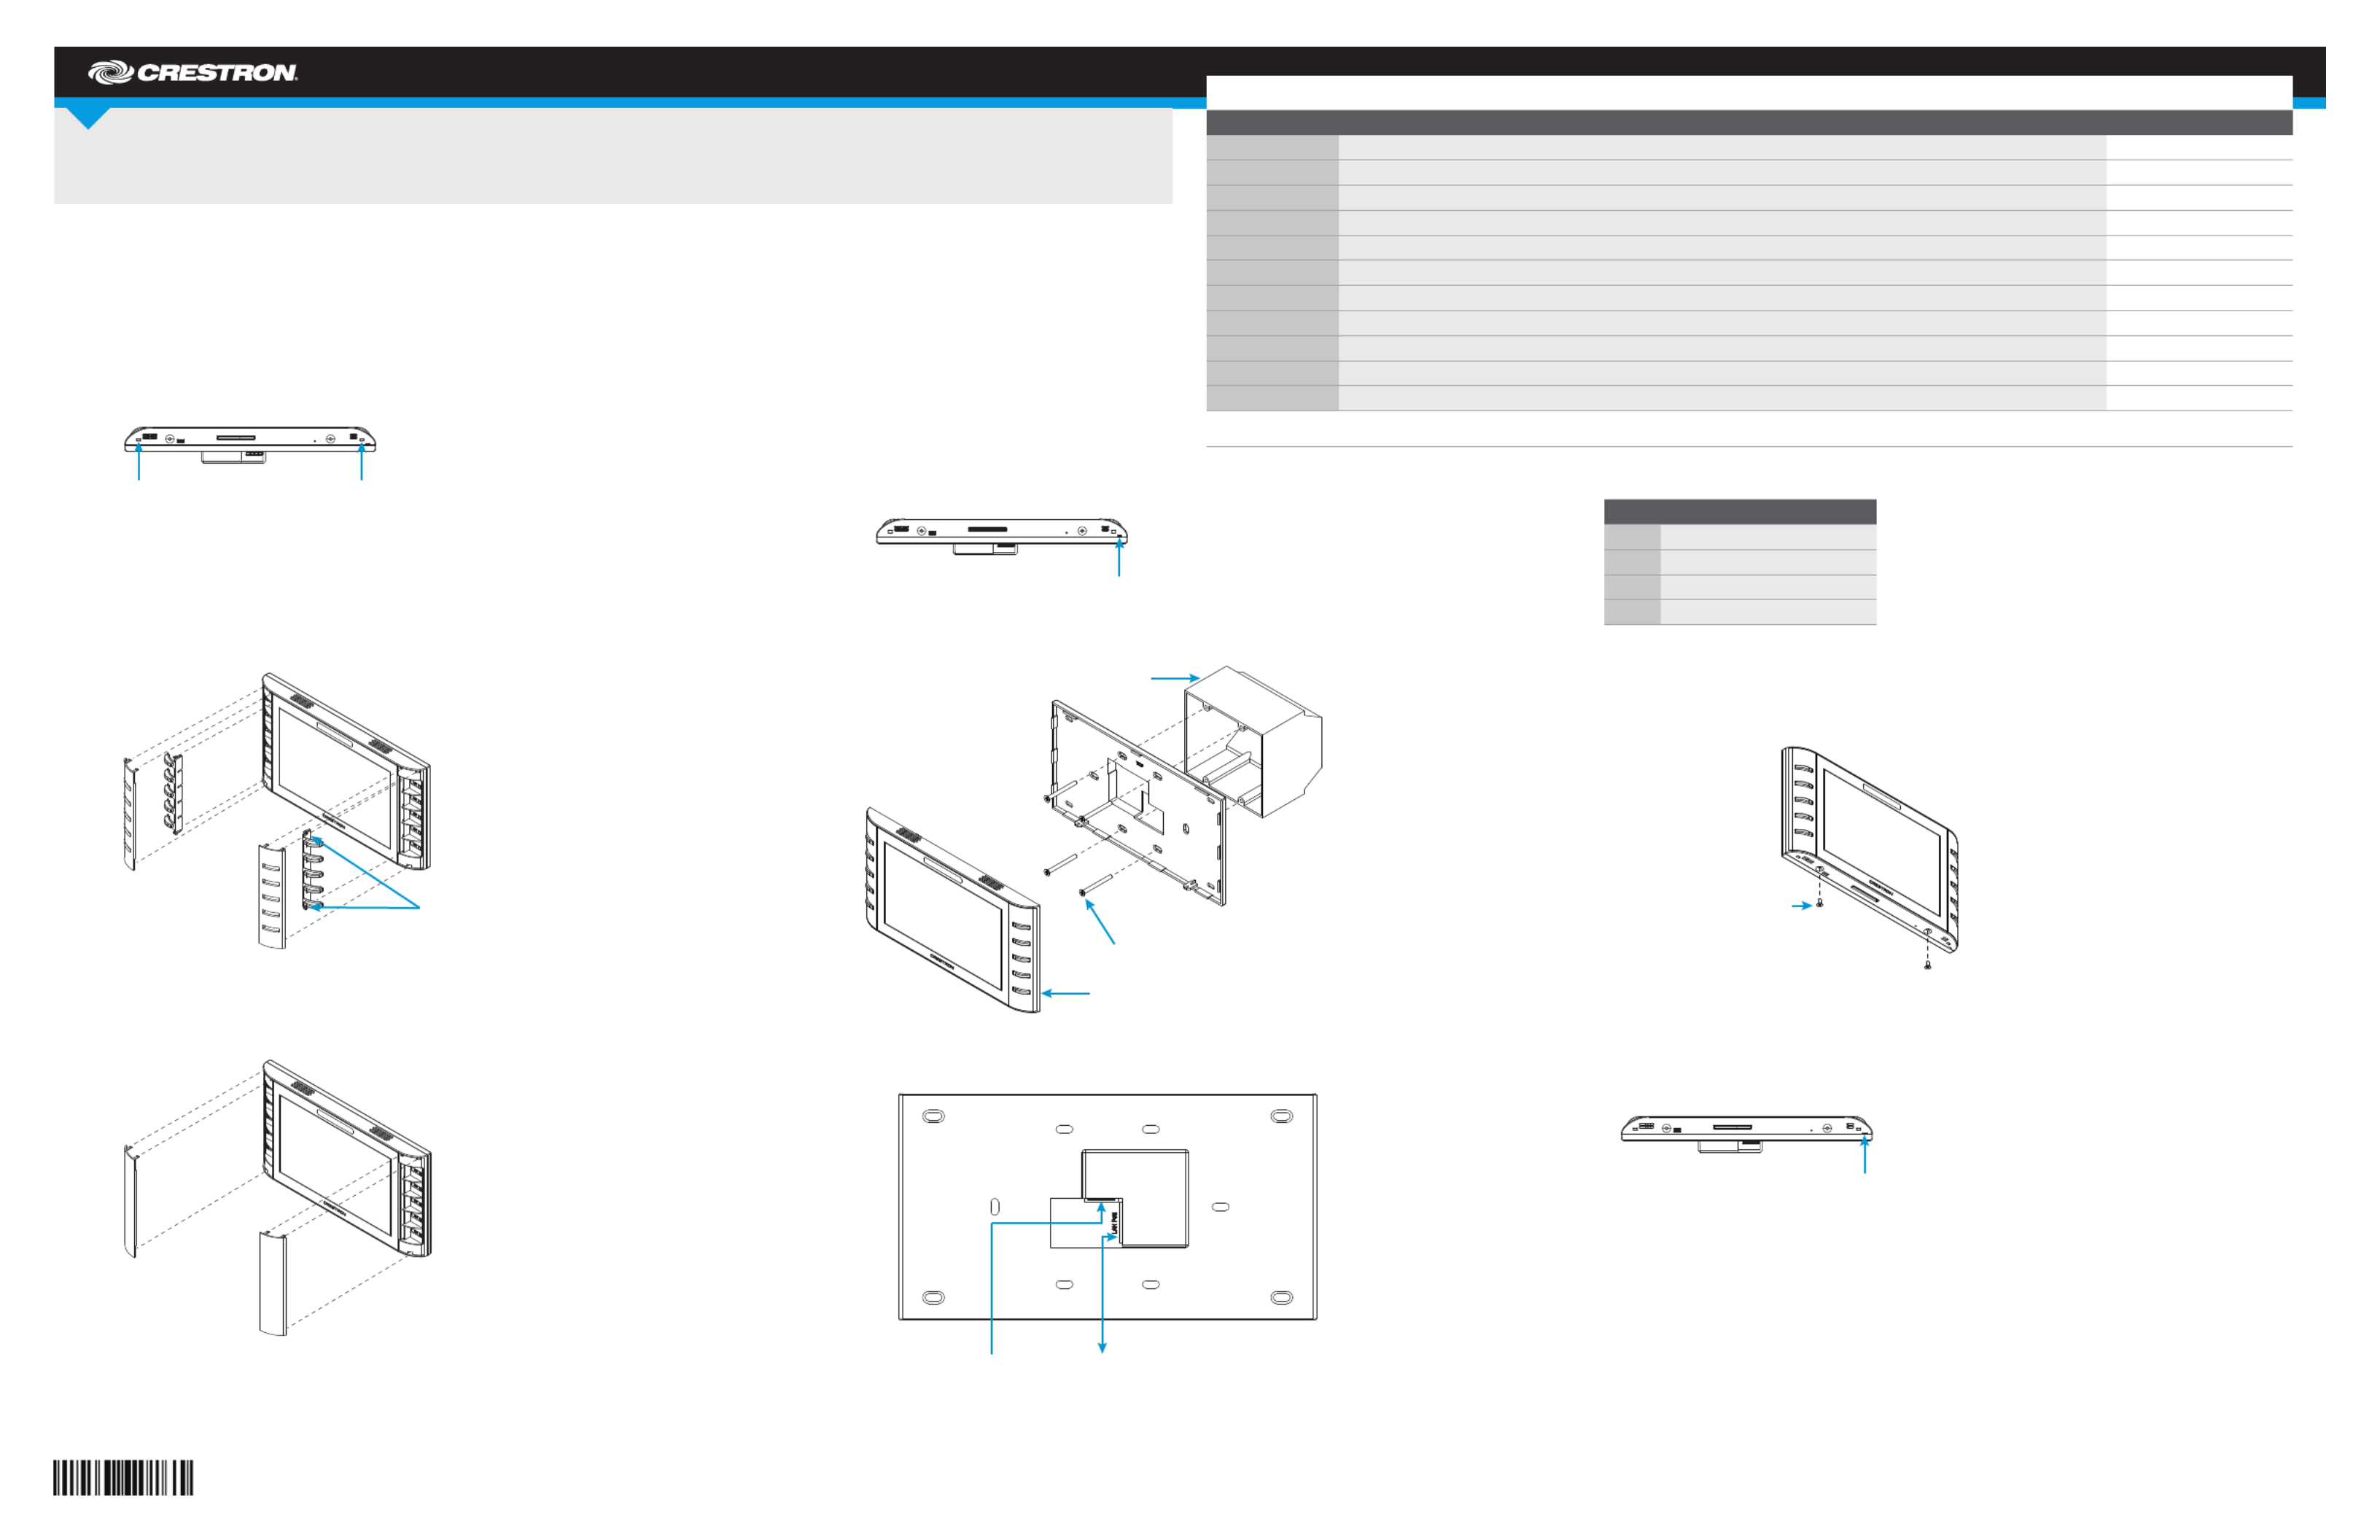
DO Change the Button Inserts or Button Covers
The Crestron® TSW-732 Touch Screen ships with 10 “hard key” push buttons for quick access to
commonly used functions. Optional, custom engravable button covers are available (TSW-730-BTNO
and custom engraving sold separately). For a clean appearance, either column of buttons may be
removed and covered using the included no-button covers.
To change the inserts or covers, use the following procedure:
1. Insert a small at head screwdriver into the appropriate hole on the bottom of the TSW-732 to
release its cover.
2. Gently remove the cover from the TSW-732.
3. If removing the button insert after removing the button cover, use a small at head screwdriver
to press the tabs, and then gently lift the button insert from the TSW-732. Refer to the following
illustration for the tab locations on the button insert.
Touch Screen with Button Inserts
4. Carefully position the new cover over the front of the touch screen and press it into place.
Touch Screen with No-Button Covers
DO Install the Touch Screen
The TSW-732 can be mounted into a standard
electrical box or onto a at surface. A tabletop
enclosure and swivel mount (TSW-730-TTK and
SMK-4SM/730, both sold separately) are also
available.
Mounting into a U.S. Electrical Box
To mount the TSW-732 into a U.S. electrical box,
use the following procedure:
1. Insert a small at head screwdriver into the
hole shown in the following illustration, and
gently separate the back panel from the touch screen.
2. Use the four included 6-32 x 1-1/2" screws to attach the back panel to the electrical box.
3. Make connections to the TSW-732 using Crestron power supplies for Crestron equipment.
4. Carefully position the front of the touch screen over the back panel and gently snap it into place.
5. Use two of the included 4-40 x 1/4" screws to secure the TSW-732. For standard applications,
use the Phillips screws. For secure applications, use the security type Torx screws along with
the included Torx screwdriver bit.
Mounting into a U.K. Electrical Box
To mount the TSW-732 into a U.K. electrical box, use the following procedure:
1. Insert a small at head screwdriver into the hole shown in the following illustration, and gently
separate the back panel from the touch screen.
Insert a screwdriver to release the covers.
Use a screwdriver
to release
the button insert.
Insert a screwdriver to separate the back panel.
U.S. Electrical Box
TSW-732
Screws (4) 6-32 x 1-1/2"
Occupancy Sensor Input:
From Room Occupancy Sensor
LAN PoE:
10BASE-T / 100BASE-TX
Ethernet to LAN
Screws (2) 4-40 x 1/4" Phillips
or
Screws (2) 4-40 x 1/4" Torx
Insert a screwdriver to separate the back panel.
PIN DESCRIPTION
G Ground
2Occupancy sensor #2 status
1Occupancy sensor #1 status
2424 Vdc power
Product specificaties
| Merk: | Crestron |
| Categorie: | Niet gecategoriseerd |
| Model: | TSW-732-B-S |
| Kleur van het product: | Zwart |
| Gewicht: | 518 g |
| Breedte: | 223 mm |
| Diepte: | 32 mm |
| Hoogte: | 121 mm |
| Beeldschermdiagonaal: | 7 " |
| Resolutie: | 800 x 480 Pixels |
| RAM-capaciteit: | 1024 MB |
| Ethernet LAN: | Ja |
| Montagewijze: | In-muur |
| Kijkhoek, horizontaal: | 70 ° |
| Kijkhoek, verticaal: | 65 ° |
| Helderheid: | 300 cd/m² |
| Ingebouwde luidsprekers: | Ja |
| Intern geheugen: | 4096 MB |
| Bedoeld voor: | Vergaderzaal |
| Beeldverhouding: | 15:9 |
| Kleurdiepte: | 18 Bit |
| Ethernet LAN, data-overdrachtsnelheden: | 10, 100 Mbit/s |
| Backlight type: | LED |
| Touchscreen technologie: | Capacitief |
| Contrastverhouding: | 350:1 |
| Wifi: | Nee |
| Bedrijfstemperatuur (T-T): | 0 - 45 °C |
| Relatieve vochtigheid in bedrijf (V-V): | 10 - 90 procent |
| Type beeldscherm: | TFT |
Heb je hulp nodig?
Als je hulp nodig hebt met Crestron TSW-732-B-S stel dan hieronder een vraag en andere gebruikers zullen je antwoorden
Handleiding Niet gecategoriseerd Crestron

26 Mei 2026
7 Maart 2026
4 Maart 2026
28 Januari 2026
27 Januari 2026
4 December 2025
3 December 2025
2 December 2025
2 December 2025
2 December 2025
Handleiding Niet gecategoriseerd
Nieuwste handleidingen voor Niet gecategoriseerd
23 Juli 2026
23 Juli 2026
23 Juli 2026
23 Juli 2026
23 Juli 2026
23 Juli 2026
23 Juli 2026
23 Juli 2026
23 Juli 2026
22 Juli 2026