Crestron TSW-1060-TTK-W-S Handleiding
Crestron Niet gecategoriseerd TSW-1060-TTK-W-S
Bekijk gratis de handleiding van Crestron TSW-1060-TTK-W-S (2 pagina’s), behorend tot de categorie Niet gecategoriseerd. Deze gids werd als nuttig beoordeeld door 248 mensen en kreeg gemiddeld 4.3 sterren uit 3 reviews. Heb je een vraag over Crestron TSW-1060-TTK-W-S of wil je andere gebruikers van dit product iets vragen? Stel een vraag
Pagina 1/2
DOGUIDE
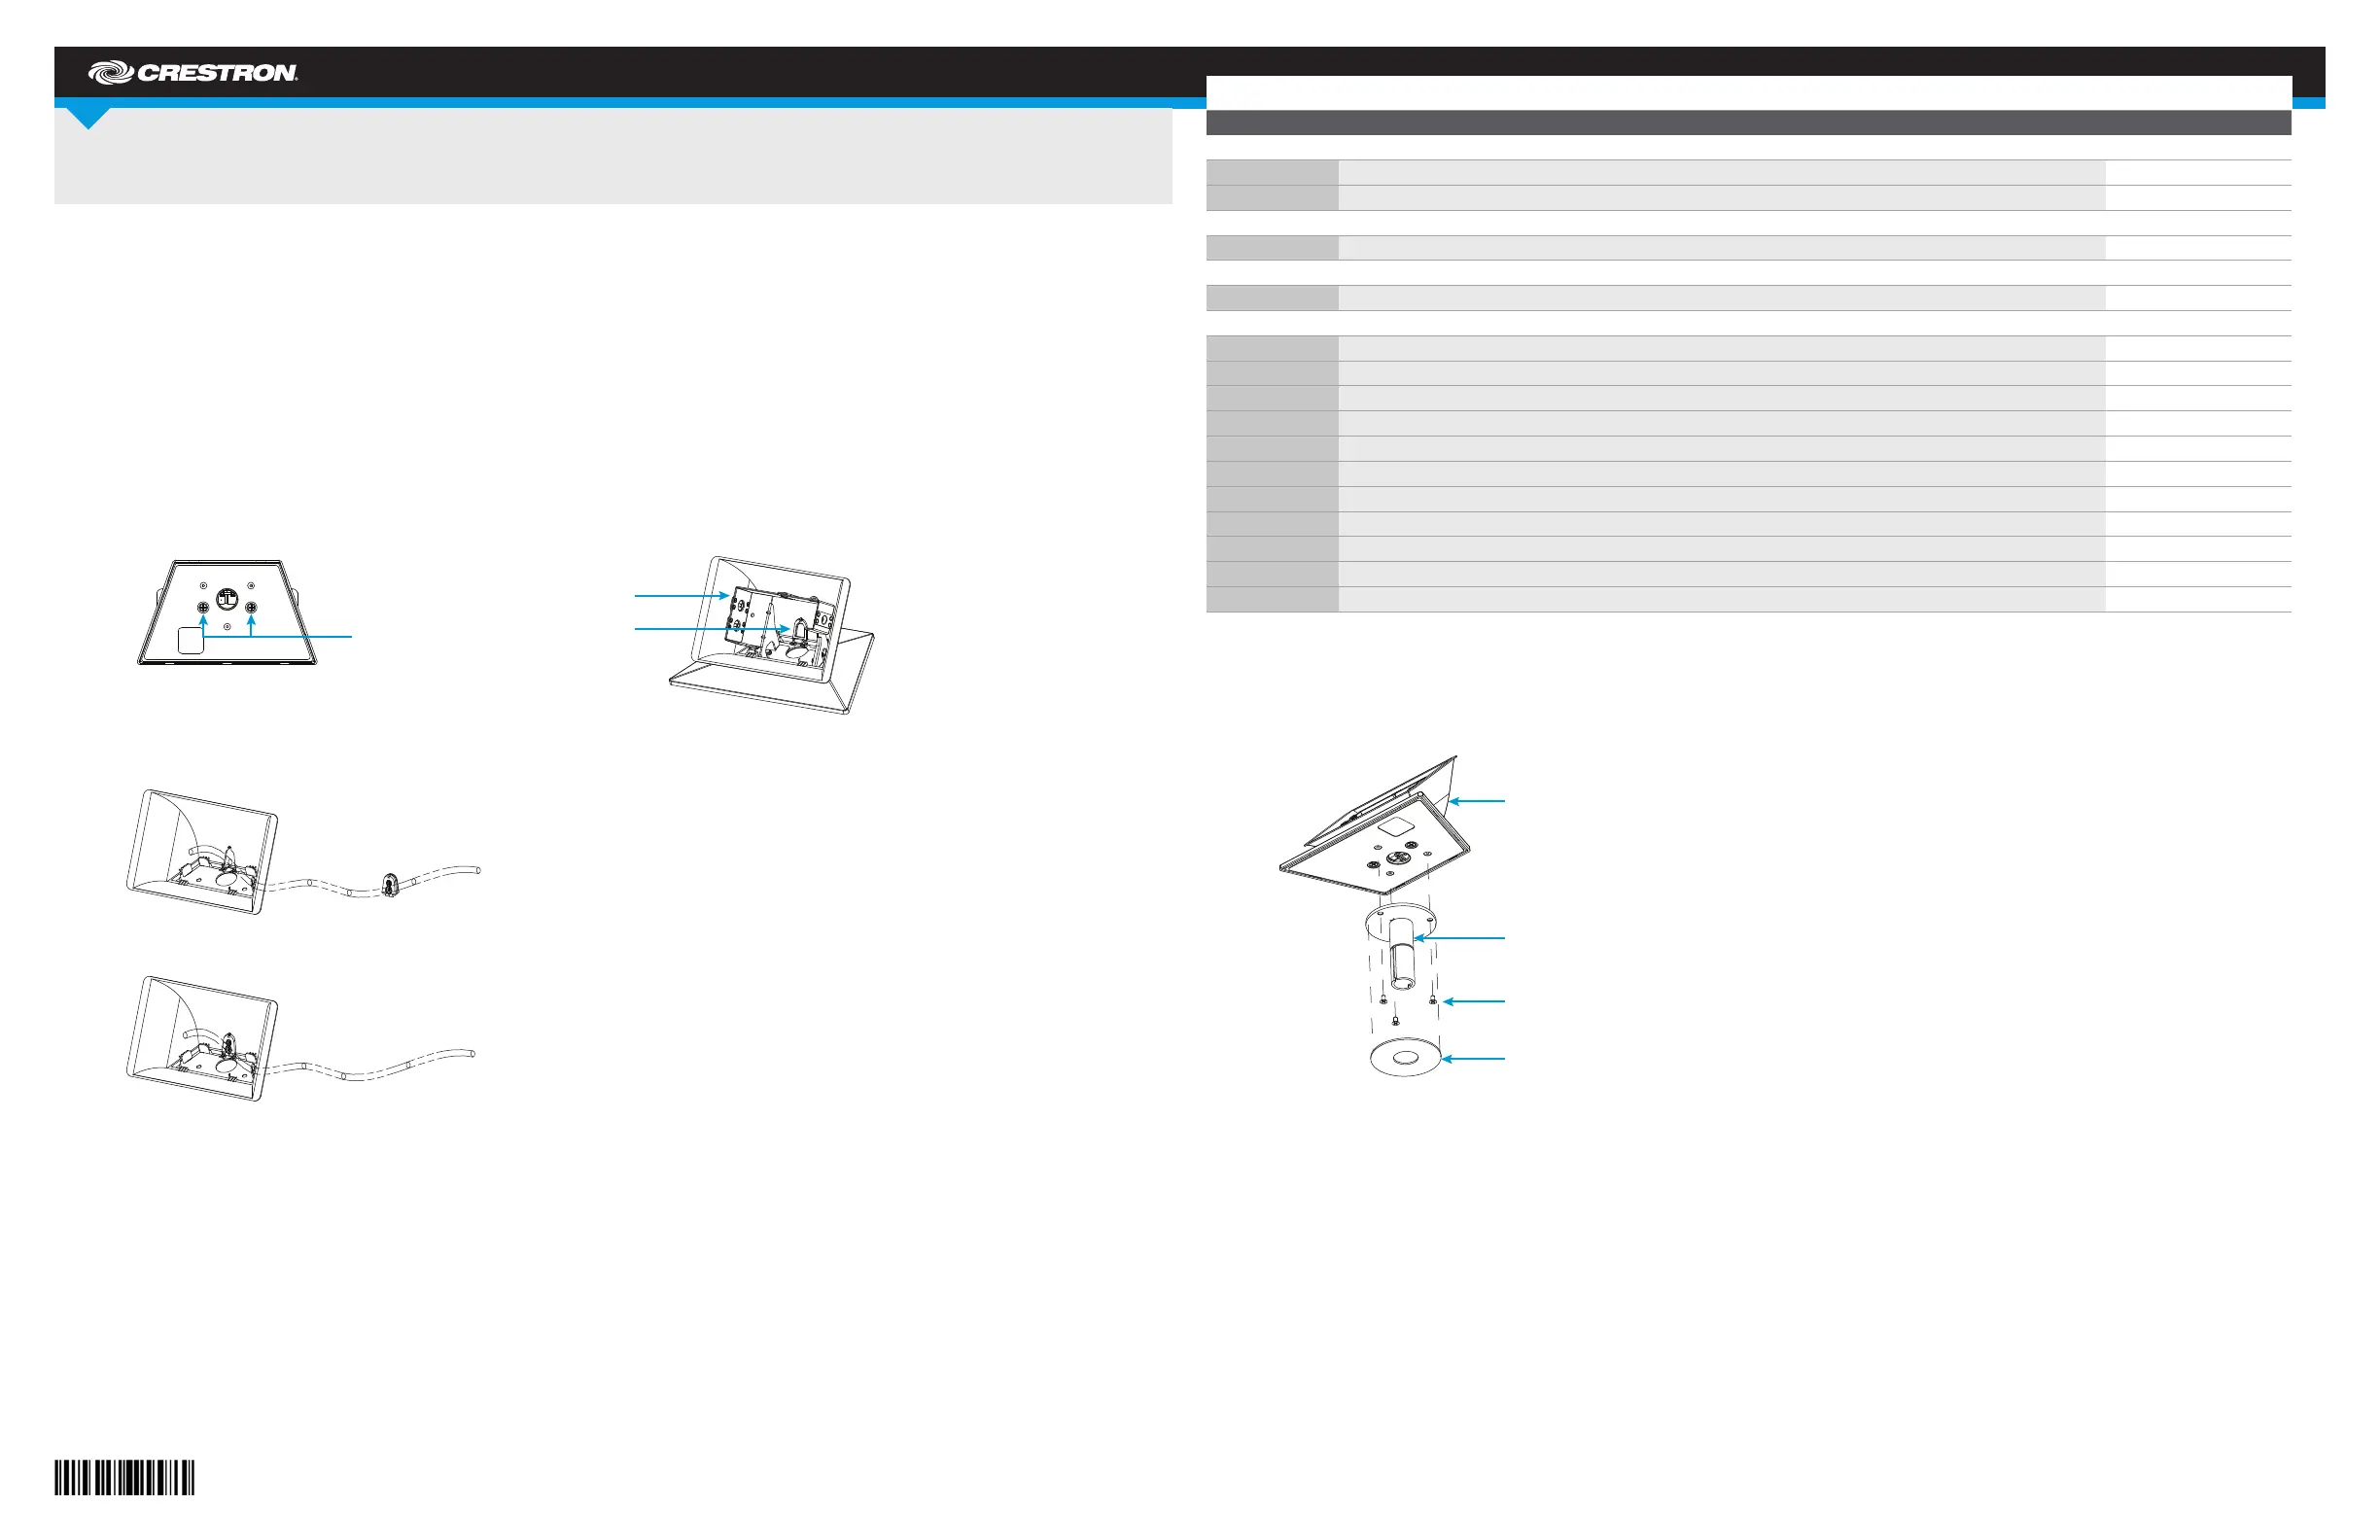
DO Assemble the TSW-560/760/1060-SMK
Assemble the Swivel Mount
To assemble the swivel mount:
1. Attach and secure the swivel mechanism tube to the bottom of the TSW-560/760/1060-TTK using the three included 6-32 x 3/16" screws.
2. Remove the paper liner from the felt washer and attach the washer to the bottom of the swivel mechanism tube.
3. If the Ethernet cable is routed to exit through the bottom of the TSW-560/760/1060-TTK, feed the full length of the cable through the swivel
mechanism tube.
4. Use the included template to prepare the mounting surface.
5. Using the six mounting holes on the swivel stop plate as a template, drill pilot holes in the mounting surface. The holes should be 0.093" (2 mm)
minimum diameter, 0.115" (3 mm) maximum diameter, and 0.35" (9 mm) maximum depth.
6. Attach the swivel stop plate to the bottom of the mounting surface using the six included 8-8B x 1/2" screws.
7. Pass the swivel mechanism tube attached to the TSW-560/760/1060-TTK down through the mounting hole and swivel stop plate.
NOTE: The swivel stop plate has a permanently installed limiting screw to prevent the swivel mechanism from spinning and tangling the touch
screen cable.
TSW-560/760/1060-TTK and TSW-560/760/1060-SMK
TableTop Kits and Swivel Mount Kit for TSW-560/760/1060
The Crestron
®
TSW-560-TTK, TSW-760-TTK, and TSW-1060-TTK are functionally identical. For simplicity within this guide, the term
“TSW-560/760/1060-TTK” is used except where noted.
DO Prepare the TSW-560/760/1060-TTK
The TSW-560/760/1060-TTK includes parts for routing device cabling through either the bottom or rear of the unit.
Routing the Cable though the Bottom of the TSW-560/760/1060-TTK
The TSW-560/760/1060-TTK has a circular opening in its metal base that allows an Ethernet cable to pass through the bottom, enabling network connection
when the unit is attached to the TSW-560/760/1060-SMK Swivel Mount Kit (sold separately).
Routing the Cable though the Rear of the TSW-560/760/1060-TTK
Modication is necessary to install the TSW-560/760/1060-TTK on a at surface. Replace the rear plastic cap with the provided grommet to route the
Ethernet cable through the rear of the unit. The grommet serves as a strain relief on the cable.
1. Remove the two screws on the bottom of the unit that hold the metal bracket. Retain the metal bracket and screws.
2. Remove the rear plastic cap by pressing the top of the cap inward until it unsnaps.
3. Insert the Ethernet cable through the rear opening of the TSW-560/760/1060-TTK and attach the provided grommet to the cable.
4. Secure the grommet to the back of the TSW-560/760/1060-TTK by pressing it into place.
NOTE: For added security, refer to “DO Use the Security Option” and follow the procedure. For standard mounting, proceed to the next step.
5. Reinstall the metal bracket using the screws removed in step 1.
DO Mount the Touch Screen in the TSW-560/760/1060-TTK
To mount the touch screen:
1. Connect the Ethernet cable to the touch screen.
2. Gently pull excess cable out through the rear of the TSW-560/760/1060-TTK as the touch screen and tabletop kit converge.
3. Seat the touch screen in the TSW-560/760/1060-TTK fully to engage the spring-loaded retainers built into the metal bracket.
DO Check the Box
QUANTITYITEMPART NUMBER
Items for TSW-560/760/1060-TTK Only
2Screw, M3 x 0.5 x 6 mm, Pan Head, Phillips2047840
1Template, Cutout4525014
Items for TSW-560/760/1060-TTK-B-S Only
1Grommet, Rubber, Black2047839
Items for TSW-560/760/1060-TTK-W-S Only
1Grommet, Rubber, White2047838
Items for TSW-560/760/1060-SMK Only
1Nut, 7/8"-142017632
1Plate, Swivel Stop4504353
3Screw, 6-32 x 3/16", Pan Head, Phillips2007202
2Screw, 8-32 x 1/8", Cap Head, Socket2017634
6Screw, 8-8B x 1/2", Pan Head, Phillips2017784
1Template, Cutout4525014
1Washer, 1.75" OD, 15/16" ID, 0.14" TH2017633
1Washer, Cork/Rubber, 1.75" OD, 0.94" ID, 1/16" TH2017614
1Washer, Felt, 2.65" OD, 0.93" ID2024711
1Washer, Keyed4506321
1Washer, Rubber, 1.75" OD, 0.94" ID, 1/16" TH2017615
TSW-560/760/1060-TTK
Swivel mechanism tube
Screws (3) 6-32 x 3/16"
Felt washer
Remove these screws
to release the metal bracket.
Metal bracket
Plastic cap
Bottom of TSW-560/760/1060-TTK
Product specificaties
| Merk: | Crestron |
| Categorie: | Niet gecategoriseerd |
| Model: | TSW-1060-TTK-W-S |
Heb je hulp nodig?
Als je hulp nodig hebt met Crestron TSW-1060-TTK-W-S stel dan hieronder een vraag en andere gebruikers zullen je antwoorden
Handleiding Niet gecategoriseerd Crestron

26 Mei 2026
7 Maart 2026
4 Maart 2026
28 Januari 2026
27 Januari 2026
4 December 2025
3 December 2025
2 December 2025
2 December 2025
2 December 2025
Handleiding Niet gecategoriseerd
Nieuwste handleidingen voor Niet gecategoriseerd
23 Juli 2026
23 Juli 2026
23 Juli 2026
23 Juli 2026
23 Juli 2026
23 Juli 2026
23 Juli 2026
23 Juli 2026
23 Juli 2026
22 Juli 2026