Crestron STIRP Handleiding
Crestron Niet gecategoriseerd STIRP
Bekijk gratis de handleiding van Crestron STIRP (2 pagina’s), behorend tot de categorie Niet gecategoriseerd. Deze gids werd als nuttig beoordeeld door 26 mensen en kreeg gemiddeld 4.5 sterren uit 8 reviews. Heb je een vraag over Crestron STIRP of wil je andere gebruikers van dit product iets vragen? Stel een vraag
Pagina 1/2
Additional Resources
Visit the product page on the Crestron website (www.crestron.com)
for additional information and the latest rmware updates. Use a QR
reader application on your mobile device to scan the QR image.
Description
The Crestron
®
STIRP is a pure IR (infrared) emitter that is designed to adhere to the IR
sensor window of a television, an optical disc player, or any other IR-controllable device.
The STIRP connects to any Crestron control system or room solution box that is
equipped with a 3.5 mm mono mini-type Crestron IR port, providing a 1-way IR control
interface to the device.
STIRP
IR Emitter Probe
Installation Guide
Installation
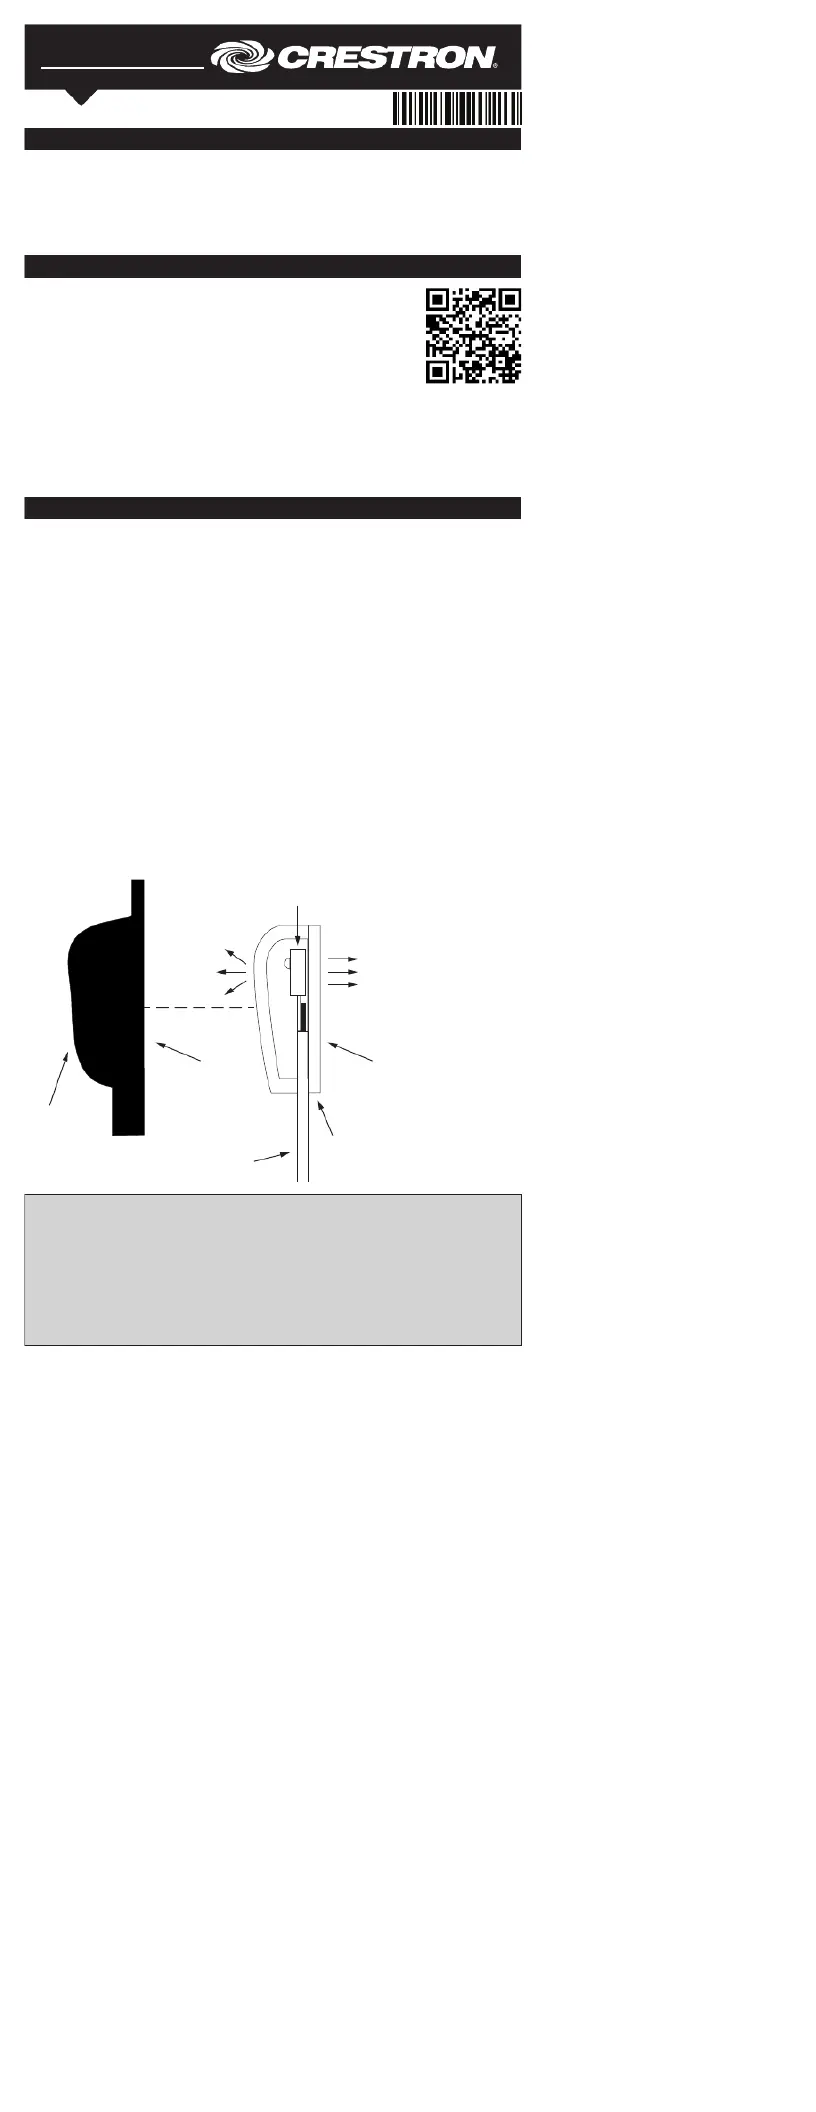
Positioning the STIRP
With many devices, the STIRP works best when positioned directly over the controlled
device’s IR sensor, but with other devices, operation is more consistent when the STIRP
is placed an inch or two offset from the IR sensor.
It may be difcult to locate the IR sensor on the controlled device, so instead, test
commands from the Crestron control system or room solution box while moving the
STIRP around the controlled device’s front panel. When operation is consistent and
reliable, attach the STIRP using the procedure below.
Attaching the STIRP
Peel off the clear adhesive strip on the back of the STIRP shell, and then carefully afx
the STIRP to the desired location on the controlled device’s front panel while pressing
rmly.
Attaching the IR Mask (Optional)
Attach the included IR mask when two or more identical components in the same rack
are being controlled. The IR mask prevents stray IR output from accidentally controlling
another device.
To attach the IR mask, t the two pieces together without removing the clear adhesive
strips from the STRIP shell or the IR mask, and then attach the STIRP to the controlled
device as described above.
STIRP Shell and (Optional) IR Mask (Side View)
Clear adhesive
layer
Internal IR
emitter
IR
output
IR
output
STIRP
shell
Miniwire
lead
NOTE:
If the STIRP’s shell must be removed and repositioned for any reason, it may
be necessary to replace the adhesive strip with a new piece of two-sided tape
(supplied) to restore adhesion.
NOTE:
The STIRP is a pure infrared emitter, and it does not emit visible light. Since
IR can be recorded by using a smart device’s digital camera, test to see that the
STIRP is properly working by triggering the STIRP using the control system or room
solution box. While the STIRP is being triggered, record a video of the emitter with a
smart phone’s digital camera. If IR is visible in the video during playback, the STIRP
is properly working.
IR
mask
(optional)
Clear adhesive
layer
Product specificaties
| Merk: | Crestron |
| Categorie: | Niet gecategoriseerd |
| Model: | STIRP |
Heb je hulp nodig?
Als je hulp nodig hebt met Crestron STIRP stel dan hieronder een vraag en andere gebruikers zullen je antwoorden
Handleiding Niet gecategoriseerd Crestron

26 Mei 2026
7 Maart 2026
4 Maart 2026
28 Januari 2026
27 Januari 2026
4 December 2025
3 December 2025
2 December 2025
2 December 2025
2 December 2025
Handleiding Niet gecategoriseerd
Nieuwste handleidingen voor Niet gecategoriseerd
8 Juni 2026
8 Juni 2026
8 Juni 2026
8 Juni 2026
8 Juni 2026
8 Juni 2026
8 Juni 2026
8 Juni 2026
7 Juni 2026
7 Juni 2026