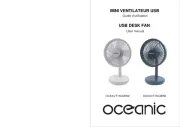
Canarm HVA36T10750 Handleiding
Canarm
Ventilator
HVA36T10750
Bekijk gratis de handleiding van Canarm HVA36T10750 (16 pagina’s), behorend tot de categorie Ventilator. Deze gids werd als nuttig beoordeeld door 9 mensen en kreeg gemiddeld 4.8 sterren uit 5 reviews. Heb je een vraag over Canarm HVA36T10750 of wil je andere gebruikers van dit product iets vragen? Stel een vraag
Pagina 1/16

M0112_NOV 2020 Page 1 of 8www.CANARM.COM
Canarm Ltd. - Corporate Head Office 2157 Parkedale Avenue, PO Box 367 Brockville, Ontario Canada K6V 5V6
Tel: (613) 342-5424 Fax: (613) 342-8437 hvacsales@canarm.ca www.canarm.com
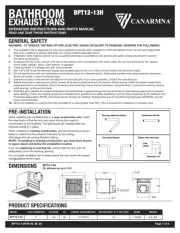
WALL EXHAUST FANS
BELT & DIRECT DRIVE
INSTALLATION AND MAINTENANCE INSTRUCTIONS
READ AND SAVE THESE INSTRUCTIONS
Models: XB, HV, HVA, HVAR, ADD, ADDR, DDS, DDP, SXB, SADD
THE PURPOSE OF THIS MANUAL IS TO AID IN THE PROPER INSTALLATION AND OPERATION OF THE
FANS. THESE INSTRUCTIONS ARE INTENDED TO SUPPLEMENT GOOD GENERAL PRACTICES AND ARE
NOT INTENDED TO COVER DETAILED INSTRUCTION PROCEDURES. IT IS THE RESPONSIBILITY OF THE
PURCHASER TO ASSURE THAT THE INSTALLATION AND MAINTENANCE OF THIS EQUIPMENT IS
HANDLED BY QUALIFIED PERSONNEL.
Inspect all shipments carefully for damage. THE RECEIVER MUST NOTE ANY DAMAGE ON THE CARRIER’S
BILL OF LADING AND FILE A CLAIM IMMEDIATELY WITH THE FREIGHT COMPANY.
ELECTRICAL CONNECTIONS
WARNING: BE SURE POWER IS OFF AT THE ELECTRICAL PANEL BEFORE WIRING.
WARNING: ALL ELECTRICAL WORK SHOULD BE PERFORMED
BY A QUALIFIED ELECTRICIAN.
INSTALLATION
1. Cut and frame the appropriate wall opening. Fans mounted to a wall require a different wall opening than fans
mounted in cabinets or sleeves. For specic dimensions, refer to the submittal drawing for the specic fan
conguration.
2. Mount the fan in the opening with the fan panel directly over the load bearing support and if this is not practical
angle supports must be provided to transfer the fan weight to the load bearing structure.
3. Caution: The fan contains rotating parts and requires electrical service. Appropriate safety precautions should
be taken during installation, operation and maintenance.
4. Warning: Do not install or operate this fan in an environment where combustible materials, gasses or fumes
are present unless it was specically designed and manufactured for that application.
5. A damper, if used, should be securely mounted in a manner that allows free and unobstructed operation.
6. All electrical work must be done, in accordance with all applicable electrical codes, by a qualied electrician.
Please follow all applicable national, state/provincial and local codes, all of them will supersede this manual.
7. Prior to wiring ensure the power supply is locked in the OFF position and that the motor nameplate voltage
and the supply voltage match.
8. Be sure to keep all wiring clear of any rotating parts.
9. Before starting the fan ensure that the wheel rotates freely.

XB, HV, HVA, HVAR, ADD, ADDR, DDS, DDP, SXB, SADD
M0112_NOV 2020 Page 2 of 8www.CANARM.COM
Canarm Ltd. - Corporate Head Office 2157 Parkedale Avenue, PO Box 367 Brockville, Ontario Canada K6V 5V6
Tel: (613) 342-5424 Fax: (613) 342-8437 hvacsales@canarm.ca www.canarm.com
WARNING: GUARDING SHOULD BE USED IF FANS ARE MOUNTED LOWER THAN
SEVEN FEET (2 METRES) OFF FLOOR OR GROUND LEVEL.
WARNING
Moving parts,
disconnect
power before
servicing.
!
INSTALLATION CONTINUED
10. Tighten all nuts, bolts and setscrews prior to fan start up (as some may have loosened during shipping).
11. On belt driven fans make sure that the belts are tensioned and aligned correctly.
12. Ensure that all protective guards and other safety devices are installed properly prior to fan start up.
STANDARD WIRING INSTRUCTIONS
1. A qualied electrician in accordance with all local and National Electrical Codes should do all wiring.
2. Lock off all power sources before any wiring is to be performed.
3. Leave enough slack in the wiring to allow for motor movement when adjusting the belt tension.
4. Excess wire must be restrained in order to prevent it from entering the shaft and propeller area.
5. Disconnect switches are recommended and should be located near the fan in order to, swiftly cut off power in
case of an emergency and maintain complete control of the power source.
6. Some motors may have to be removed in order to make the connections in the motor terminal box.
7. Follow the wiring diagrams on the motor nameplate.
1. Wall Fans
• Extend the proper gauge wire to the fan motor.
• Restrain excess wire from entering the shaft and propeller area
2. Wall Fans with Cabinets
• Remove guard from cabinet.
• Drill a hole through the cabinet at a convenient location and pull the wires
through (never wire through the guard).
• Restrain excess wire from entering the shaft and propeller area
OPERATION
Pre Start Inspection
• Lock out all power sources
• Inspect all fasteners and set screws and tighten as required
• Inspect belt alignment and tension
• Conrm power source voltage and motor voltage are the same and that the motor is wired correctly
• Rotate the fan blade to ensure that neither the fan blade nor the belts come into contact with the housing
• Inspect the fan and the ductwork to ensure they are free of debris
• Check to ensure that all guards and accessories are securely mounted
• Check to be sure the propeller rotation is correct
Product specificaties
| Merk: | Canarm |
| Categorie: | Ventilator |
| Model: | HVA36T10750 |
Heb je hulp nodig?
Als je hulp nodig hebt met Canarm HVA36T10750 stel dan hieronder een vraag en andere gebruikers zullen je antwoorden
Handleiding Ventilator Canarm

11 Juni 2025

10 Juni 2025

10 Juni 2025

10 Juni 2025

10 Juni 2025

10 Juni 2025
10 Juni 2025

10 Juni 2025

10 Juni 2025
10 Juni 2025
Handleiding Ventilator
- DeepCool
- Eldom
- Vortice
- Quigg
- Hema
- Handson
- Techwood
- SPT
- EVOLVEO
- Elix
- Life On Products
- Concept
- Bosch
- Adler
- Mirpol
Nieuwste handleidingen voor Ventilator
30 Juli 2025

29 Juli 2025
29 Juli 2025
29 Juli 2025
28 Juli 2025
23 Juli 2025
23 Juli 2025
22 Juli 2025

22 Juli 2025

22 Juli 2025